@zhangyy
2021-09-17T09:41:54.000000Z
字数 8780
阅读 1221
ansible 的使用(三)
ansible系列
一:Ansible常用模块
1.1 ansible的模块
2015年底270多个模块,2016年达到540个,2018年01月12日有1378个模块,2018年07月15日1852个模块,2019年05月25日(ansible 2.7.10)时2080个模块,2020年03月02日有3387个模块虽然模块众多,但最常用的模块也就2,30个而已,针对特定业务只用10几个模块常用模块帮助文档参考:https://docs.ansible.com/ansible/latest/modules/modules_by_category.html
1.2 Command 模块
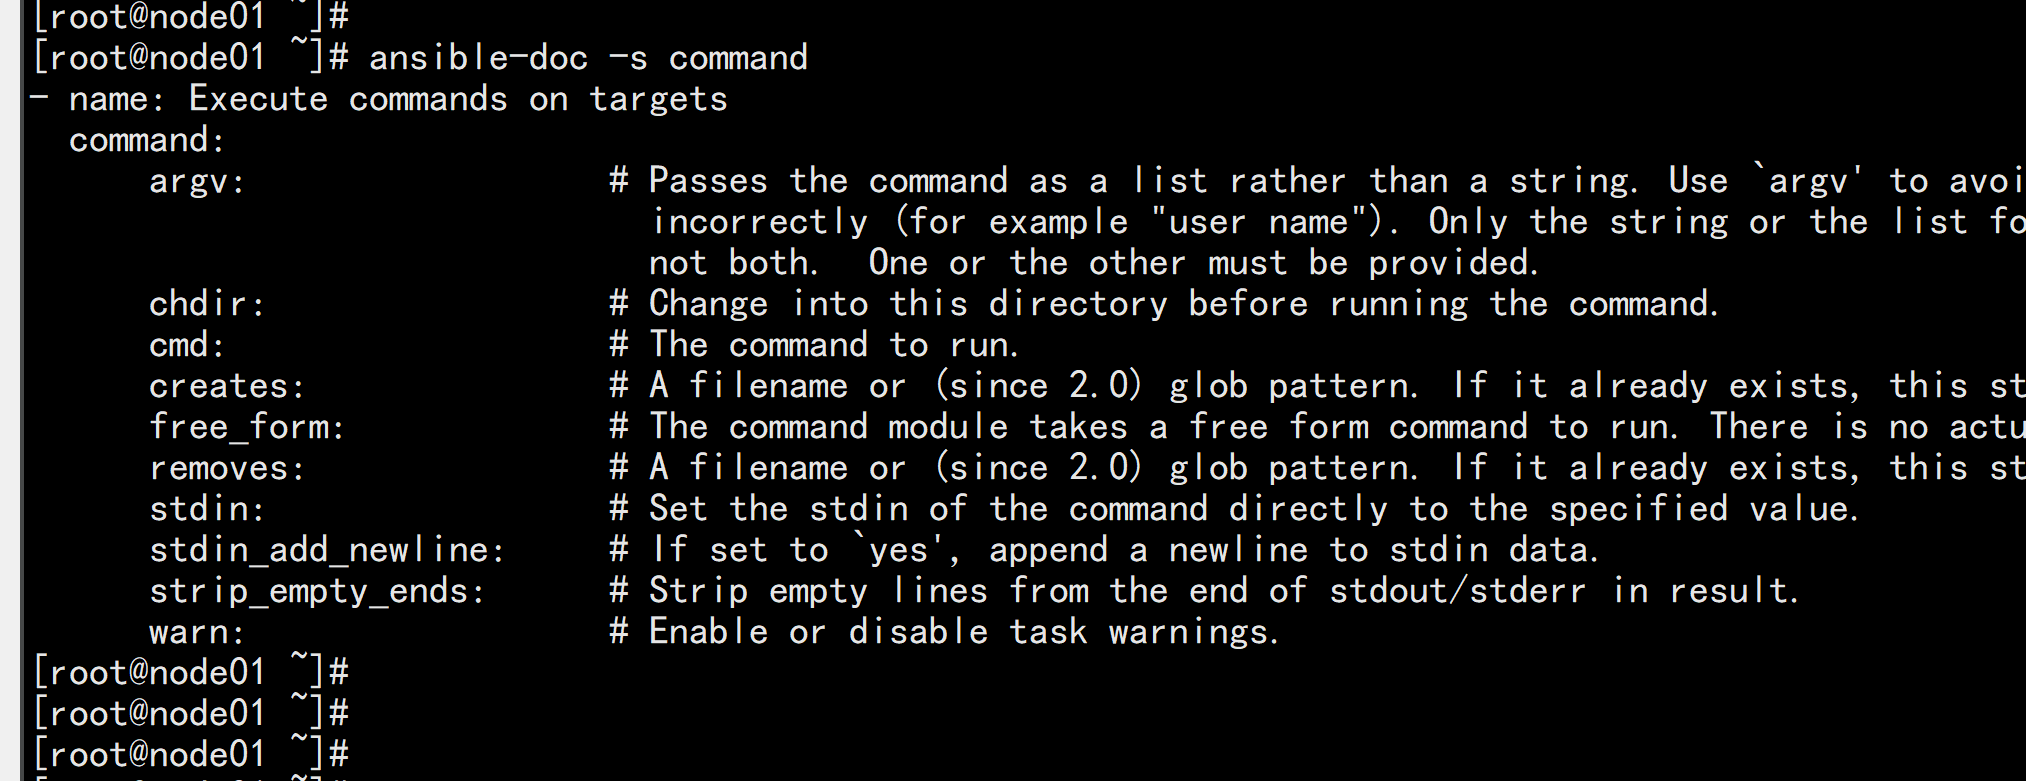
功能:在远程主机执行命令,此为默认模块,可忽略-m选项注意:此命令不支持 $VARNAME < > | ; & 等,用shell模块实现ansible-doc -s command
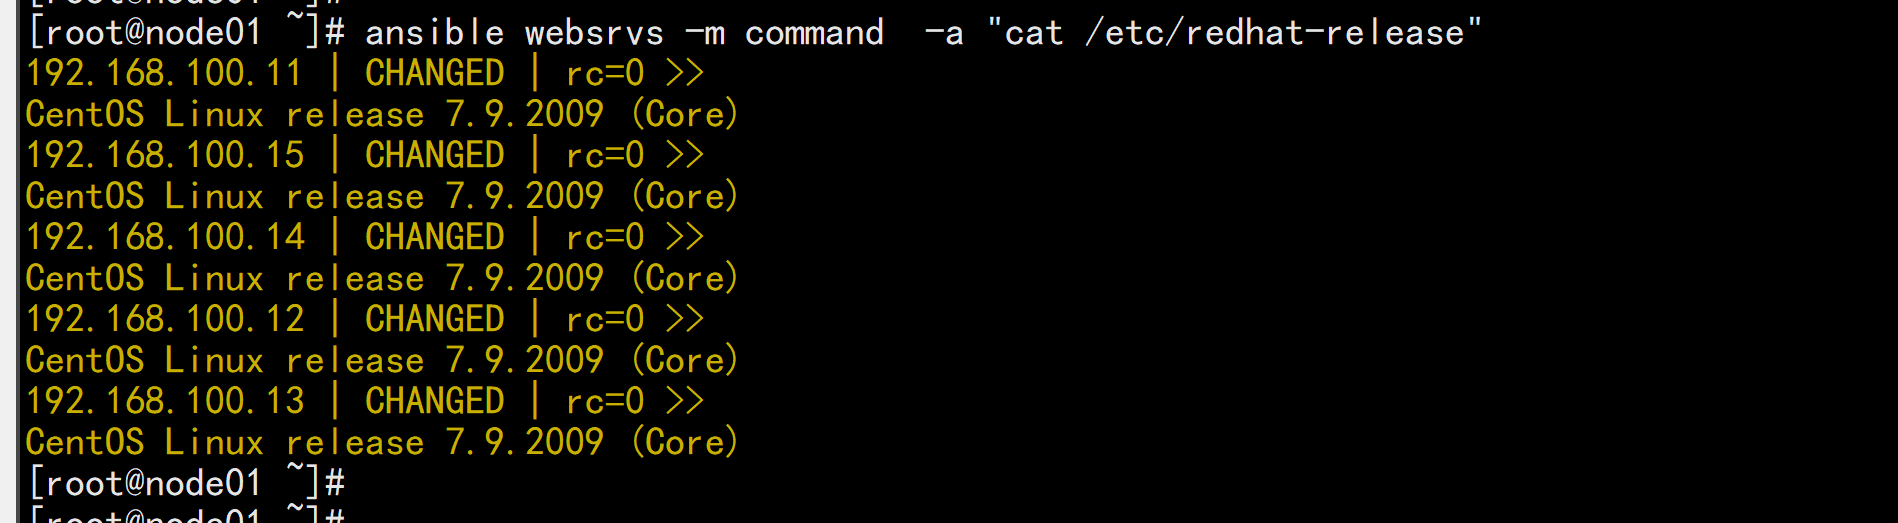
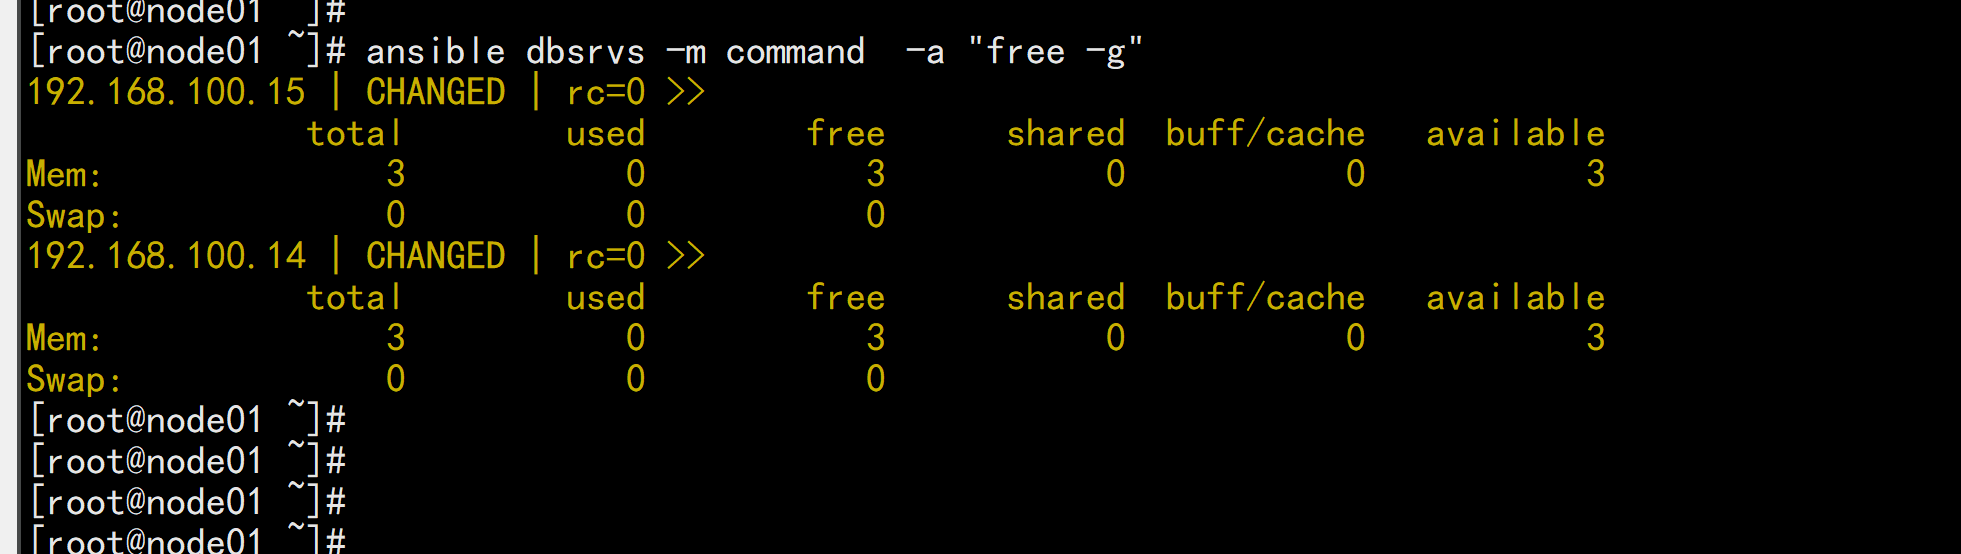
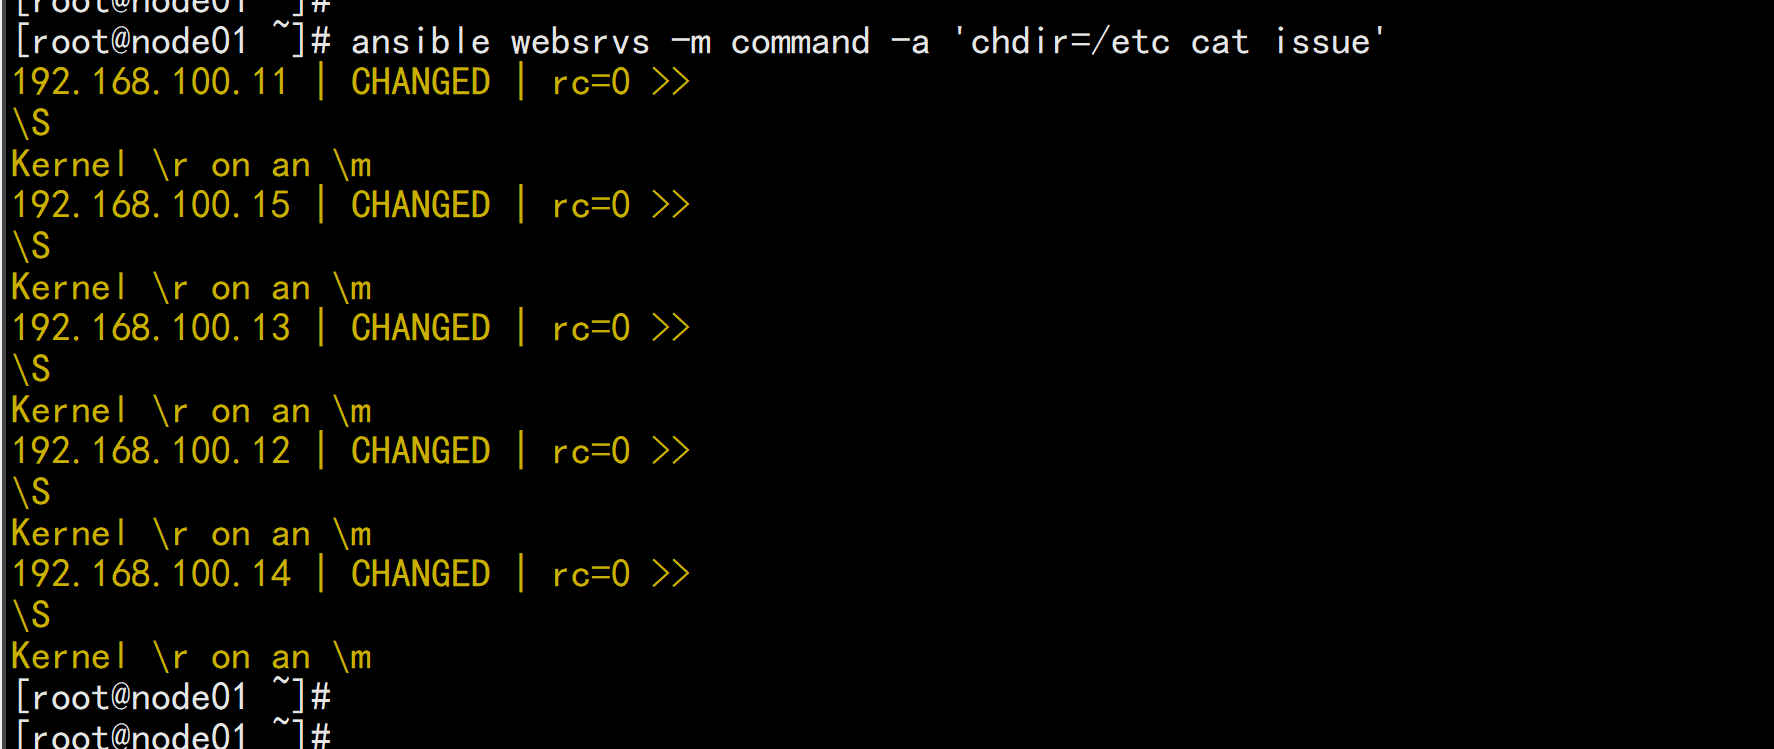
范列:ansible websrvs -m commnad -a "cat /etc/redhat-release"ansible dbsrvs -m command -a "free -g"ansible websrvs -m command -a 'chdir=/etc cat issue'ansible websrvs -m command -a 'chdir=/etc creates=/data/f1.txtcat centos-release' [文件不存在就执行,文件存在不执行]#ansible websrvs -m command -a 'chdir=/etc removes=/data/f1.txtcat centos-release'
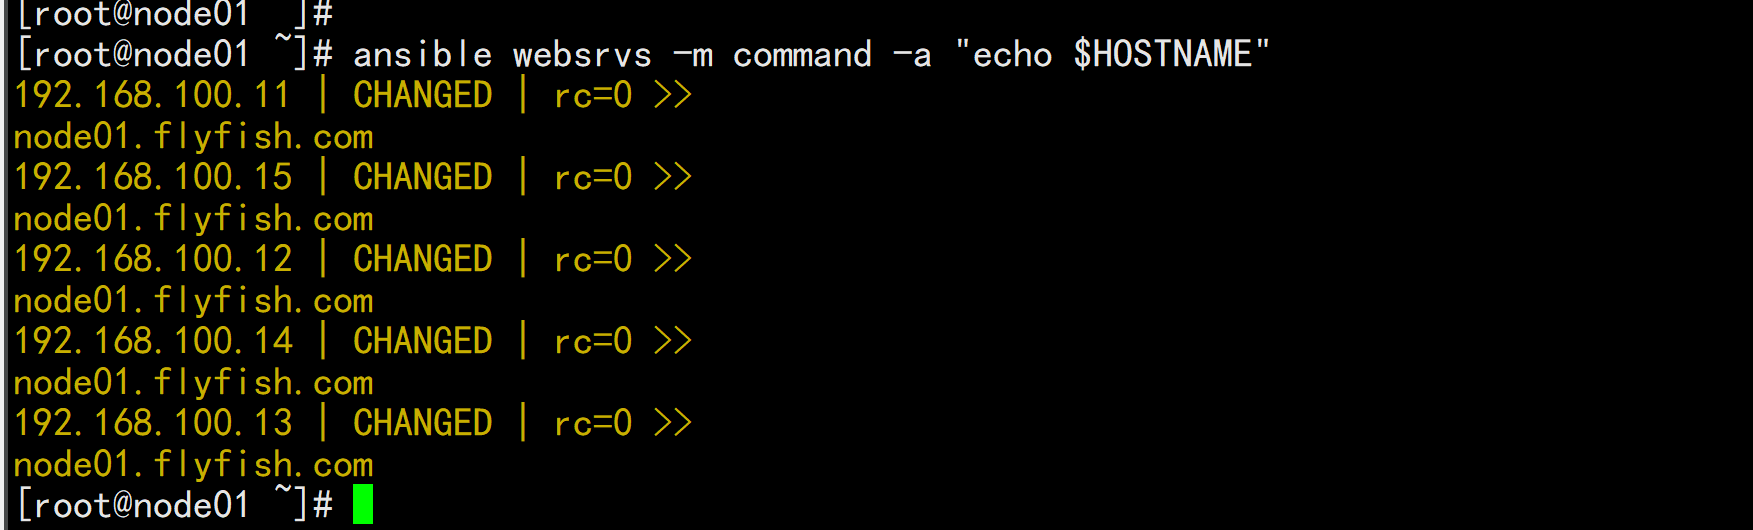
ansible websrvs -m command -a ‘service vsftpd start’执行有问题:ansible websrvs -m command -a 'rm -rf /data/'ansible websrvs -m command -a 'echo hello > /data/hello.log'ansible websrvs -m command -a "echo $HOSTNAME"
1.3 shell 模块
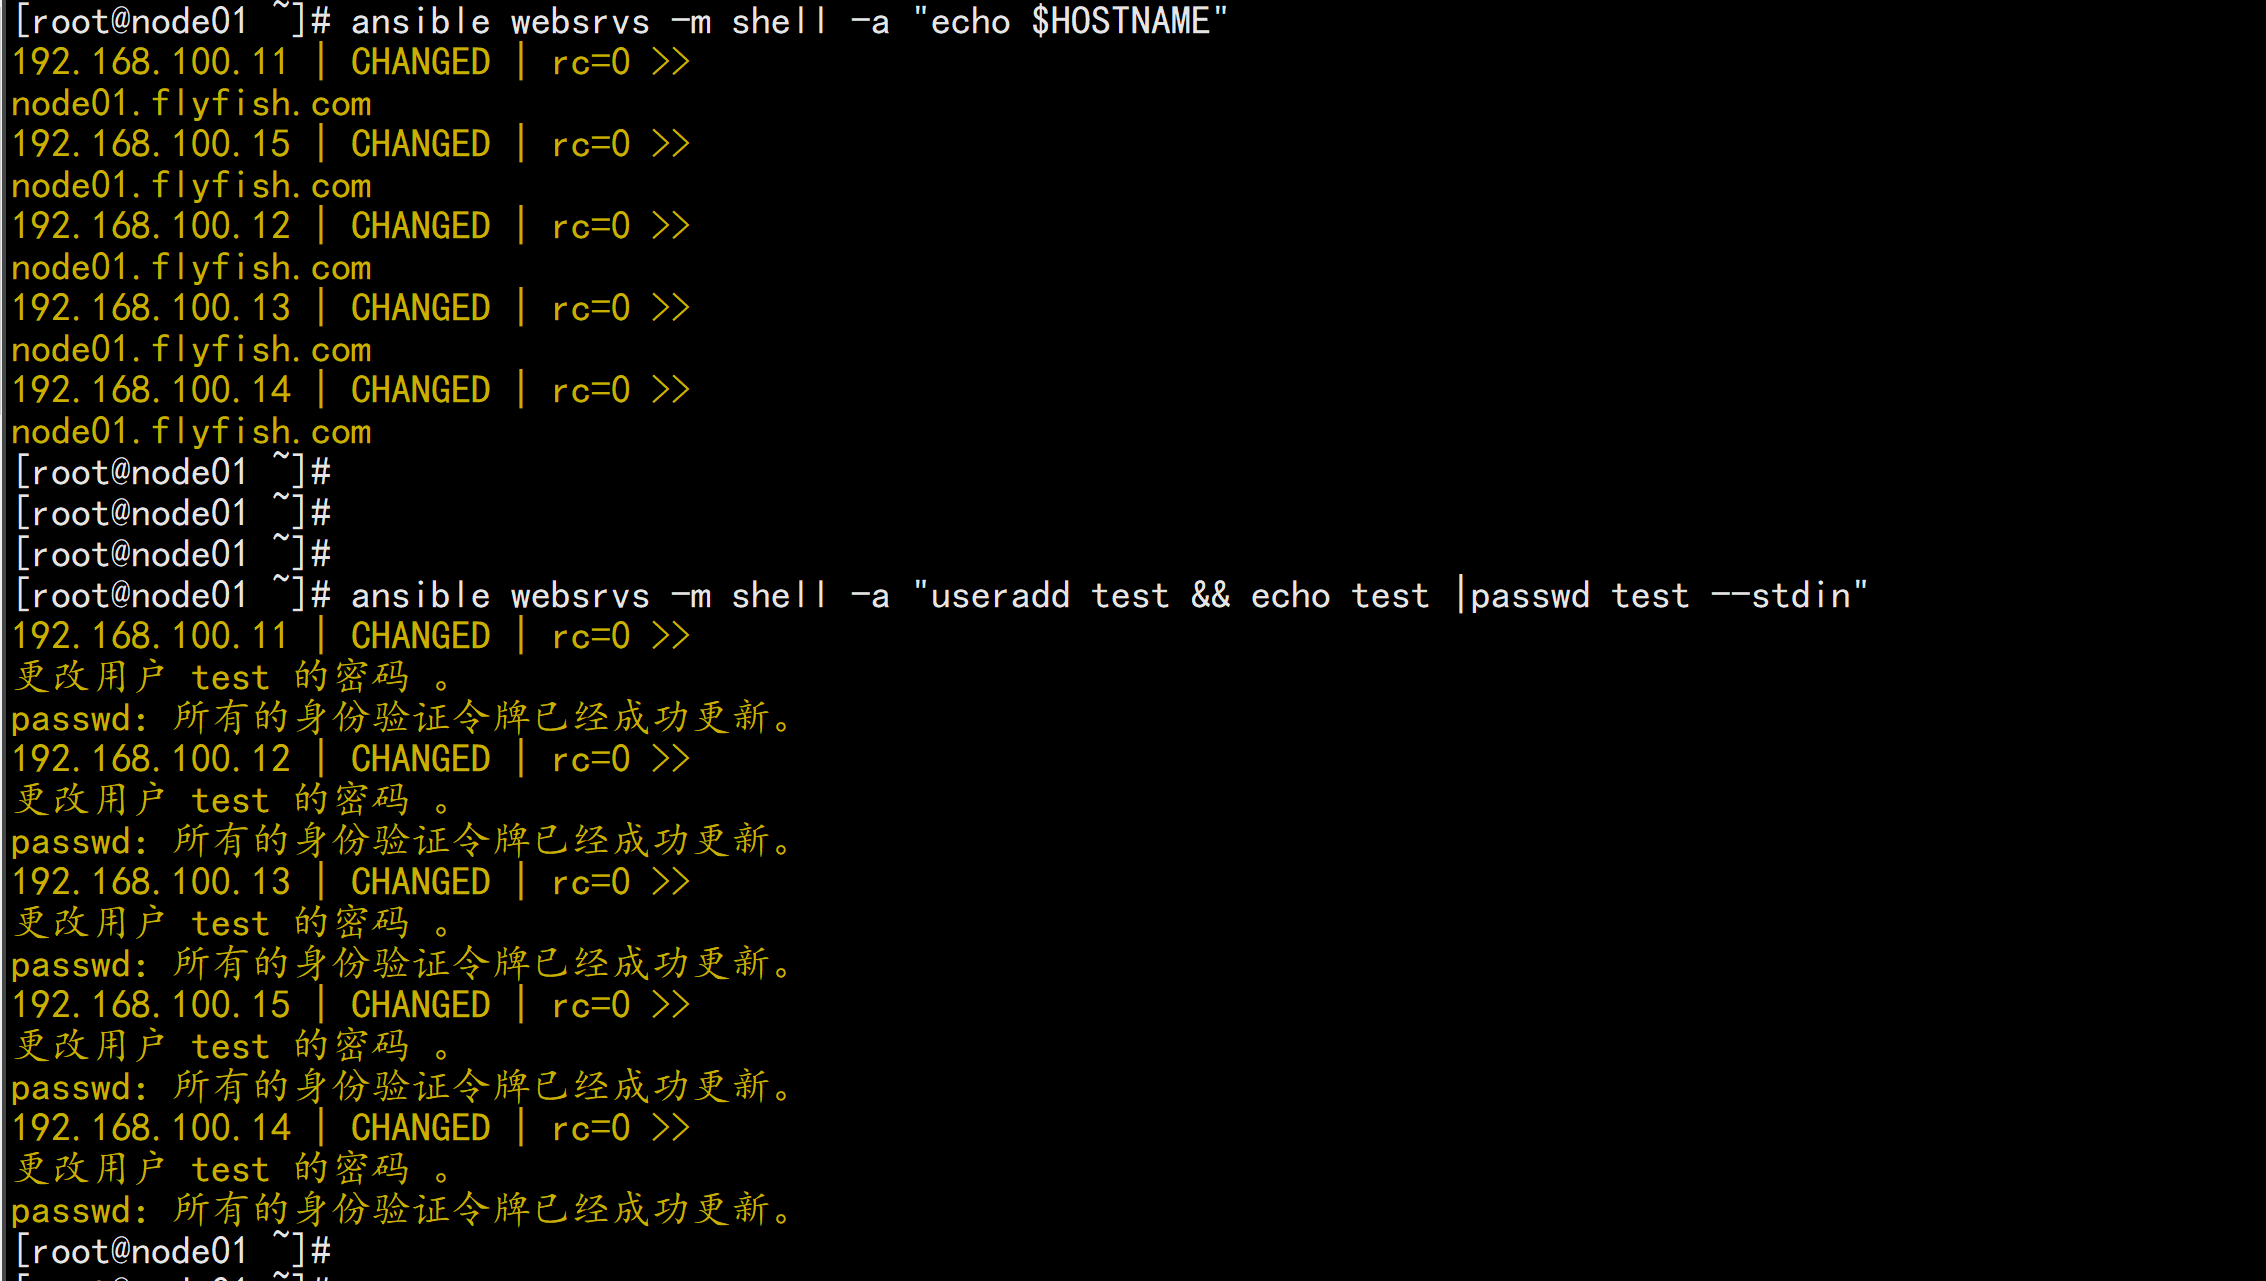
Shell模块功能:和command相似,用shell执行命令注意:此模块不具有幂等性范例:ansible websrvs -m shell -a "echo $HOSTNAME"ansible websrvs -m shell -a "useradd test && echo test |passwd test --stdin"ansible websrvs -m shell -a "id test"

注意:调用bash执行命令 类似 cat /tmp/test.md | awk -F'|' '{print $1,$2}' &> /tmp/example.txt 这些复杂命令,即使使用shell也可能会失败,解决办法:写到脚本时,copy到远程,执行,再把需要的结果拉回执行命令的机器范例:将shell模块代替command,设为模块[root@ansible ~]#vim /etc/ansible/ansible.cfg#修改下面一行module_name = shell
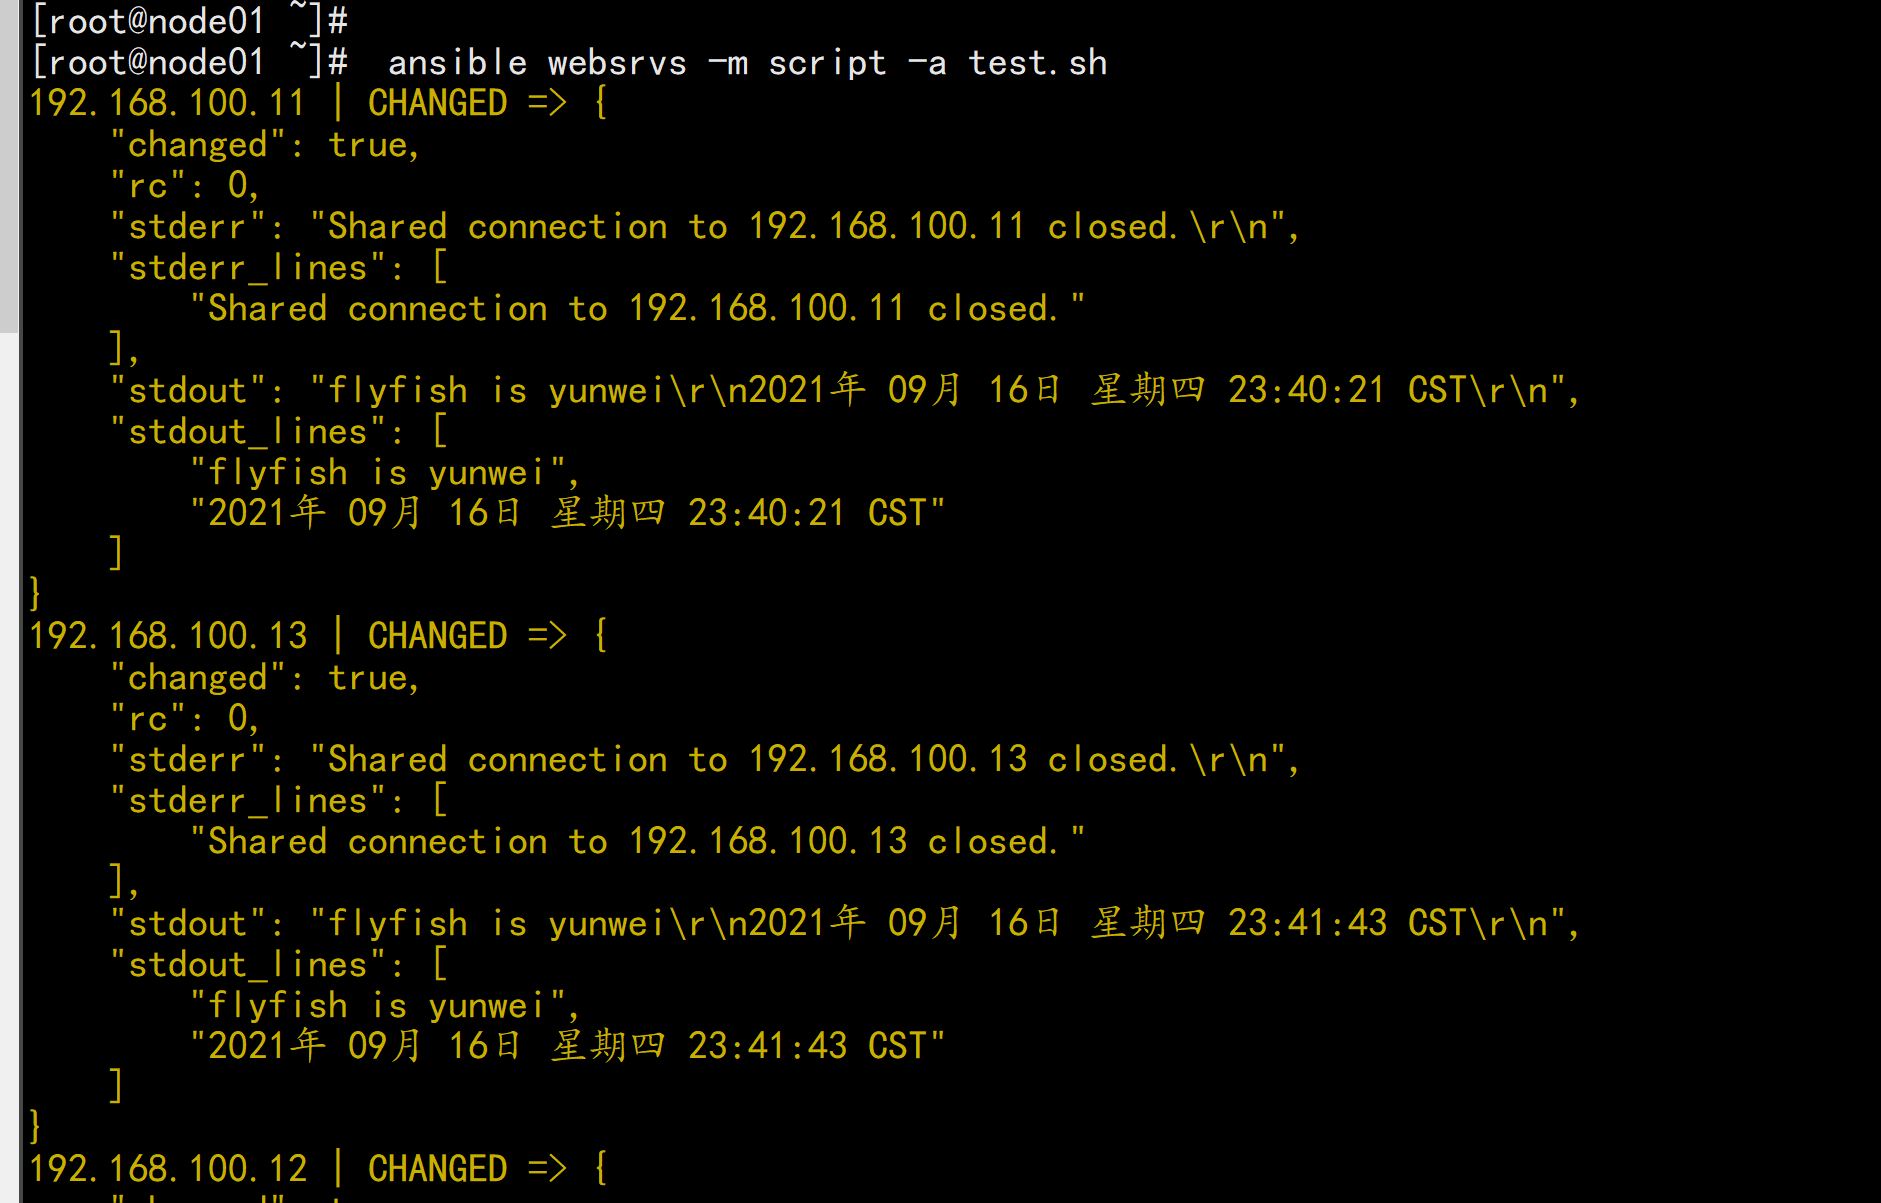
1.4 script 模块
功能:在远程主机上运行ansible服务器上的脚本(无需执行权限)注意:此模块不具有幂等性ansible websrvs -m script -a /root/test.sh
1.5 copy 模块
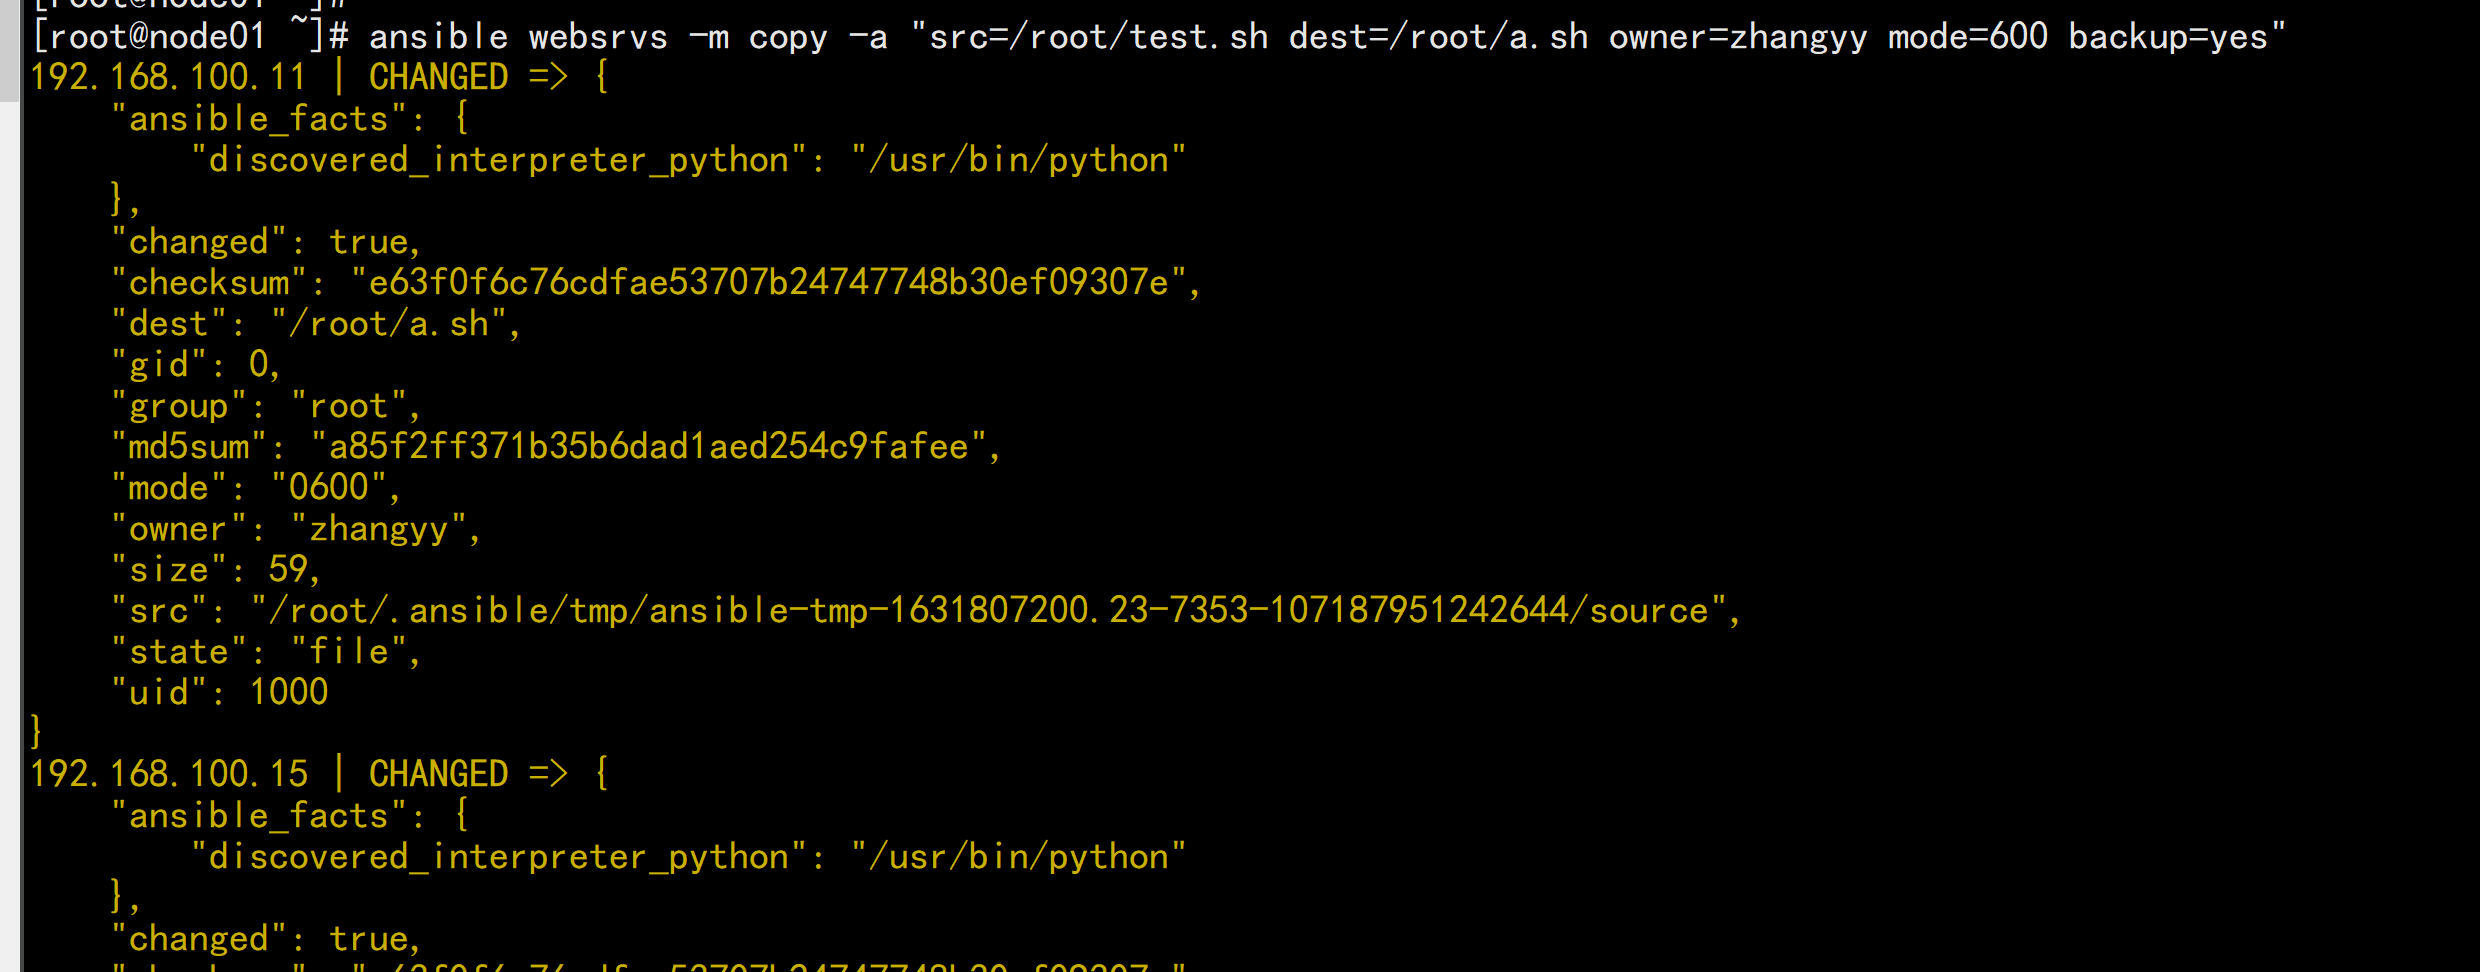
功能:从ansible服务器主控端复制文件到远程主机注意: src=file 如果是没指明路径,则为当前目录或当前目录下的files目录下的file文件#如目标存在,默认覆盖,此处指定先备份ansible websrvs -m copy -a "src=/root/test1.sh dest=/tmp/test2.sh owner=wang mode=600 backup=yes"#指定内容,直接生成目标文件ansible websrvs -m copy -a "content='test line1\ntest line2\n'dest=/tmp/test.txt"#复制/etc目录自身,注意/etc/后面没有/ansible websrvs -m copy -a "src=/etc dest=/backup"#复制/etc/下的文件,不包括/etc/目录自身,注意/etc/后面有/ansible websrvs -m copy -a "src=/etc/ dest=/backup"ansible websrvs -m copy -a "src=/root/test.sh dest=/root/a.sh owner=zhangyy mode=600 backup=yes"
1.6 fetch 模块
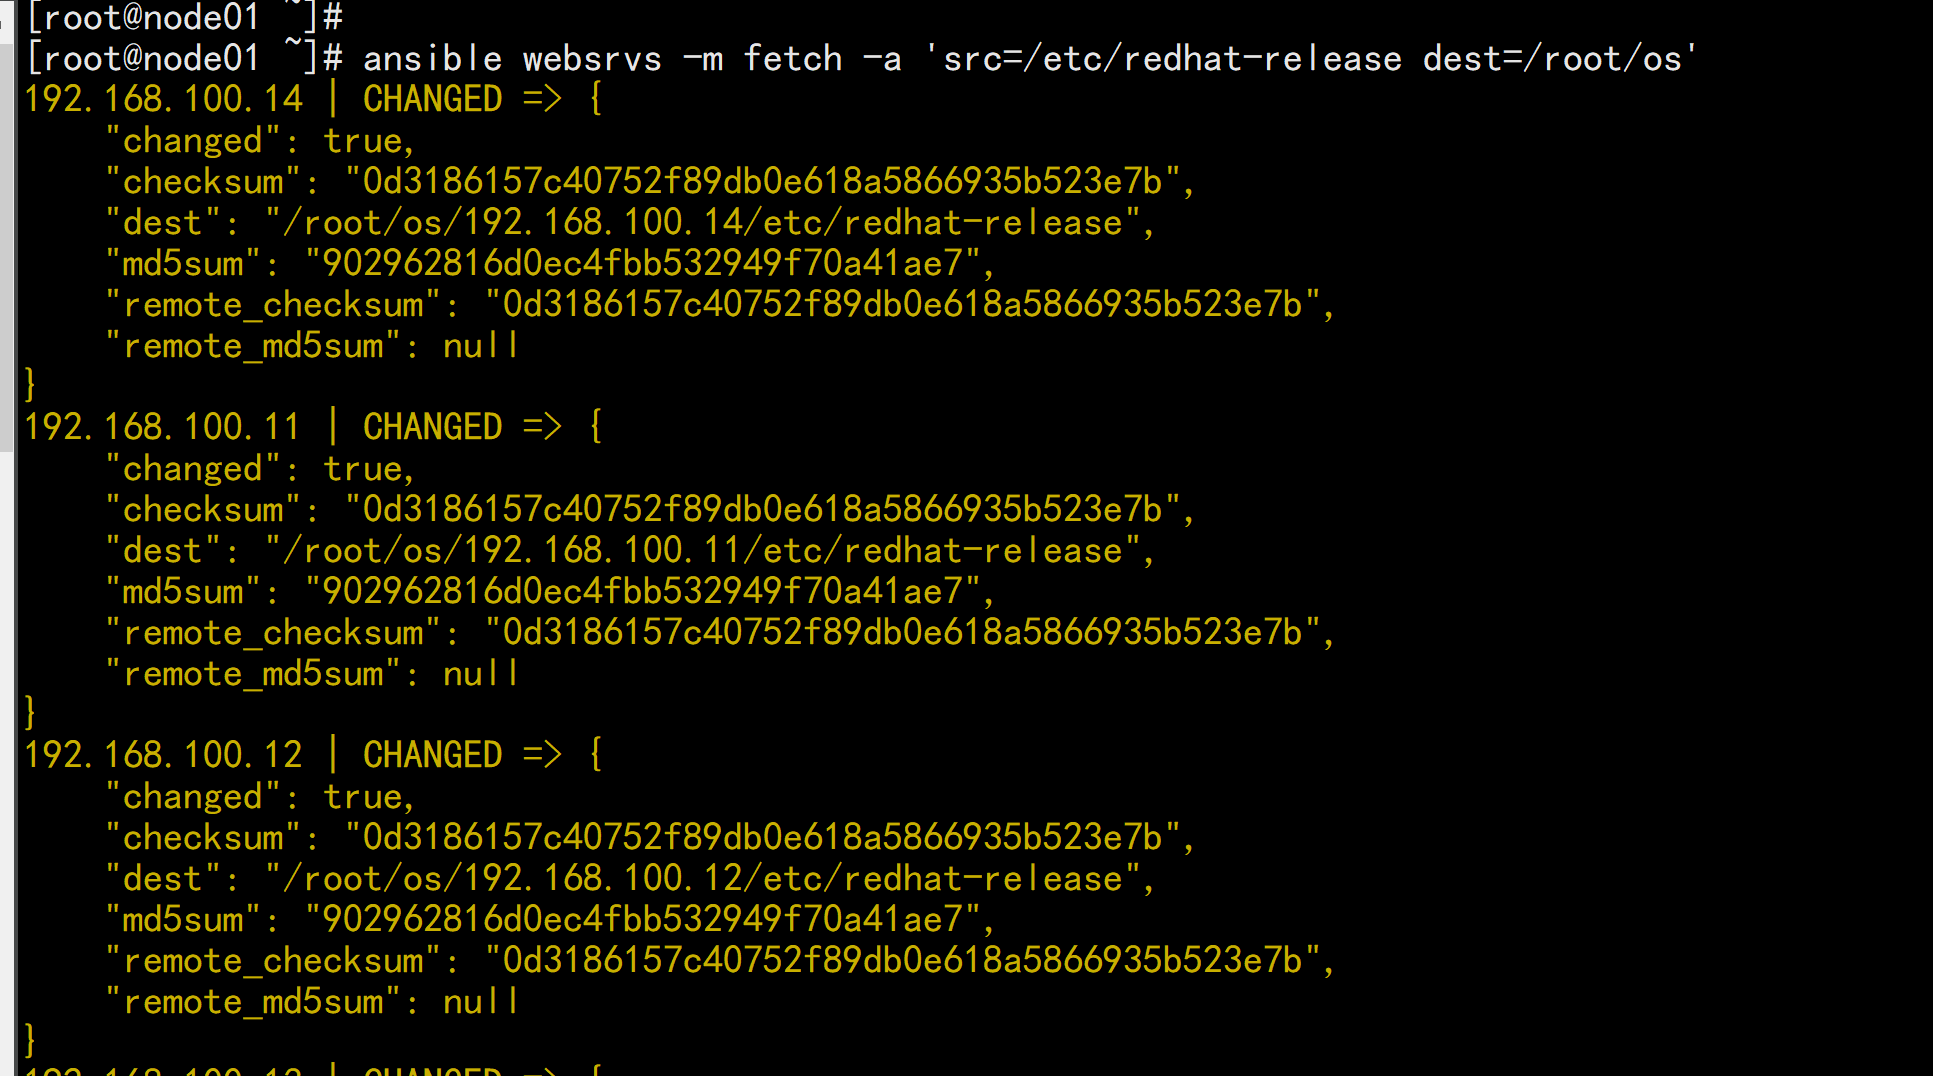
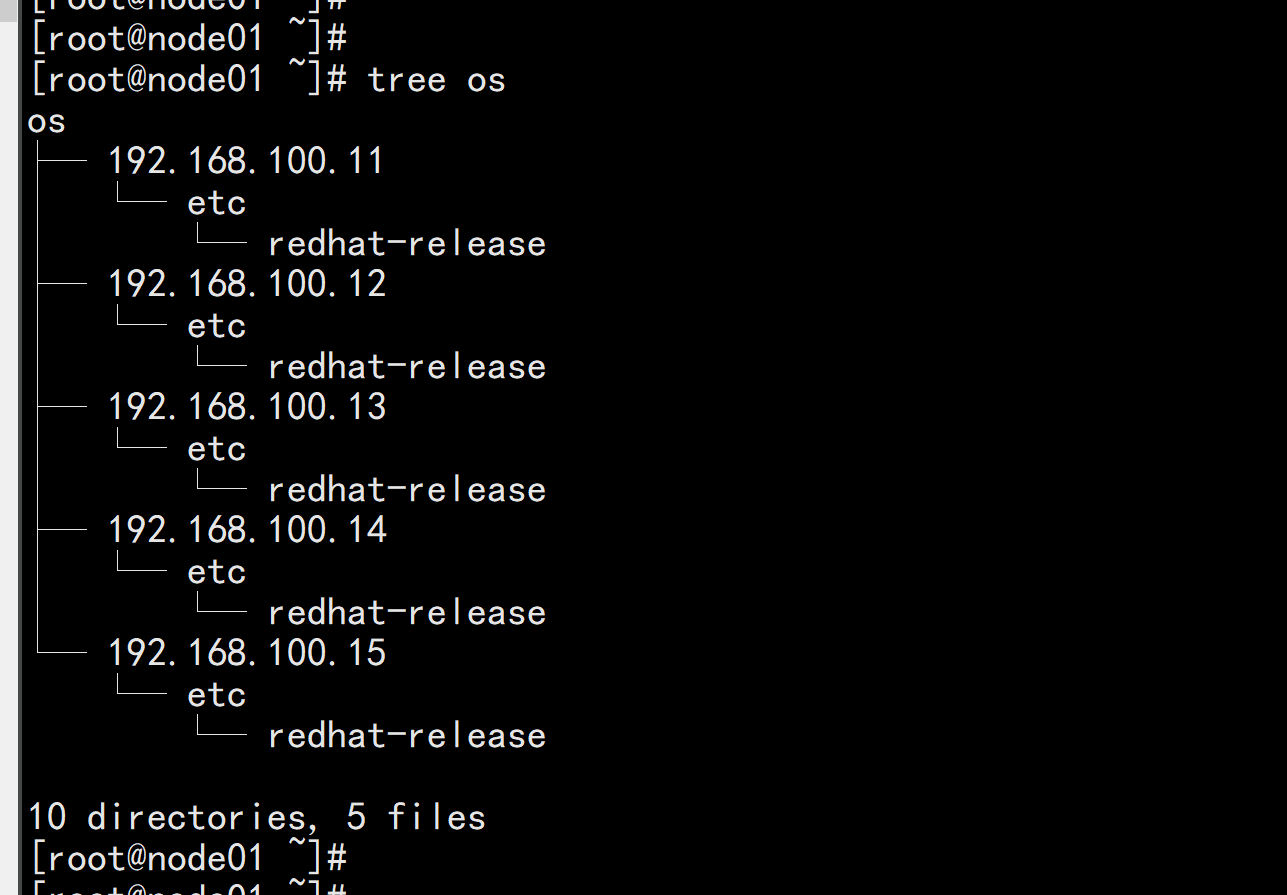
功能:从远程主机提取文件至ansible的主控端,copy相反,目前不支持目录范例:ansible websrvs -m fetch -a 'src=/etc/redhat-release dest=/root/os'
1.7 File 模块
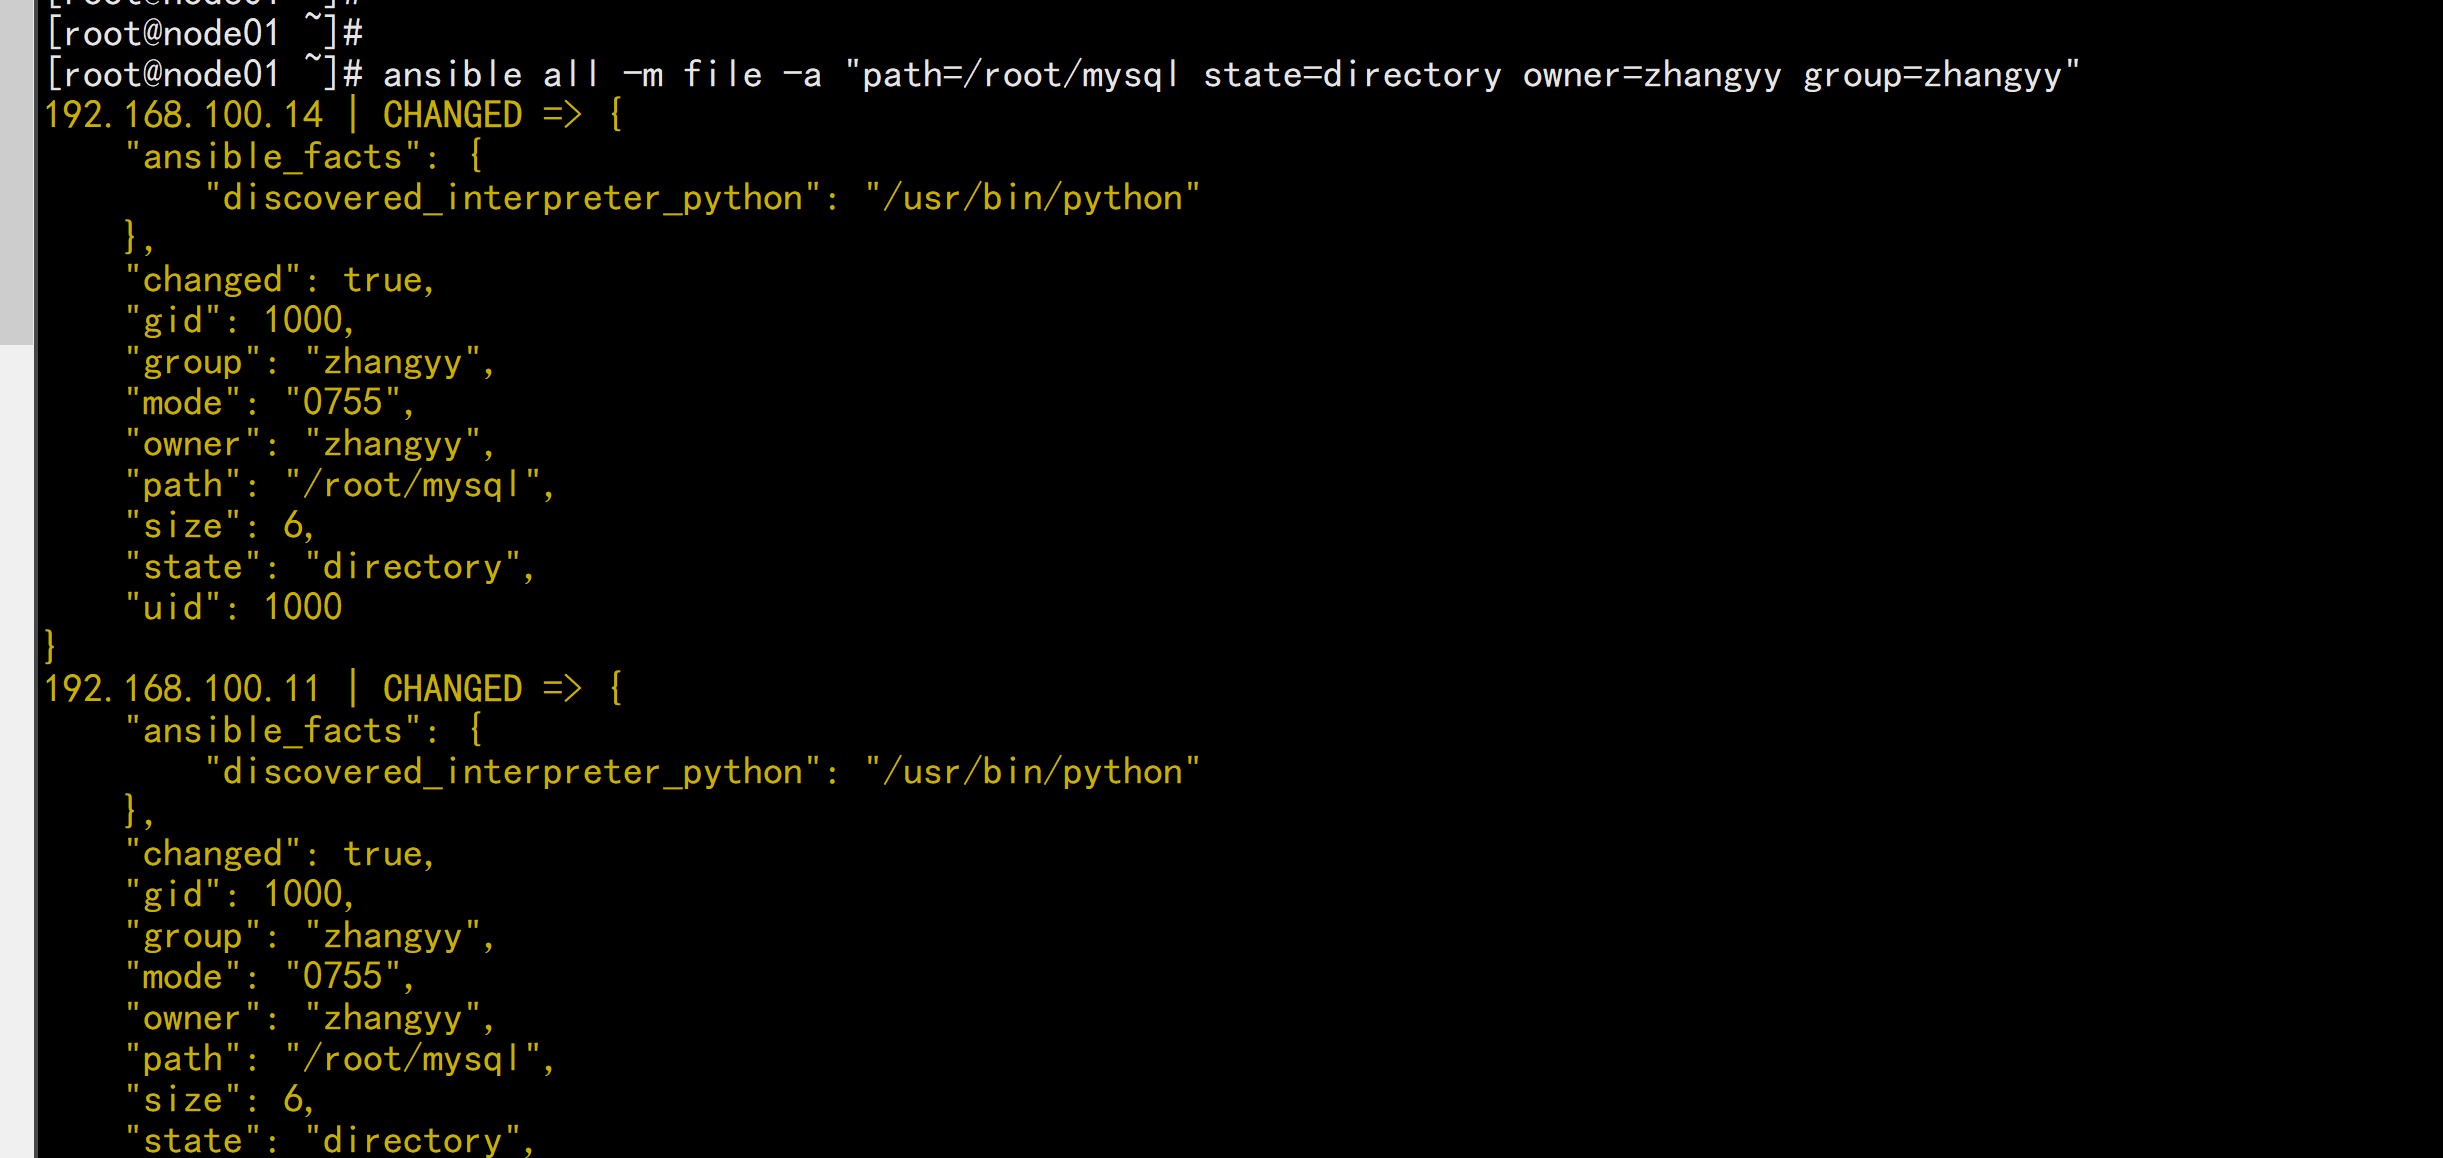
功能:设置文件属性,创建软链接等范例:#创建空文件ansible all -m file -a 'path=/root/test.txt state=touch' 创建ansible all -m file -a 'path=/root/test.txt state=absent' 删除ansible all -m file -a "path=/root/test.sh owner=zhangyy mode=755" 改文件所有者#创建目录ansible all -m file -a "path=/root/mysql state=directory owner=mysql group=mysql"#创建软链接ansible all -m file -a 'src=/data/testfile path|dest|name=/data/testfile-linkstate=link'#创建目录ansible all -m file -a 'path=/data/testdir state=directory'#递归修改目录属性,但不递归至子目录ansible all -m file -a "path=/data/mysql state```=directory owner=mysqlgroup=mysql"#递归修改目录及子目录的属性ansible all -m file -a "path=/data/mysql state=directory owner=mysql group=mysql recurse=yes"
1.8 unarchive 模块
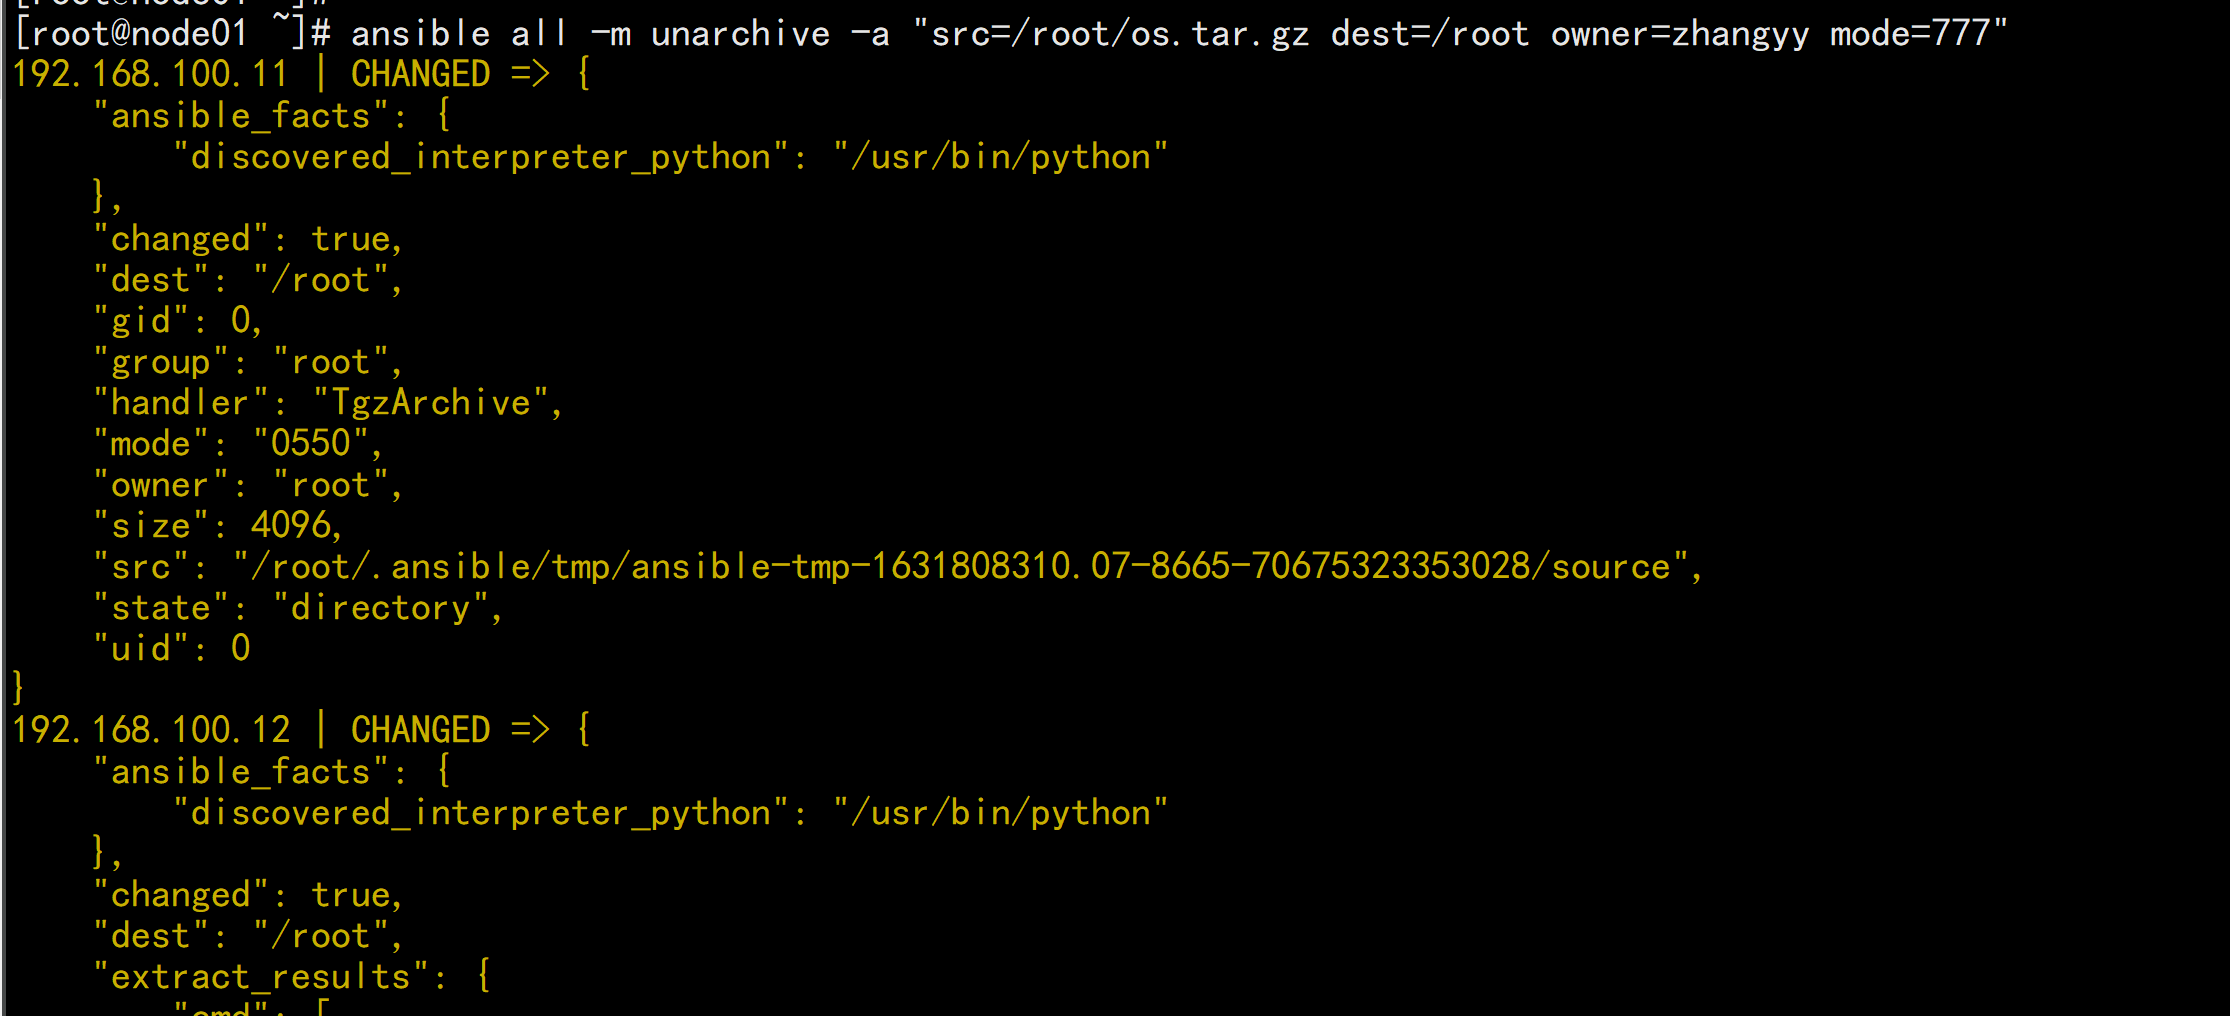
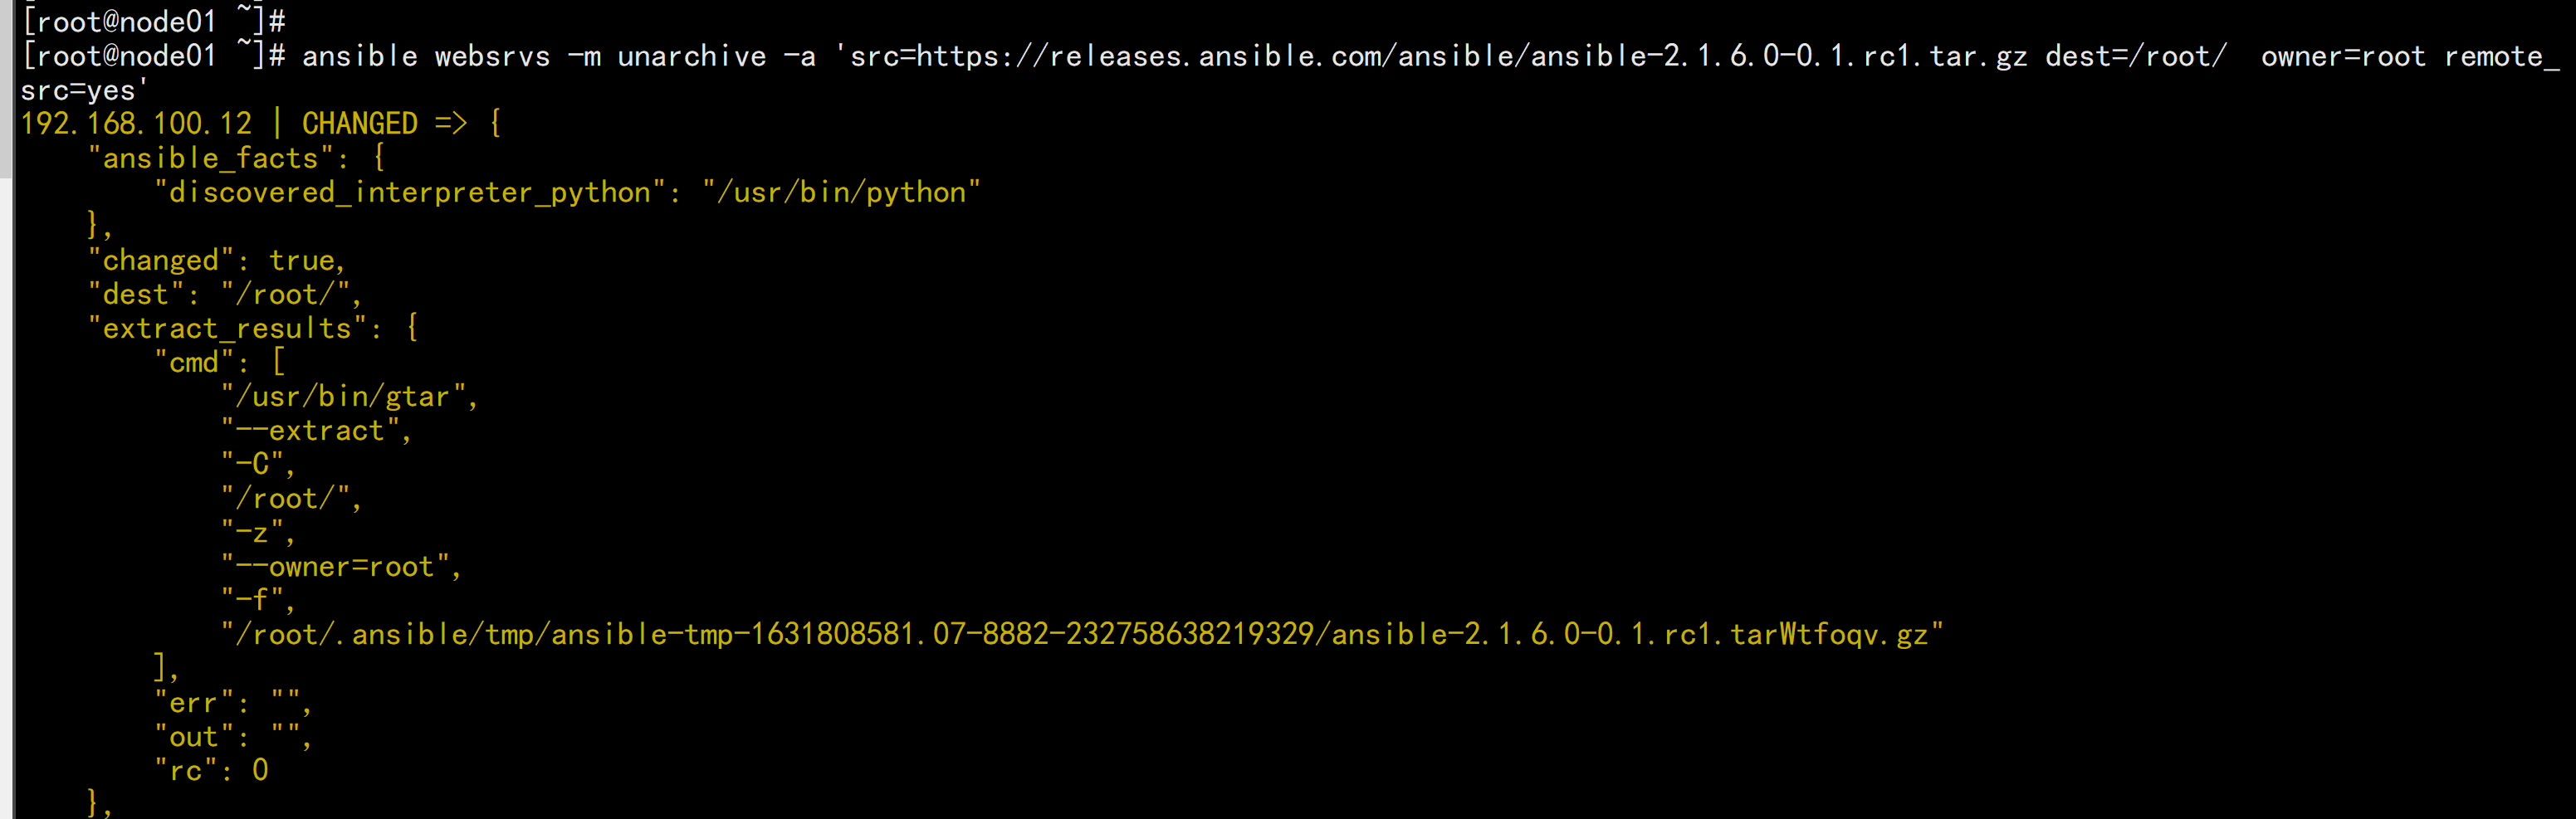
功能:解包解压缩实现有两种用法:1、将ansible主机上的压缩包传到远程主机后解压缩至特定目录,设置copy=yes2、将远程主机上的某个压缩包解压缩到指定路径下,设置copy=no常见参数:copy:默认为yes,当copy=yes,拷贝的文件是从ansible主机复制到远程主机上,如果设置为copy=no,会在远程主机上寻找src源文件remote_src:和copy功能一样且互斥,yes表示在远程主机,不在ansible主机,no表示文件在ansible主机上src:源路径,可以是ansible主机上的路径,也可以是远程主机(被管理端或者第三方主机)上的路径,如果是远程主机上的路径,则需要设置copy=nodest:远程主机上的目标路径mode:设置解压缩后的文件权限ansible all -m unarchive -a 'src=/data/foo.tgz dest=/var/lib/foo owner=wanggroup=bin'ansible all -m unarchive -a 'src=/tmp/foo.zip dest=/data copy=no mode=0777'ansible all -m unarchive -a 'src=https://example.com/example.zip dest=/datacopy=no'ansible websrvs -m unarchive -a'src=https://releases.ansible.com/ansible/ansible-2.1.6.0-0.1.rc1.tar.gzdest=/root/ owner=root remote_src=yes'ansible websrvs -m unarchive -a 'src=http://nginx.org/download/nginx-1.18.0.tar.gz dest=/usr/local/src/ copy=no'ansible all -m unarchive -a "src=/root/os.tar.gz dest=/root owner=zhangyy mode=777"ansible websrvs -m unarchive -a 'src=https://releases.ansible.com/ansible/ansible-2.1.6.0-0.1.rc1.tar.gz dest=/root/ owner=root remote_src=yes'
1.9 Archive 模块
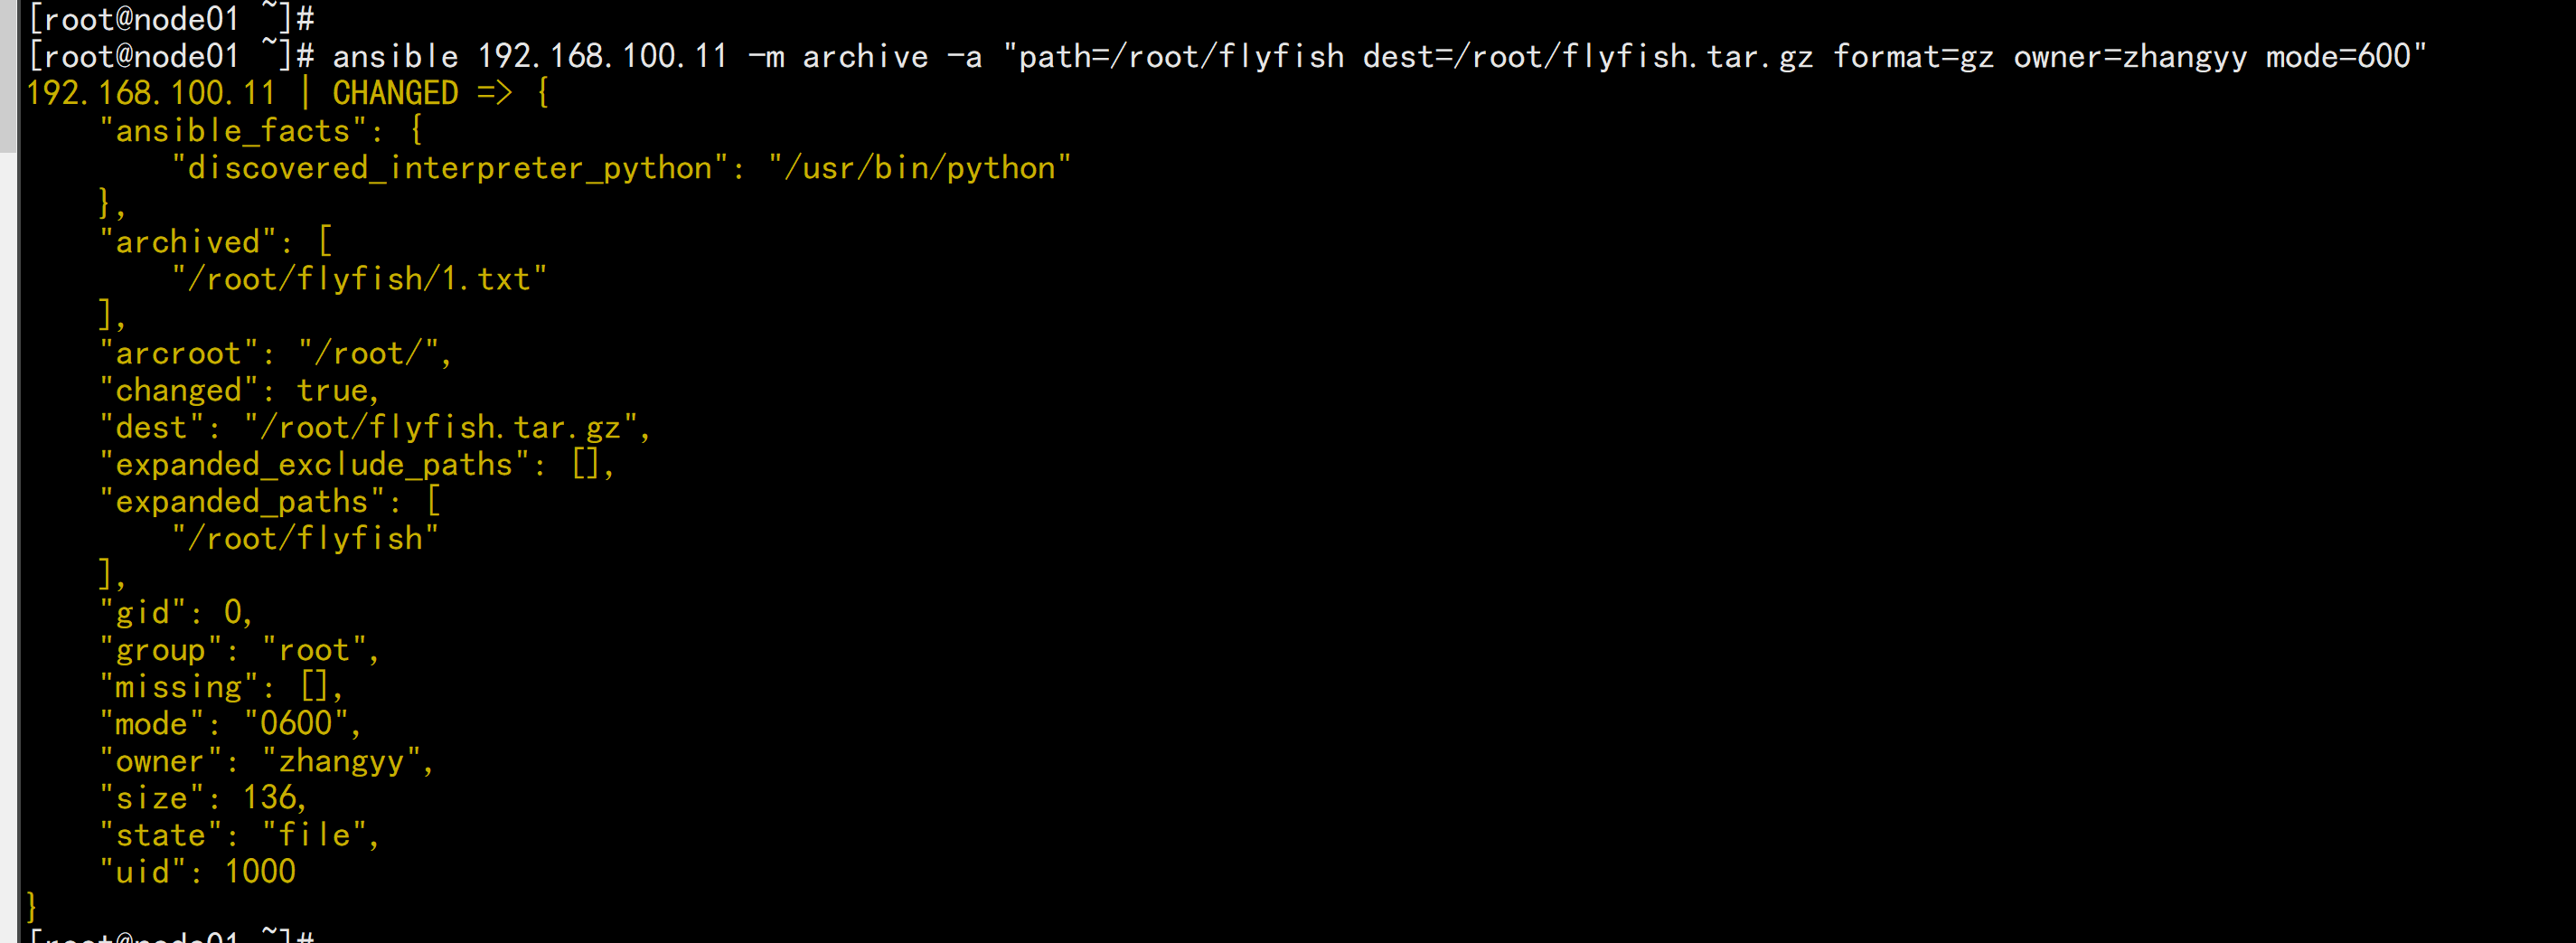
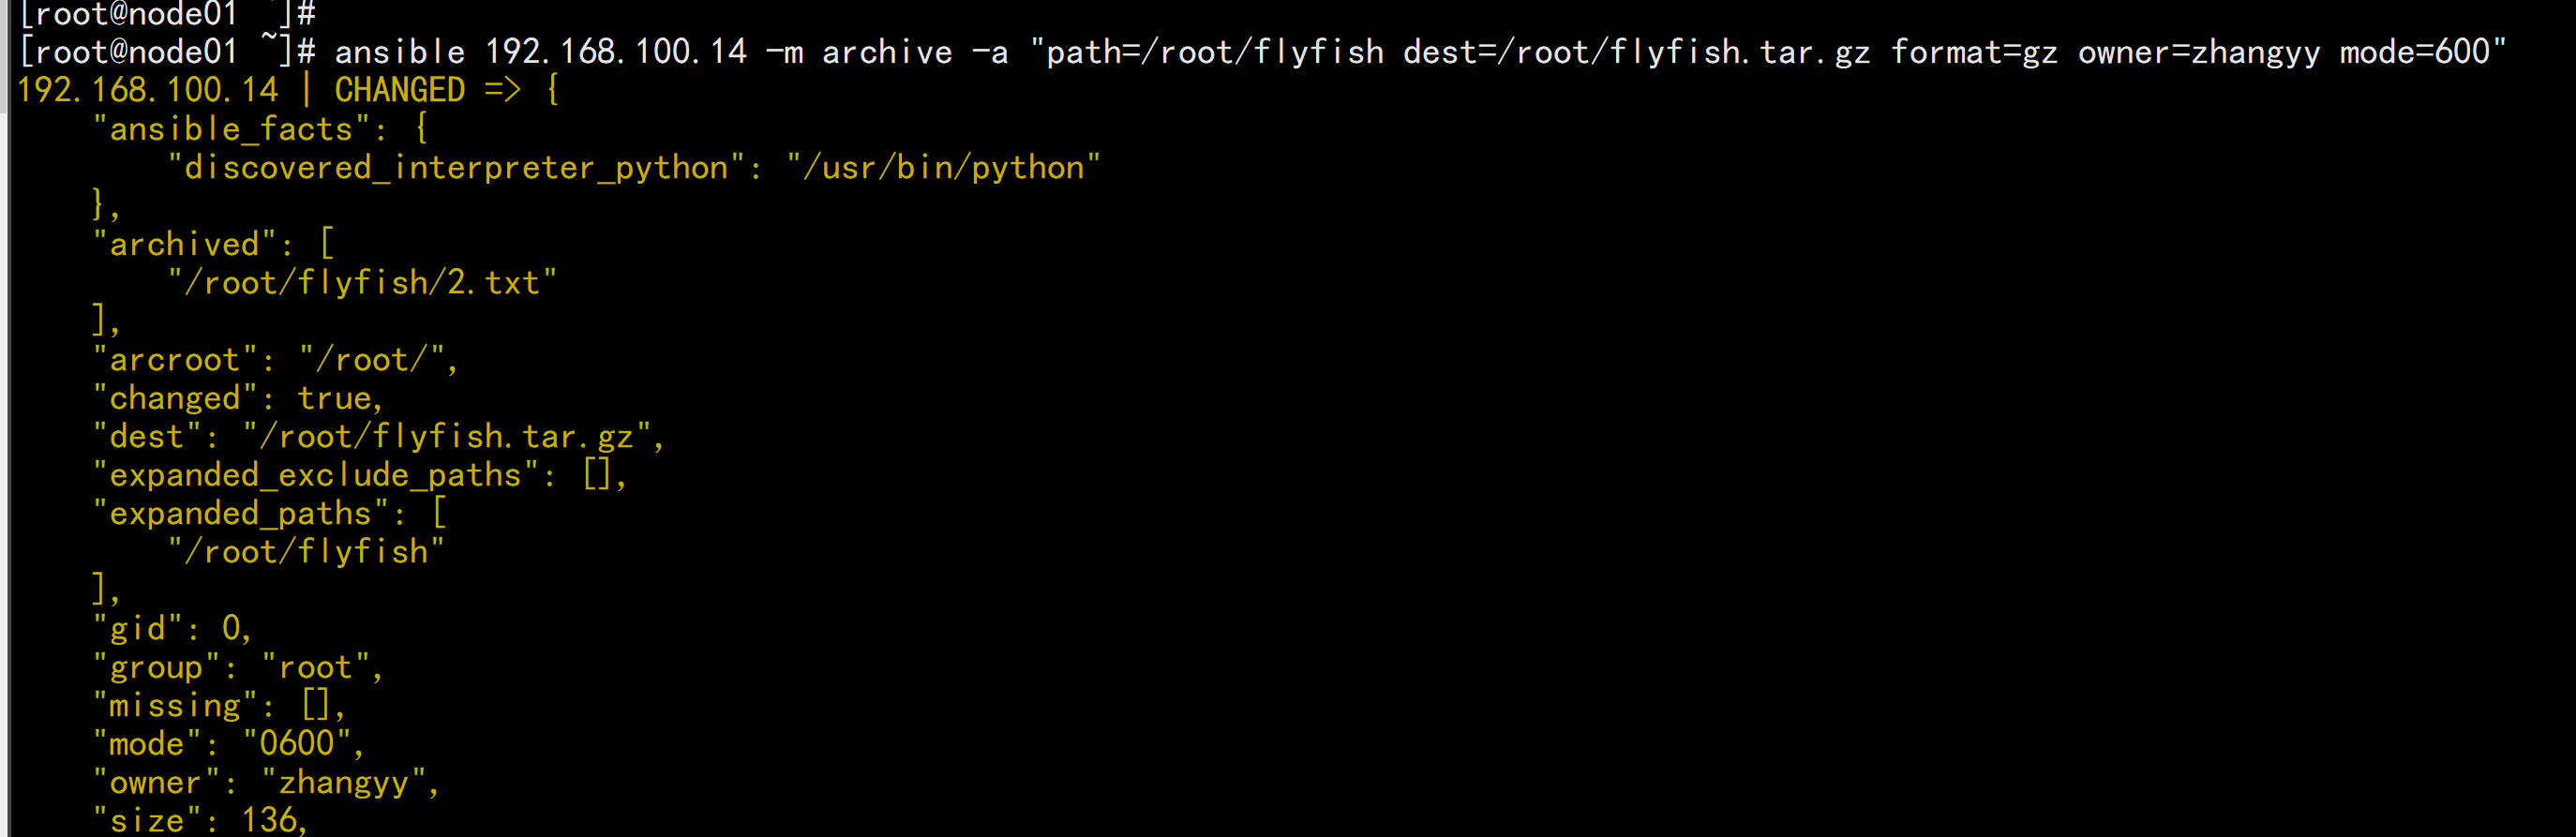
功能:打包压缩保存在被管理节点ansible websrvs -m archive -a 'path=/var/log/ dest=/root/log.tar.gz format=gzowner=wang mode=0600'ansible 192.168.100.11 -m archive -a "path=/root/flyfish dest=/root/flyfish.tar.gz format=gz owner=zhangyy mode=600"ansible 192.168.100.14 -m archive -a "path=/root/flyfish dest=/root/flyfish.tar.gz format=gz owner=zhangyy mode=600"
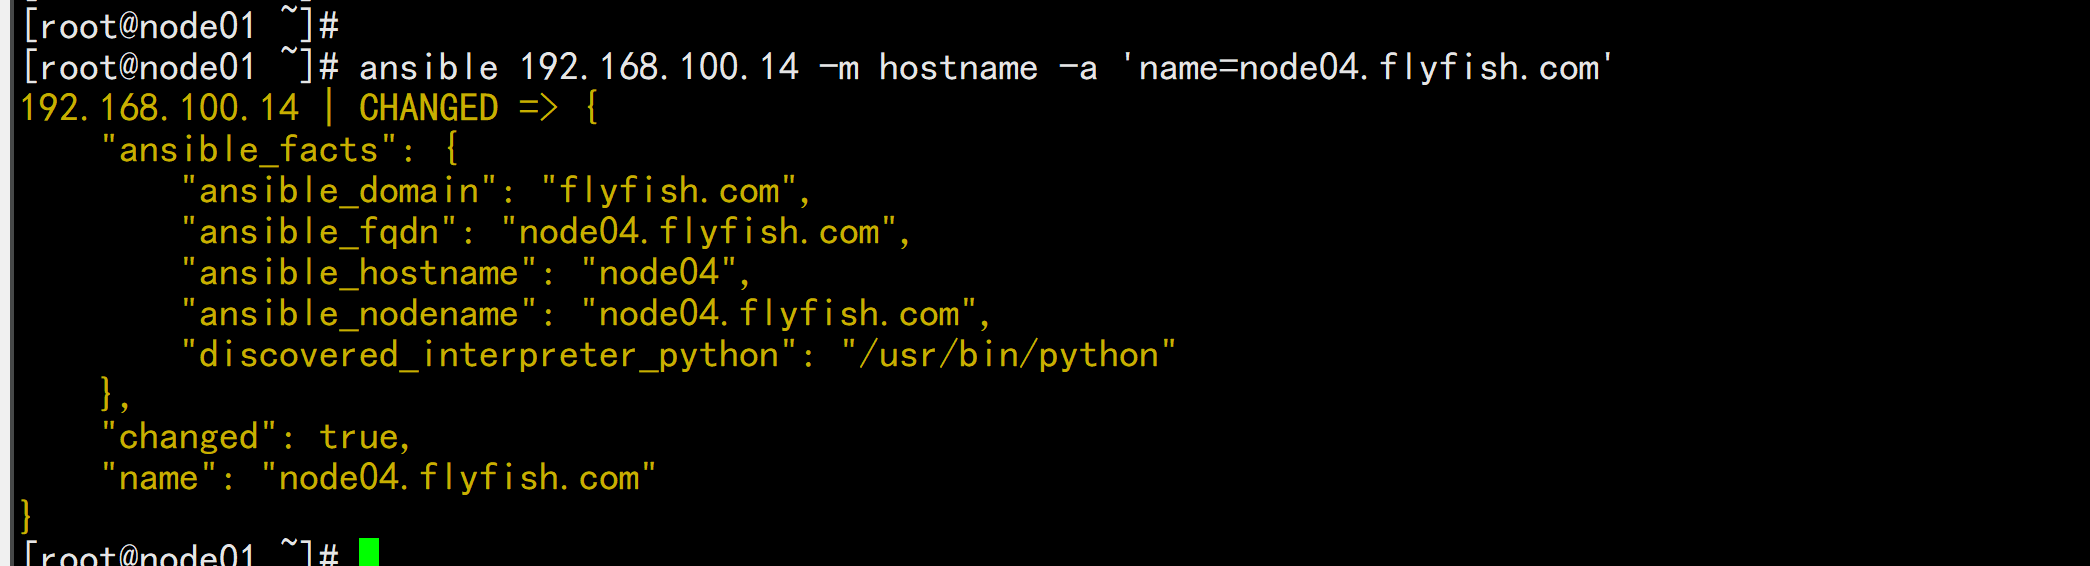
1.10 Hostname 模块
功能:管理主机名范例:ansible node1 -m hostname -a "name=websrv"ansible 192.168.100.14 -m hostname -a 'name=node18.flyfish.com'ansible 192.168.100.14 -m hostname -a 'name=node04.flyfish.com'
1.11 Cron 模块
功能:计划任务支持时间:minute,hour,day,month,weekday#备份数据库脚本[root@centos8 ~]#cat /root/mysql_backup.sh#!/bin/bashmysqldump -A -F --single-transaction --master-data=2 -q -uroot |gzip >/data/mysql_`date +%F_%T`.sql.gz#创建任务ansible 10.0.0.8 -m cron -a 'hour=2 minute=30 weekday=1-5 name="backup mysql"job=/root/mysql_backup.sh'ansible websrvs -m cron -a "minute=*/5 job='/usr/sbin/ntpdate ntp.aliyun.com&>/dev/null' name=Synctime"#禁用计划任务ansible websrvs -m cron -a "minute=*/5 job='/usr/sbin/ntpdate 172.20.0.1&>/dev/null' name=Synctime disabled=yes"#启用计划任务ansible websrvs -m cron -a "minute=*/5 job='/usr/sbin/ntpdate 172.20.0.1&>/dev/null' name=Synctime disabled=no"#删除任务ansible websrvs -m cron -a "name='backup mysql' state=absent"ansible websrvs -m cron -a 'state=absent name=Synctime'
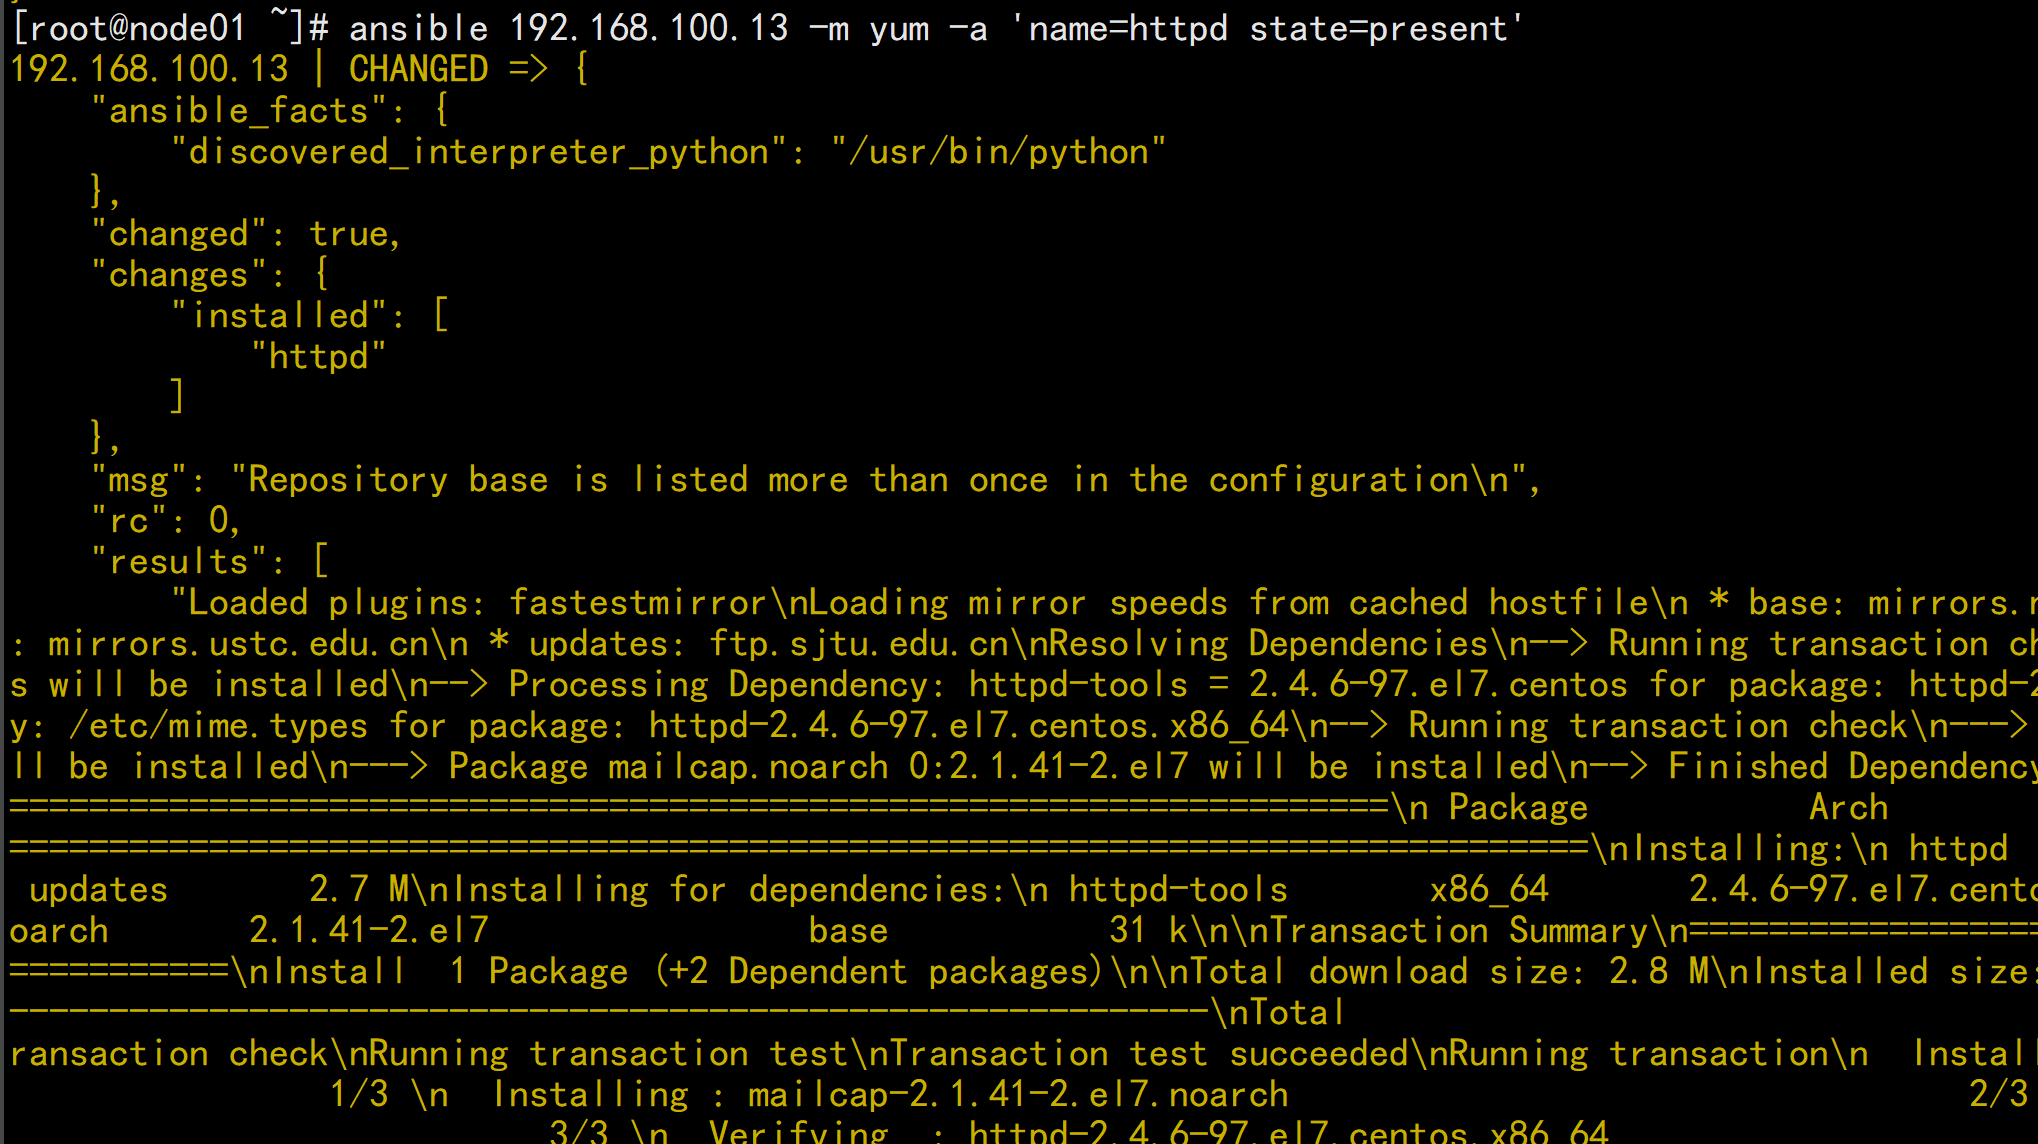
1.12 yum 模块
功能:yum 管理软件包,只支持RHEL,CentOS,fedora,不支持Ubuntu其它版本apt 模块管理 Debian 相关版本的软件包ansible websrvs -m yum -a 'name=httpd state=present' #安装ansible websrvs -m yum -a 'name=nginx state=present enablerepo=epel' #启用epel源进行安装ansible websrvs -m yum -a 'name=* state=lastest exclude=kernel*,foo*' #升级除kernel和foo开头以外的所有包ansible websrvs -m yum -a 'name=httpd state=absent' #删除[root@ansible ~]#ansible websrvs -m yum -a 'name=sl,cowsay'范例:[root@ansible ~]#ansible websrvs -m yum -a"name=https://mirror.tuna.tsinghua.edu.cn/zabbix/zabbix/5.2/rhel/7/x86_64/zabbix-agent-5.2.5-1.el7.x86_64.rpm"
范例:[root@centos8 ~]#ansible 10.0.0.100 -m apt -a'name=bb,sl,cowsay,cmatrix,oneko,hollywood,boxes,libaa-bin,x11-apps'[root@centos8 ~]#ansible websrvs -m apt -a 'name=rsync,psmisc state=absent'
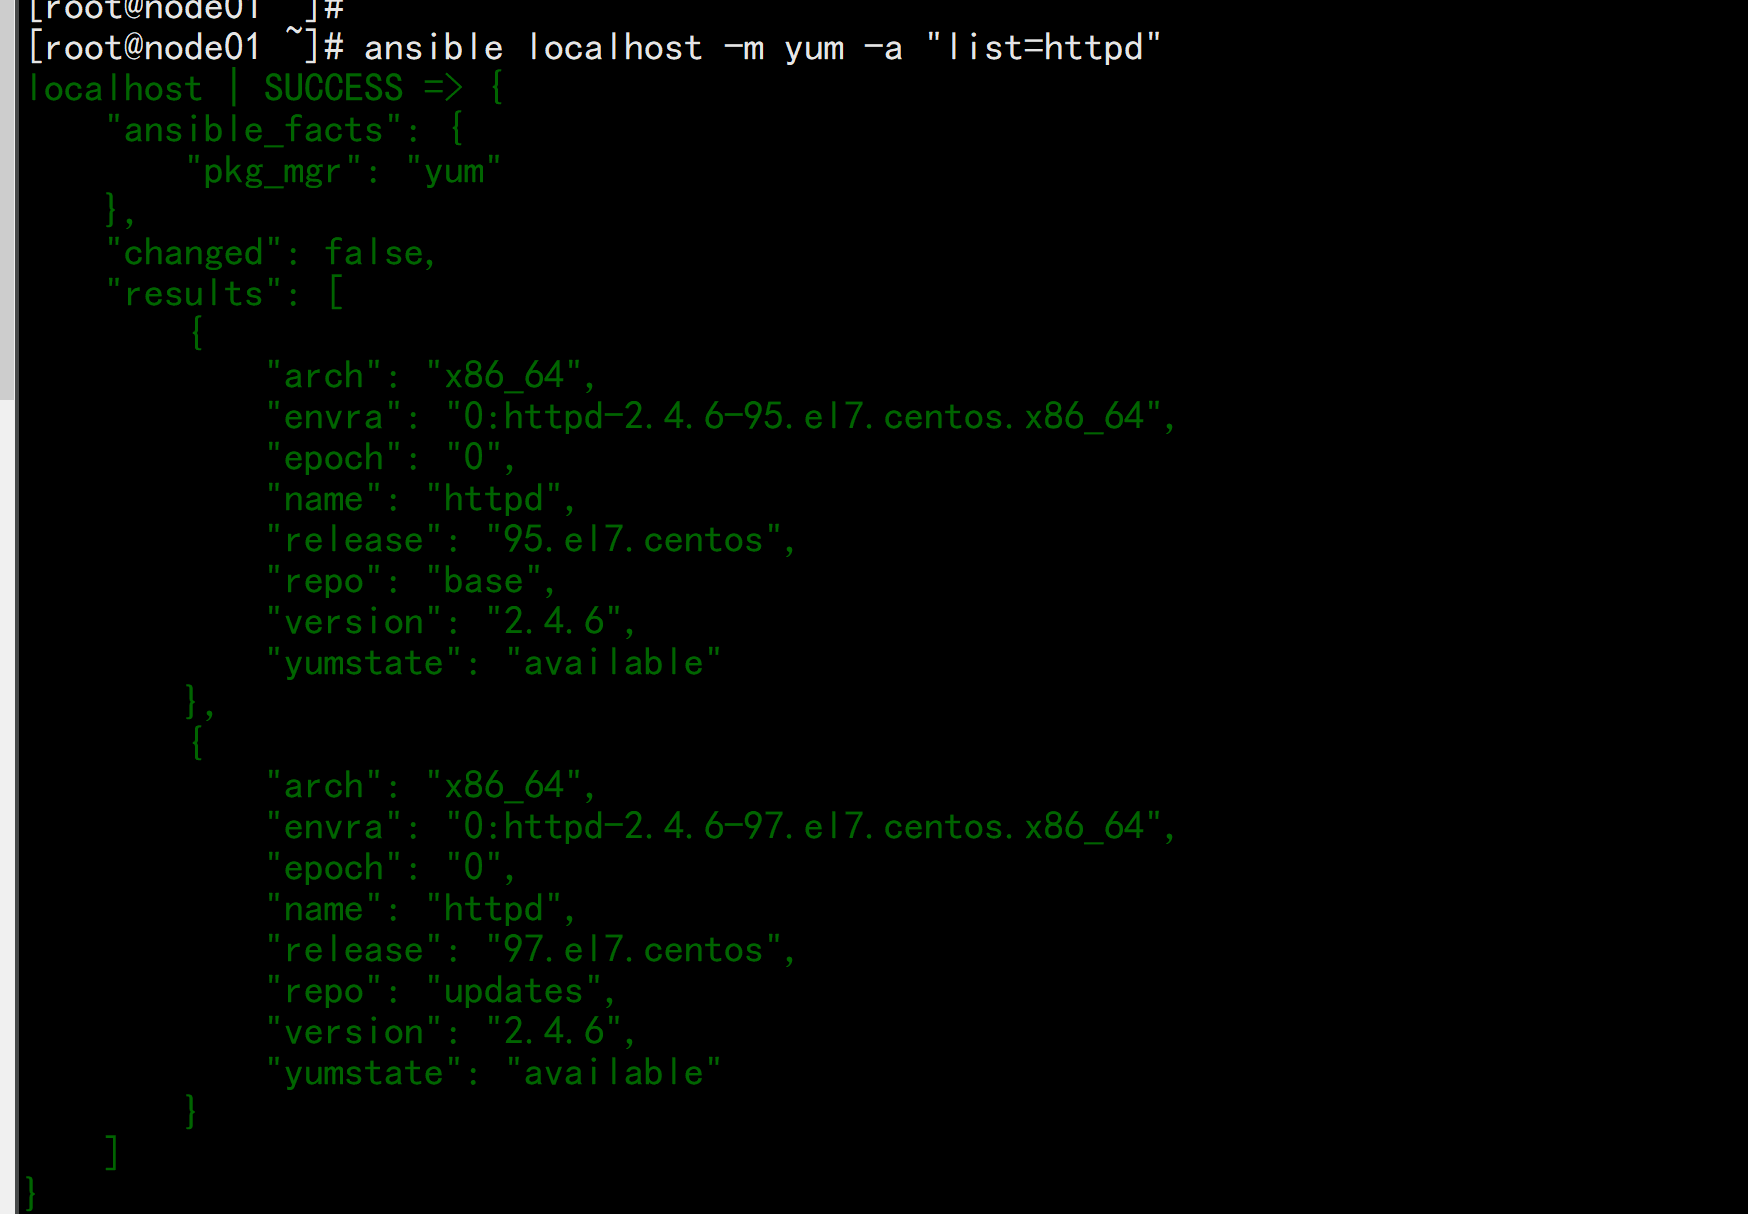
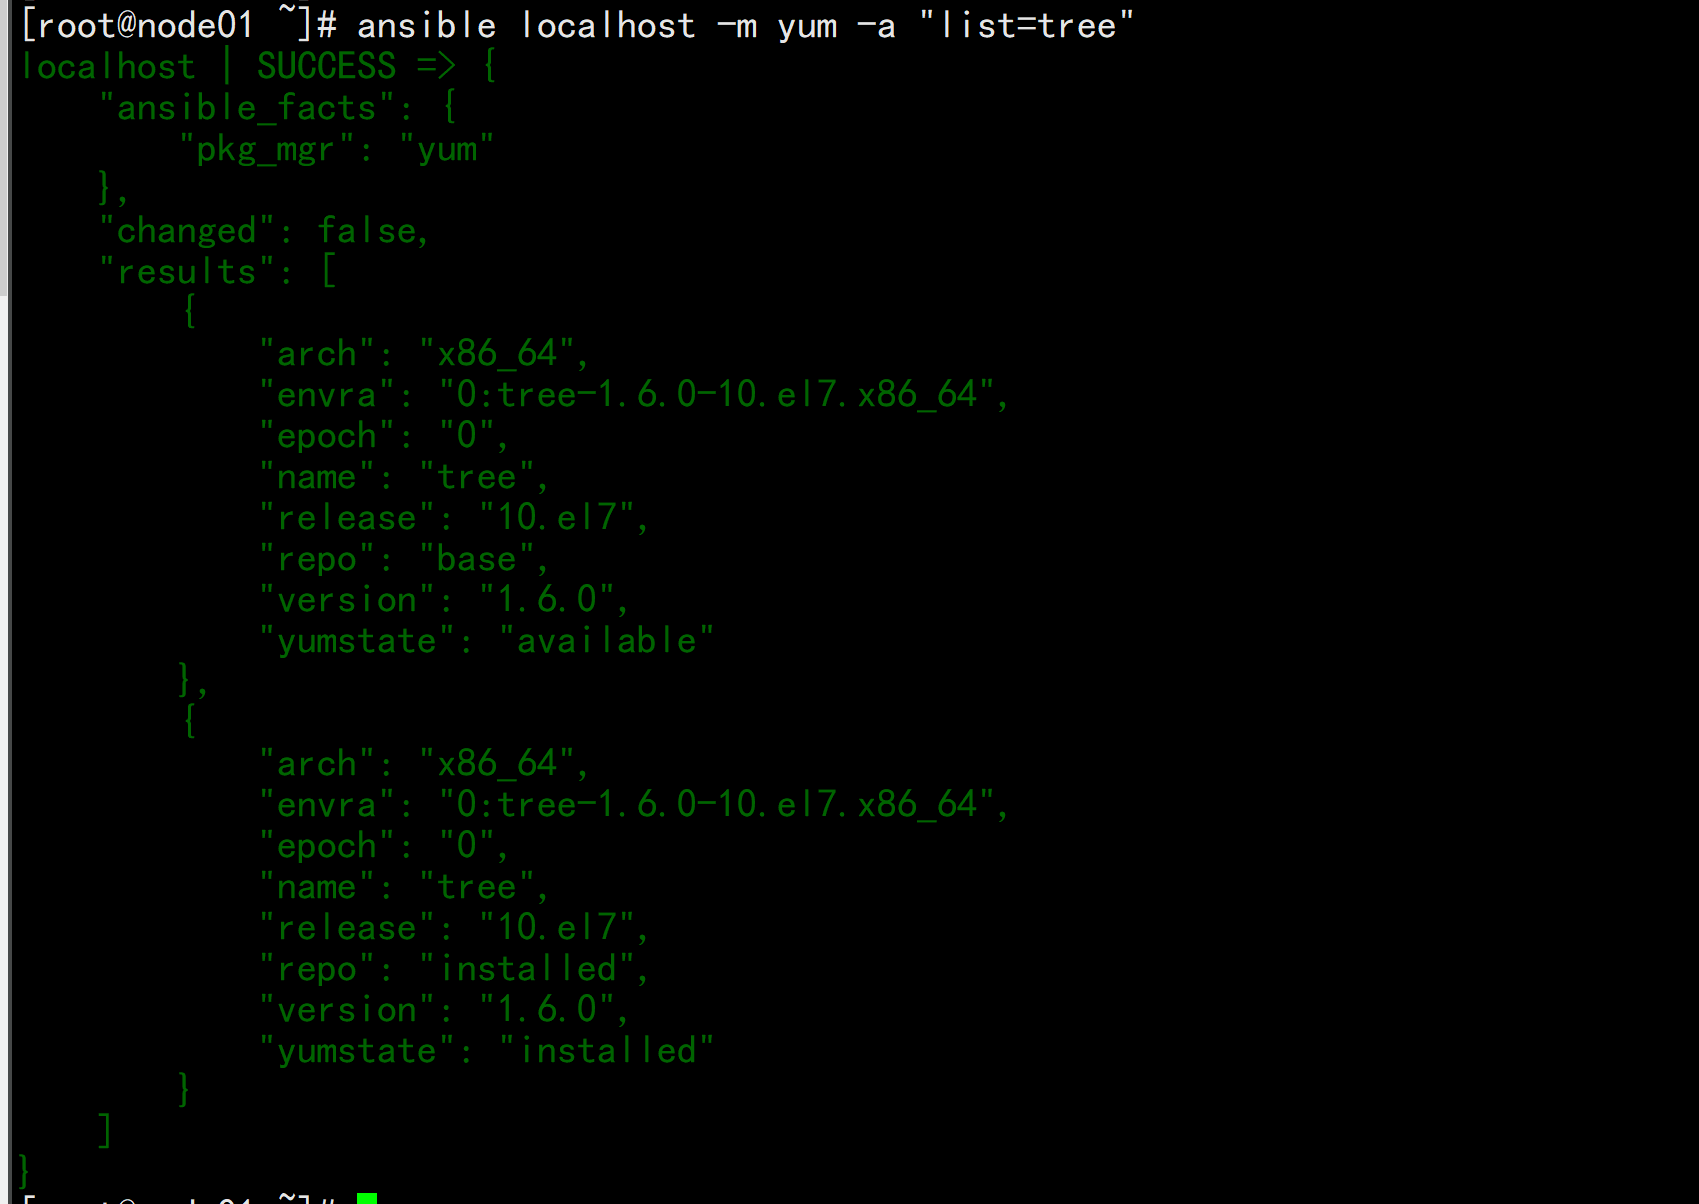
范例: 查看包[root@ansible ~]#ansible localhost -m yum -a "list=tree"localhost | SUCCESS => {"ansible_facts": {"pkg_mgr": "dnf"},"changed": false,"msg": "","results": [{"arch": "x86_64","epoch": "0","name": "tree","nevra": "0:tree-1.7.0-15.el8.x86_64","release": "15.el8","repo": "@System","version": "1.7.0","yumstate": "installed"},{"arch": "x86_64","epoch": "0","name": "tree","nevra": "0:tree-1.7.0-15.el8.x86_64","release": "15.el8","repo": "BaseOS","version": "1.7.0","yumstate": "available"}]}
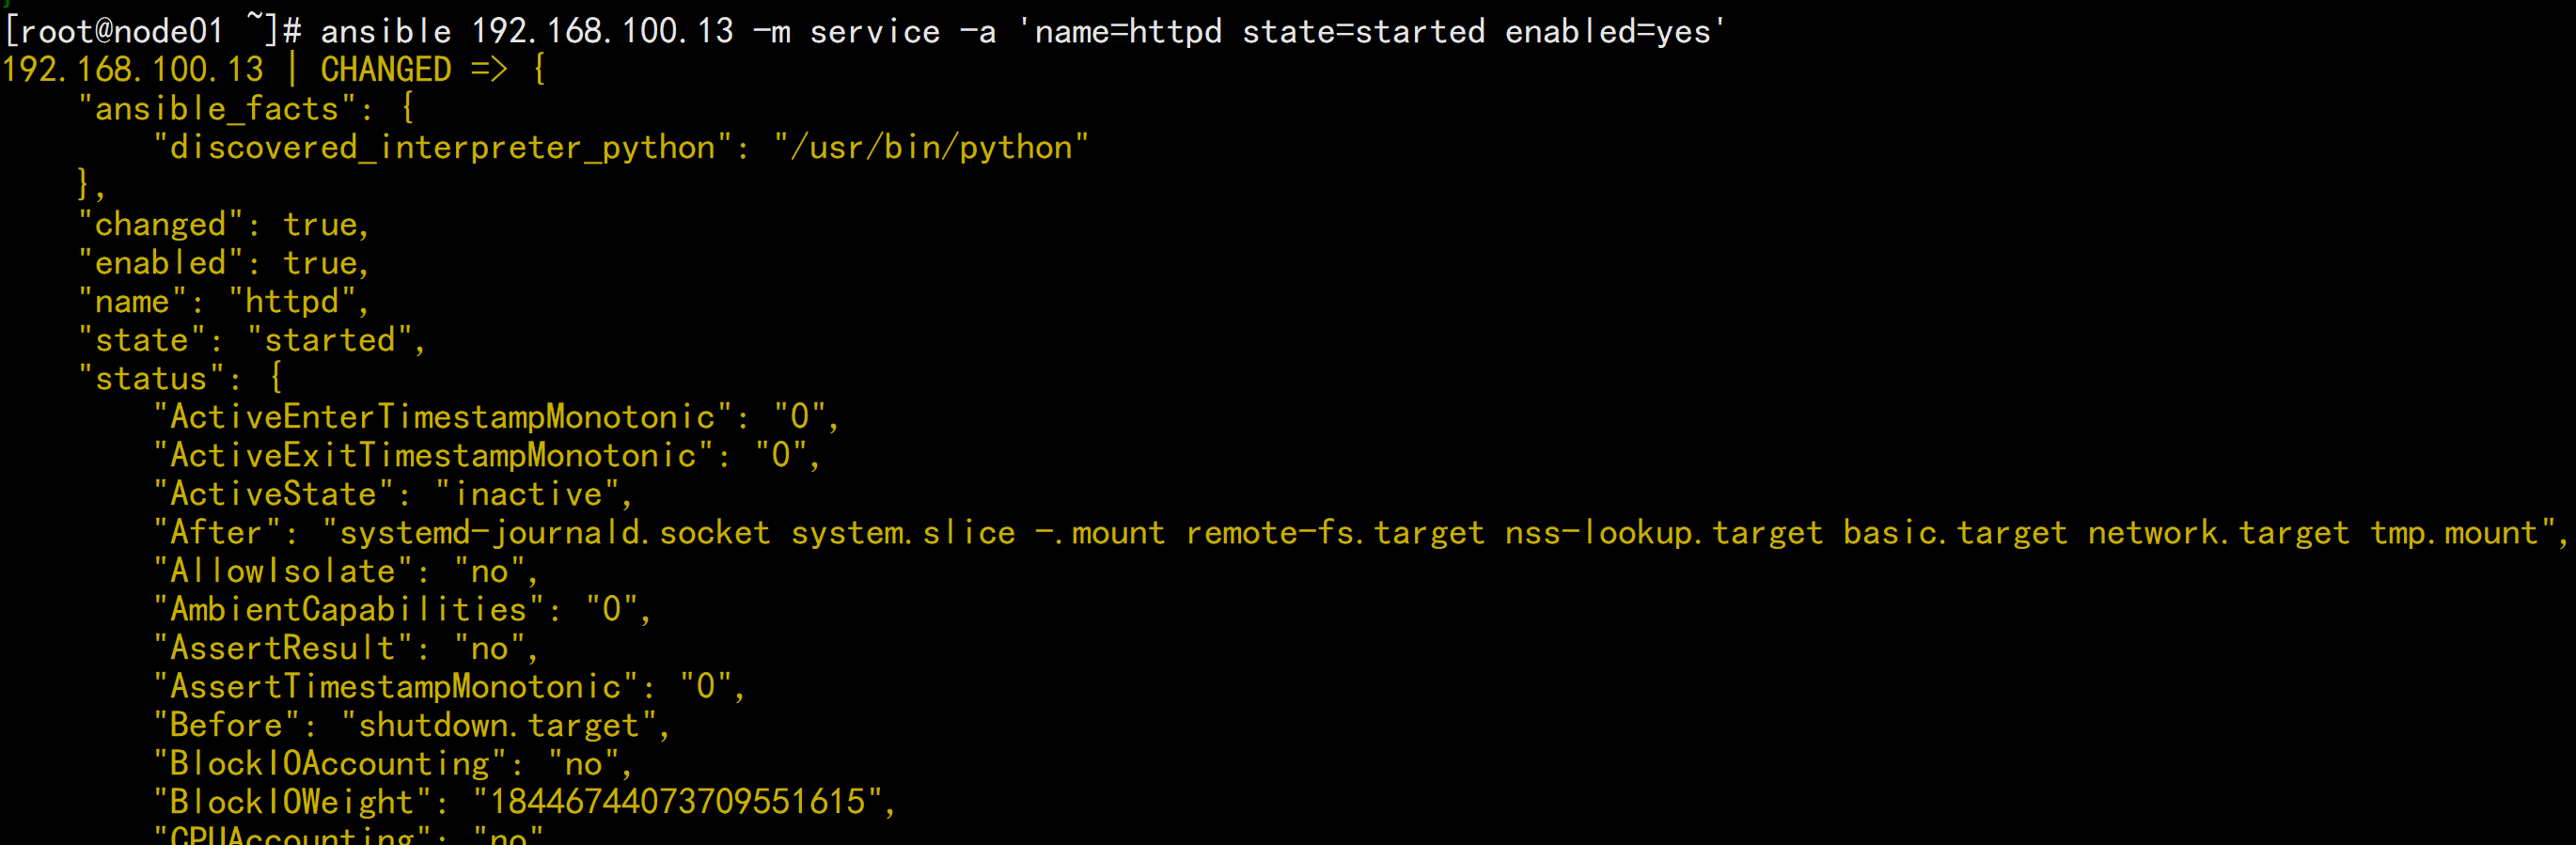
1.13 services 模块
功能:管理服务范例:ansible all -m service -a 'name=httpd state=started enabled=yes'ansible all -m service -a 'name=httpd state=stopped'ansible all -m service -a 'name=httpd state=reloaded'ansible all -m shell -a "sed -i 's/^Listen 80/Listen 8080/'/etc/httpd/conf/httpd.conf"ansible all -m service -a 'name=httpd state=restarted'
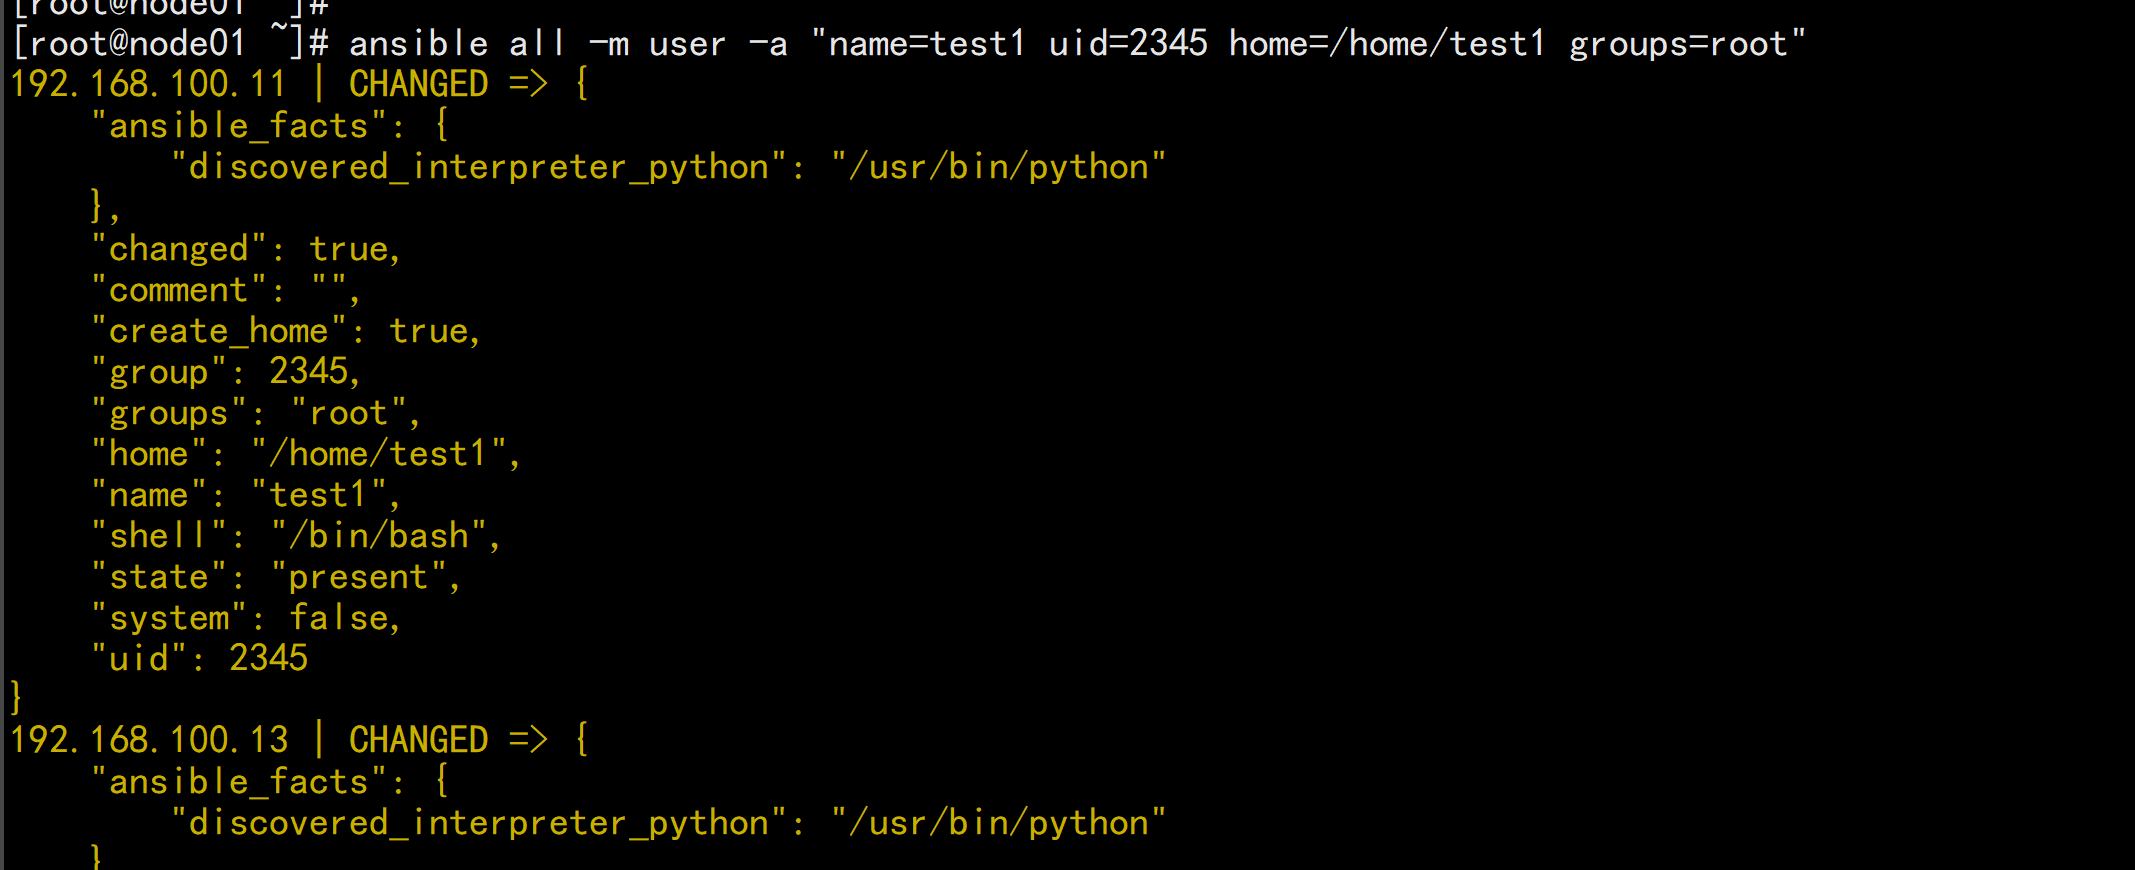
1.14 user 模块
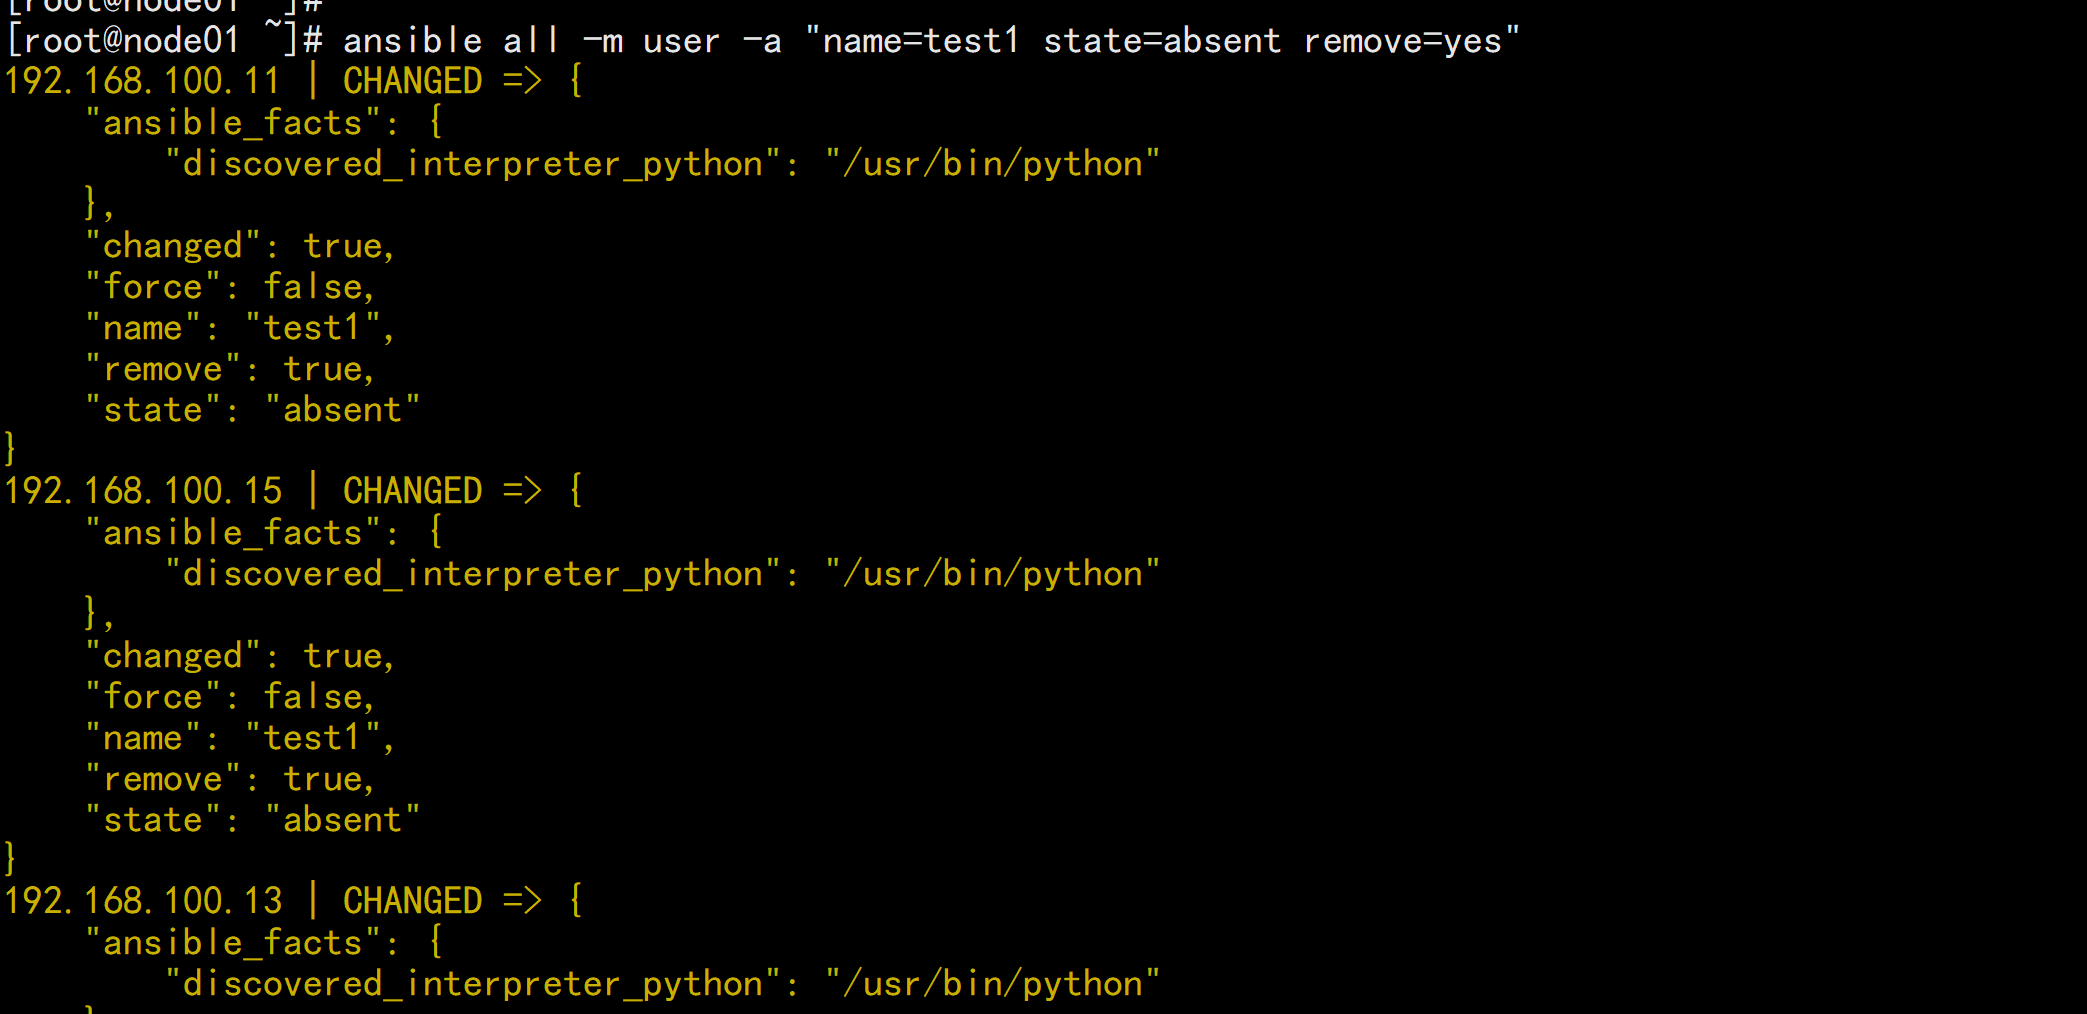
User 模块:功能:管理用户范例:#创建用户ansible all -m user -a 'name=user1 comment="test user" uid=2048 home=/app/user1group=root'ansible all -m user -a 'name=nginx comment=nginx uid=88 group=nginxgroups="root,daemon" shell=/sbin/nologin system=yes create_home=nohome=/data/nginx non_unique=yes'#remove=yes表示删除用户及家目录等数据,默认remove=noansible all -m user -a 'name=nginx state=absent remove=yes'ansible all -m user "name=test1 uid=2345 home=/home/test1 group=root"ansible all -m user -a "name=test1 state=absent remove=yes"
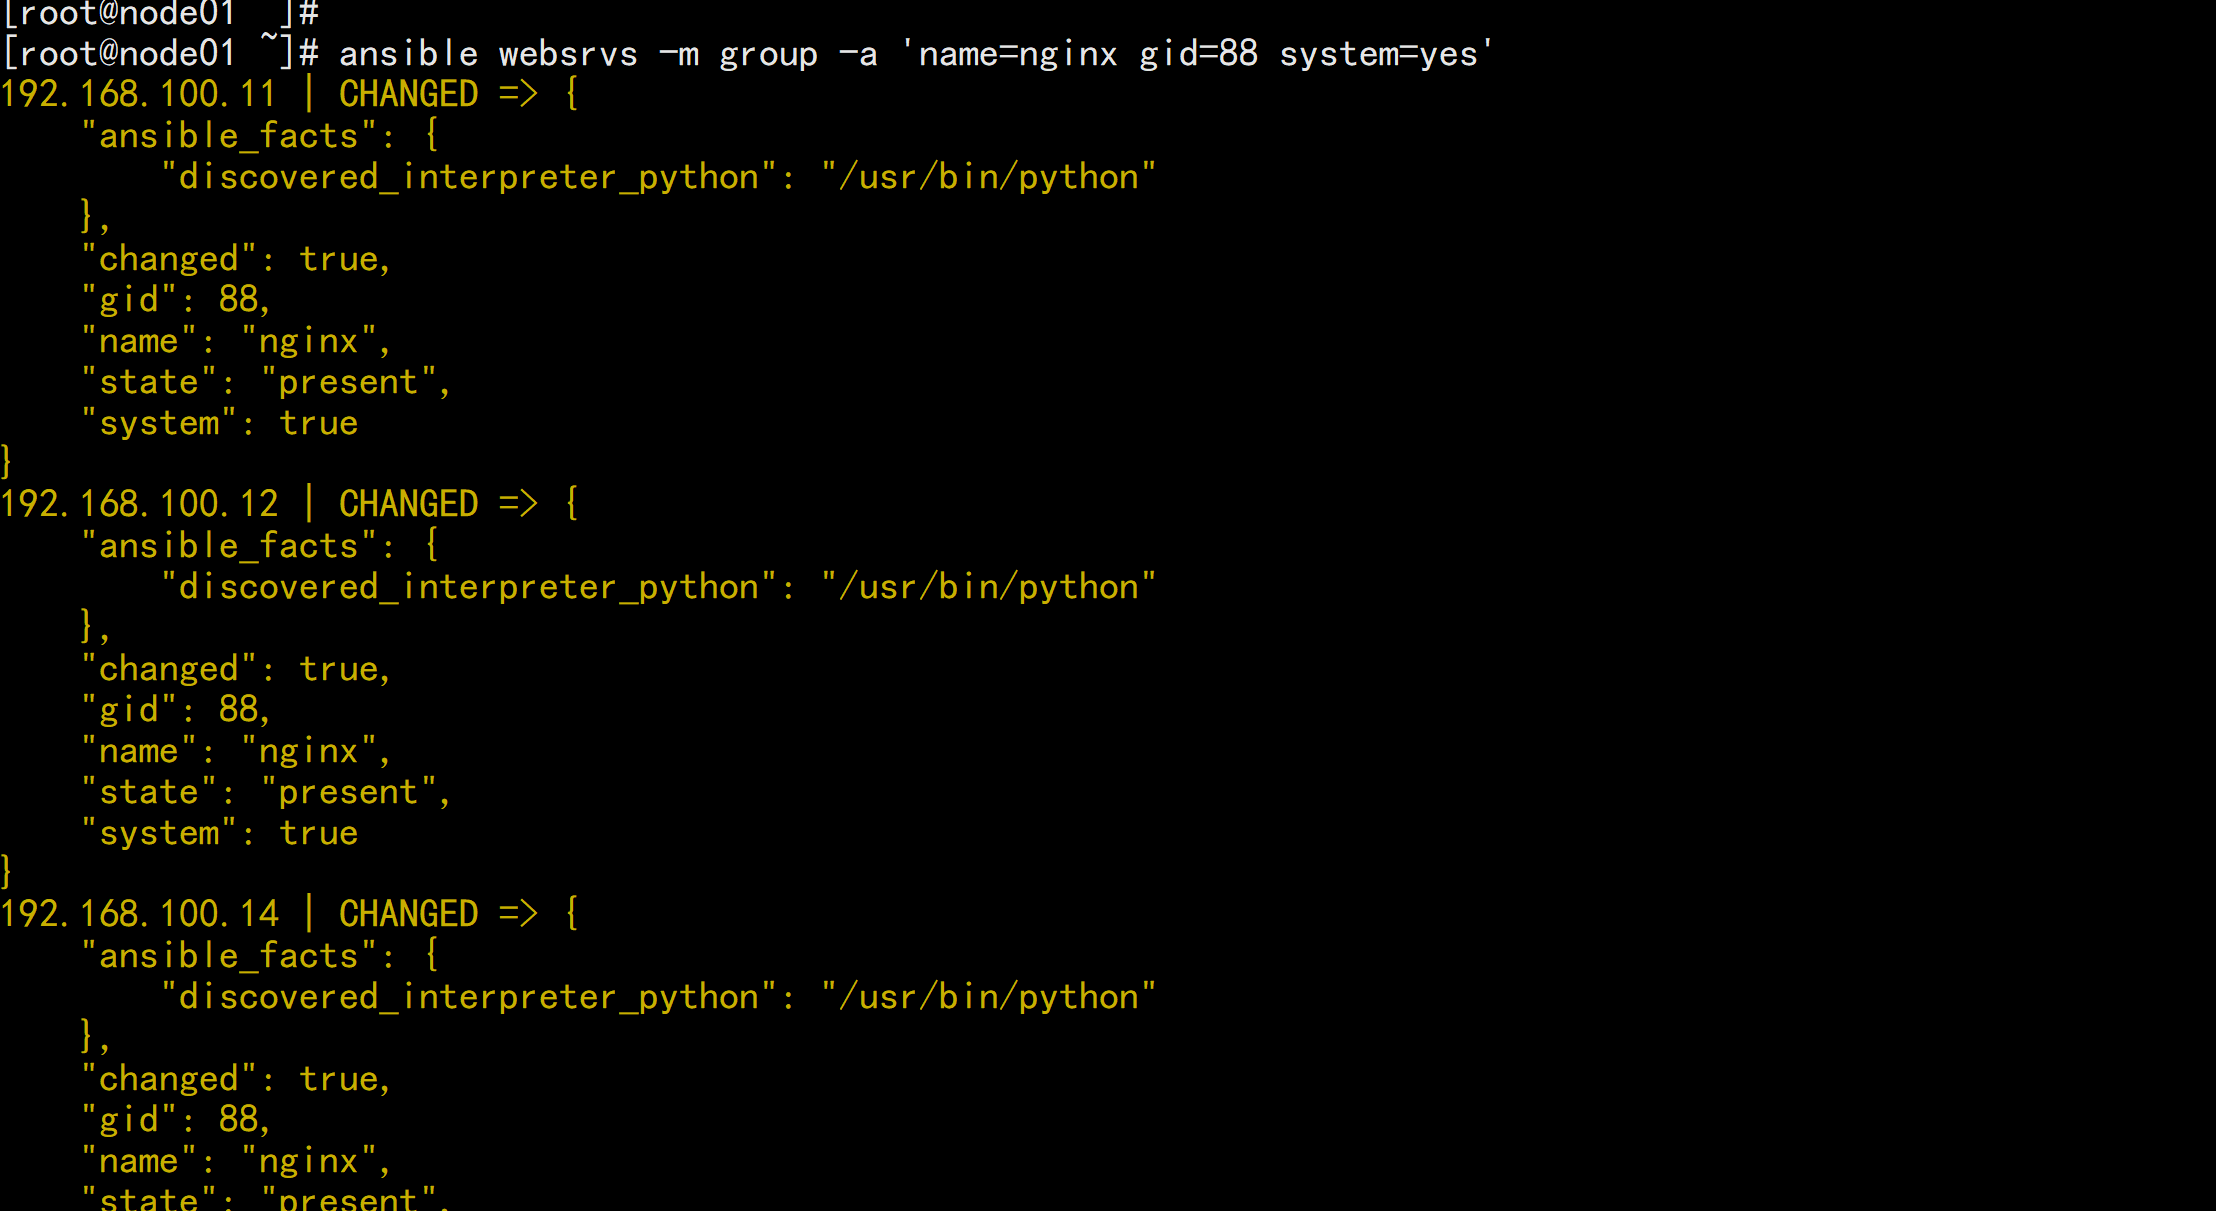
1.15 Group 模块
功能:管理组范例:#创建组ansible websrvs -m group -a 'name=nginx gid=88 system=yes'#删除组ansible websrvs -m group -a 'name=nginx state=absent'
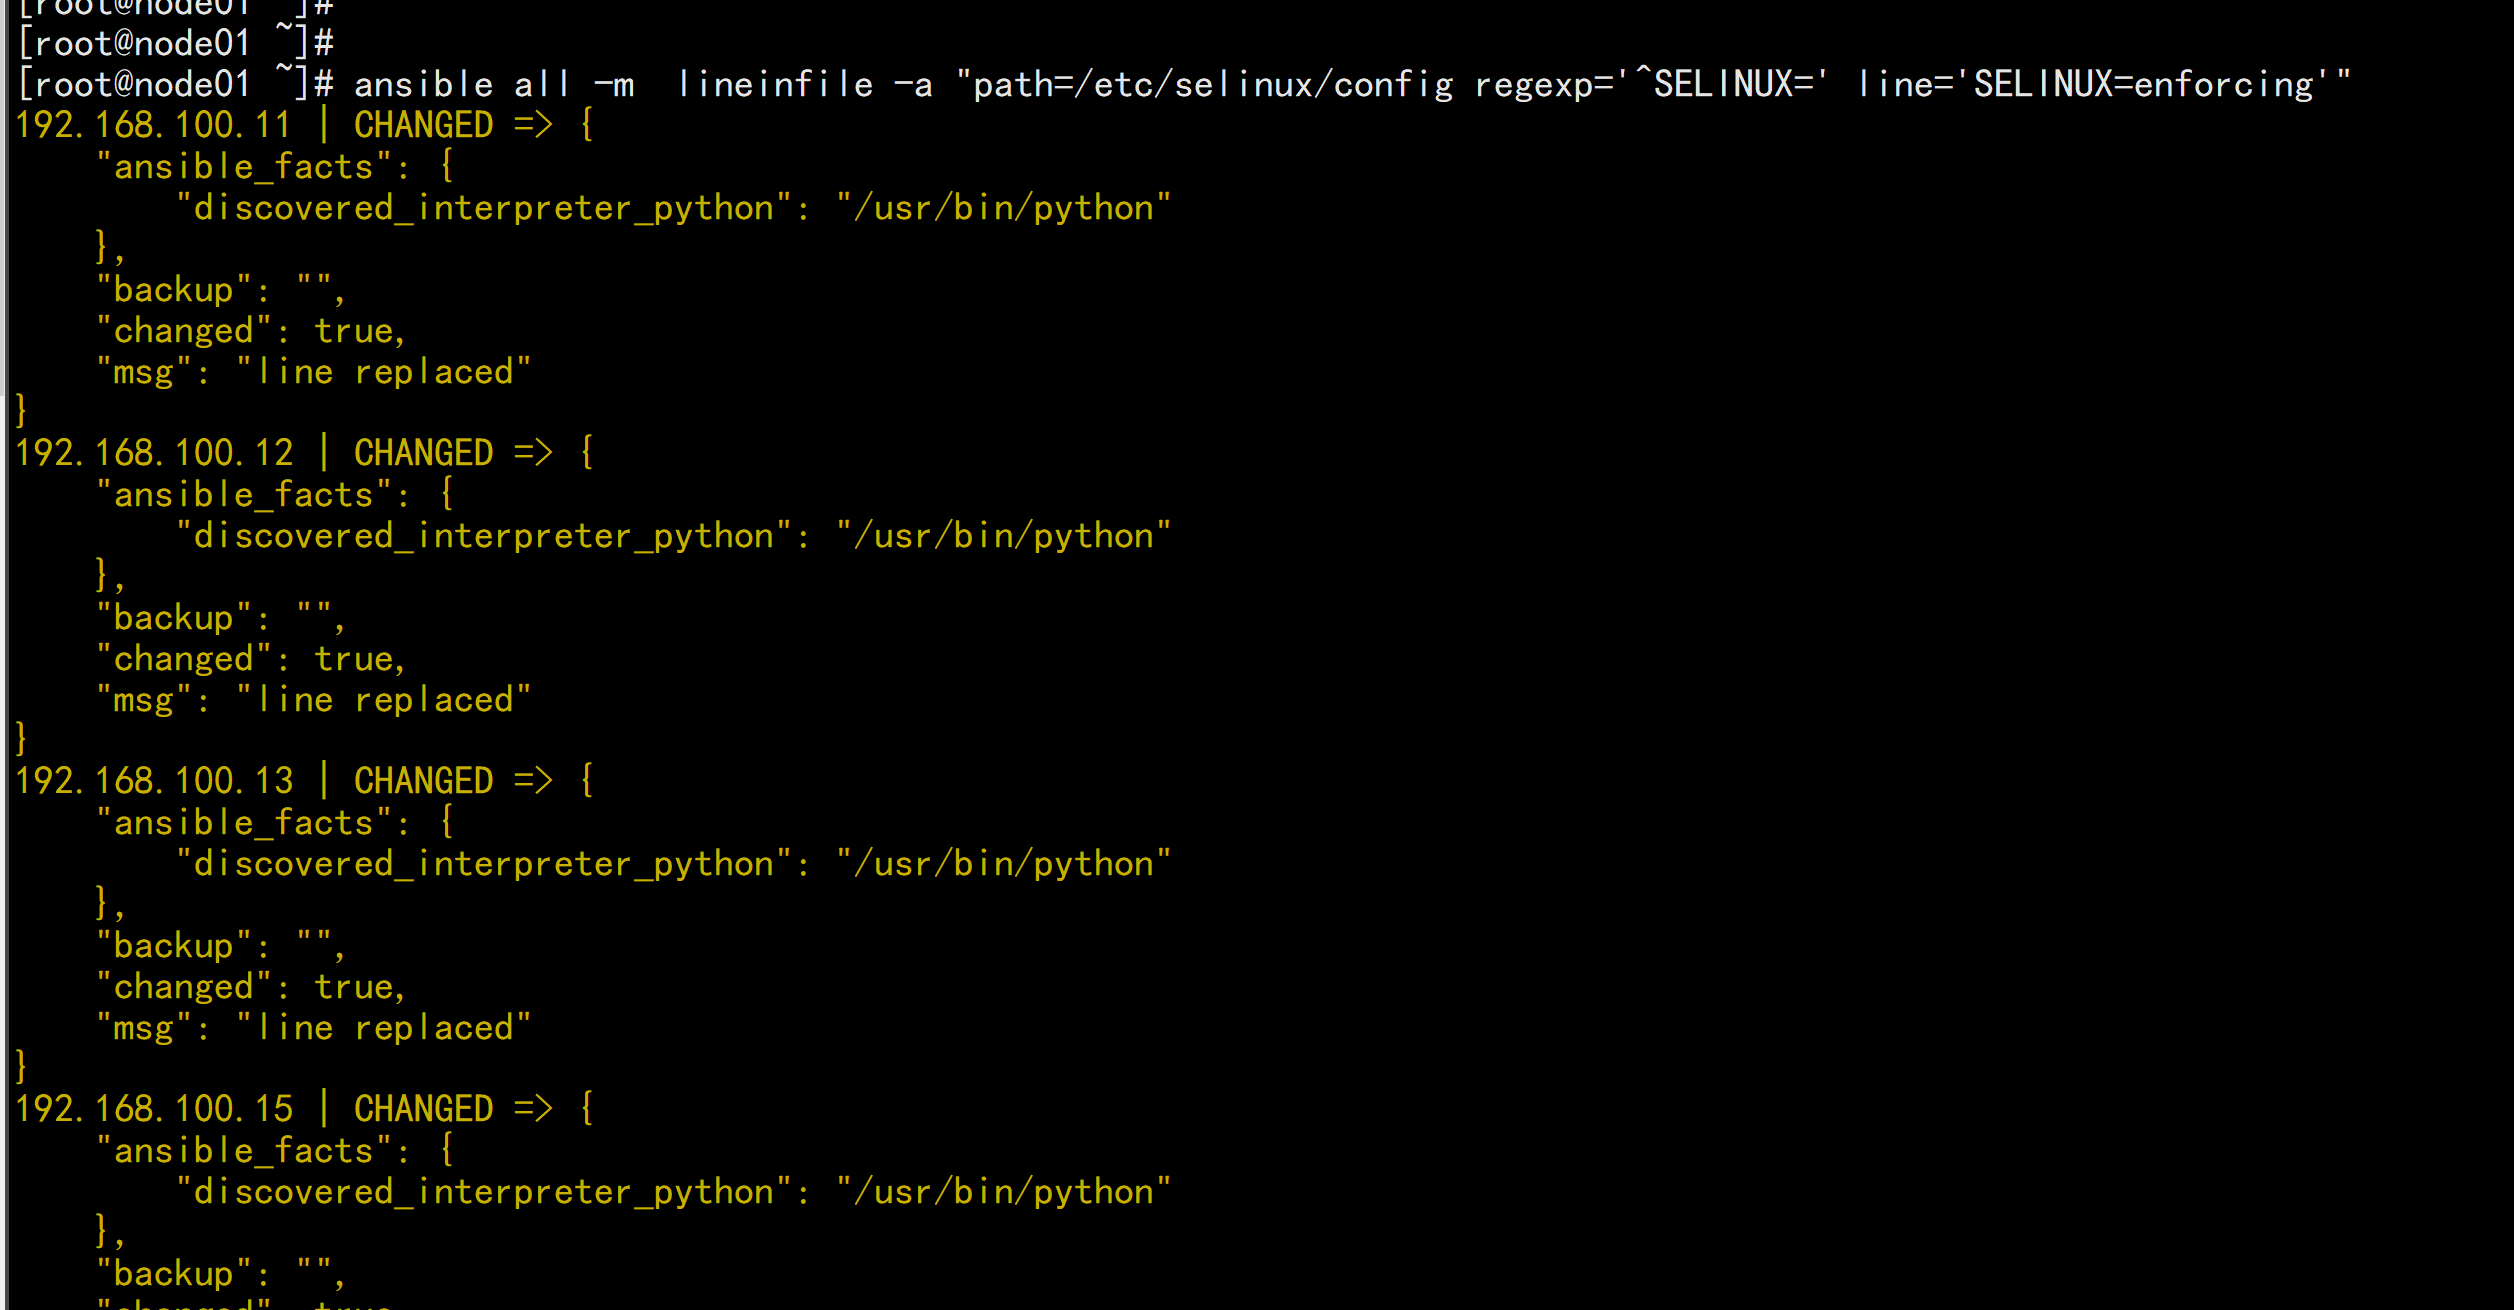
1.16 Lineinfile 模块
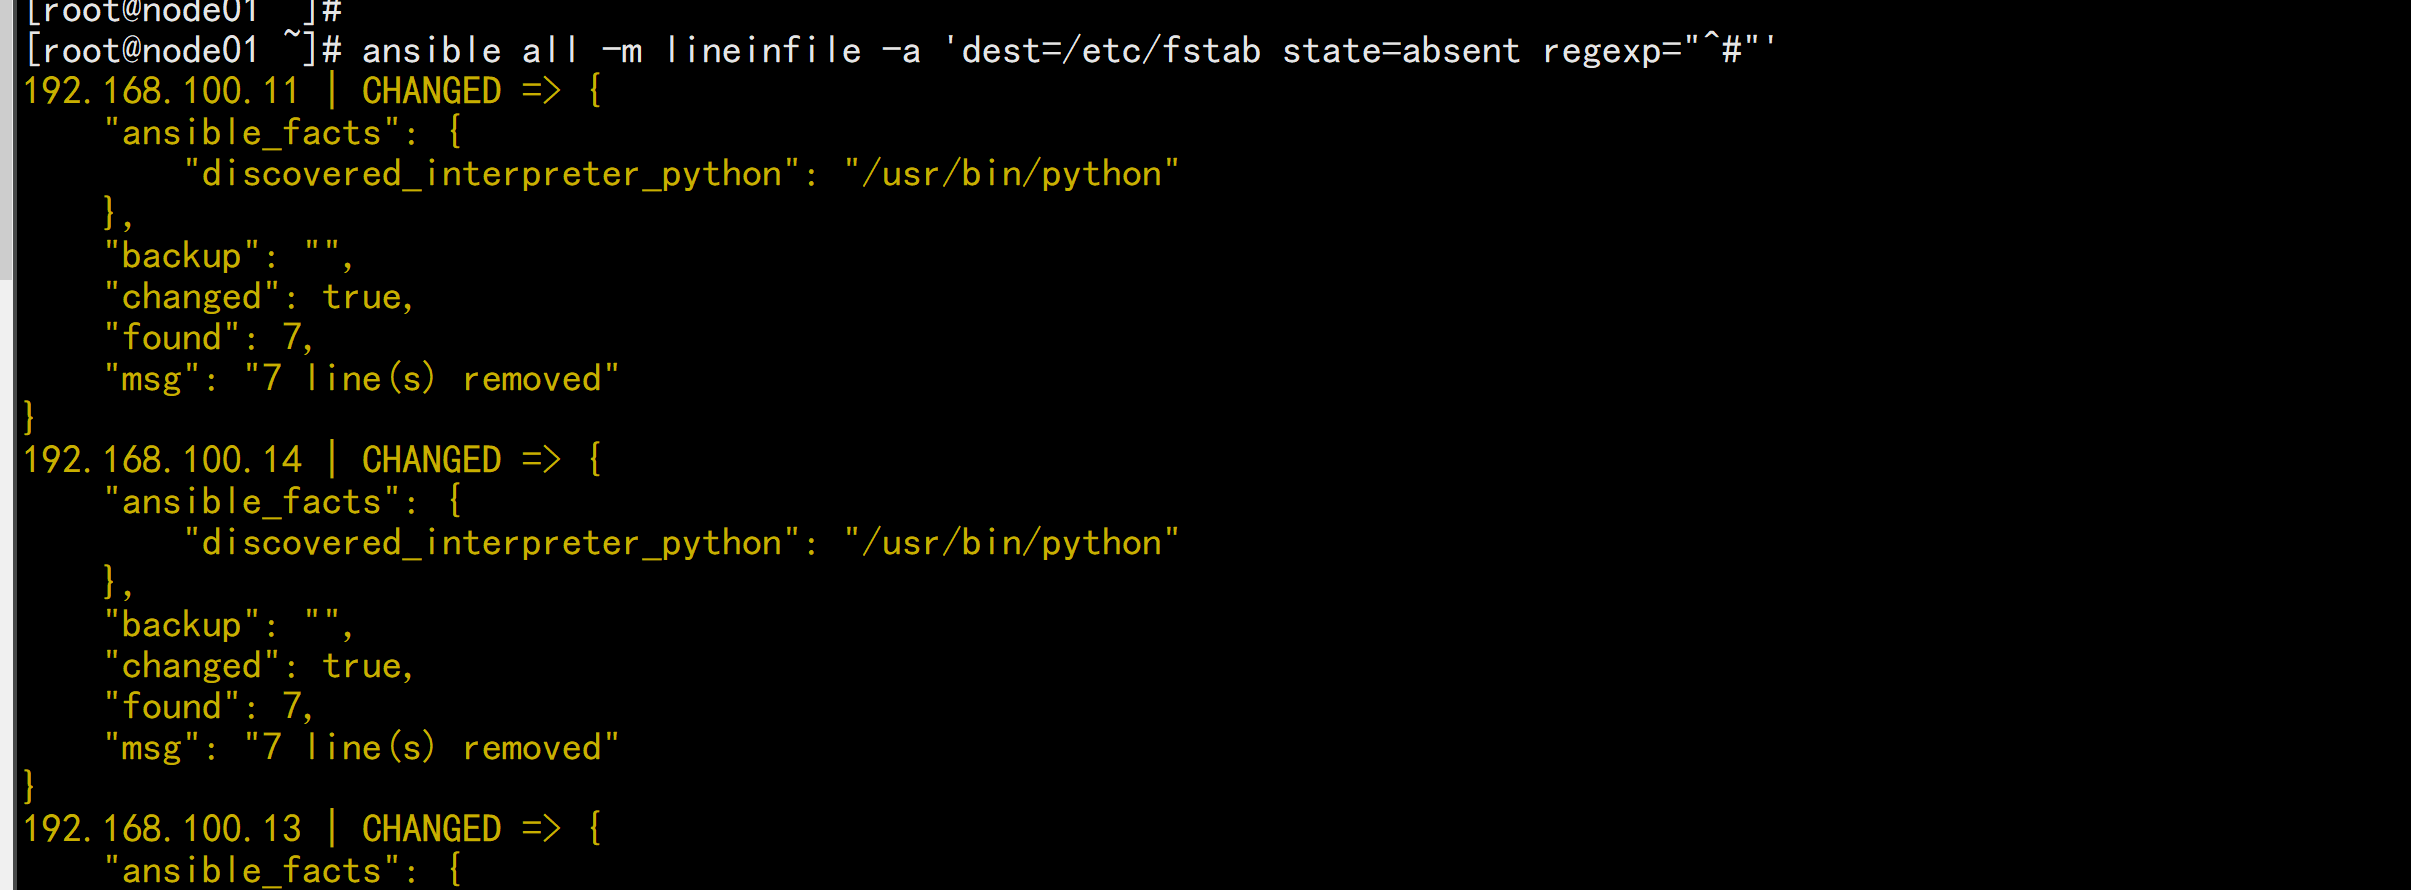
ansible在使用sed进行替换时,经常会遇到需要转义的问题,而且ansible在遇到特殊符号进行替换时,存在问题,无法正常进行替换 。其实在ansible自身提供了两个模块:lineinfile模块和replace模块,可以方便的进行替换一般在ansible当中去修改某个文件的单行进行替换的时候需要使用lineinfile模块regexp参数 :使用正则表达式匹配对应的行,当替换文本时,如果有多行文本都能被匹配,则只有最后面被匹配到的那行文本才会被替换,当删除文本时,如果有多行文本都能被匹配,这么这些行都会被删除。如果想进行多行匹配进行替换需要使用replace模块功能:相当于sed,可以修改文件内容范例:ansible websrvs -m lineinfile -a "path=/etc/httpd/conf/httpd.confregexp='^Listen' line='Listen 80'"ansible all -m lineinfile -a "path=/etc/selinux/config regexp='^SELINUX='line='SELINUX=disabled'"ansible all -m lineinfile -a 'dest=/etc/fstab state=absent regexp="^#"'
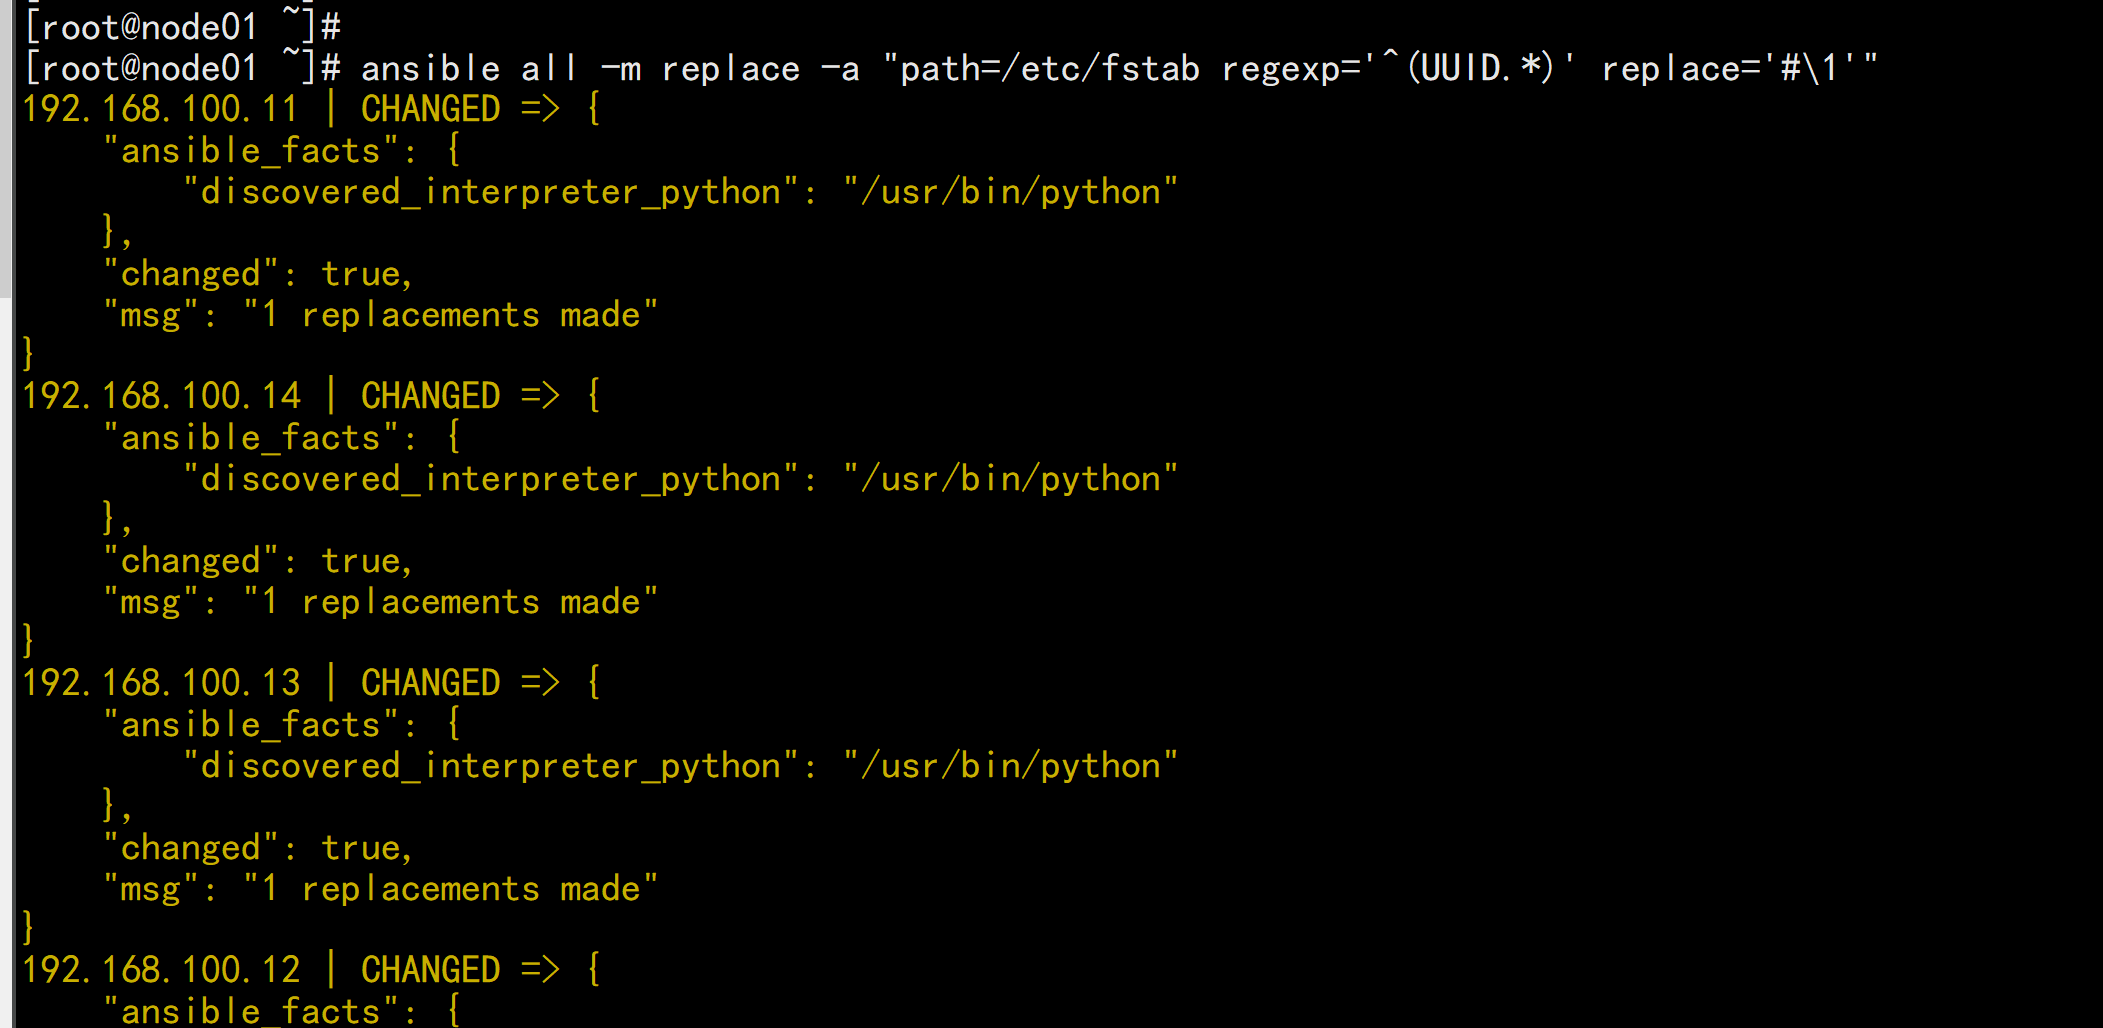
1.17 Replace 模块
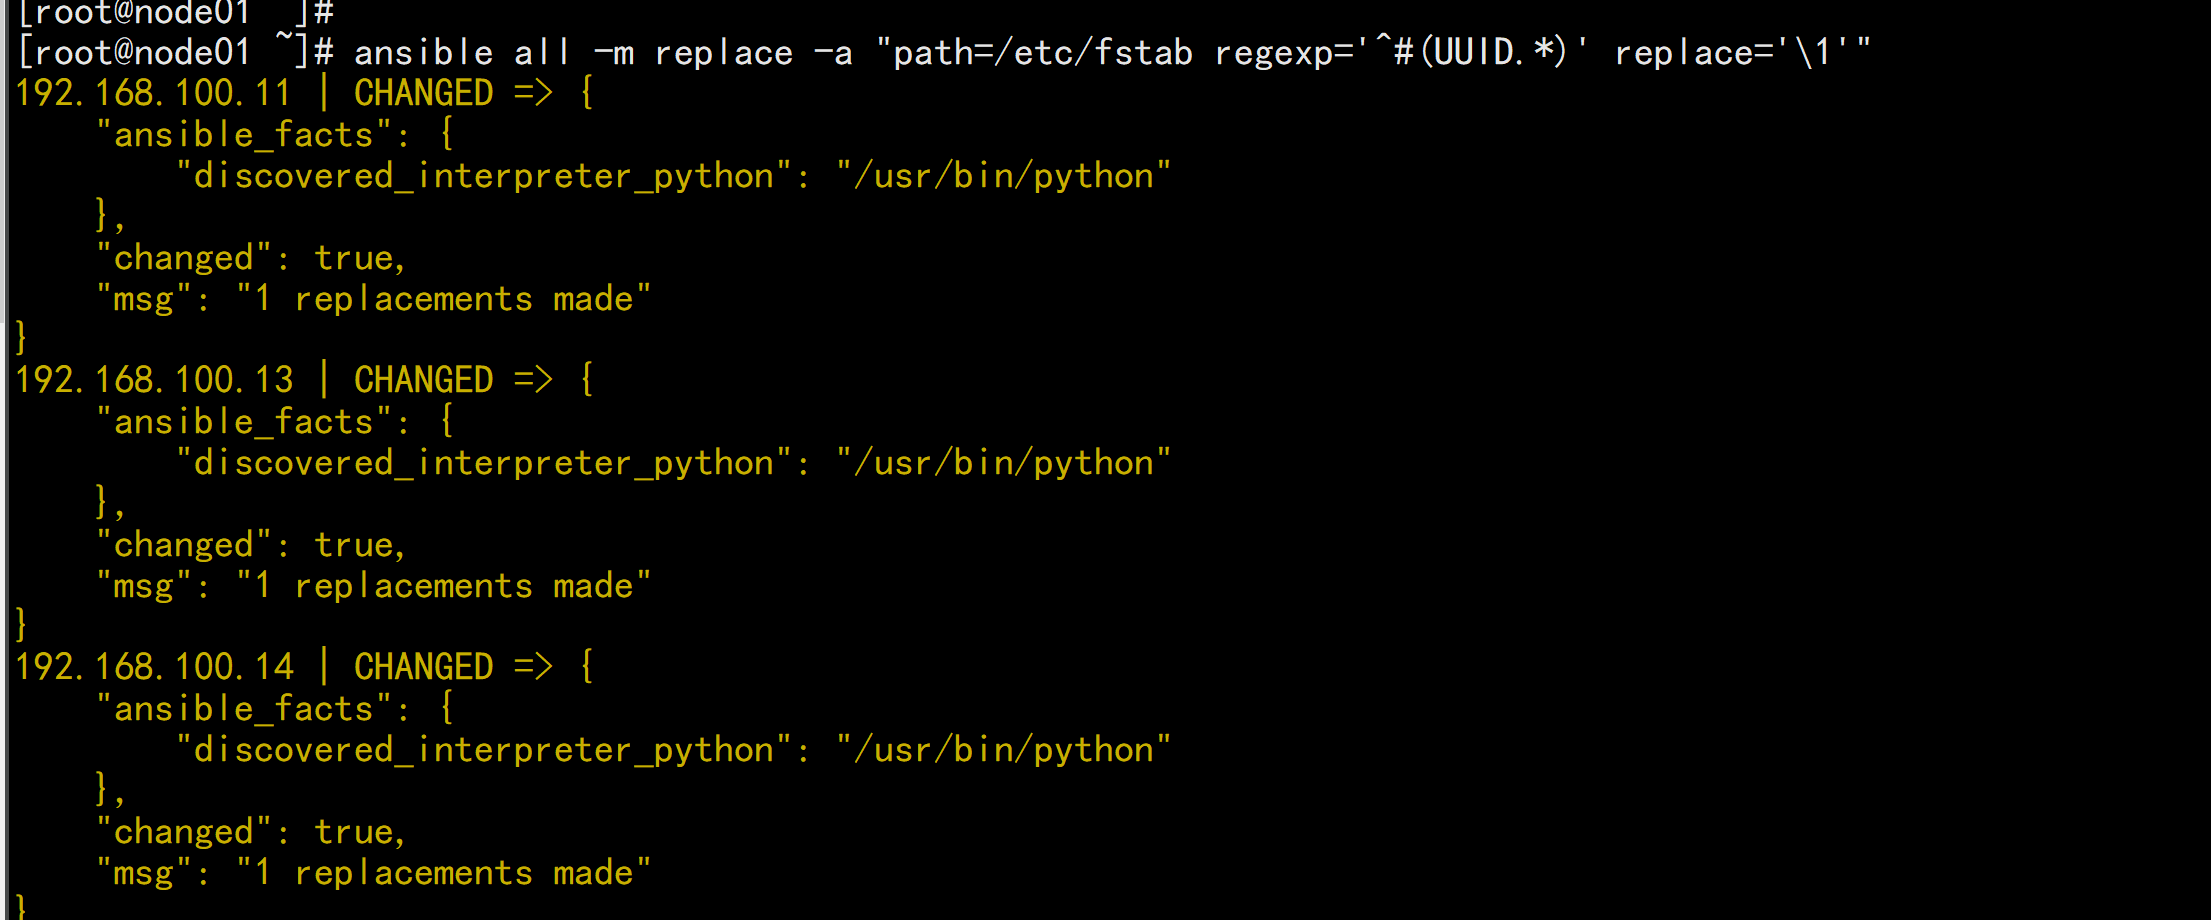
该模块有点类似于sed命令,主要也是基于正则进行匹配和替换,建议使用范例:ansible all -m replace -a "path=/etc/fstab regexp='^(UUID.*)' replace='#\1'"ansible all -m replace -a "path=/etc/fstab regexp='^#(UUID.*)' replace='\1'"
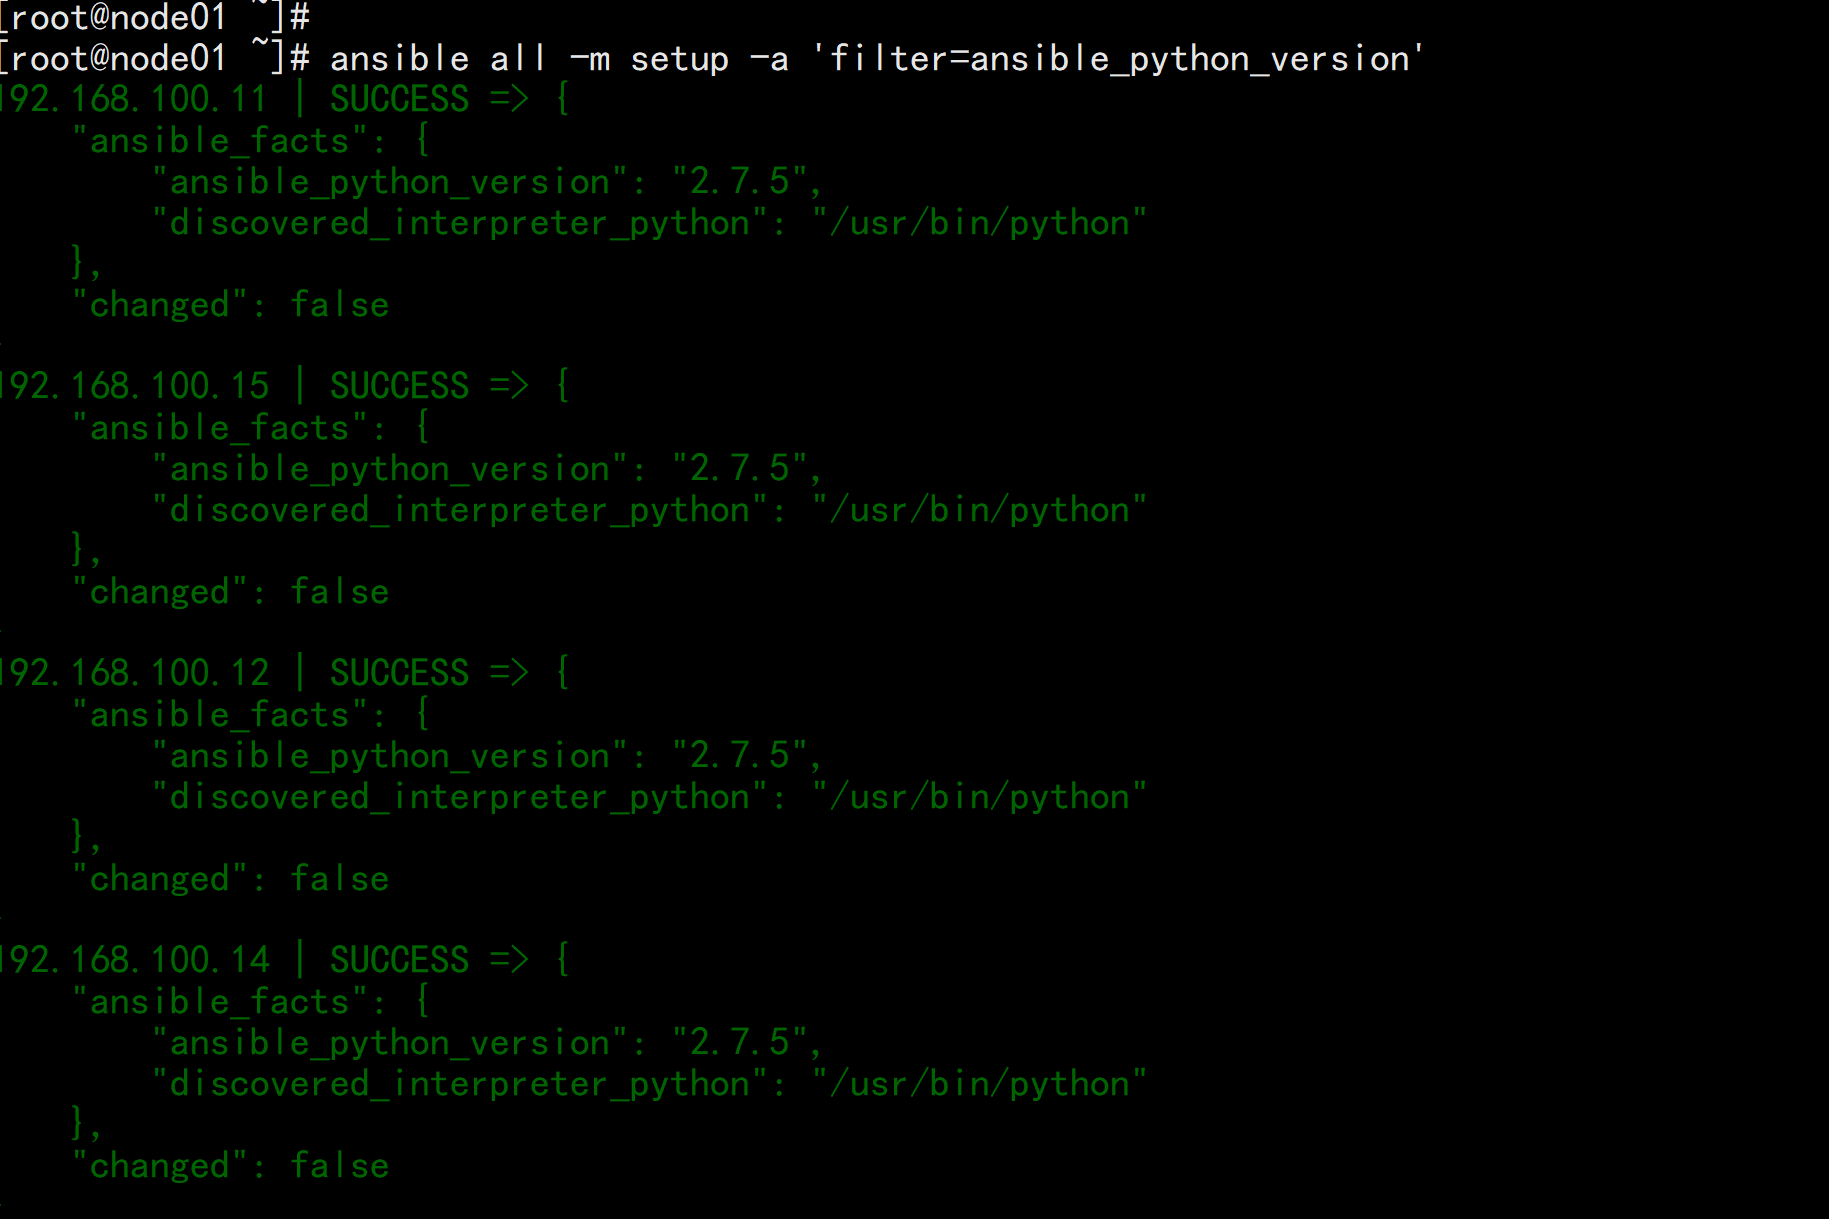
1.18 Setup 模块
功能: setup 模块来收集主机的系统信息,这些 facts 信息可以直接以变量的形式使用,但是如果主机较多,会影响执行速度可以使用 gather_facts: no 来禁止 Ansible 收集 facts 信息范例:ansible all -m setupansible all -m setup -a "filter=ansible_nodename"ansible all -m setup -a "filter=ansible_hostname"ansible all -m setup -a "filter=ansible_domain"ansible all -m setup -a "filter=ansible_memtotal_mb"ansible all -m setup -a "filter=ansible_memory_mb"ansible all -m setup -a "filter=ansible_memfree_mb"ansible all -m setup -a "filter=ansible_os_family"ansible all -m setup -a "filter=ansible_distribution_major_version"ansible all -m setup -a "filter=ansible_distribution_version"ansible all -m setup -a "filter=ansible_processor_vcpus"ansible all -m setup -a "filter=ansible_all_ipv4_addresses"ansible all -m setup -a "filter=ansible_architecture"ansible all -m setup -a "filter=ansible_uptime_seconds"ansible all -m setup -a "filter=ansible_processor*"ansible all -m setup -a 'filter=ansible_env'