@zhangyy
2021-07-02T05:32:35.000000Z
字数 12890
阅读 383
greeplum的基础
greenplum系列
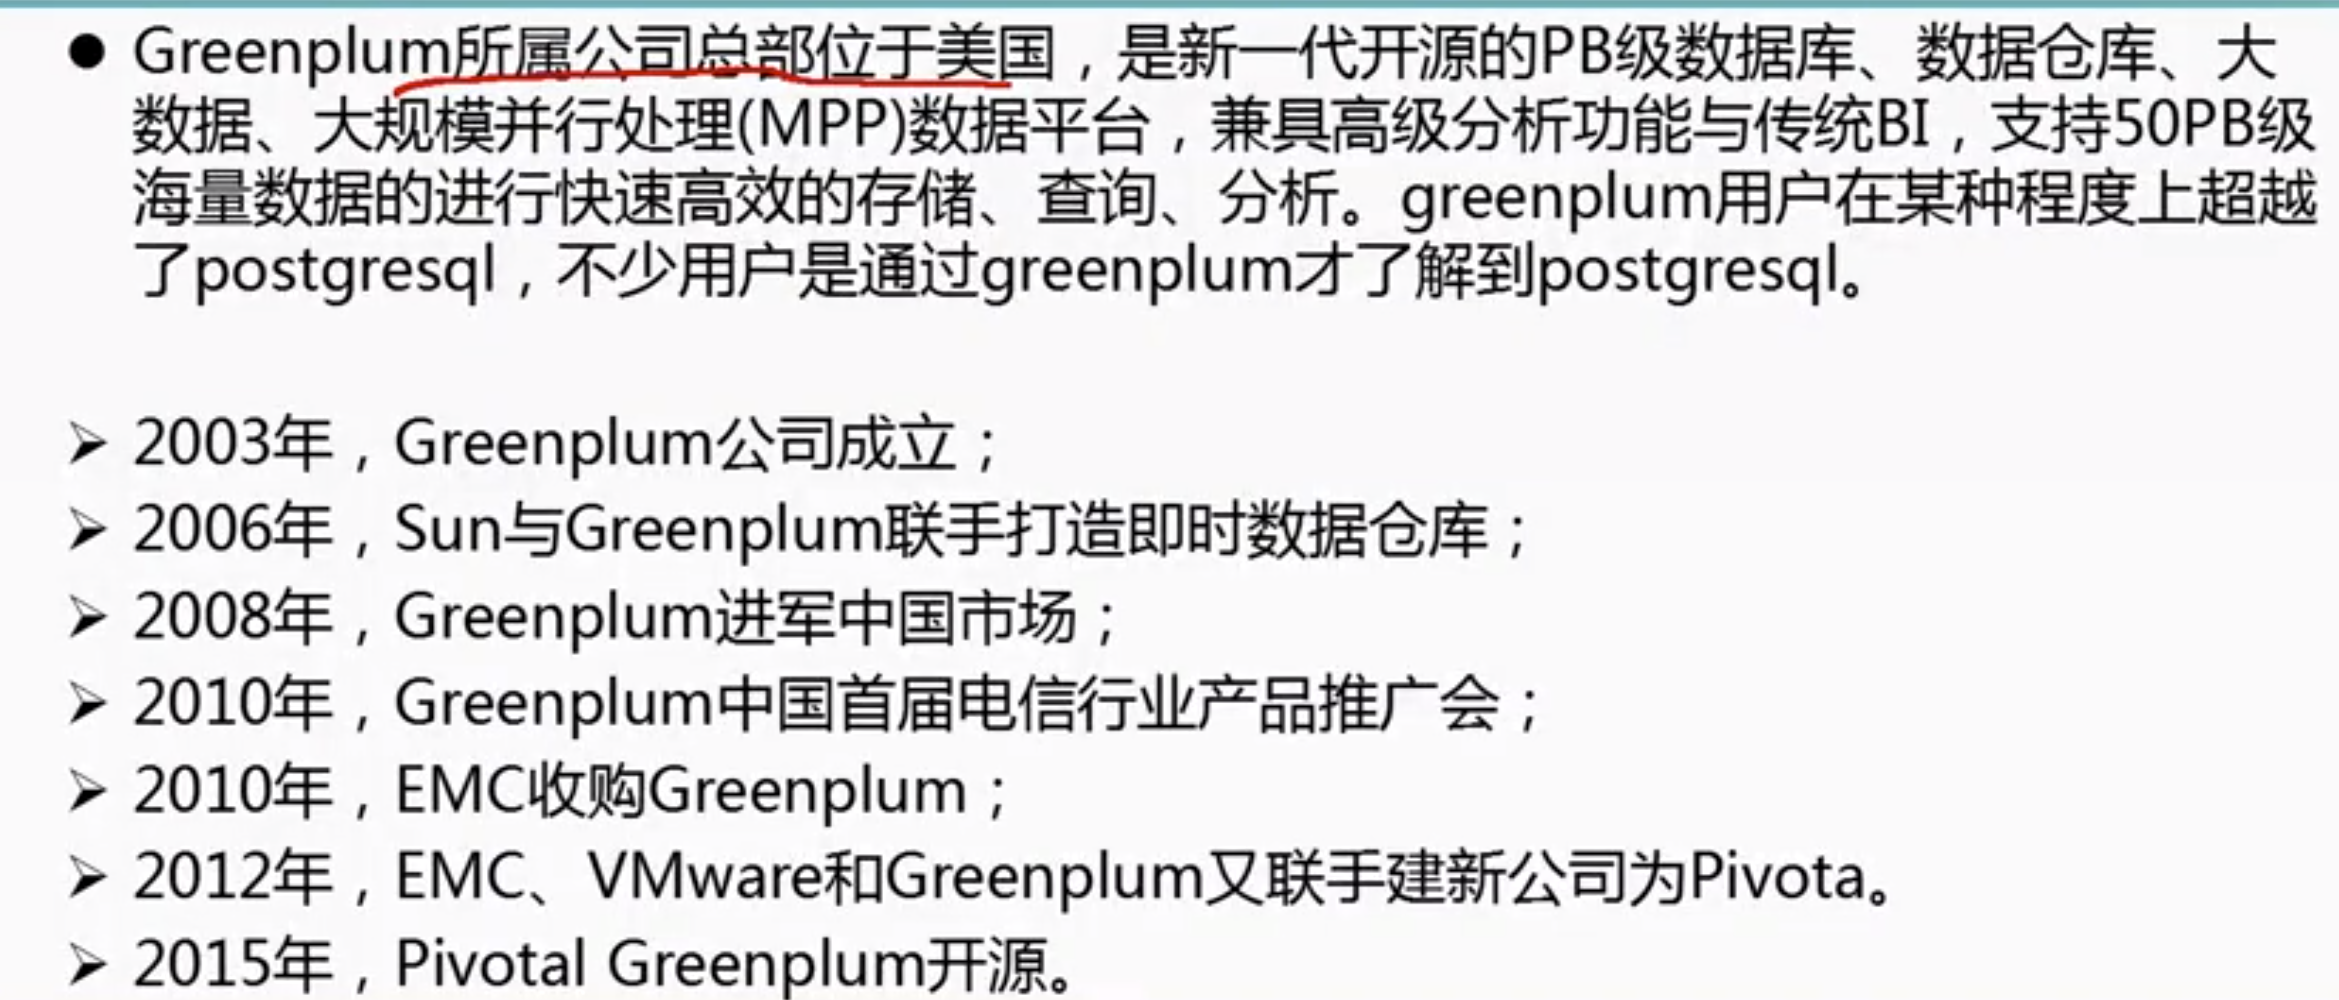
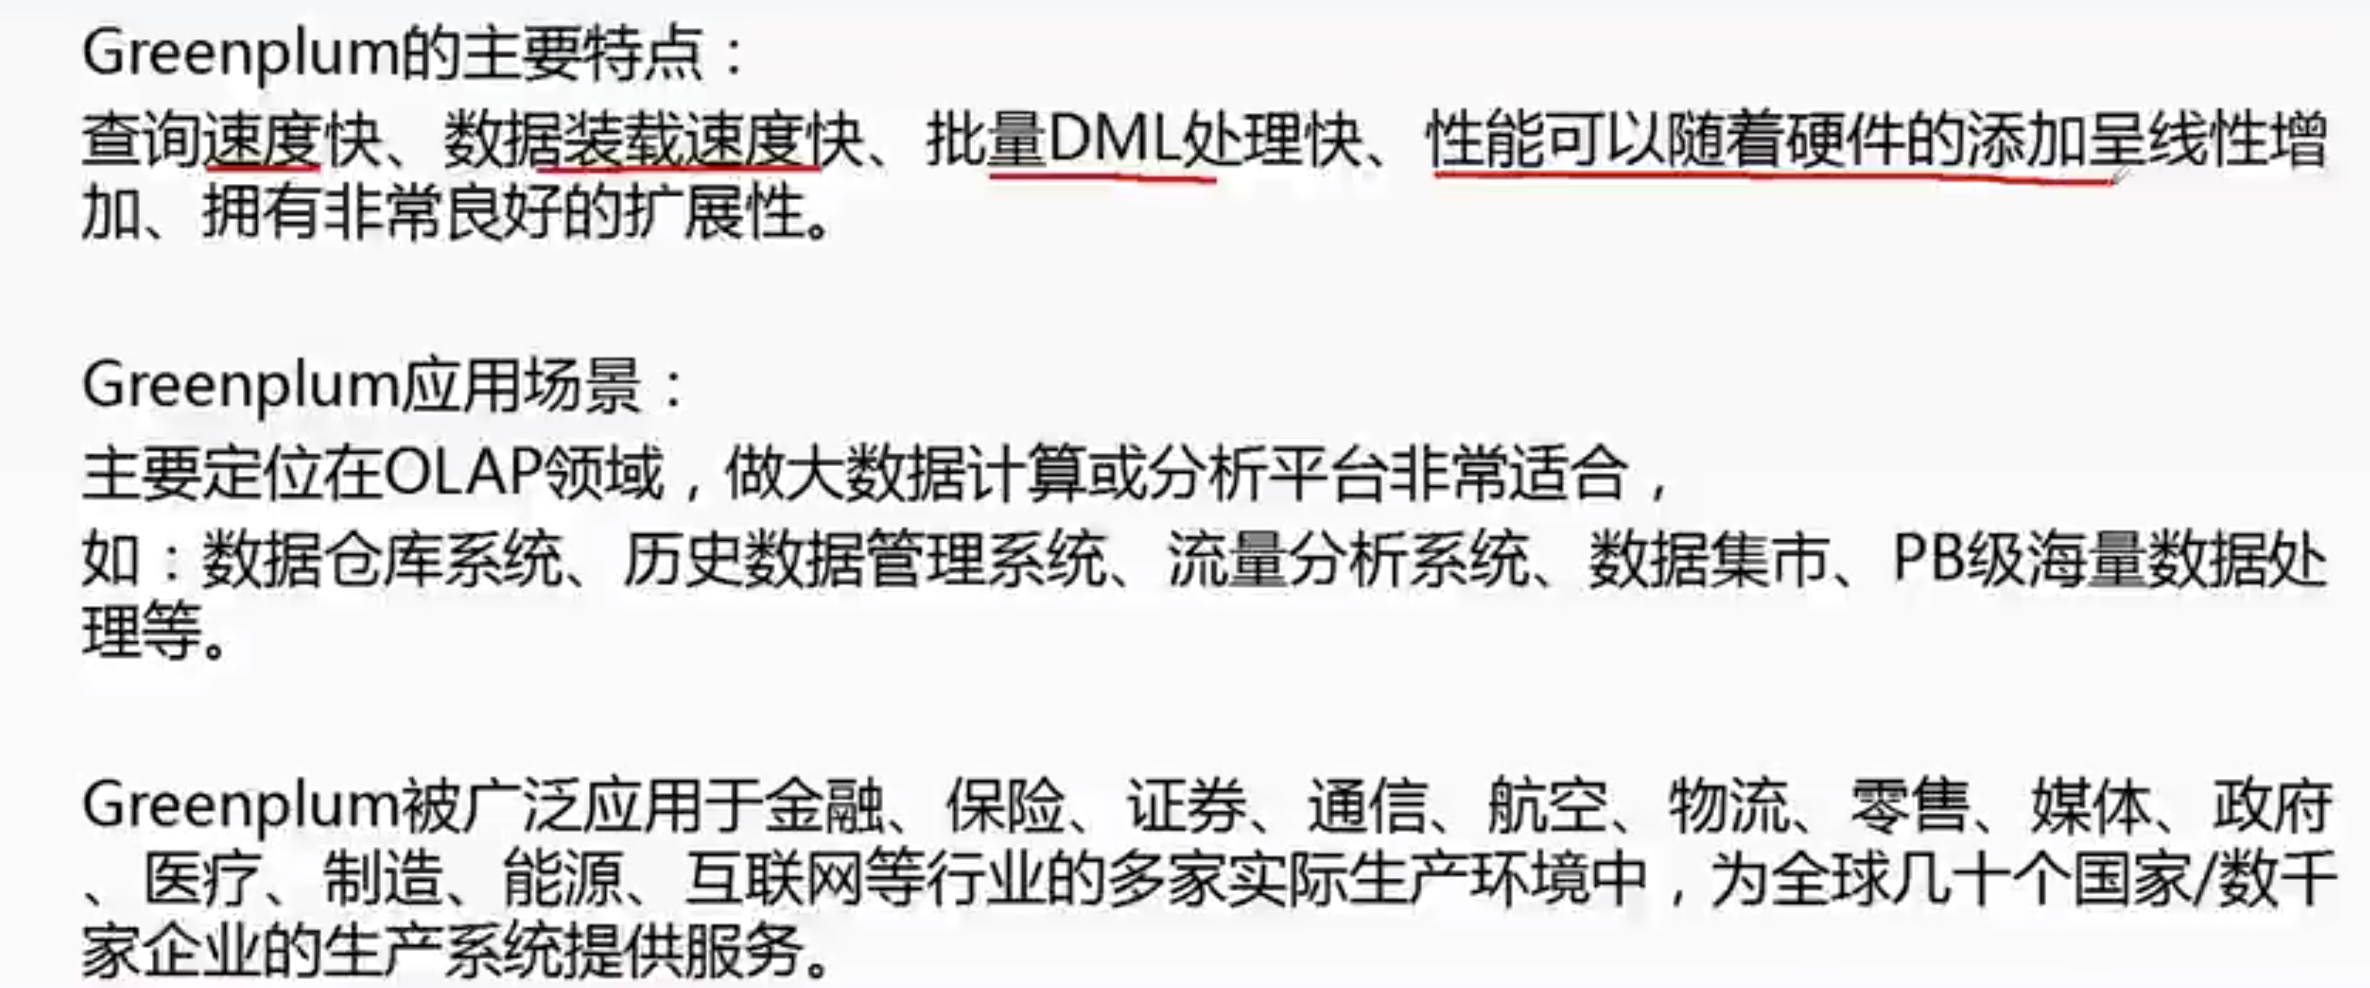
一: greeplum 的介绍
二:greeplum的应用场景
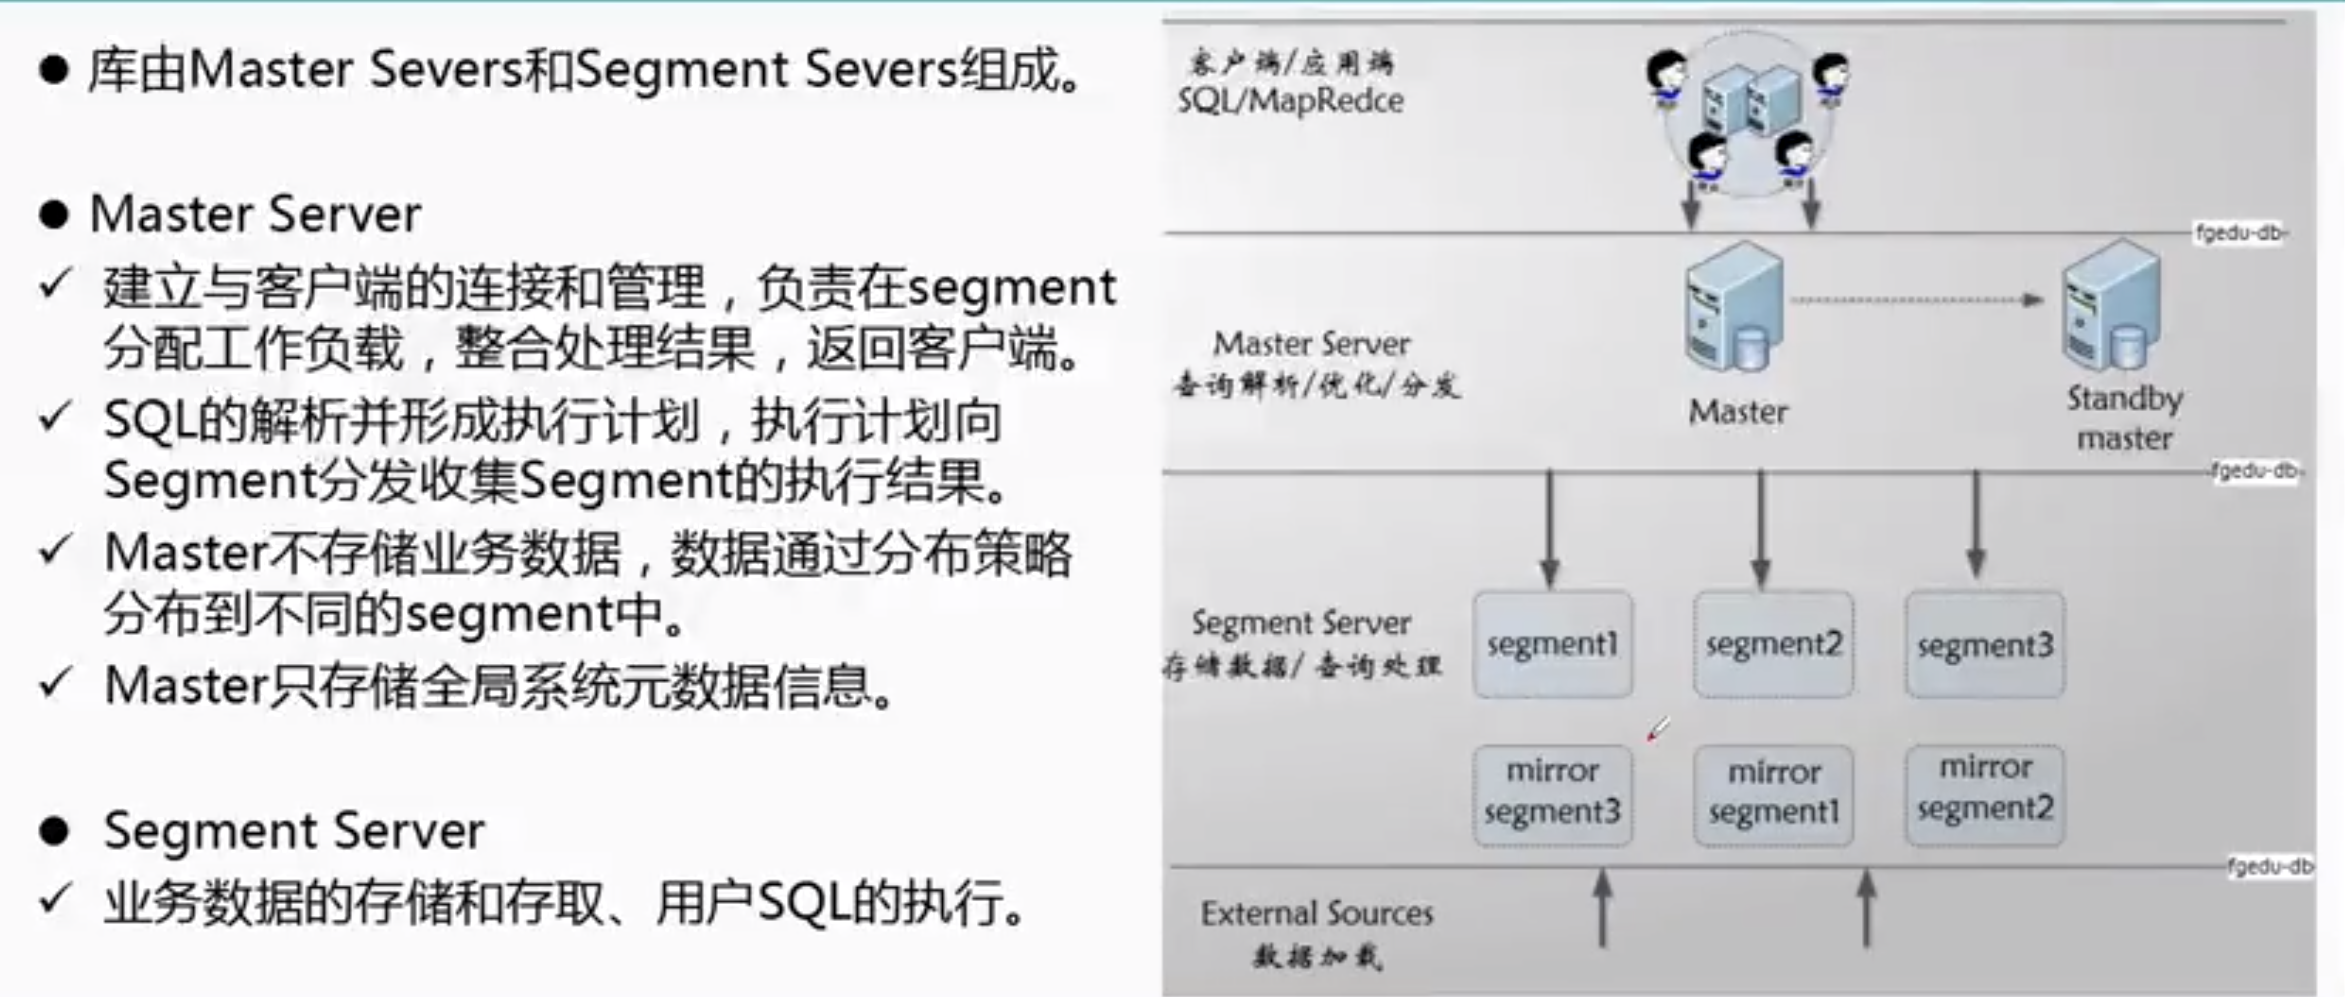
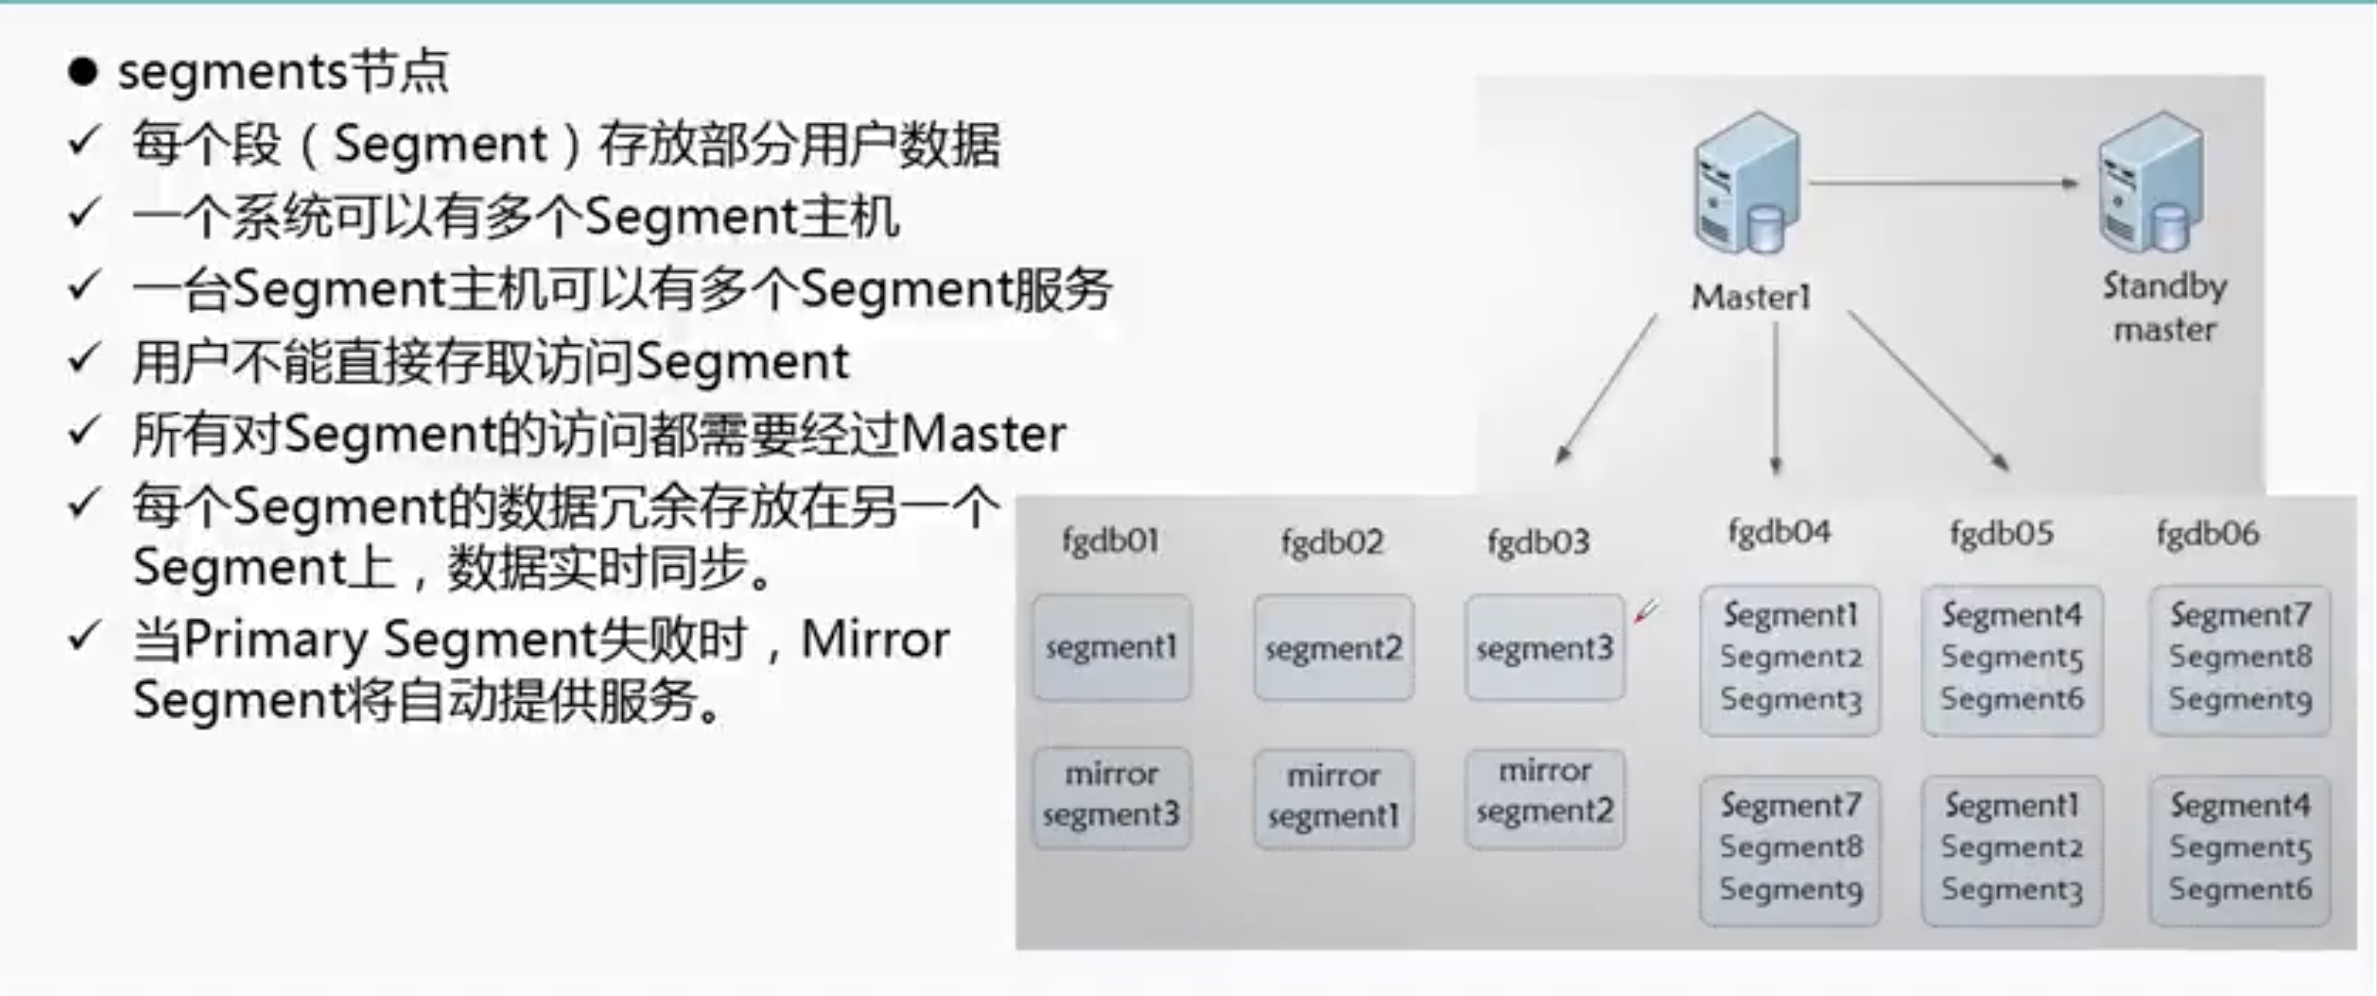
三: greeplum 的架构
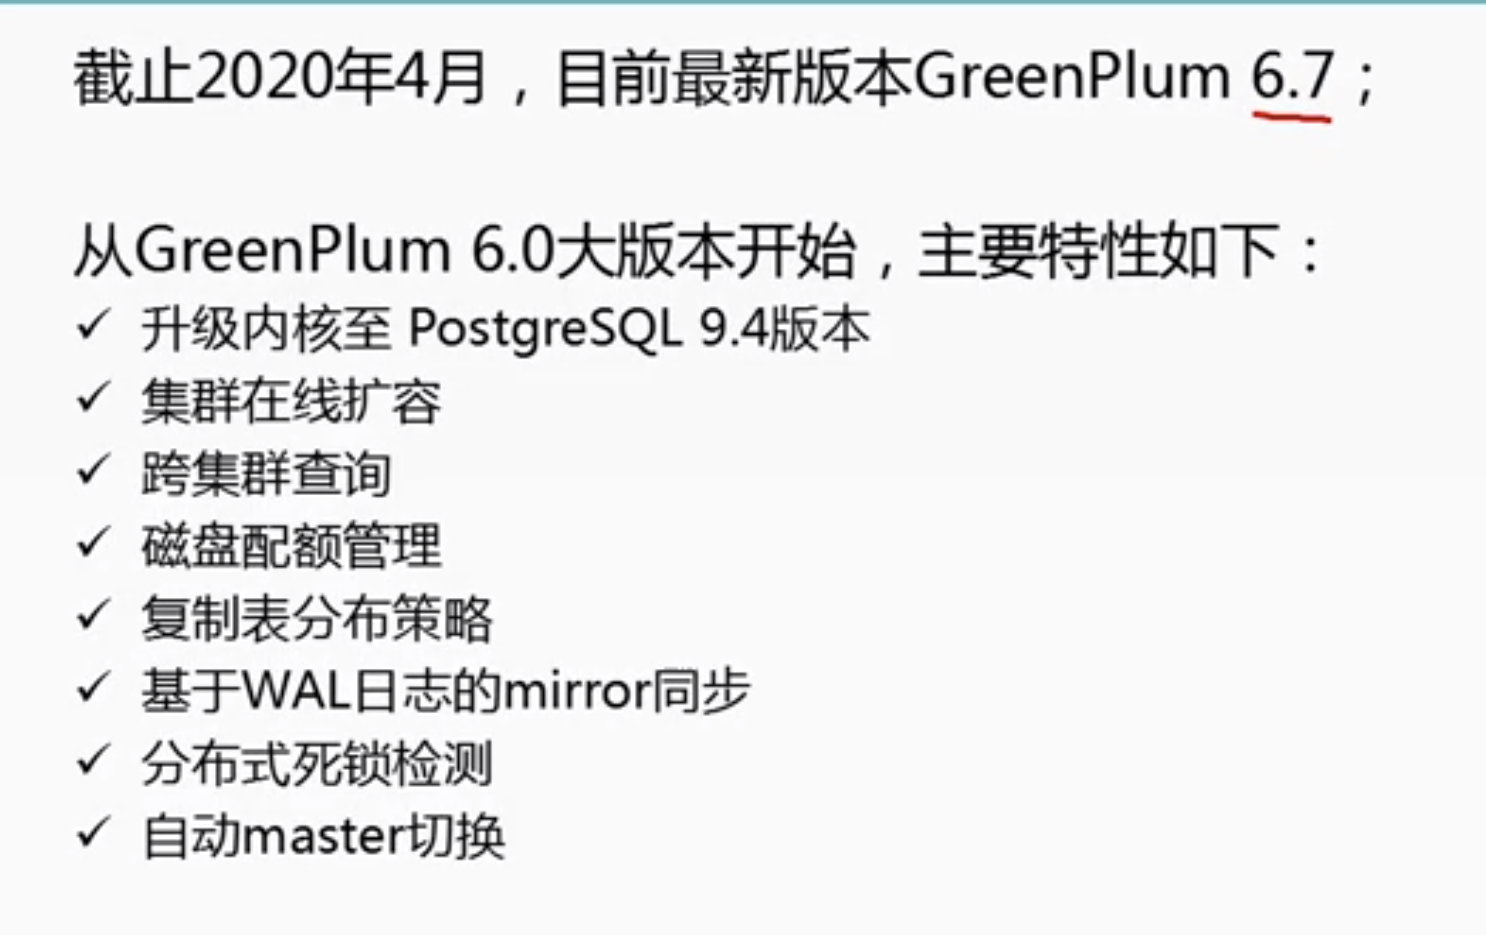
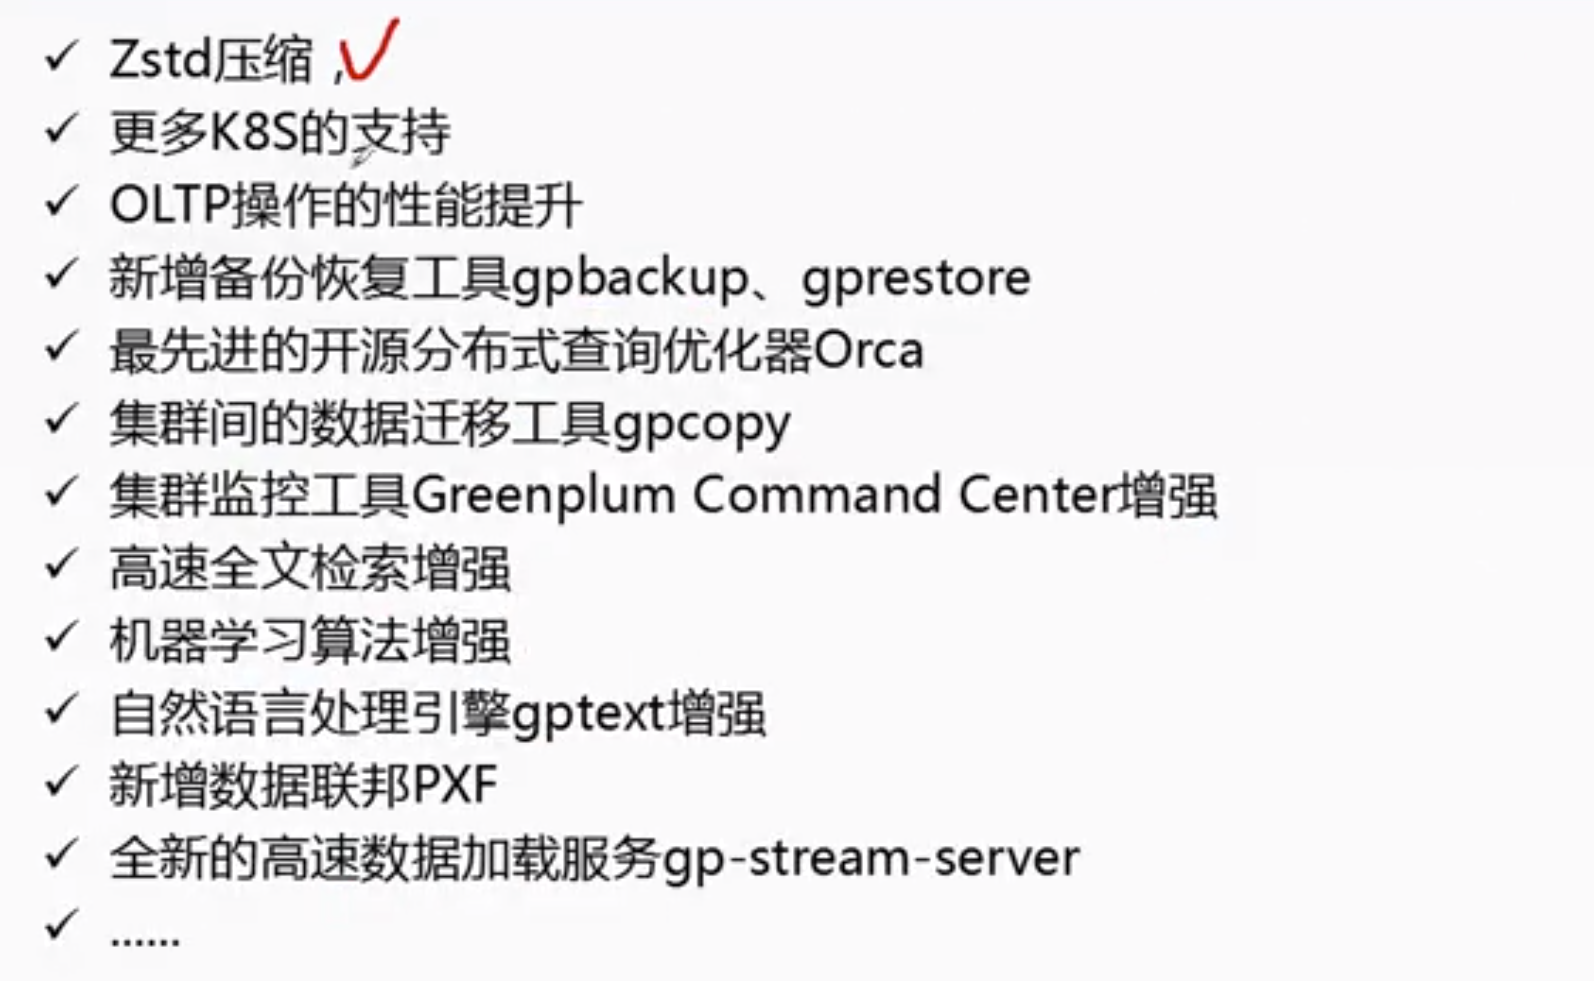
四: greeplum 的版本演进
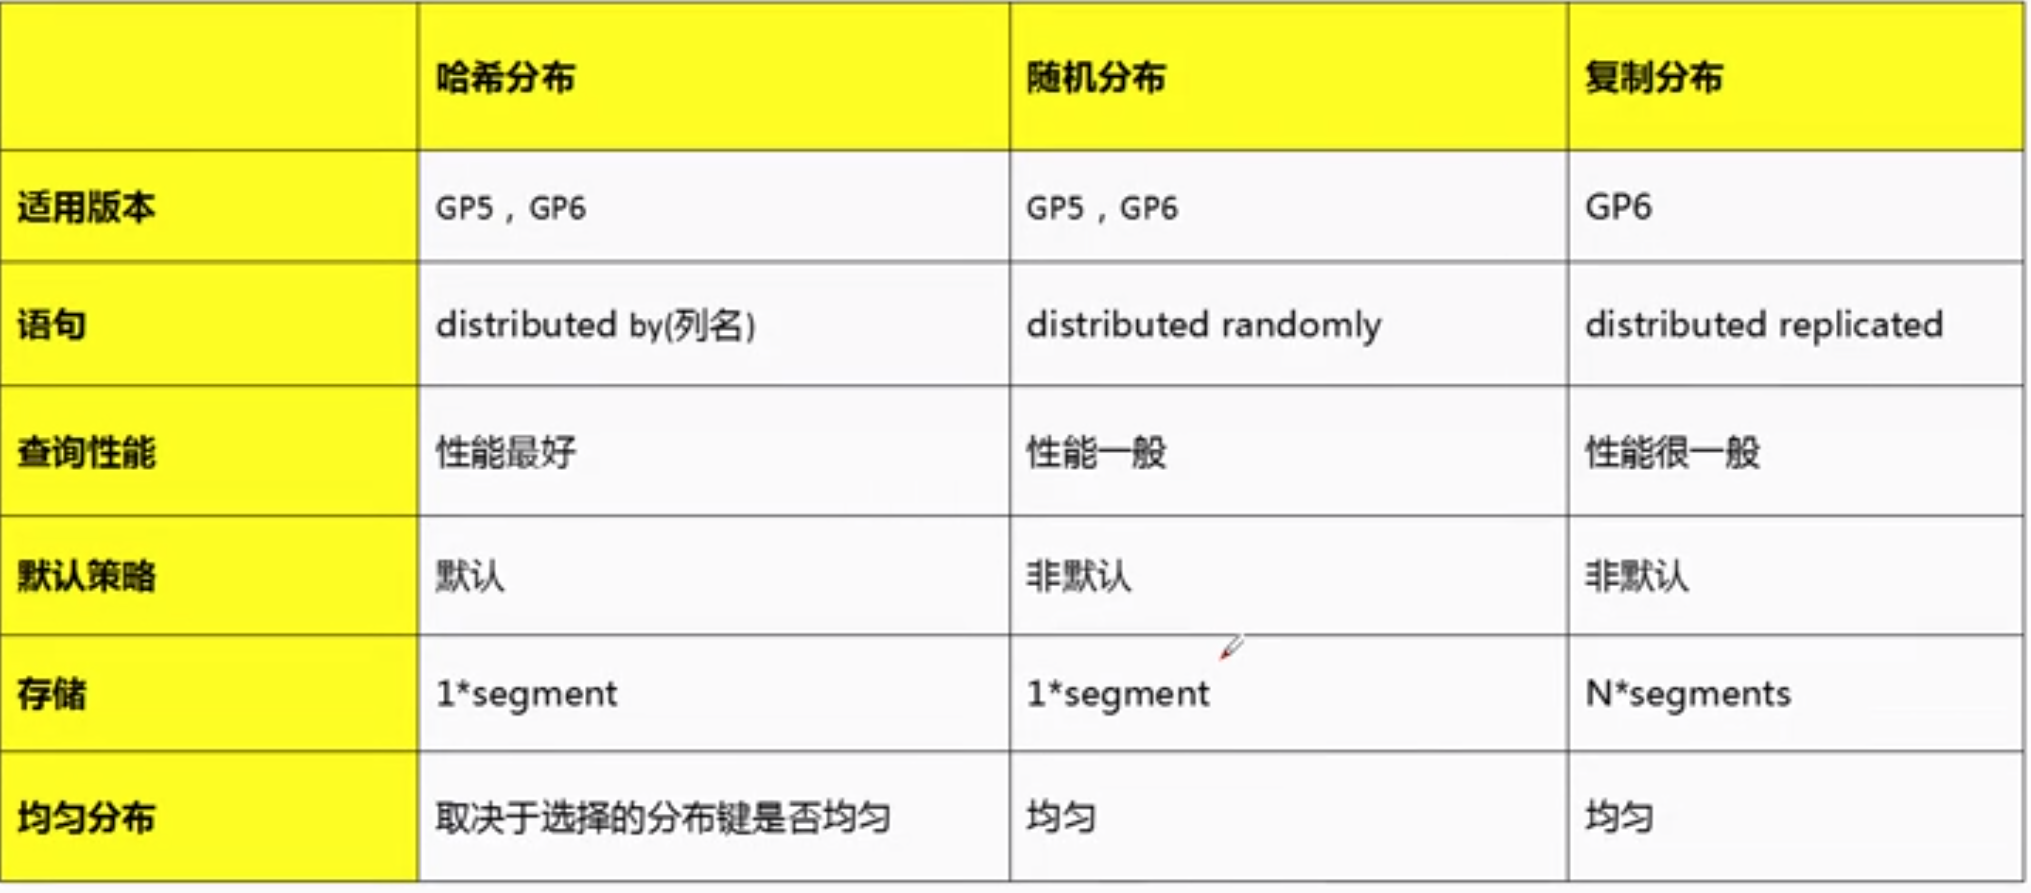
五:greeplum的表的分布策略
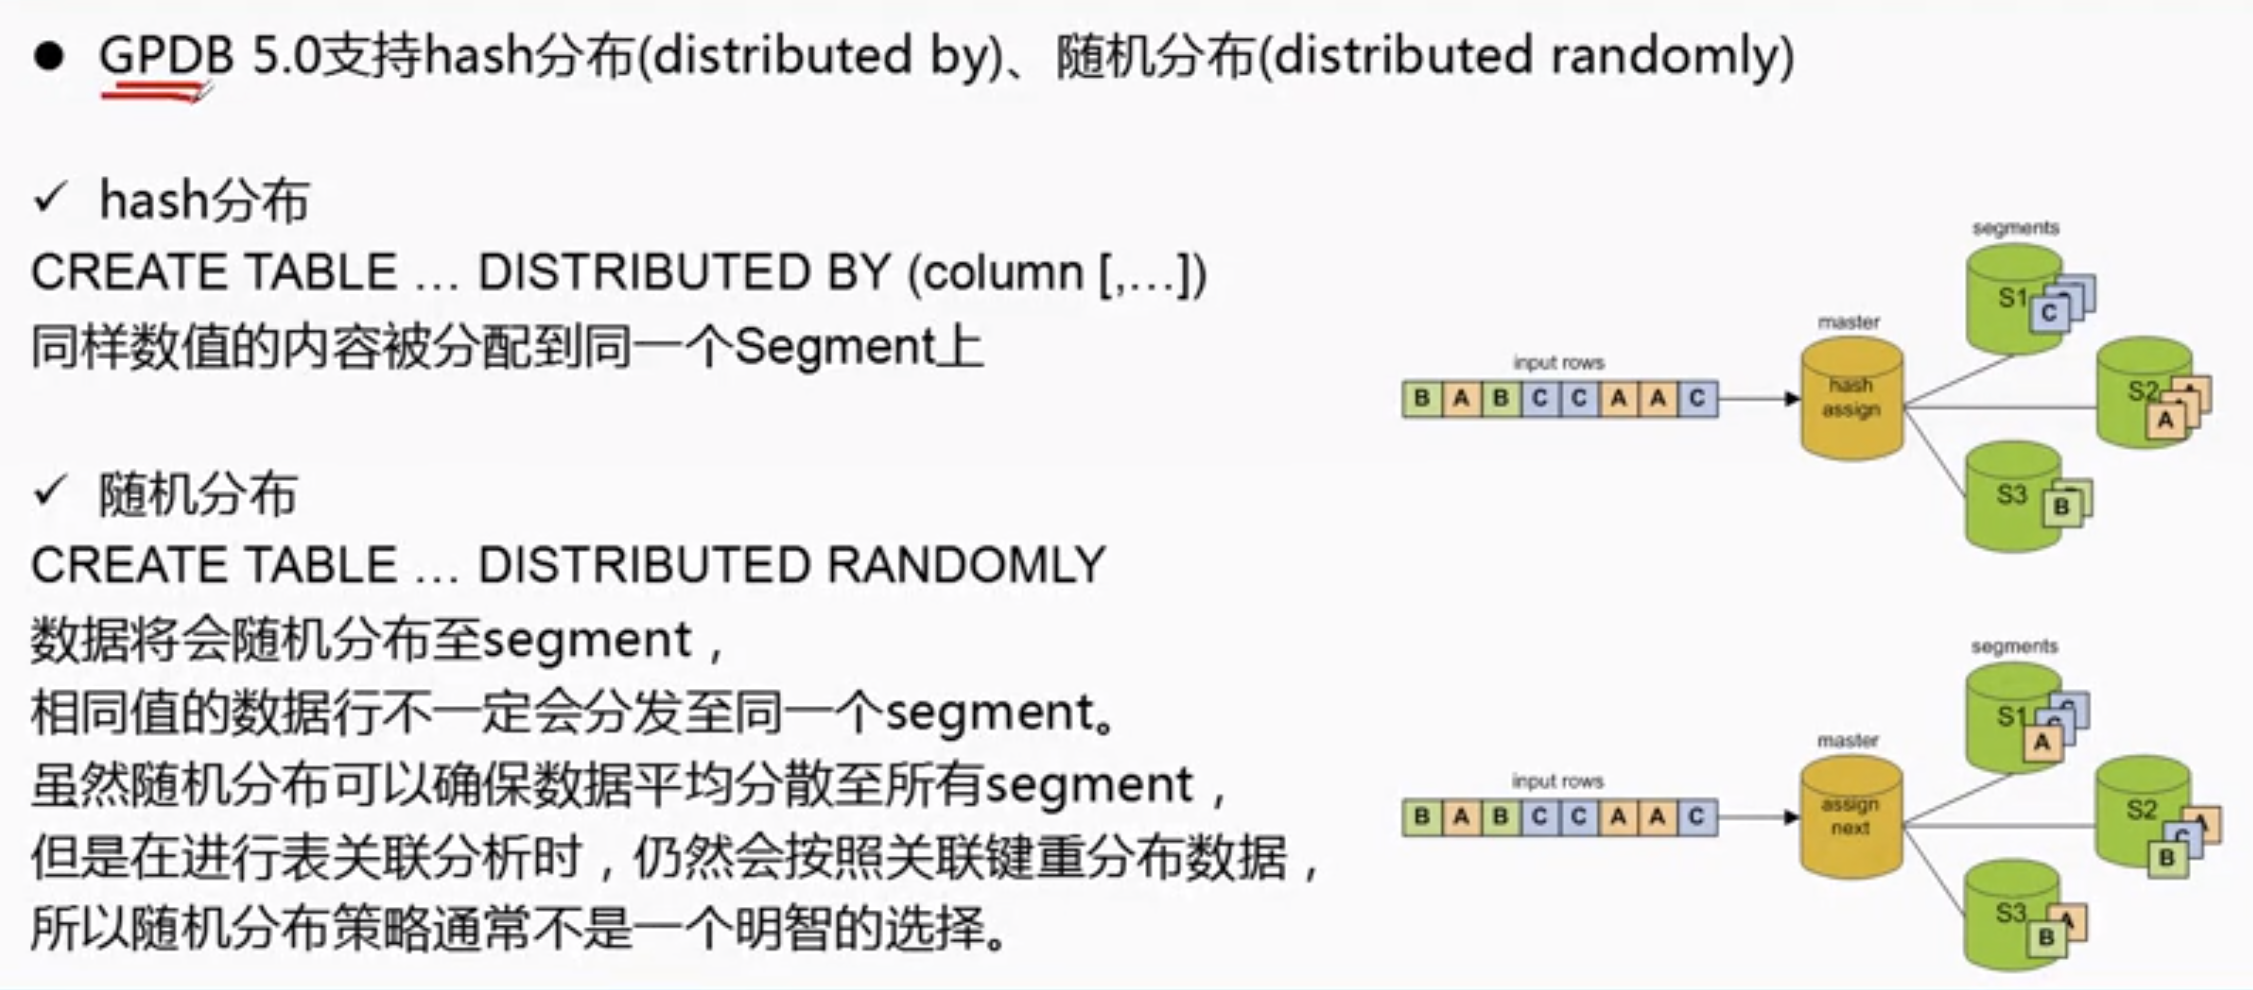

六:greeplum 的表分区介绍

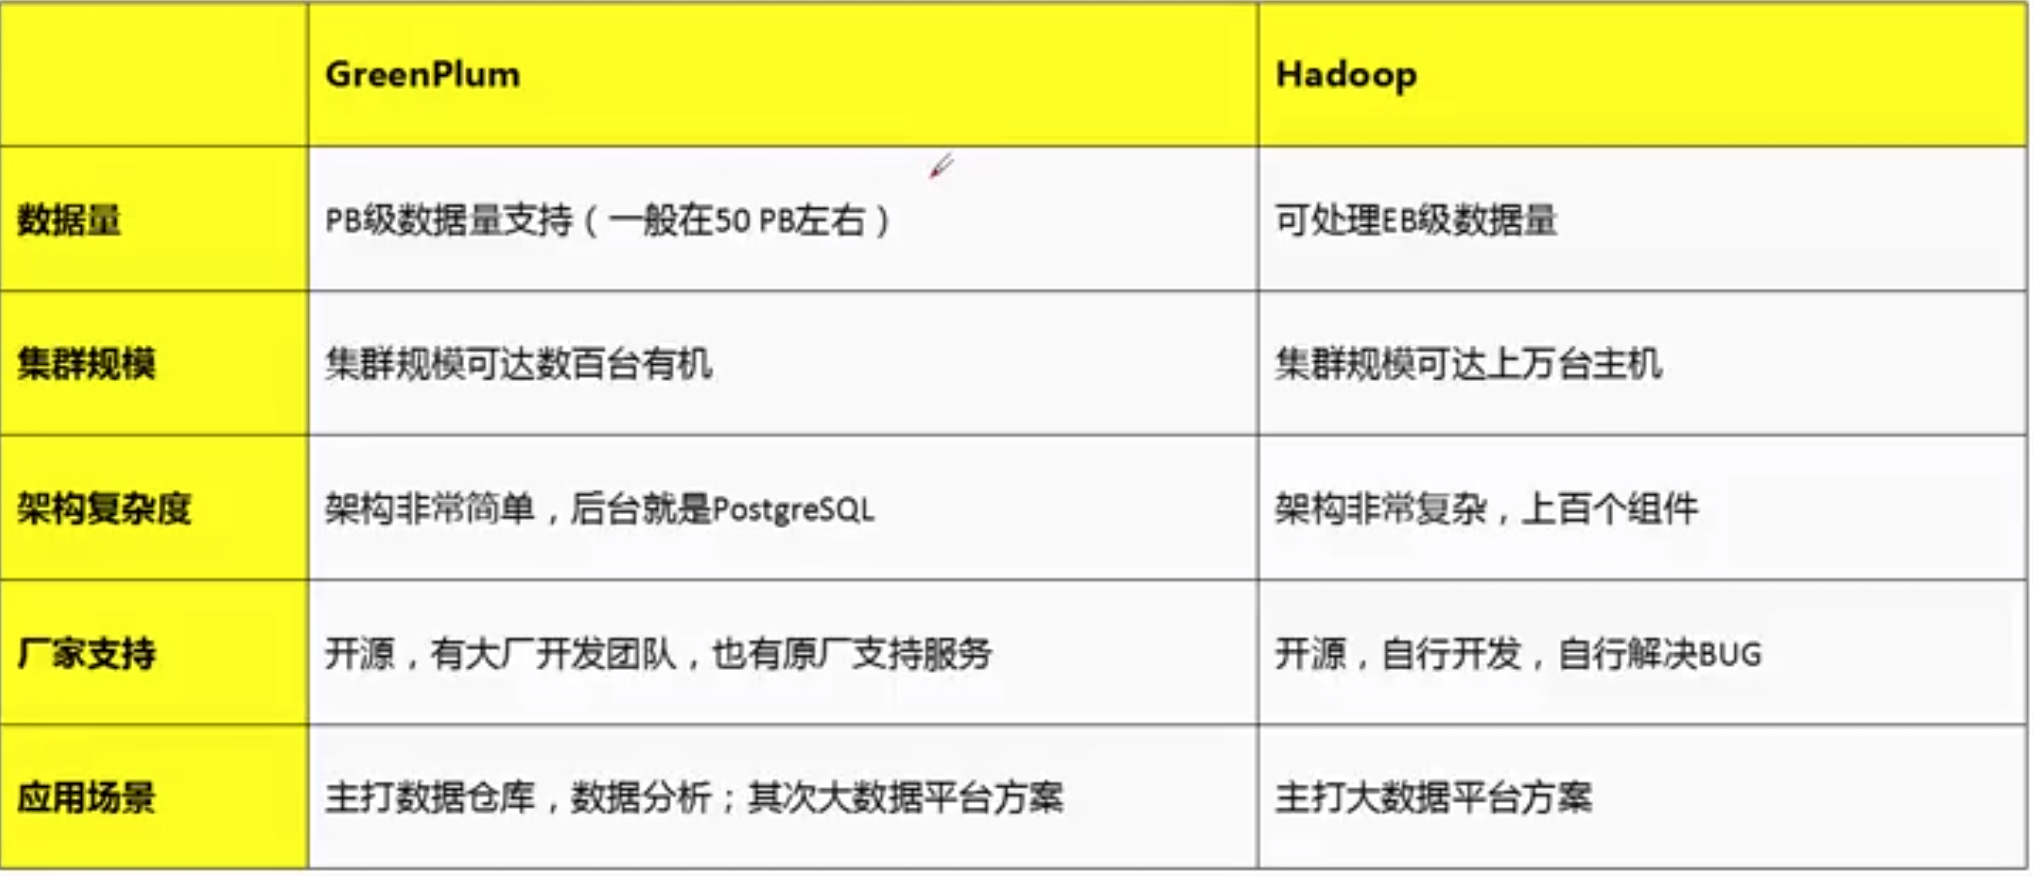
七:greeplum 的与hadoop区别
八:greeplum 的部署
8.1 环境准备
环境:centos7.8x641. master 一台2. standby 一台3. segment 三台4. 扩容集群 二台----cat /etc/hosts----192.168.3.121 test01.greenplum.uniondrug.com192.168.3.122 test02.greenplum.uniondrug.com192.168.3.123 test03.greenplum.uniondrug.com192.168.3.124 test04.greenplum.uniondrug.com192.168.3.125 test05.greenplum.uniondrug.com192.168.3.126 test06.greenplum.uniondrug.com192.168.3.127 test07.greenplum.uniondrug.com----
8.2 系统初始化:
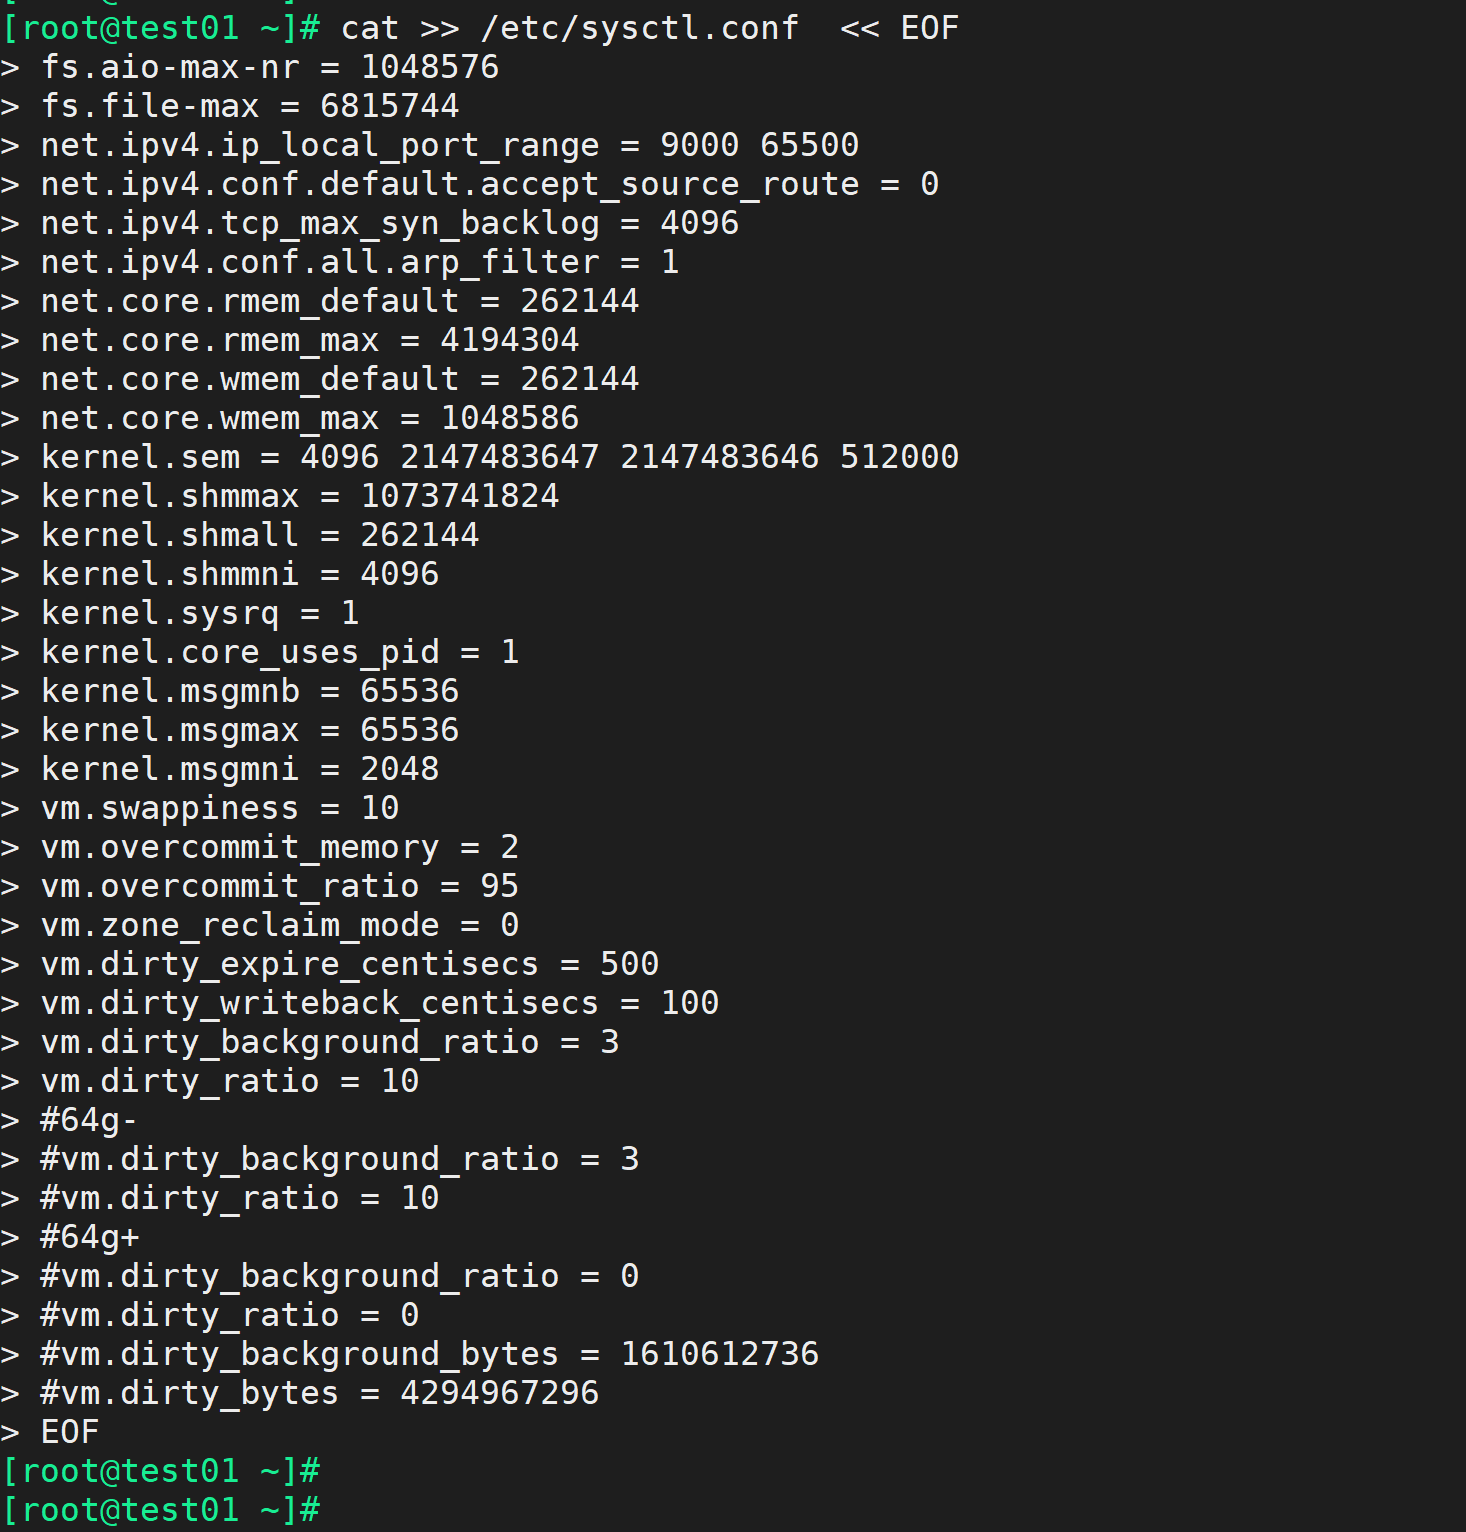
cat >> /etc/sysctl.conf << EOFfs.aio-max-nr = 1048576fs.file-max = 6815744net.ipv4.ip_local_port_range = 9000 65500net.ipv4.conf.default.accept_source_route = 0net.ipv4.tcp_max_syn_backlog = 4096net.ipv4.conf.all.arp_filter = 1net.core.rmem_default = 262144net.core.rmem_max = 4194304net.core.wmem_default = 262144net.core.wmem_max = 1048586kernel.sem = 204800 512000 3000 20480kernel.shmmax = 1073741824kernel.shmall = 262144kernel.shmmni = 4096kernel.sysrq = 1kernel.core_uses_pid = 1kernel.msgmnb = 65536kernel.msgmax = 65536kernel.msgmni = 2048vm.swappiness = 10vm.overcommit_memory = 2vm.overcommit_ratio = 95vm.zone_reclaim_mode = 0vm.dirty_expire_centisecs = 500vm.dirty_writeback_centisecs = 100vm.dirty_background_ratio = 3vm.dirty_ratio = 10#64g-#vm.dirty_background_ratio = 3#vm.dirty_ratio = 10#64g+#vm.dirty_background_ratio = 0#vm.dirty_ratio = 0#vm.dirty_background_bytes = 1610612736#vm.dirty_bytes = 4294967296EOF----sysctl -p
---
--02.资源限制cat >> /etc/security/limits.conf << EOF* soft nproc unlimited* hard nproc unlimited* soft nofile 524288* hard nofile 524288* soft stack unlimited* hard stack unlimited* hard memlock unlimited* soft memlock unlimitedEOFrm -f /etc/security/limits.d/*


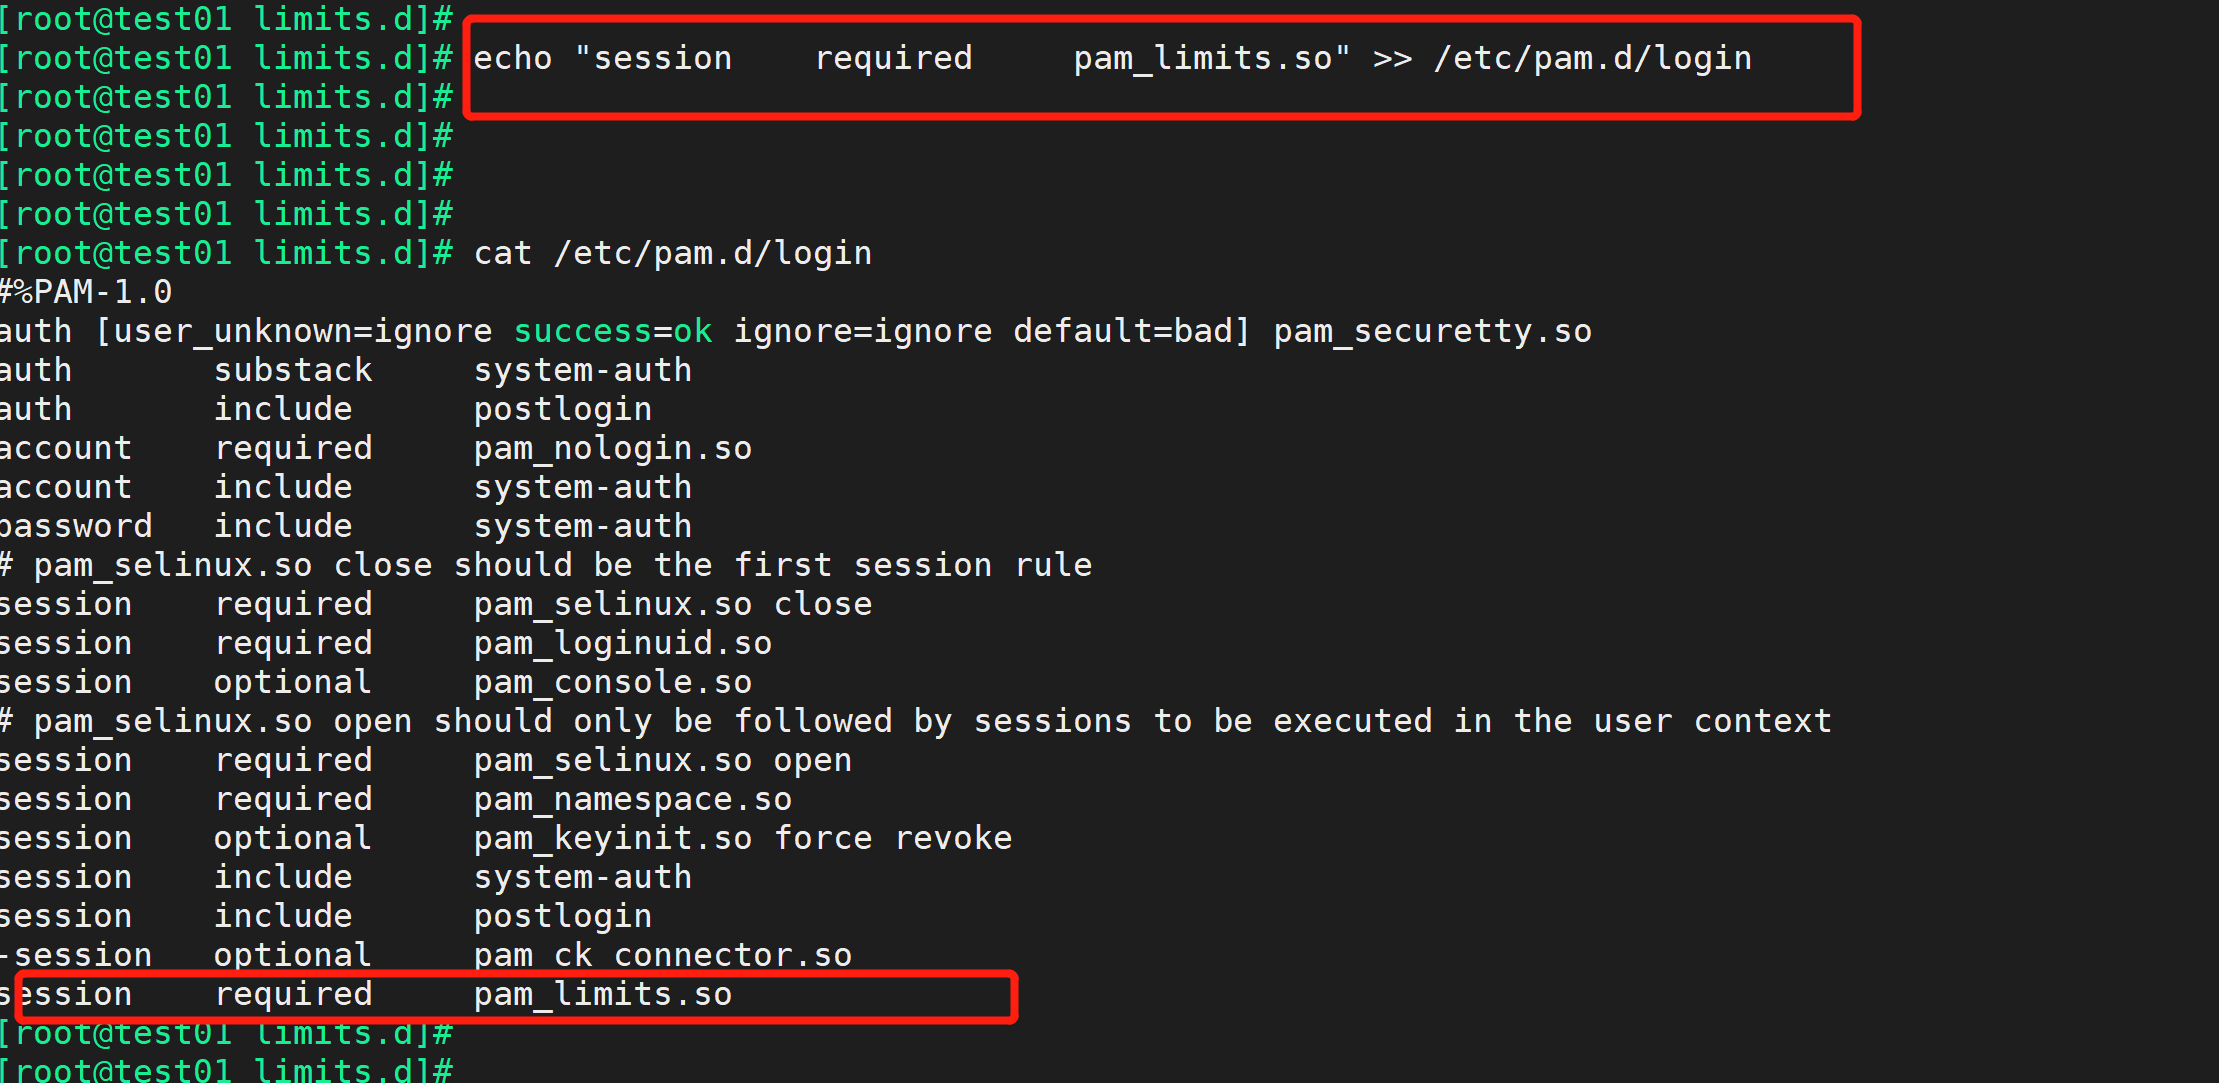
echo "session required pam_limits.so" >> /etc/pam.d/logincat /etc/pam.d/loginecho "RemoveIPC=no" >> /etc/systemd/logind.confservice systemd-logind restart
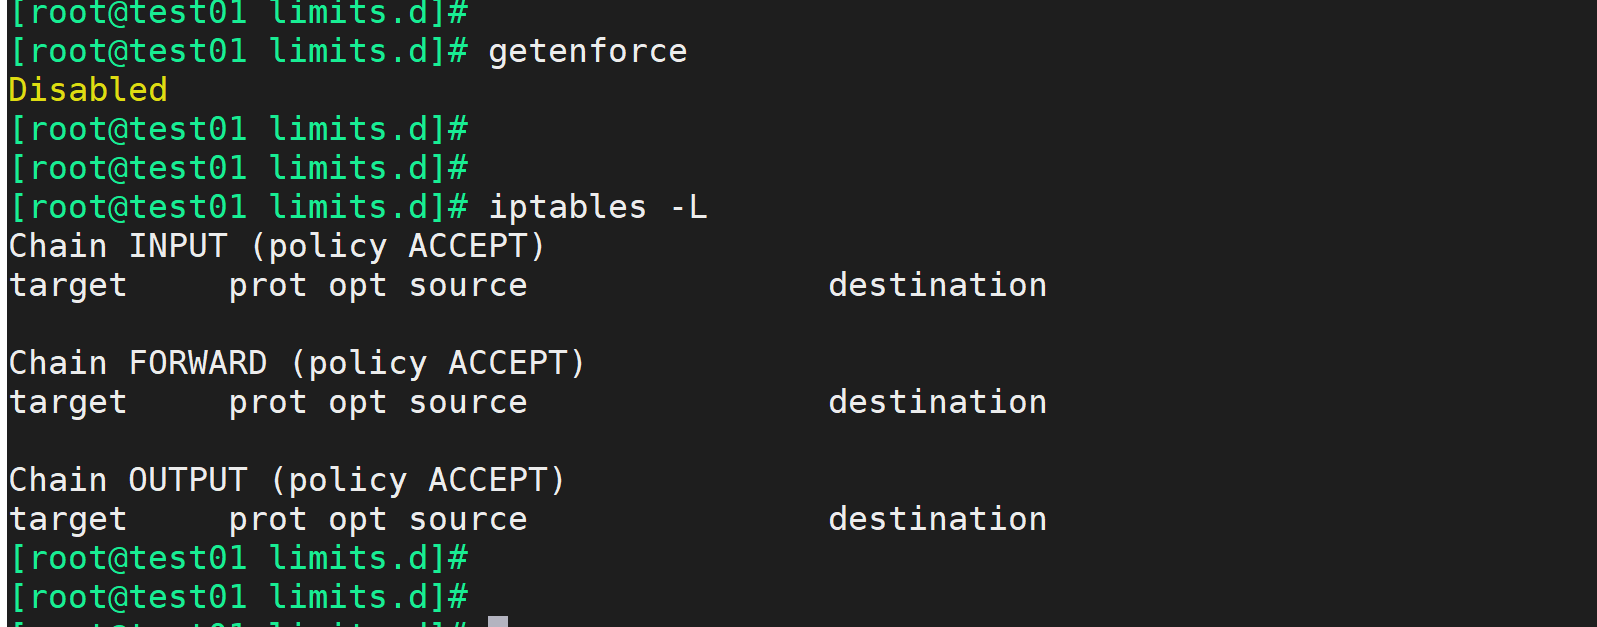
--03.安全配置echo "SELINUX=disabled" > /etc/selinux/configsetenforce 0systemctl stop firewalld.servicesystemctl disable firewalld.servicesystemctl status firewalld.servicesystemctl set-default multi-user.target
XFS:rw,noatime,inode64,allocsize=16m/dev/sdb1 /greenplum xfs rw,noatime,inode64,allocsize=16m 0 0/dev/sdb2 /usr/local xfs rw,noatime,inode64,allocsize=16m 0 0echo "blockdev --setra 65536 /dev/sdb " >> /etc/rc.d/rc.localecho "blockdev --setra 65536 /dev/sdb1 " >> /etc/rc.d/rc.localecho "blockdev --setra 65536 /dev/sdb2 " >> /etc/rc.d/rc.localecho deadline > /sys/block/sdb/queue/scheduleryum install numactlvi /etc/default/grubGRUB_CMDLINE_LINUX="crashkernel=auto rhgb quiet numa=off transparent_hugepage=never elevator=deadline"grub2-mkconfig -o /etc/grub2.cfgnumastatnumactl --shownumactl --hardwareecho "RemoveIPC=no" >> /etc/systemd/logind.confservice systemd-logind restart

yum -y install openssh-clients gcc gcc-c++ make automake autoconf libtool krb5-devel perl rsync coreutils glib2 ed lrzsz sysstat e4fsprogs xfsprogs ntp readline-devel zlib zlib-devel unzip bzip2 libyaml zip libeventshutdown -r now

/home/gpadmin/.bash_profile :echo "source /usr/local/greenplum-db/greenplum_path.sh" >>~/.bash_profileecho "export MASTER_DATA_DIRECTORY=/greenplum/gpdata/master/gpseg-1" >>~/.bash_profileecho "export PGHOME=/usr/local/greenplum-db" >>~/.bash_profileecho "export PGPORT=5432" >>~/.bash_profileecho "export PGDATABASE=postgres" >>~/.bash_profileecho "export PGUSER=gpadmin" >>~/.bash_profilecat ~/.bash_profilesource ~/.bash_profile/home/gpadmin/.bashrc :echo "source /usr/local/greenplum-db/greenplum_path.sh" >>~/.bashrcecho "export MASTER_DATA_DIRECTORY=/greenplum/gpdata/master/gpseg-1" >>~/.bashrcecho "export PGHOME=/usr/local/greenplum-db" >>~/.bashrcecho "export PGPORT=5432" >>~/.bashrcecho "export PGDATABASE=postgres" >>~/.bashrcecho "export PGUSER=gpadmin" >>~/.bashrccat ~/.bashrcsource ~/.bashrc
8.3 greeplum 的 安装区别
GPDB 4.x /5.x先安装master, .bin 可以安装目录gpseginstallgp 集群参数校验gpinitsystem 集群初始化GPDB 6.x不在提供zip,bin的格式 只提供rpm 包安装master; 目录 安装在 /usr/local/gp6 没有gpseginstall 包了,只能打包、单独安装gp集群参数校验gpinitsystem 集群初始化
8.4 greeplum 安装
下载安装包(官方下载)安装目录:/usr/local/greeplum-dbmkdir -p /greenplum/gpdatamkdir -p /greenplum/soft安装rpm 安装rpm -ivh greenplum-db-6.11.2-rhel7-x86_64.rpm
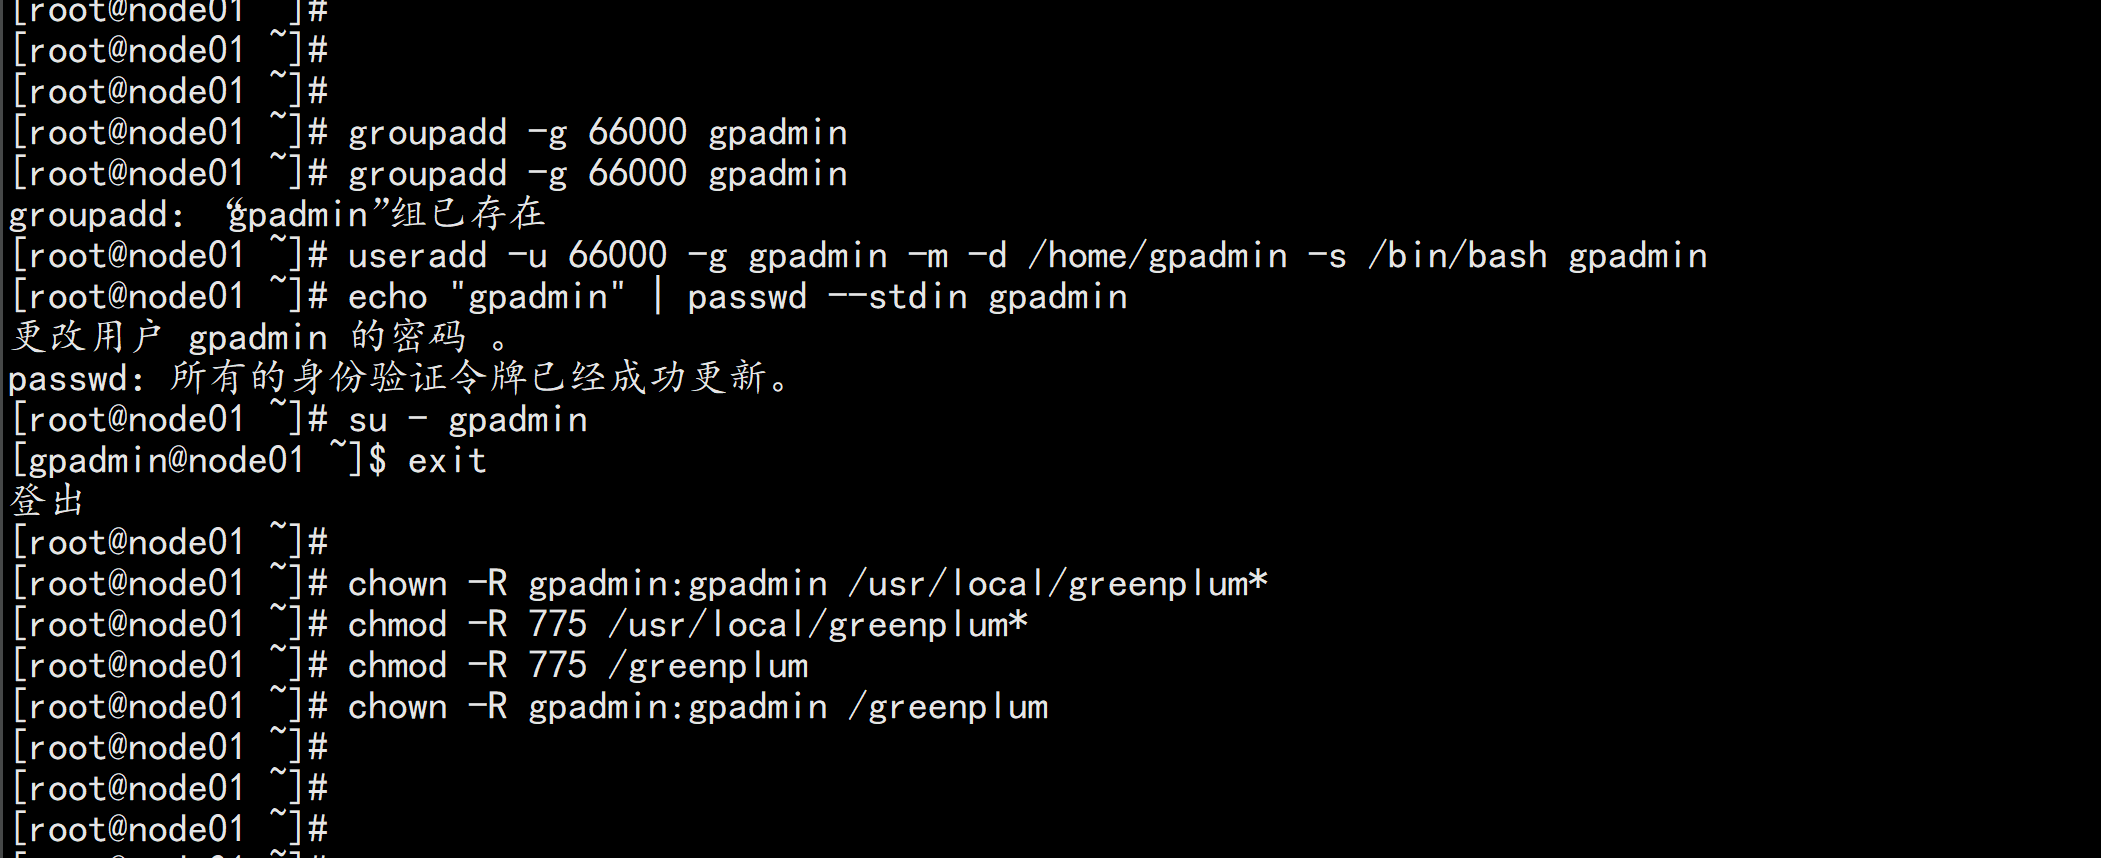
创建用户:groupadd -g 66000 gpadminuseradd -u 66000 -g gpadmin -m -d /home/gpadmin -s /bin/bash gpadminecho "gpadmin" | passwd --stdin gpadminsu - gpadminexitchown -R gpadmin:gpadmin /usr/local/greenplum*chmod -R 775 /usr/local/greenplum*chmod -R 775 /greenplumchown -R gpadmin:gpadmin /greenplum
设置主机名 的配置su - gpadminmkdir /usr/local/greenplum-db/configvim /usr/local/greenplum-db/config/all_hosts.txt---test01.greenplum.uniondrug.comtest02.greenplum.uniondrug.comtest03.greenplum.uniondrug.comtest04.greenplum.uniondrug.comtest05.greenplum.uniondrug.com---vim /usr/local/greenplum-db/config/all_seg.txt---test03.greenplum.uniondrug.comtest04.greenplum.uniondrug.comtest05.greenplum.uniondrug.com---
做gpadmin 的无密钥认证./fgssh -user gpadmin -hosts "fggpmaster01 fggpmaster02 fggpdata01 fggpdata02fggpdata03" -advanced -exverify -confirmchmod 600 /home/gpadmin/.ssh/configgpssh -f /usr/local/greenplum-db/config/all_hosts.txt -e 'ls -ls /greenplum'
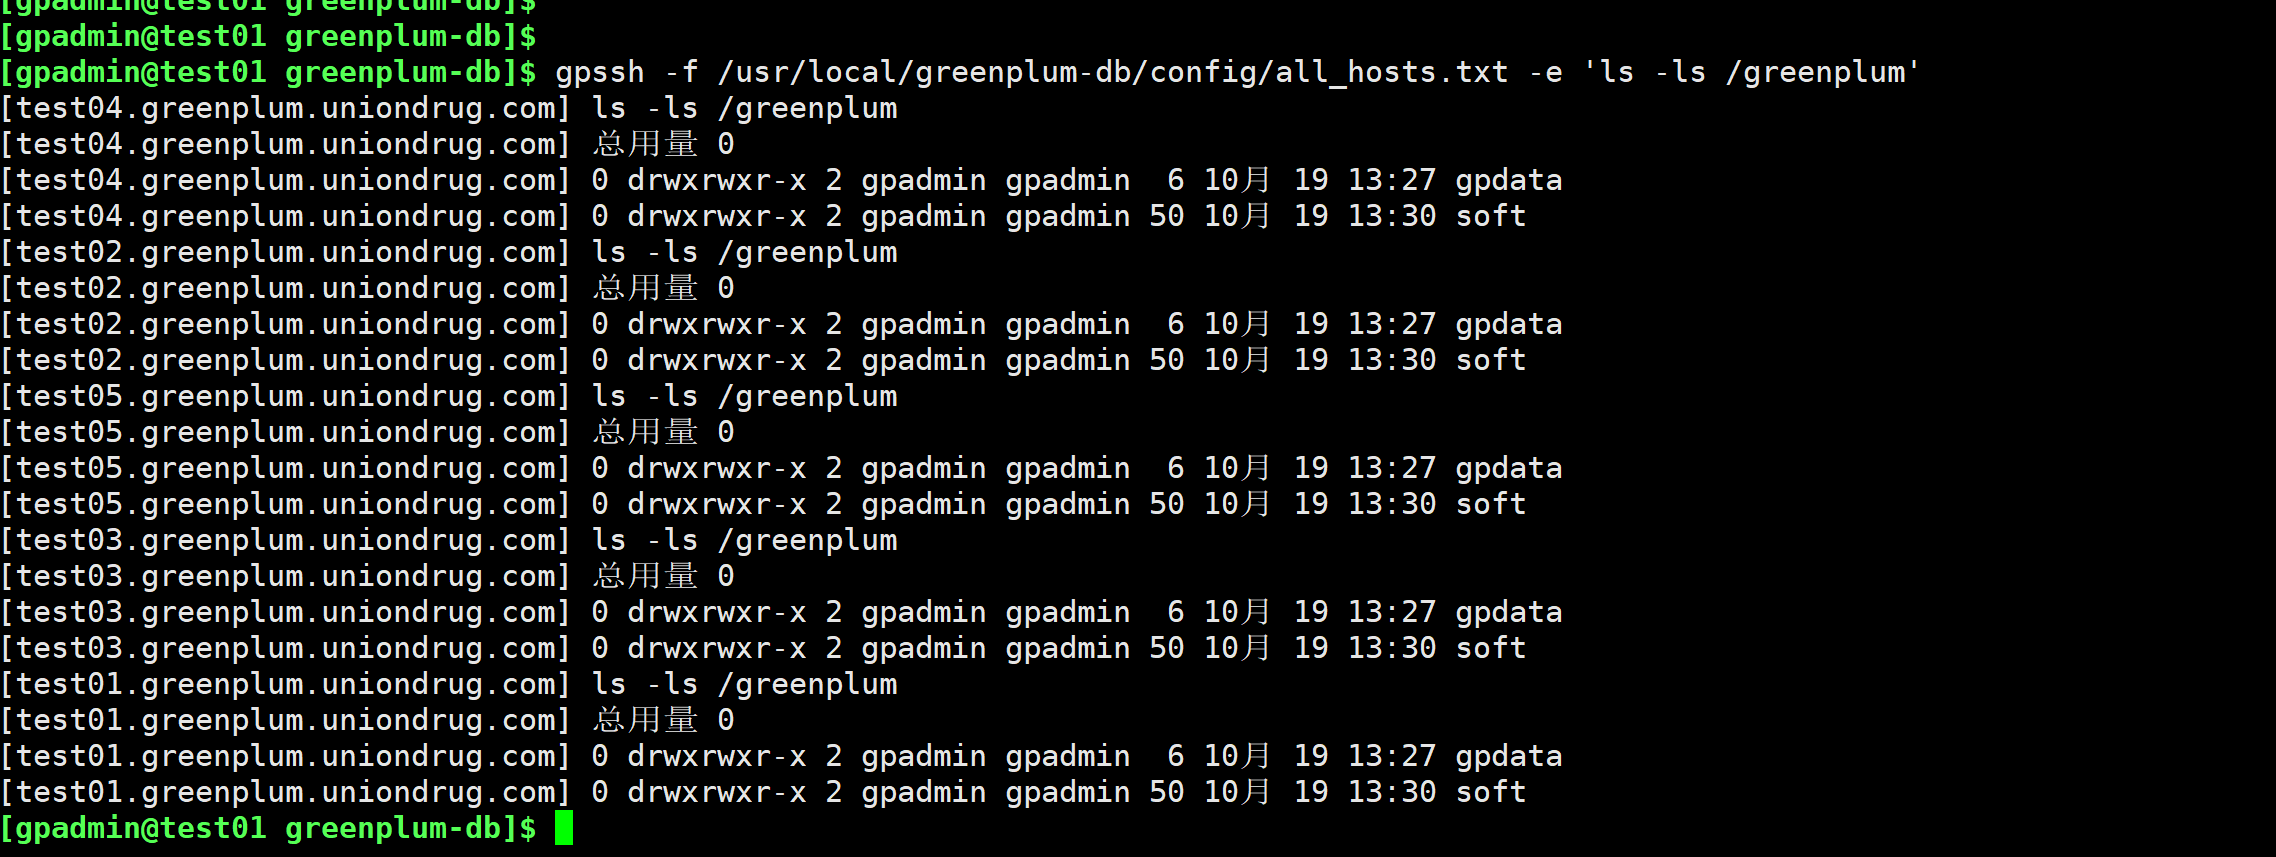
su - gpadminmkdir -p /greenplum/gpdata/master (主节点与备份节点配置)gpssh -f /usr/local/greenplum-db/config/all_hosts.txt -e 'mkdir -p /greenplum/gpdata/primary'gpssh -f /usr/local/greenplum-db/config/all_hosts.txt -e 'mkdir -p /greenplum/gpdata/mirror'


设置:gpadmin 环境变量su - gpadmin/home/gpadmin/.bash_profile :echo "source /usr/local/greenplum-db/greenplum_path.sh" >>~/.bash_profileecho "export MASTER_DATA_DIRECTORY=/greenplum/gpdata/master/gpseg-1" >>~/.bash_profileecho "export PGHOME=/usr/local/greenplum-db" >>~/.bash_profileecho "export PGPORT=5432" >>~/.bash_profileecho "export PGDATABASE=postgres" >>~/.bash_profileecho "export PGUSER=gpadmin" >>~/.bash_profilecat ~/.bash_profilesource ~/.bash_profile/home/gpadmin/.bashrc :echo "source /usr/local/greenplum-db/greenplum_path.sh" >>~/.bashrcecho "export MASTER_DATA_DIRECTORY=/greenplum/gpdata/master/gpseg-1" >>~/.bashrcecho "export PGHOME=/usr/local/greenplum-db" >>~/.bashrcecho "export PGPORT=5432" >>~/.bashrcecho "export PGDATABASE=postgres" >>~/.bashrcecho "export PGUSER=gpadmin" >>~/.bashrccat ~/.bashrcsource ~/.bashrc
同步所有节点gpscp -f /usr/local/greenplum-db/config/all_hosts.txt /home/gpadmin/.bash_profilegpadmin@=:/home/gpadmin/.bash_profilegpscp -f /usr/local/greenplum-db/config/all_hosts.txt /home/gpadmin/.bashrcgpadmin@=:/home/gpadmin/.bashrc
主机测试:网络:gpcheckperf -f /usr/local/greenplum-db/config/all_seg.txt -r N -d /tmpI/O 与内存:gpcheckperf -f /usr/local/greenplum-db/config/all_seg.txt -r ds -D -d/greenplum/gpdata/primary -d /greenplum/gpdata/mirror时间同步验证:gpssh -f /usr/local/greenplum-db/config/all_hosts.txt -e 'date'
时间同步:如果不同步,需要配置 NTP主库:root:echo server 127.127.1.0 iburst >> /etc/ntp.confsystemctl restart ntpdsystemctl enable ntpdntpq -p别的库:root:echo server 192.168.1.11>> /etc/ntp.confecho restrict 192.168.1.11 nomodify notrap noquery >> /etc/ntp.confntpdate -u 192.168.1.11hwclock -wsystemctl restart ntpdsystemctl enable ntpdntpq -p测试:su - gpadmin:gpssh -f /usr/local/greenplum-db/config/all_hosts.txt -e 'date'

九: 集群节点的安装
vim /usr/local/greenplum-db/config/gpinitsystem_configARRAY_NAME="greenplum"SEG_PREFIX=gpsegPORT_BASE=55000declare -a DATA_DIRECTORY=(/greenplum/gpdata/primary /greenplum/gpdata/primary /greenplum/gpdata/primary)MASTER_HOSTNAME=test01.greenplum.uniondrug.comMASTER_DIRECTORY=/greenplum/gpdata/masterMASTER_PORT=5432MACHINE_LIST_FILE=/usr/local/greenplum-db/config/all_seg.txtTRUSTED_SHELL=sshCHECK_POINT_SEGMENTS=8ENCODING=UNICODEMIRROR_PORT_BASE=56000REPLICATION_PORT_BASE=57000MIRROR_REPLICATION_PORT_BASE=58000declare -a MIRROR_DATA_DIRECTORY=(/greenplum/gpdata/mirror /greenplum/gpdata/mirror /greenplum/gpdata/mirror)

初始化数据库:gpinitsystem -c /usr/local/greenplum-db/config/gpinitsystem_config -aorgpinitsystem -c /usr/local/greenplum-db/config/gpinitsystem_config -a -h/usr/local/greenplum-db/config/all_seg.txt完全冗余gpinitsystem -c /usr/local/greenplum-db/config/gpinitsystem_config -a -h/usr/local/greenplum-db/config/all_seg.txt -s fggpmaster02 -Dorgpinitsystem -c /usr/local/greenplum-db/config/gpinitsystem_config -a -h/usr/local/greenplum-db/config/all_seg.txt \-s test02.greenplum.uniondrug.com -D -B 2机器多gpinitsytem -c /usr/local/greenplum-db/config/gpinitsystem_config -a -h/usr/local/greenplum-db/config/seg_hosts.txt \-s fggpmaster02 -D -B 2 -S /greenplum/gpdata/mirror备份方案2种group Mirror 默认 (机器少)主机的mirror 节点全部放在下一个主机上面1 2 3 4 55 1 2 3 4镜像存储存放Spread mirror 另一种方式 -S 防止一个节点挂掉,另外的一个节点集中成为瓶颈 (机器多)一般允许挂掉一台,另一台就负载加重一倍,机器多可以允许两台挂掉主机的 第一个mirror 在下一个主机,第二个 mirror 在次下一个主机,第三个mirror 在次次下个主机 下面1 2 3 4 5 6 7 85 1 6 2 7 3 8 4如果挂掉一台,宕机对应的mirror 机器负载家中,机器多的时候,可以挂掉一台如果 安装失败,建议gpstop/bin/rm -rf /greenplum/gpdata/master/*/bin/rm -rf /greenplum/gpdata/primary/*/bin/rm -rf /greenplum/gpdata/mirror/*
修改参数gpconfig -c shared_buffers -v 129MB -m 126MBgpconfig -c max_connections -v 1000 -m 300gpconfig -s shared_buffersgpconfig -s max_connectionsgpstop -u远程登录:psql -h 192.168.3.121 -p5432 -U gpadmin
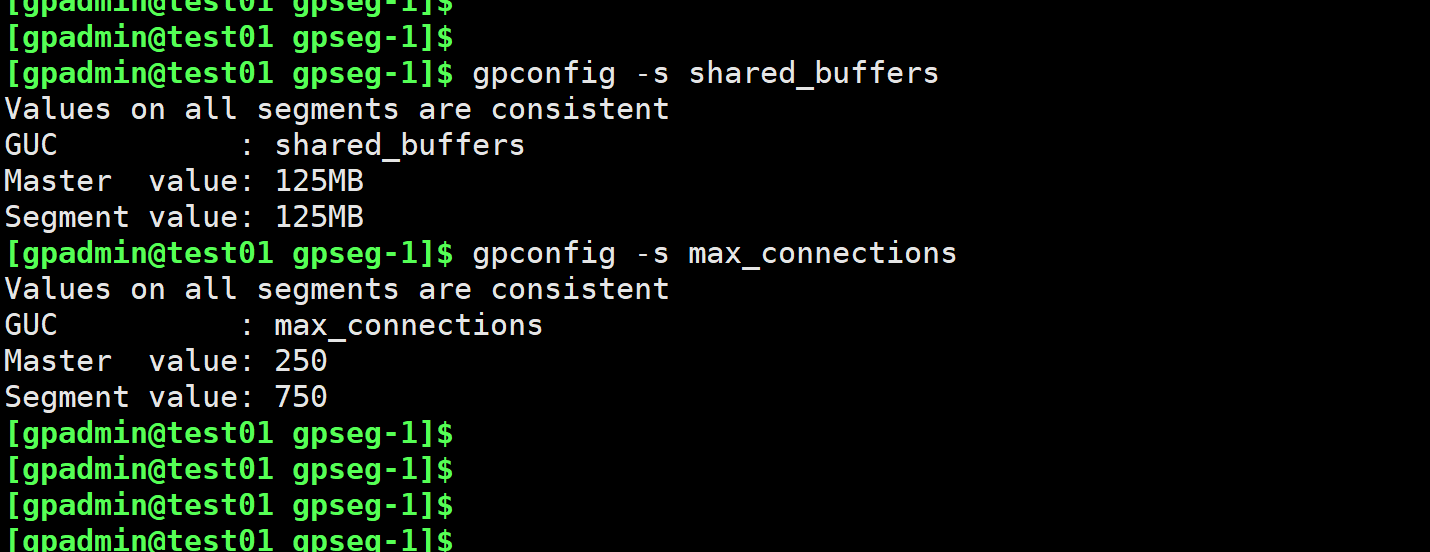

相关使用命令select version();

select * from gp_segment_configuration order by content asc,dbid;

关于segment 的 连接psql -h 192.168.3.123 -p55000 -U gpadmin----psql: FATAL: connections to primary segments are not allowedDETAIL: This database instance is running as a primary segment in a Greenplum cluster and does not permit direct connections.HINT: To force a connection anyway (dangerous!), use utility mode.-----

psql -h 192.168.100.13 -p55000 -U gpadmin

data 节点连接PGOPTIONS='-c gp_session_role=utility' psql -h127.0.0.1 -p55000PGOPTIONS='-c gp_session_role=utility' psql -h192.168.100.13 -p55000


远程连接:
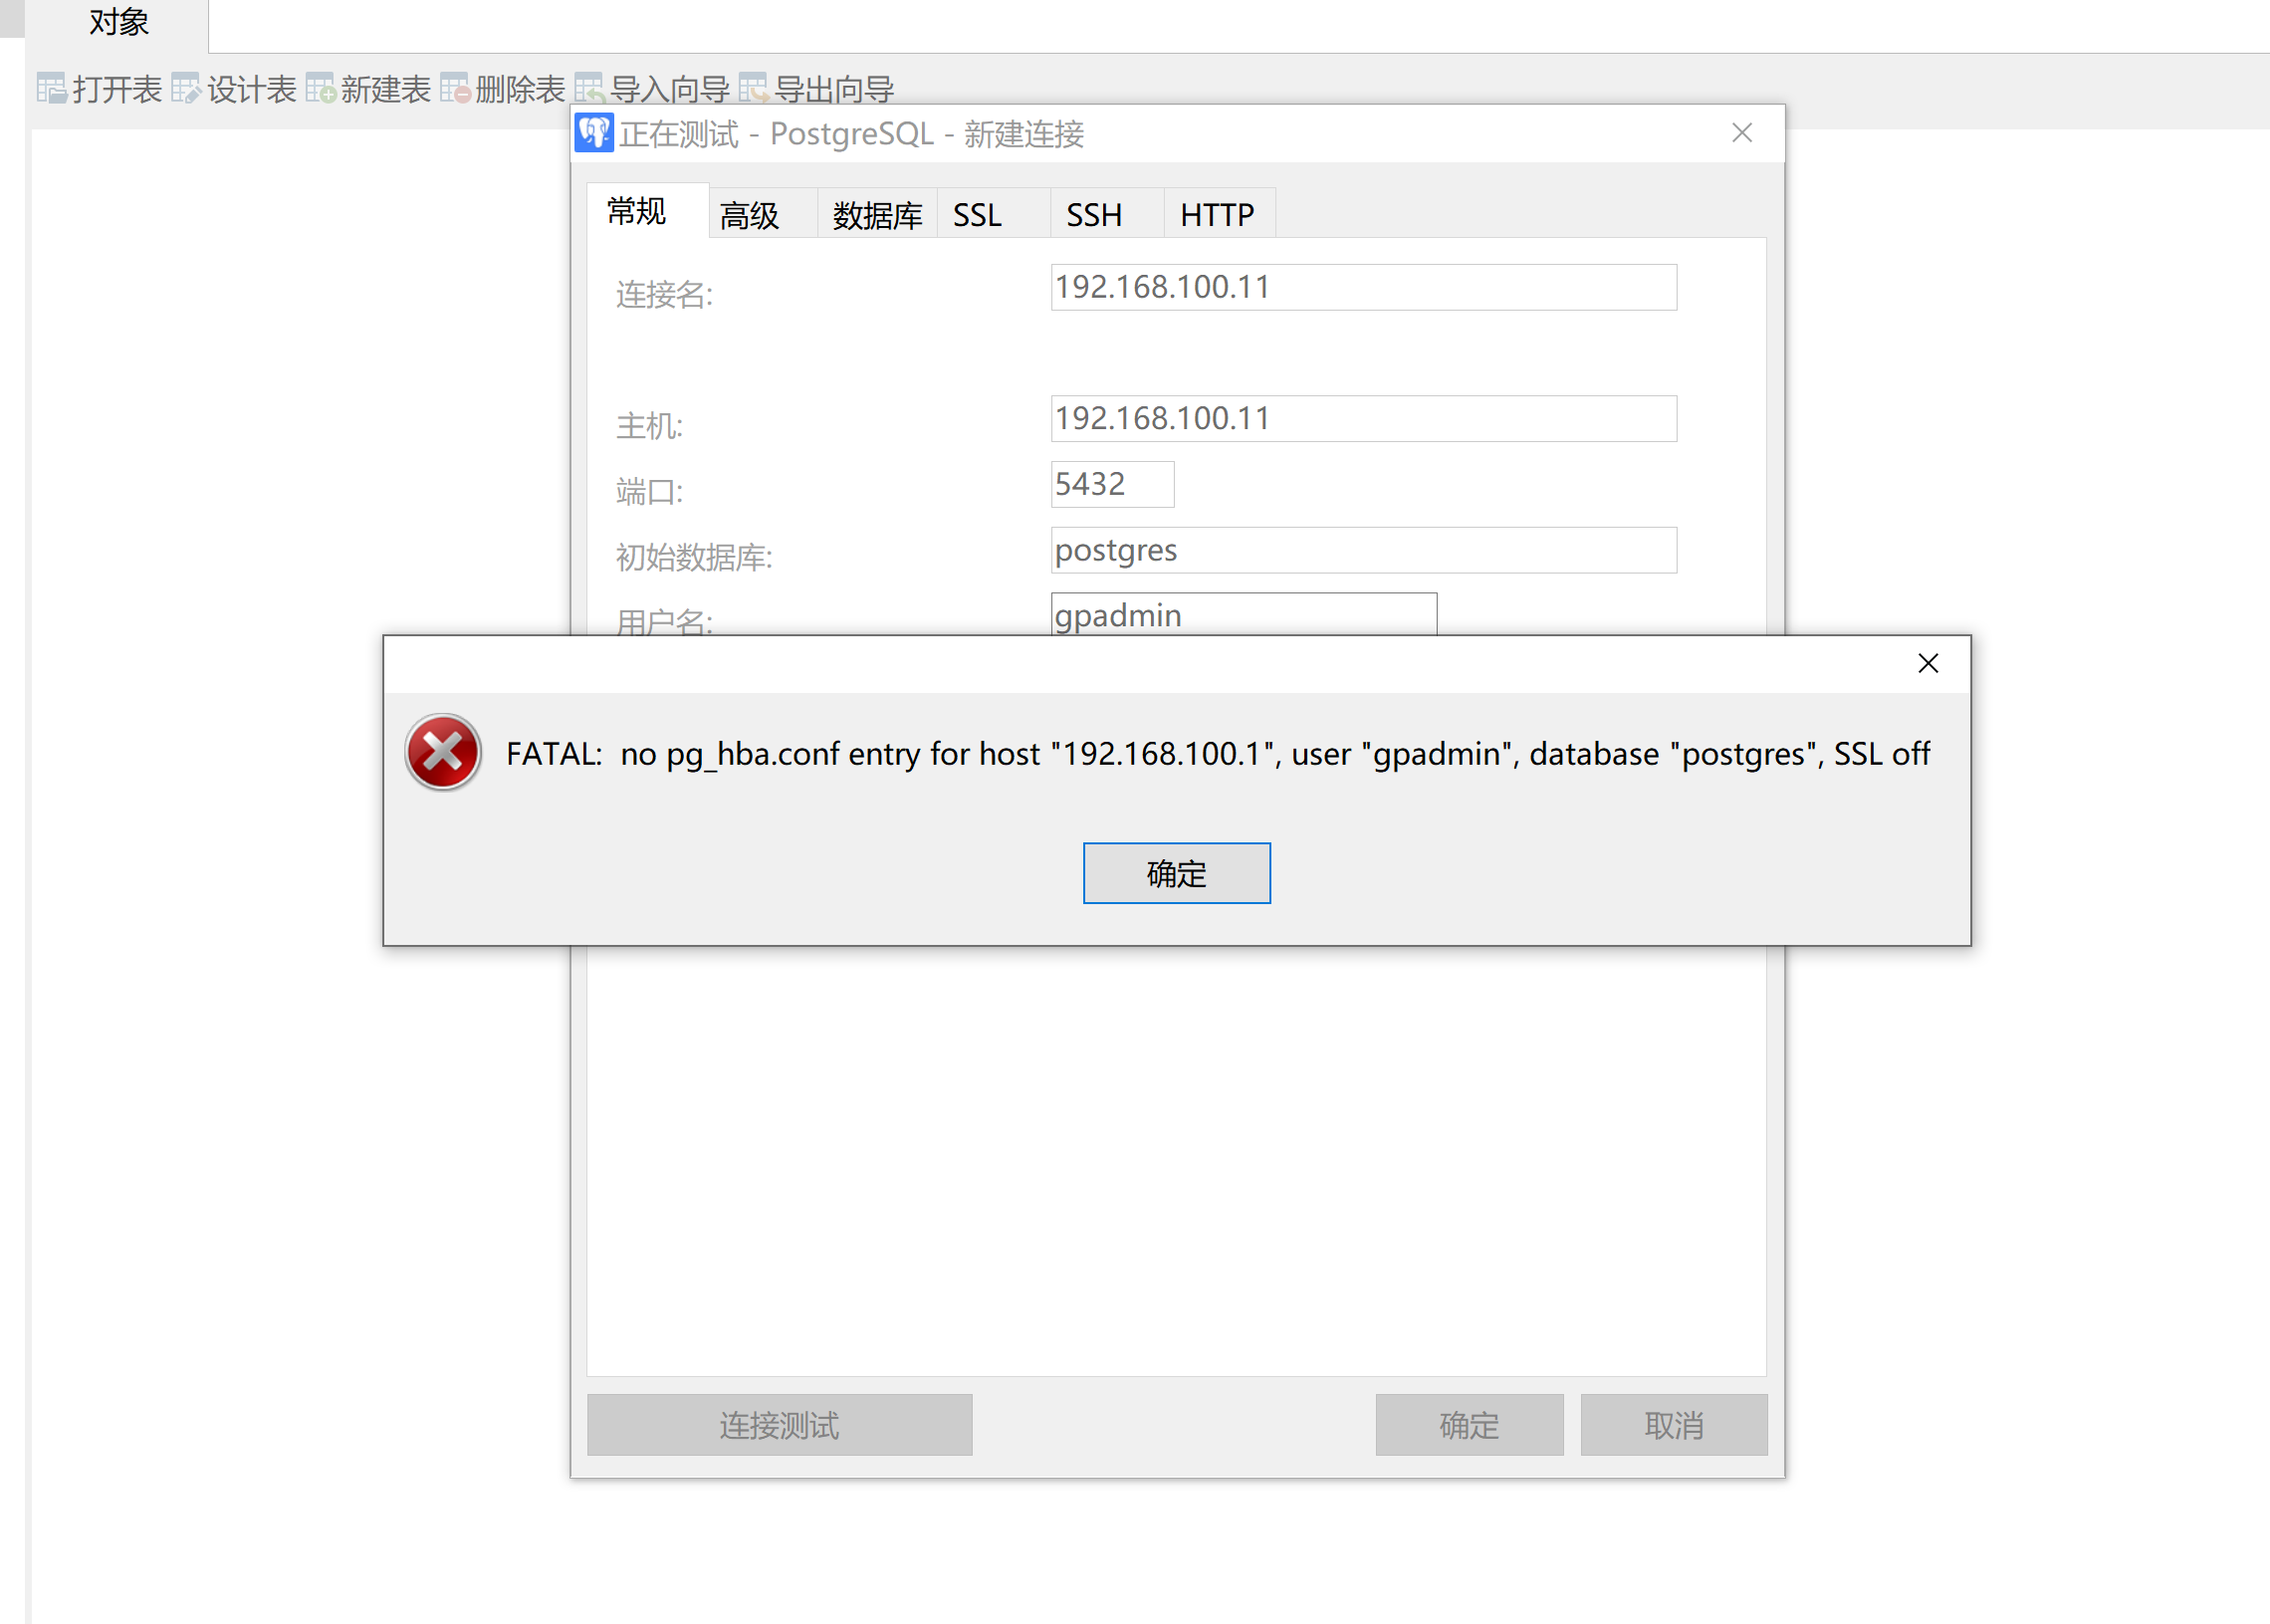
---
psql -h192.168.100.11 -p5432 -U gpadminalter role gpadmin with password 'gpadmin';

cd /greenplum/gpdata/master/gpseg-1vim pg_hba.conf----到最后加上:host all all 0.0.0.0/0 md5----gpstop -u

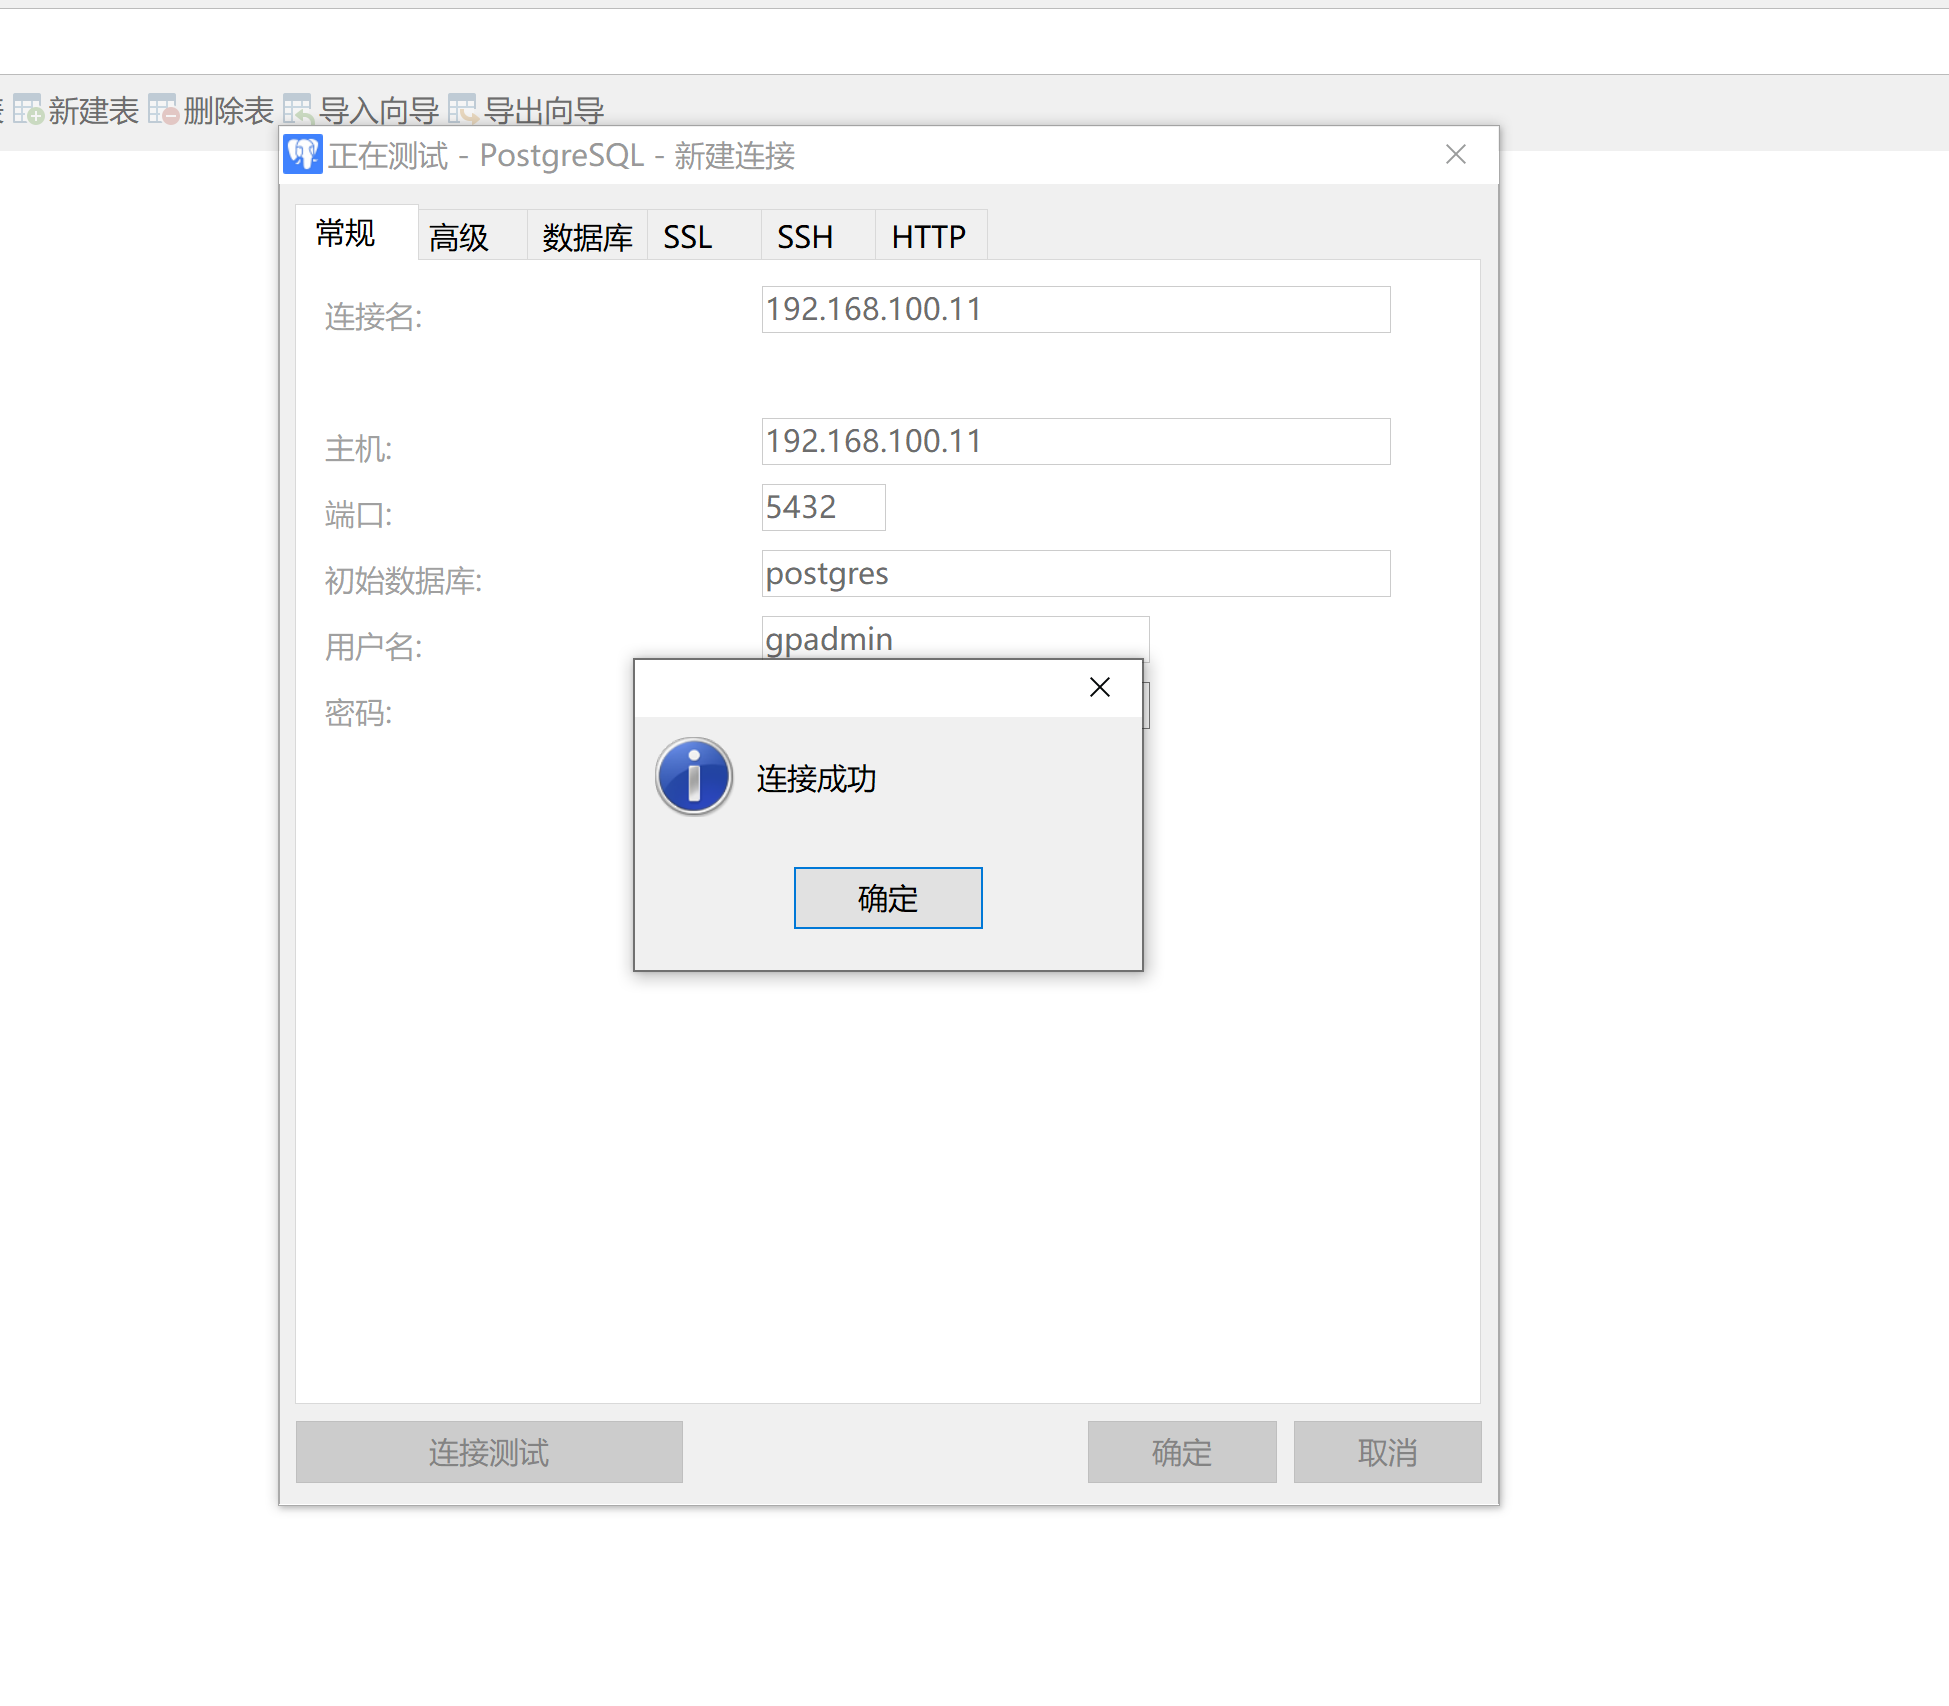
新建一个查询:create database fgeducreate user fgedu with password 'fgedu123'insert into itpux1 values(1,'itpux01',21);insert into itpux1 values(2,'itpux01',22);insert into itpux1 values(3,'itpux03',23);insert into itpux1 values(4,'itpux04',24);insert into itpux1 values(5,'itpux05',25);insert into itpux1 values(6,'itpux06',26);insert into itpux1 values(7,'itpux07',27);insert into itpux1 values(8,'itpux05',28);insert into itpux1 values(9,'itpux09',29);insert into itpux1 values(10,'itpux10',30);insert into itpux1 values(11,'itpux11',31);insert into itpux1 values(12,'itpux12',32);
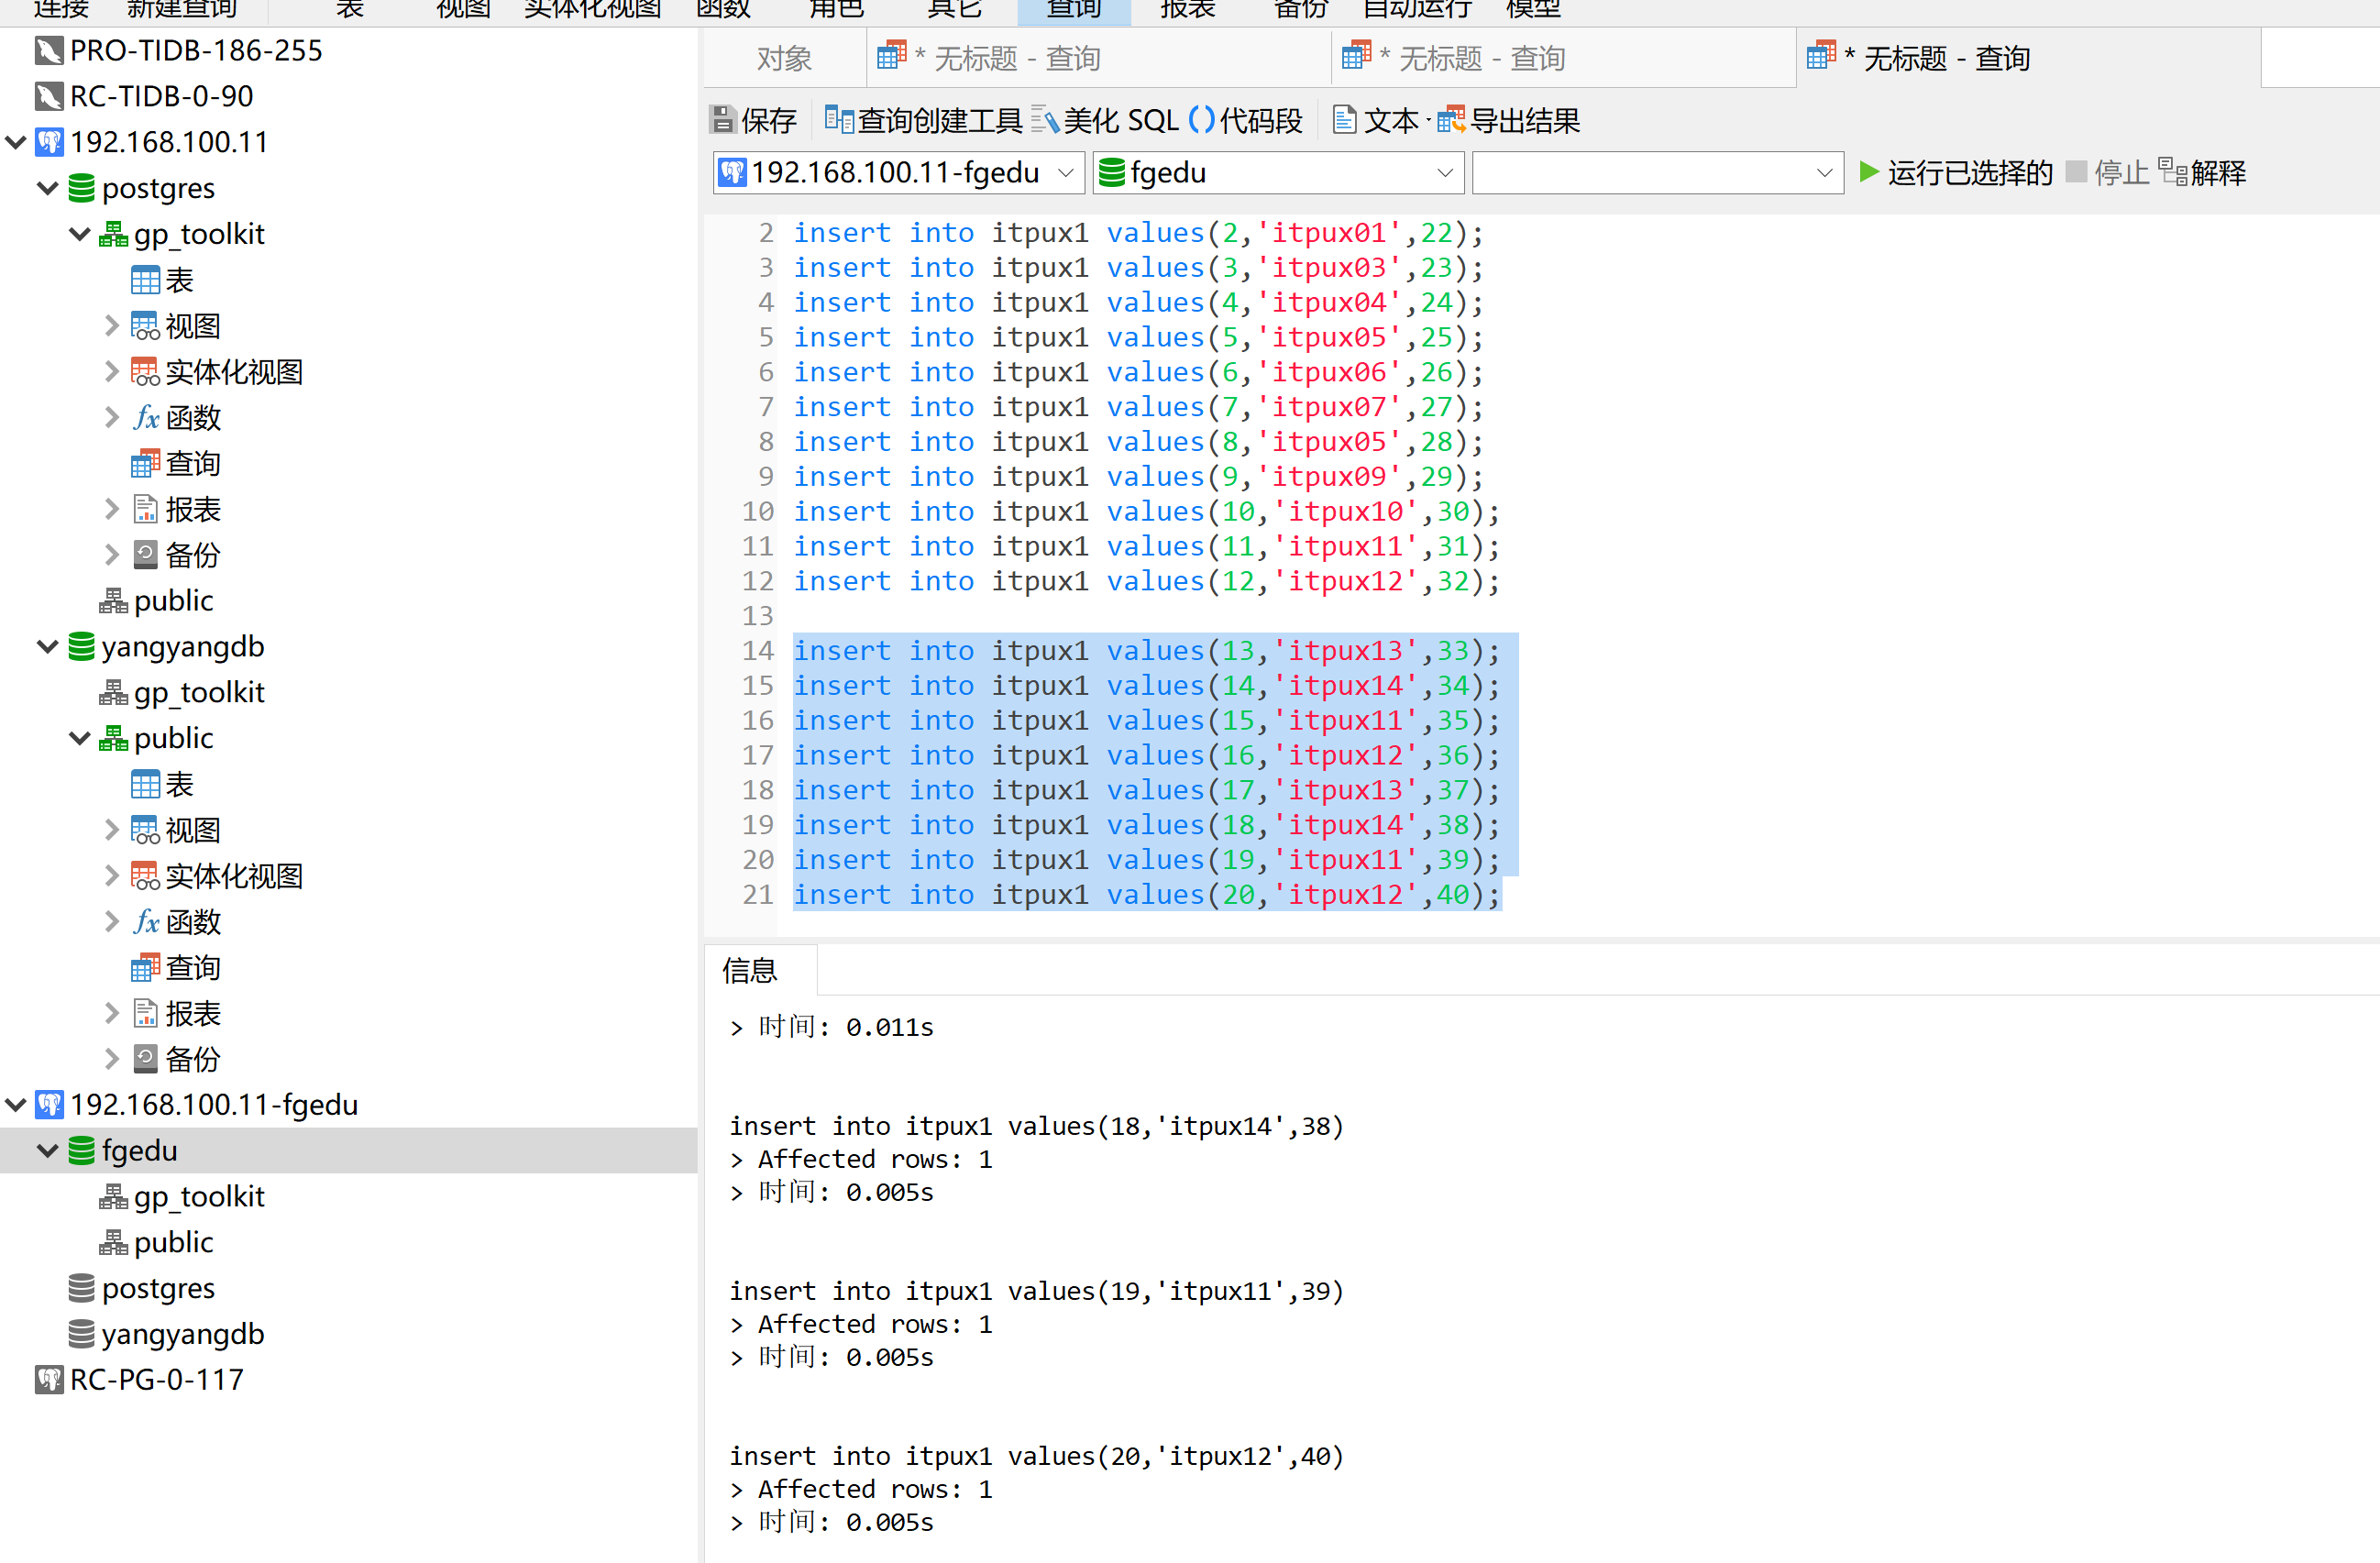
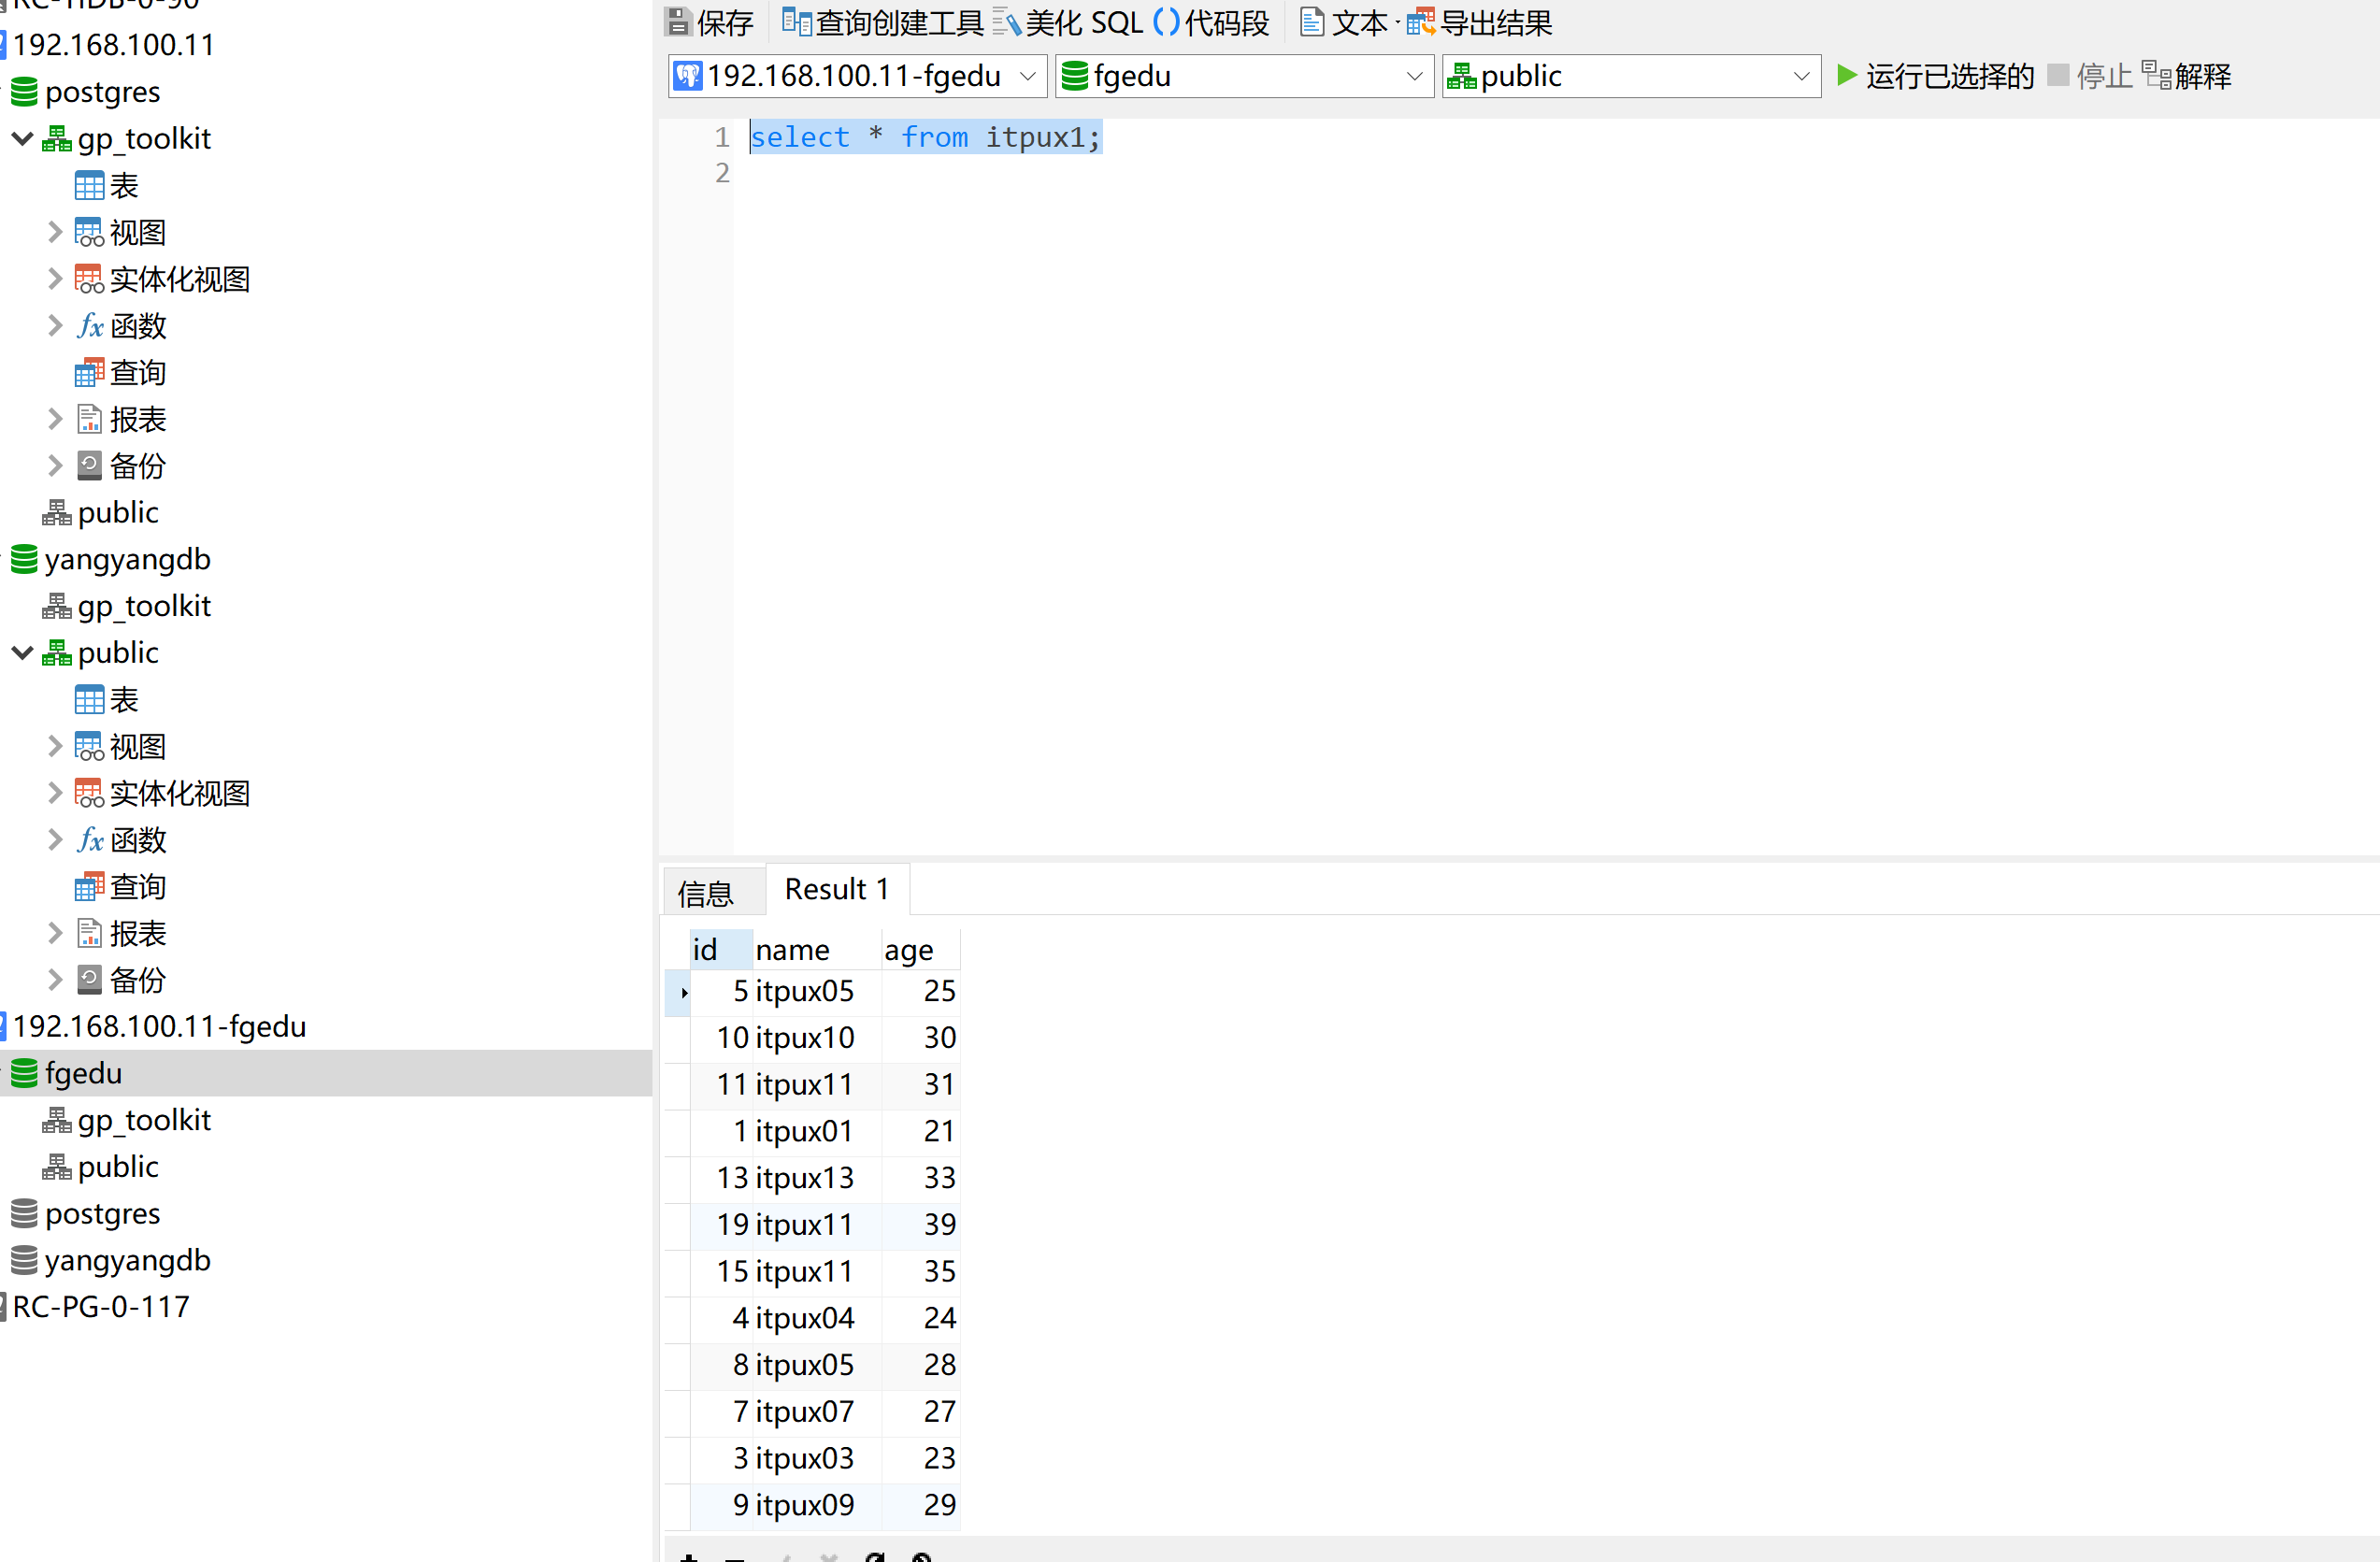
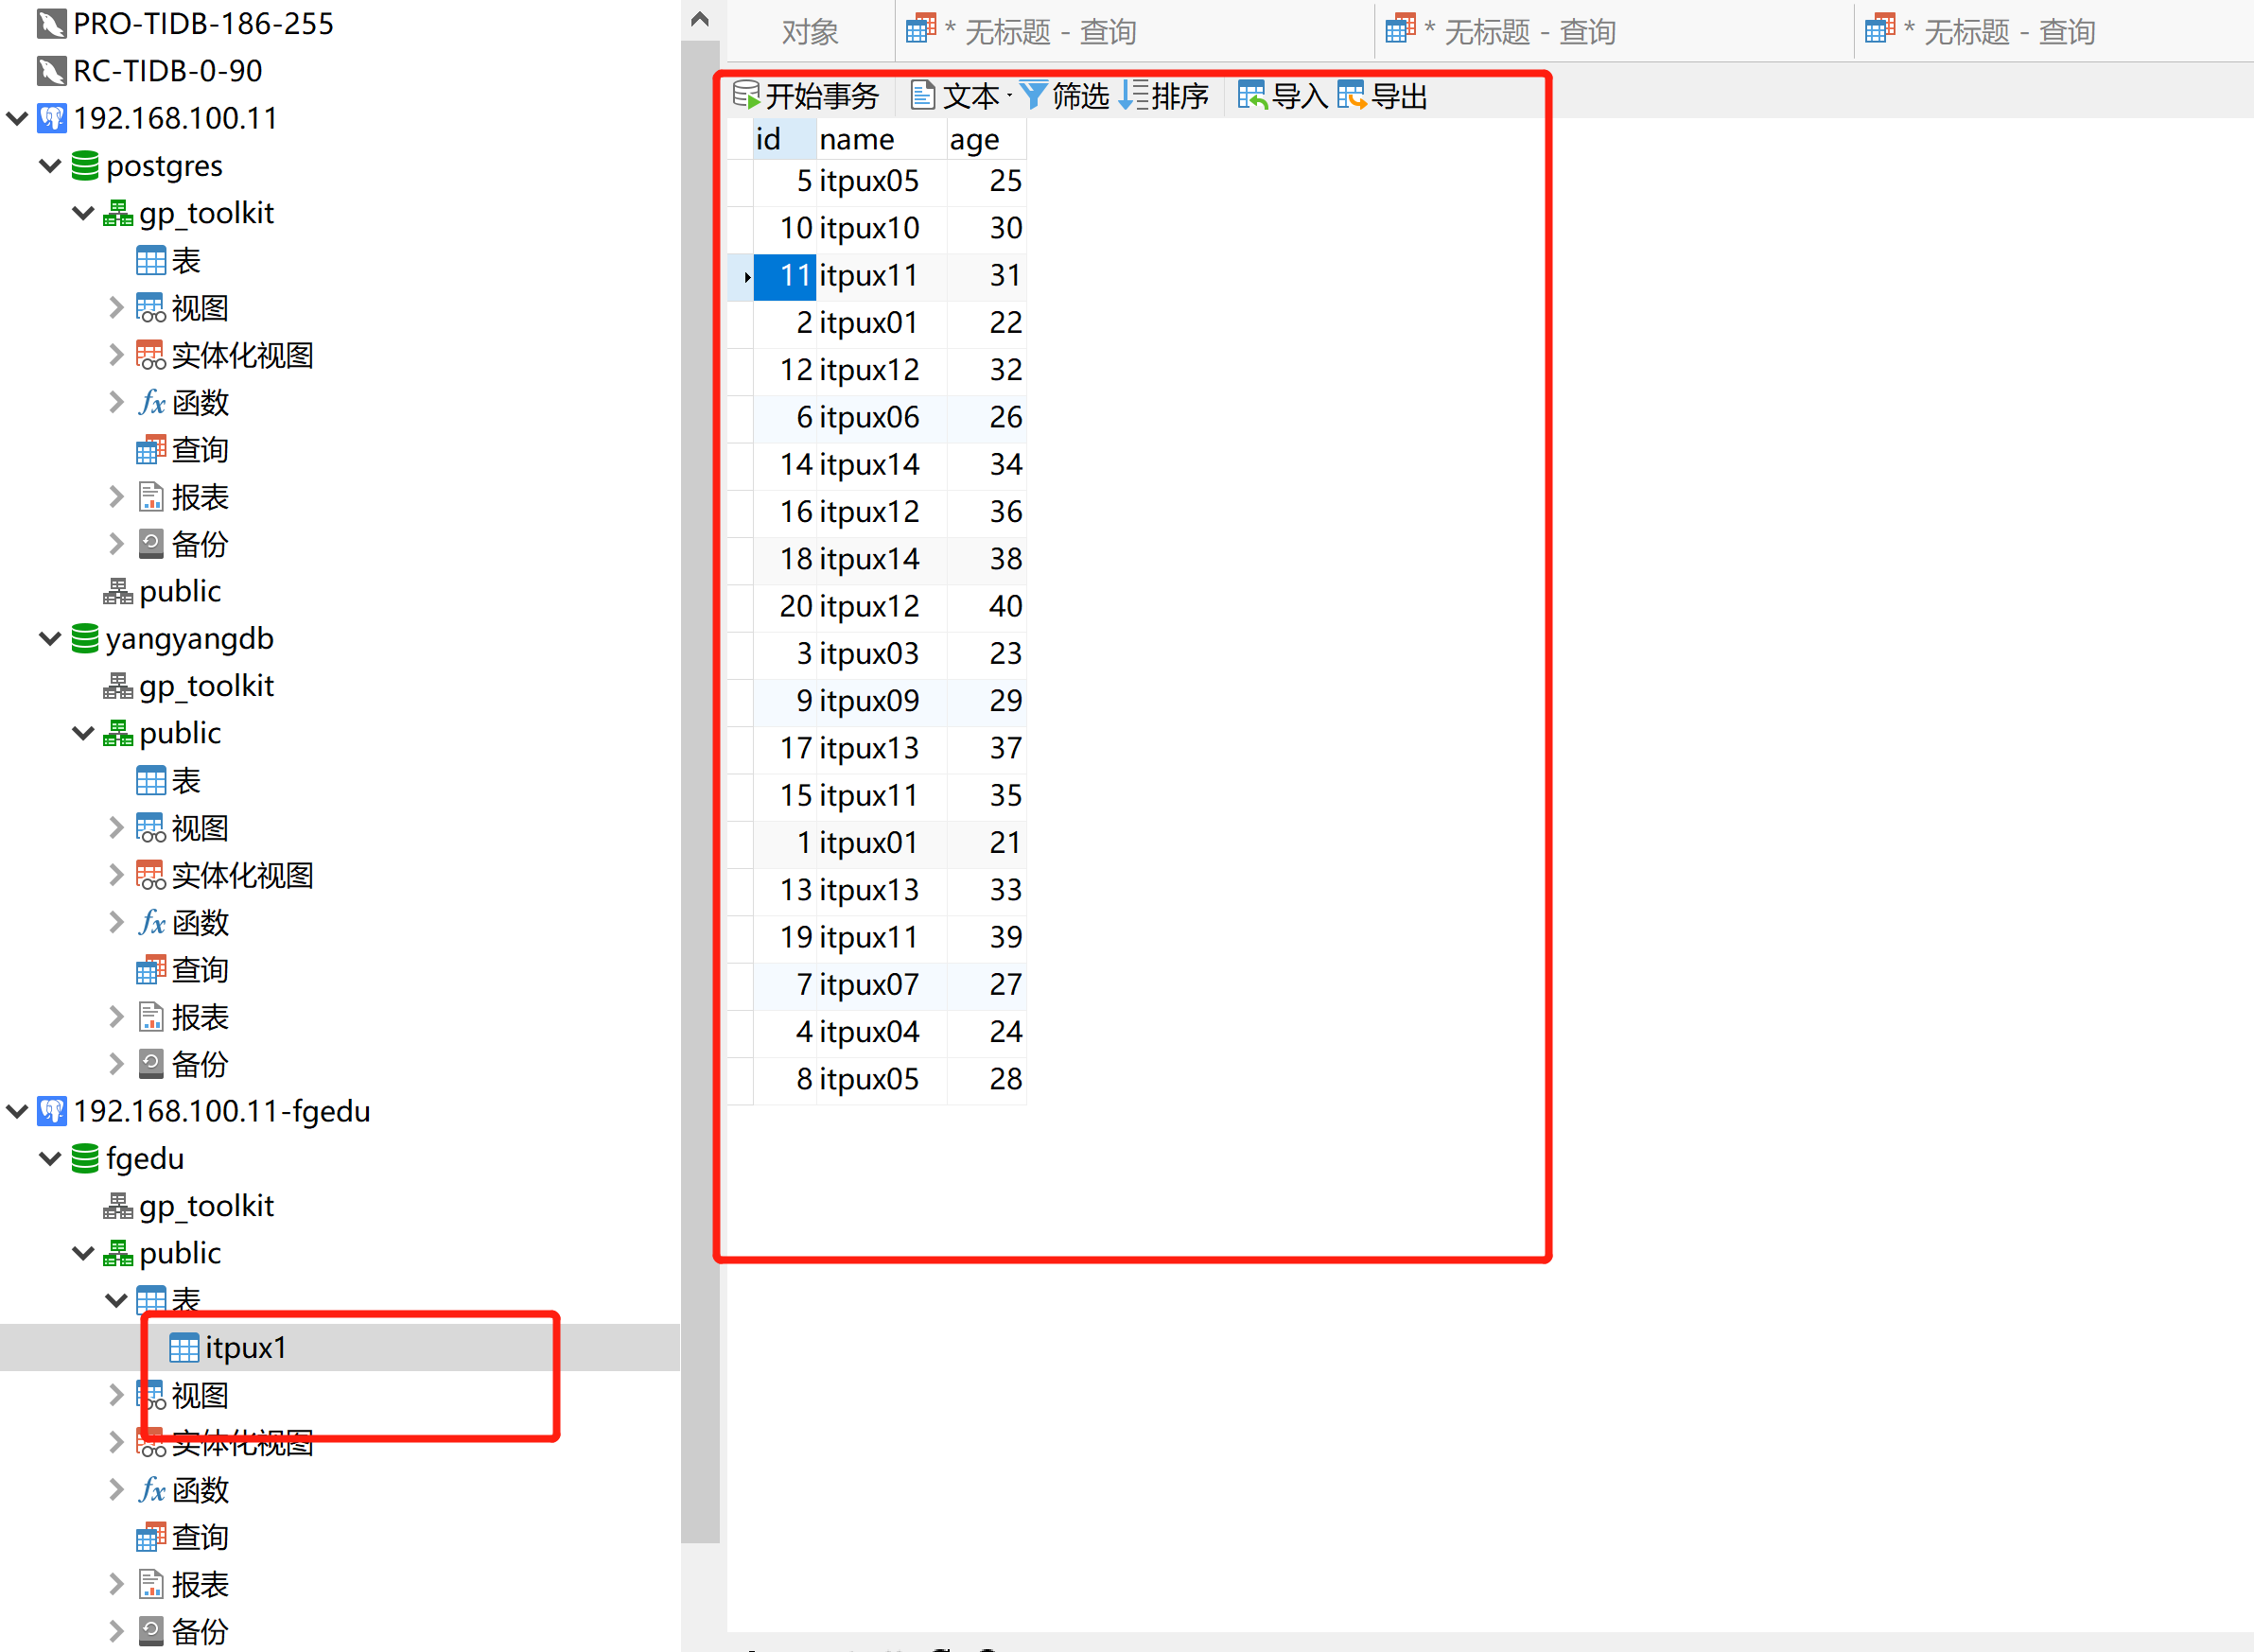

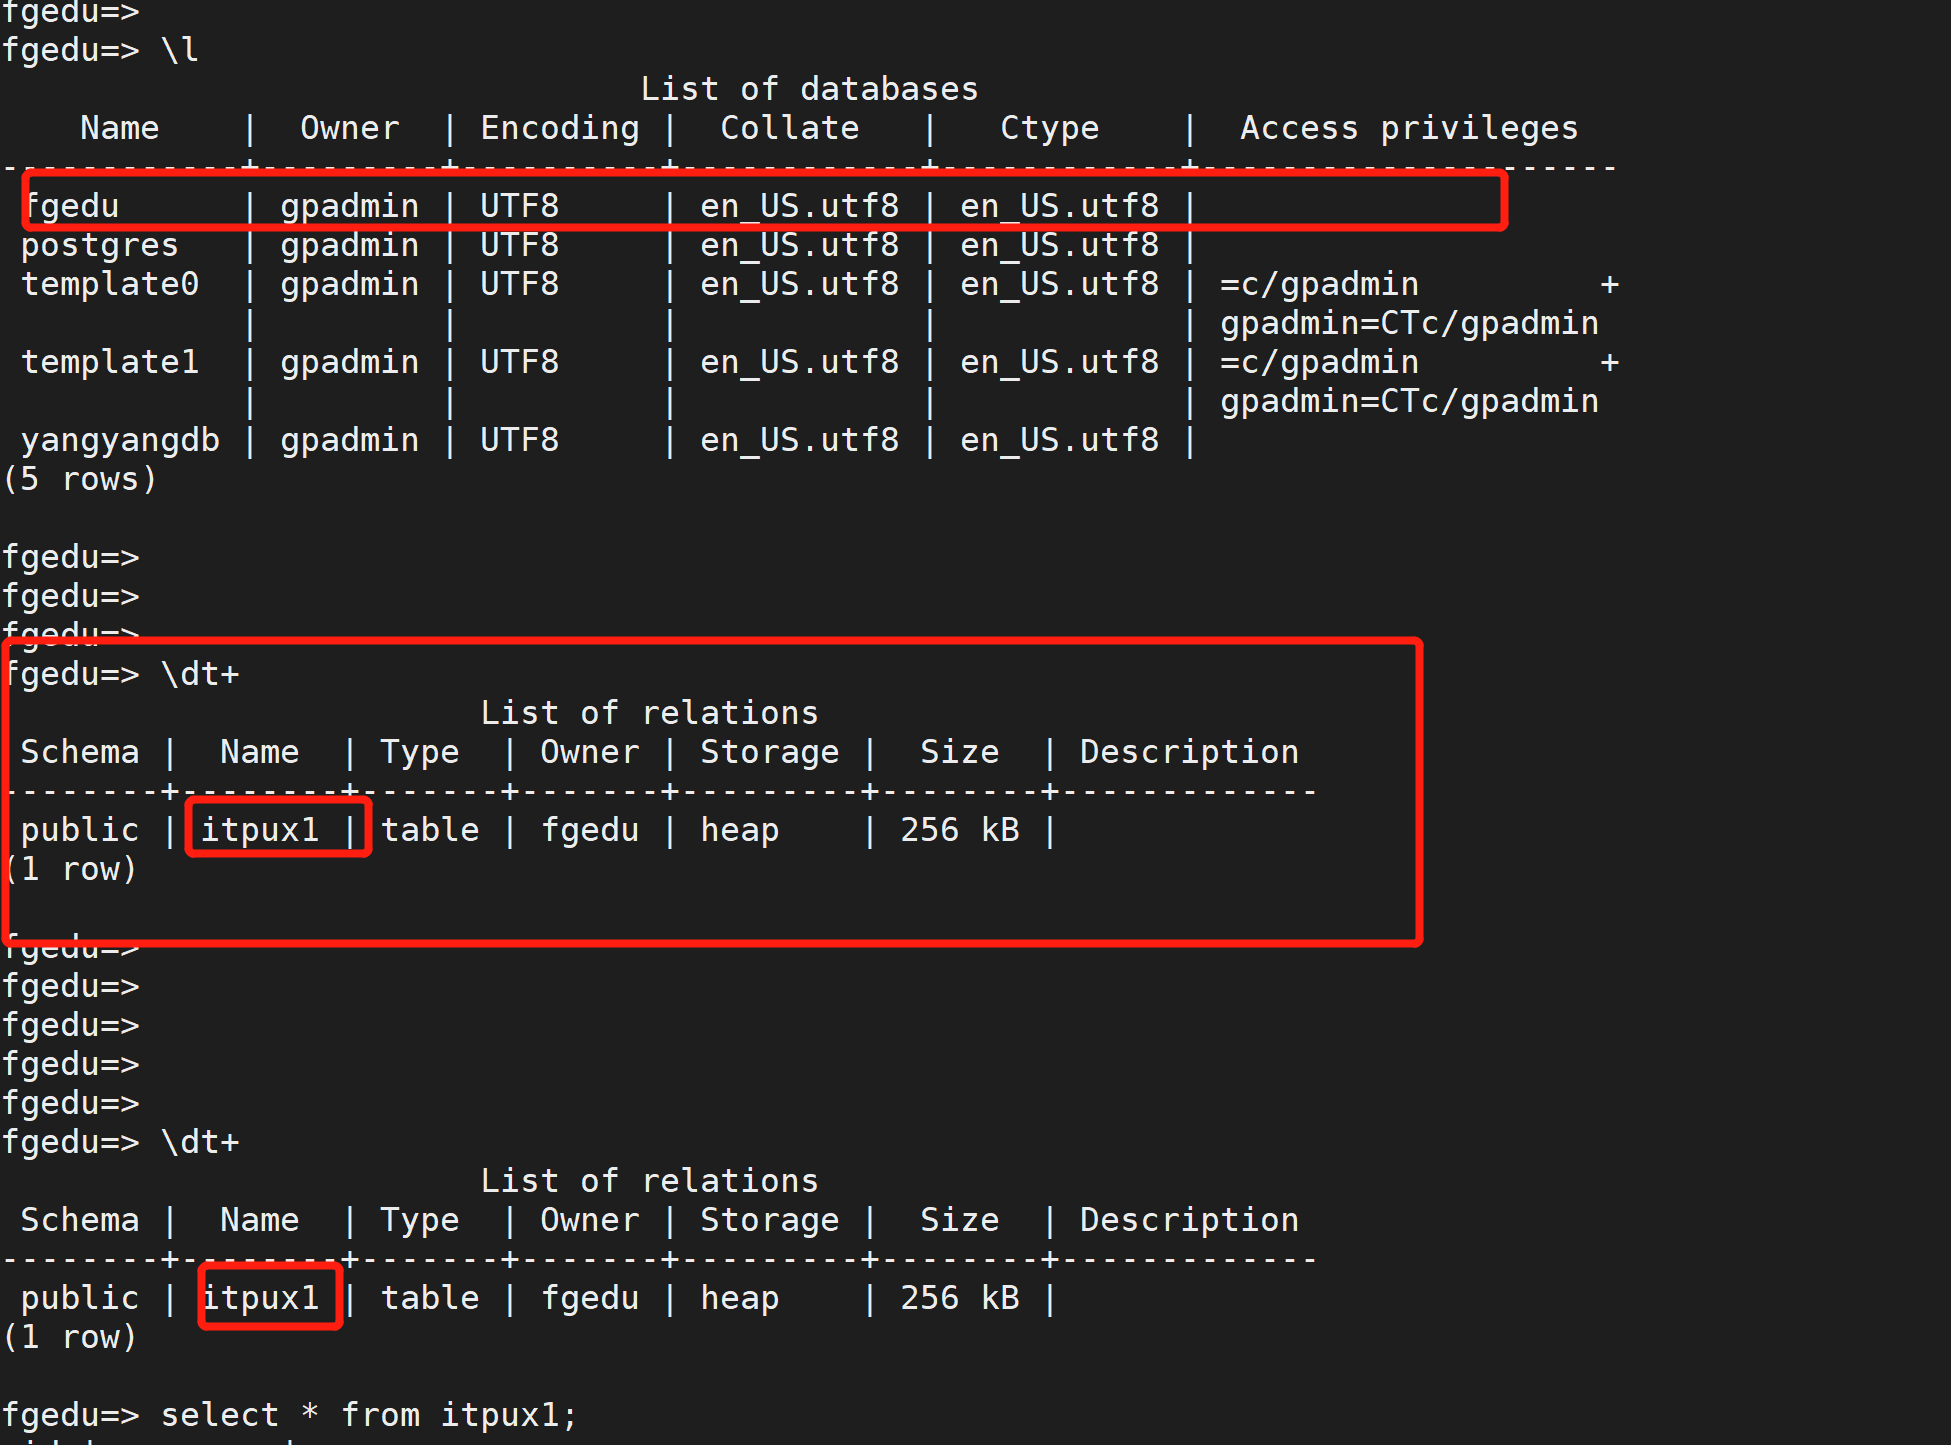
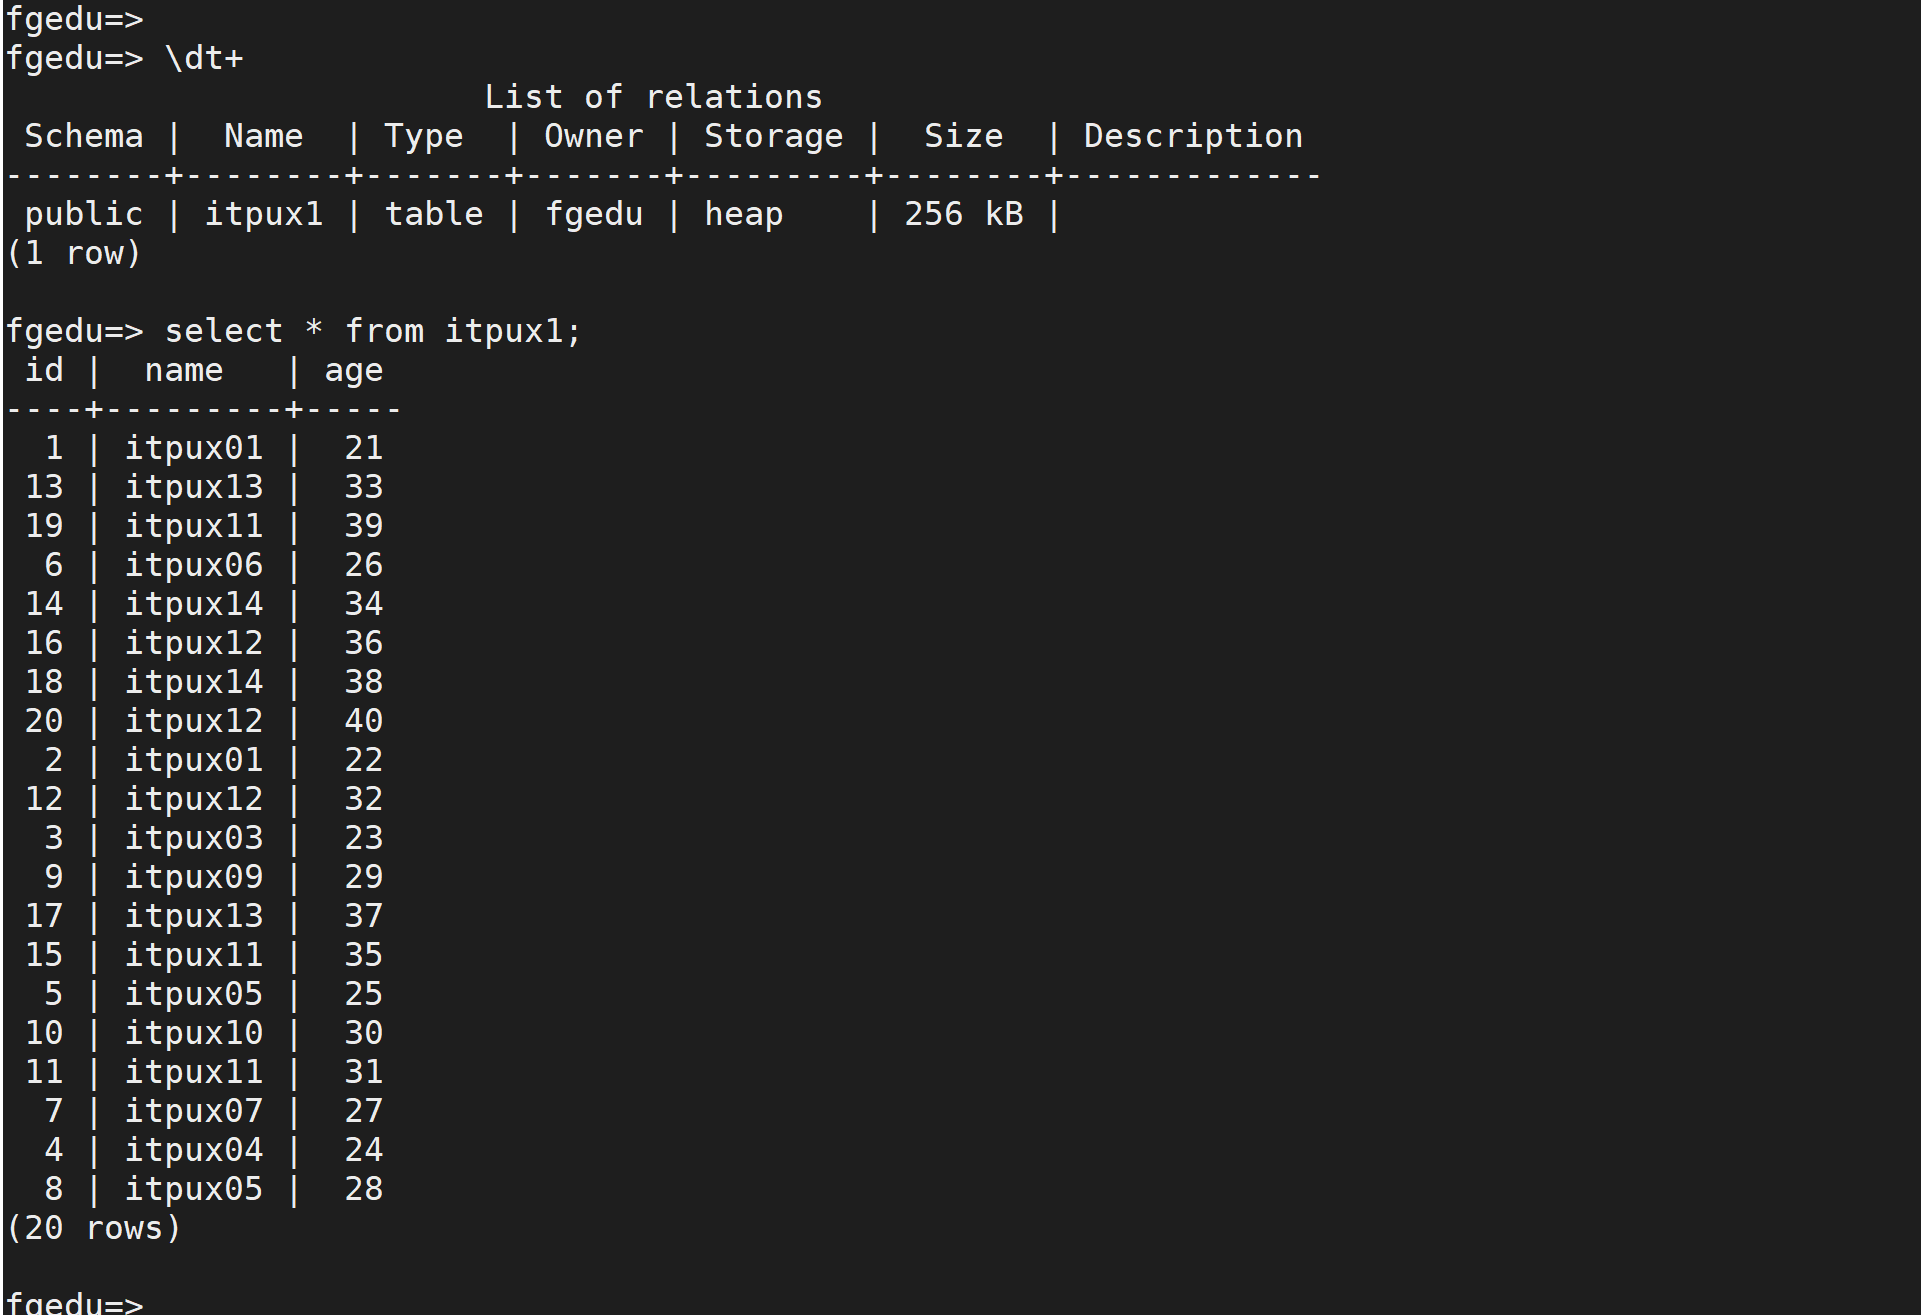
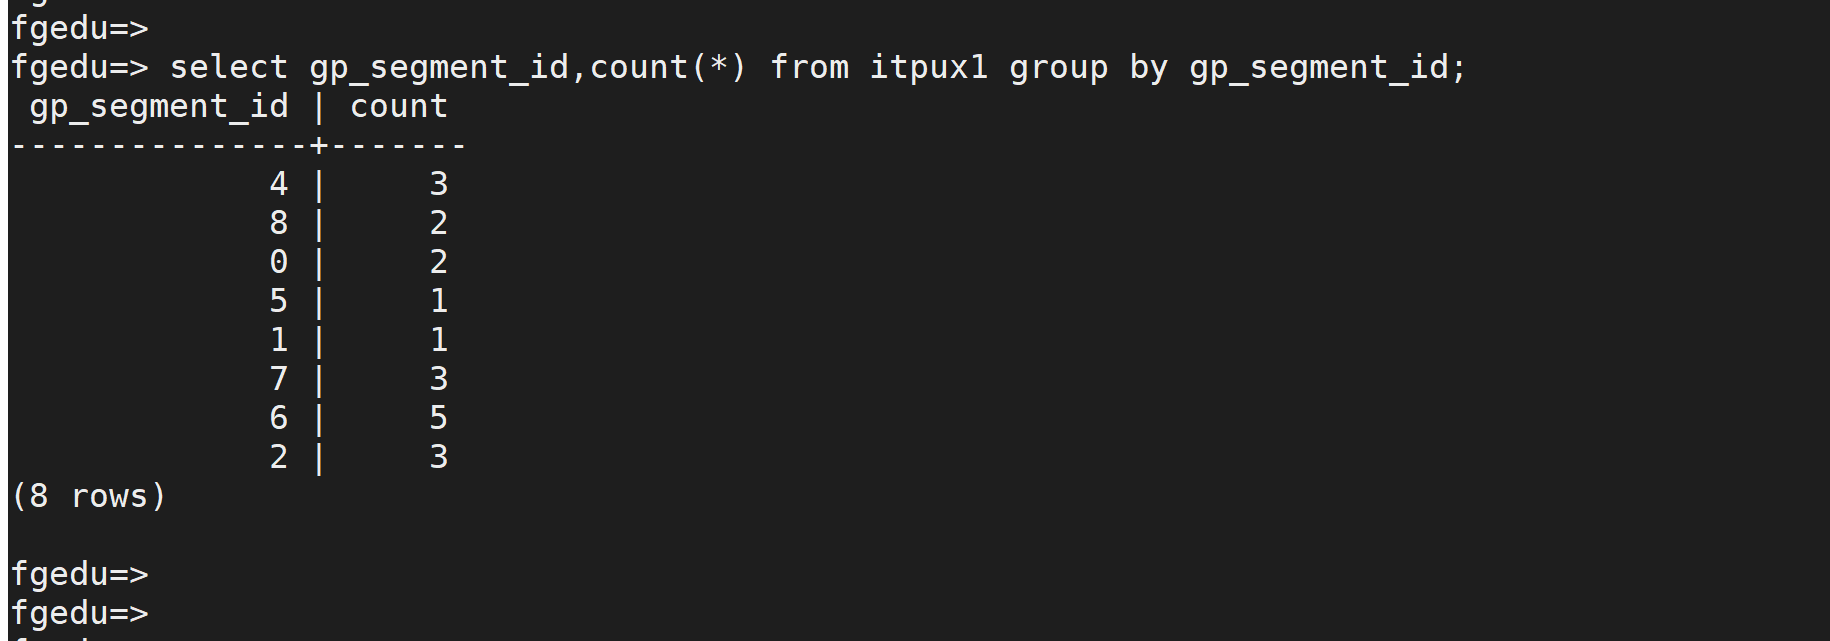
select gp_segment_id,count(*) from itpux1 group by gp_segment_id;查看 数据分段
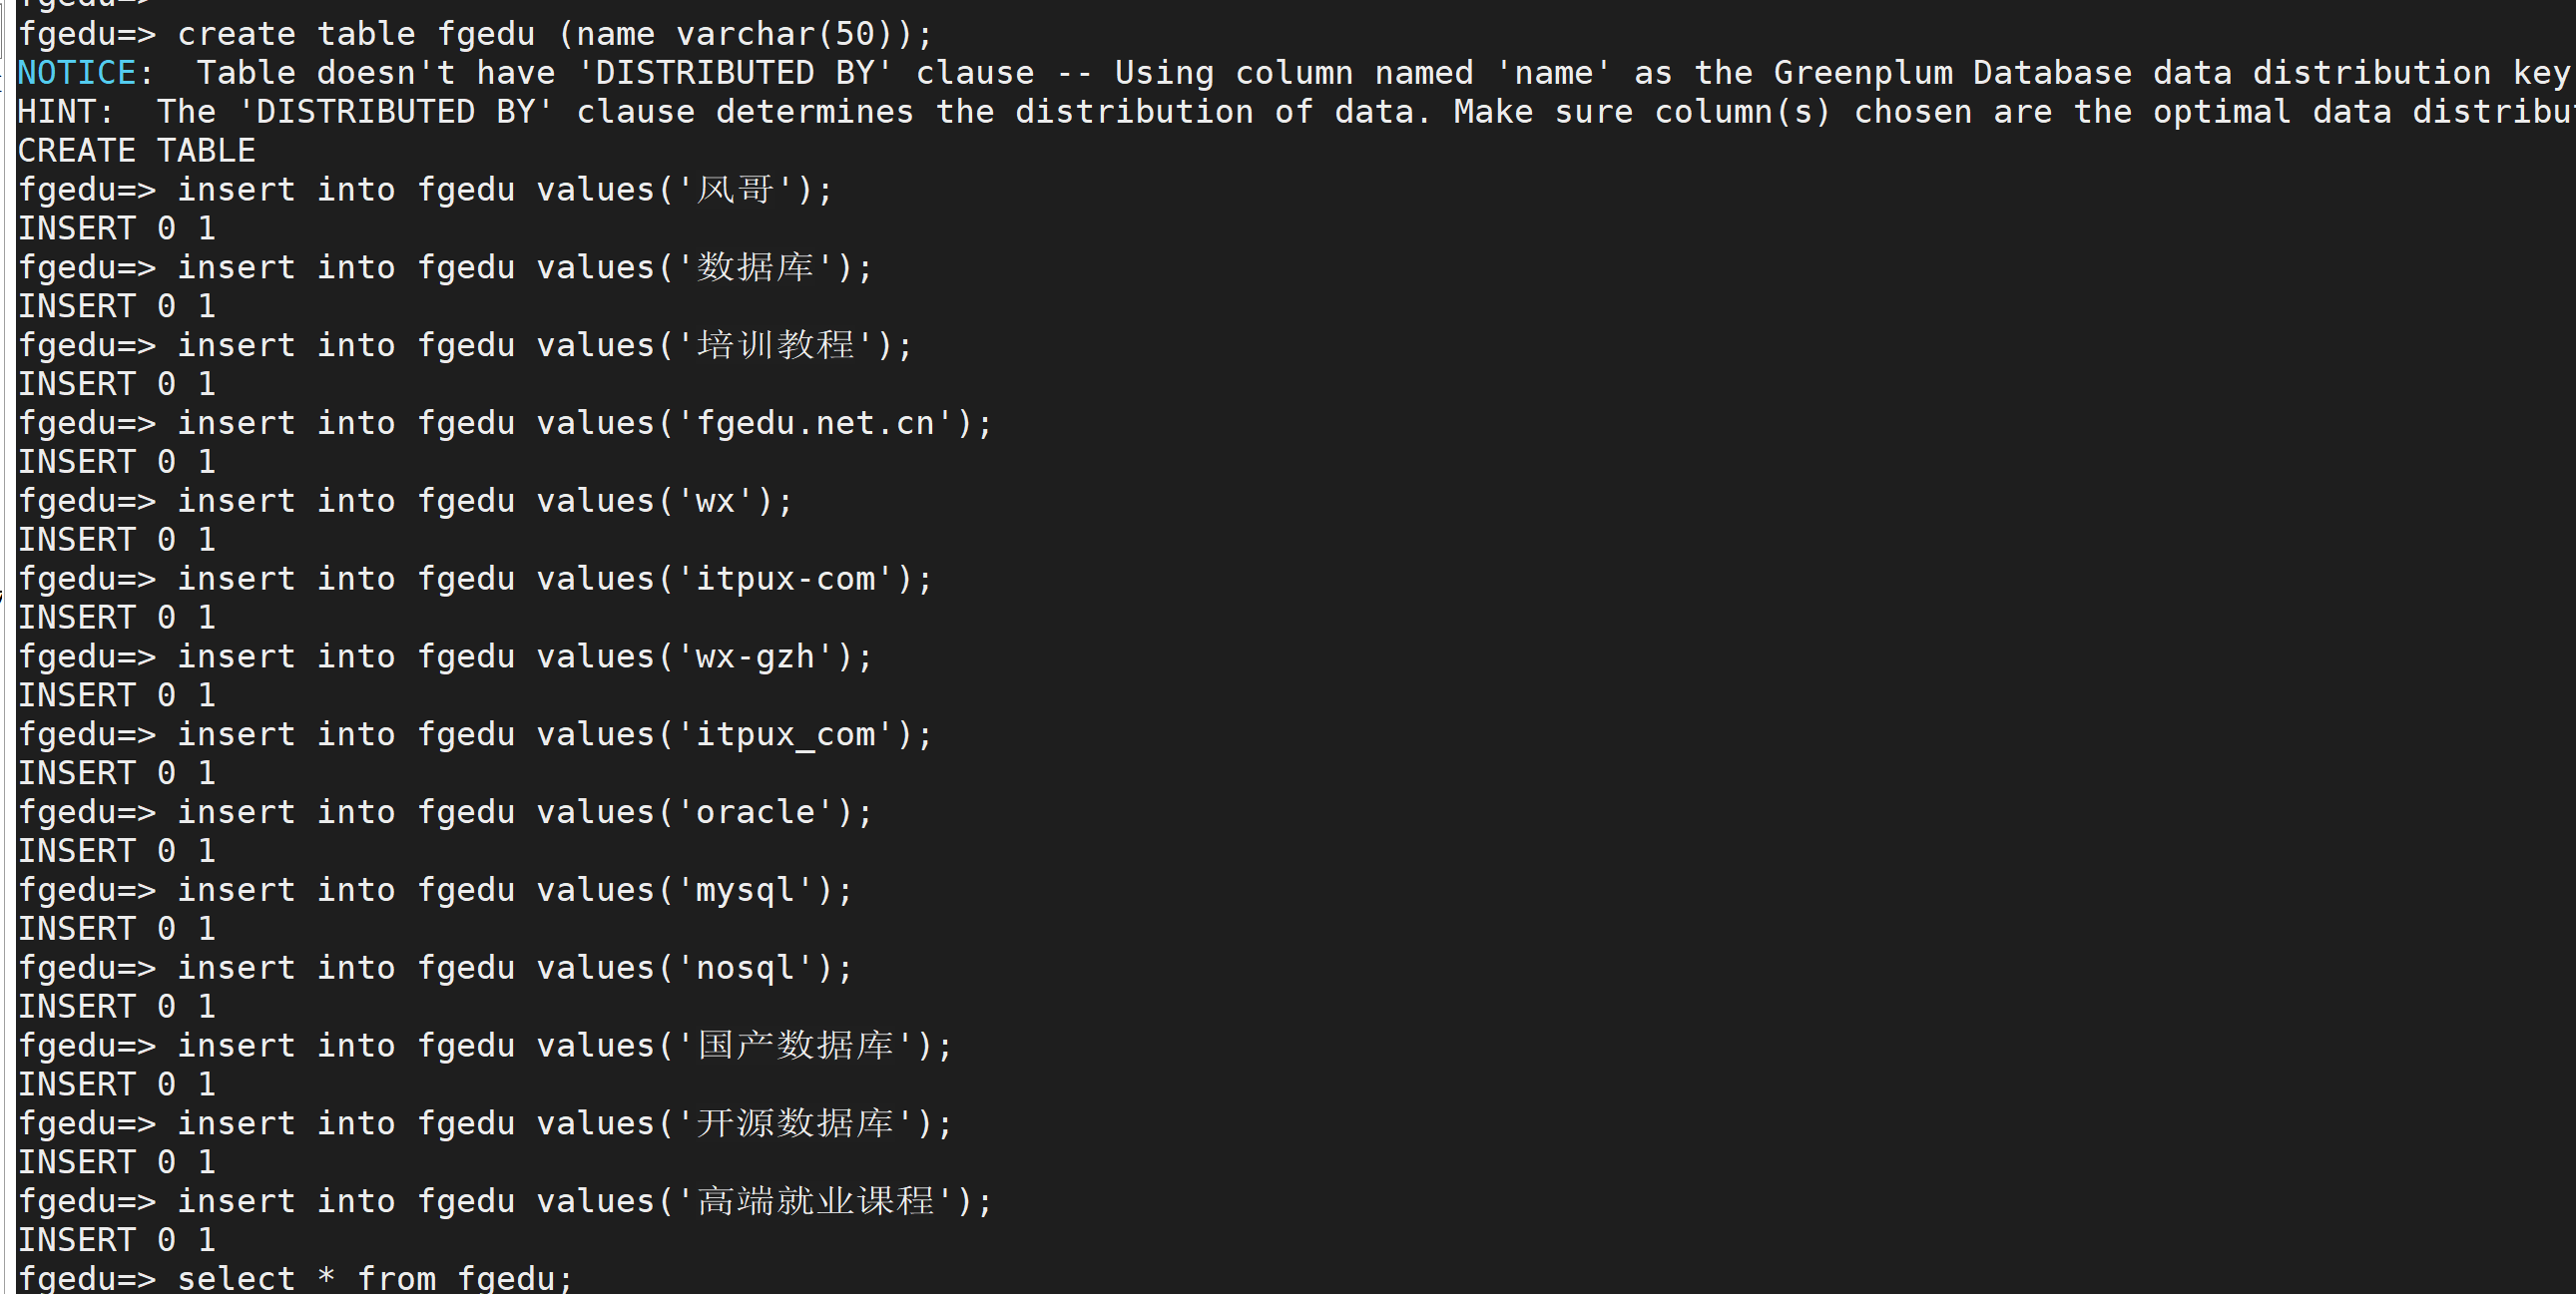
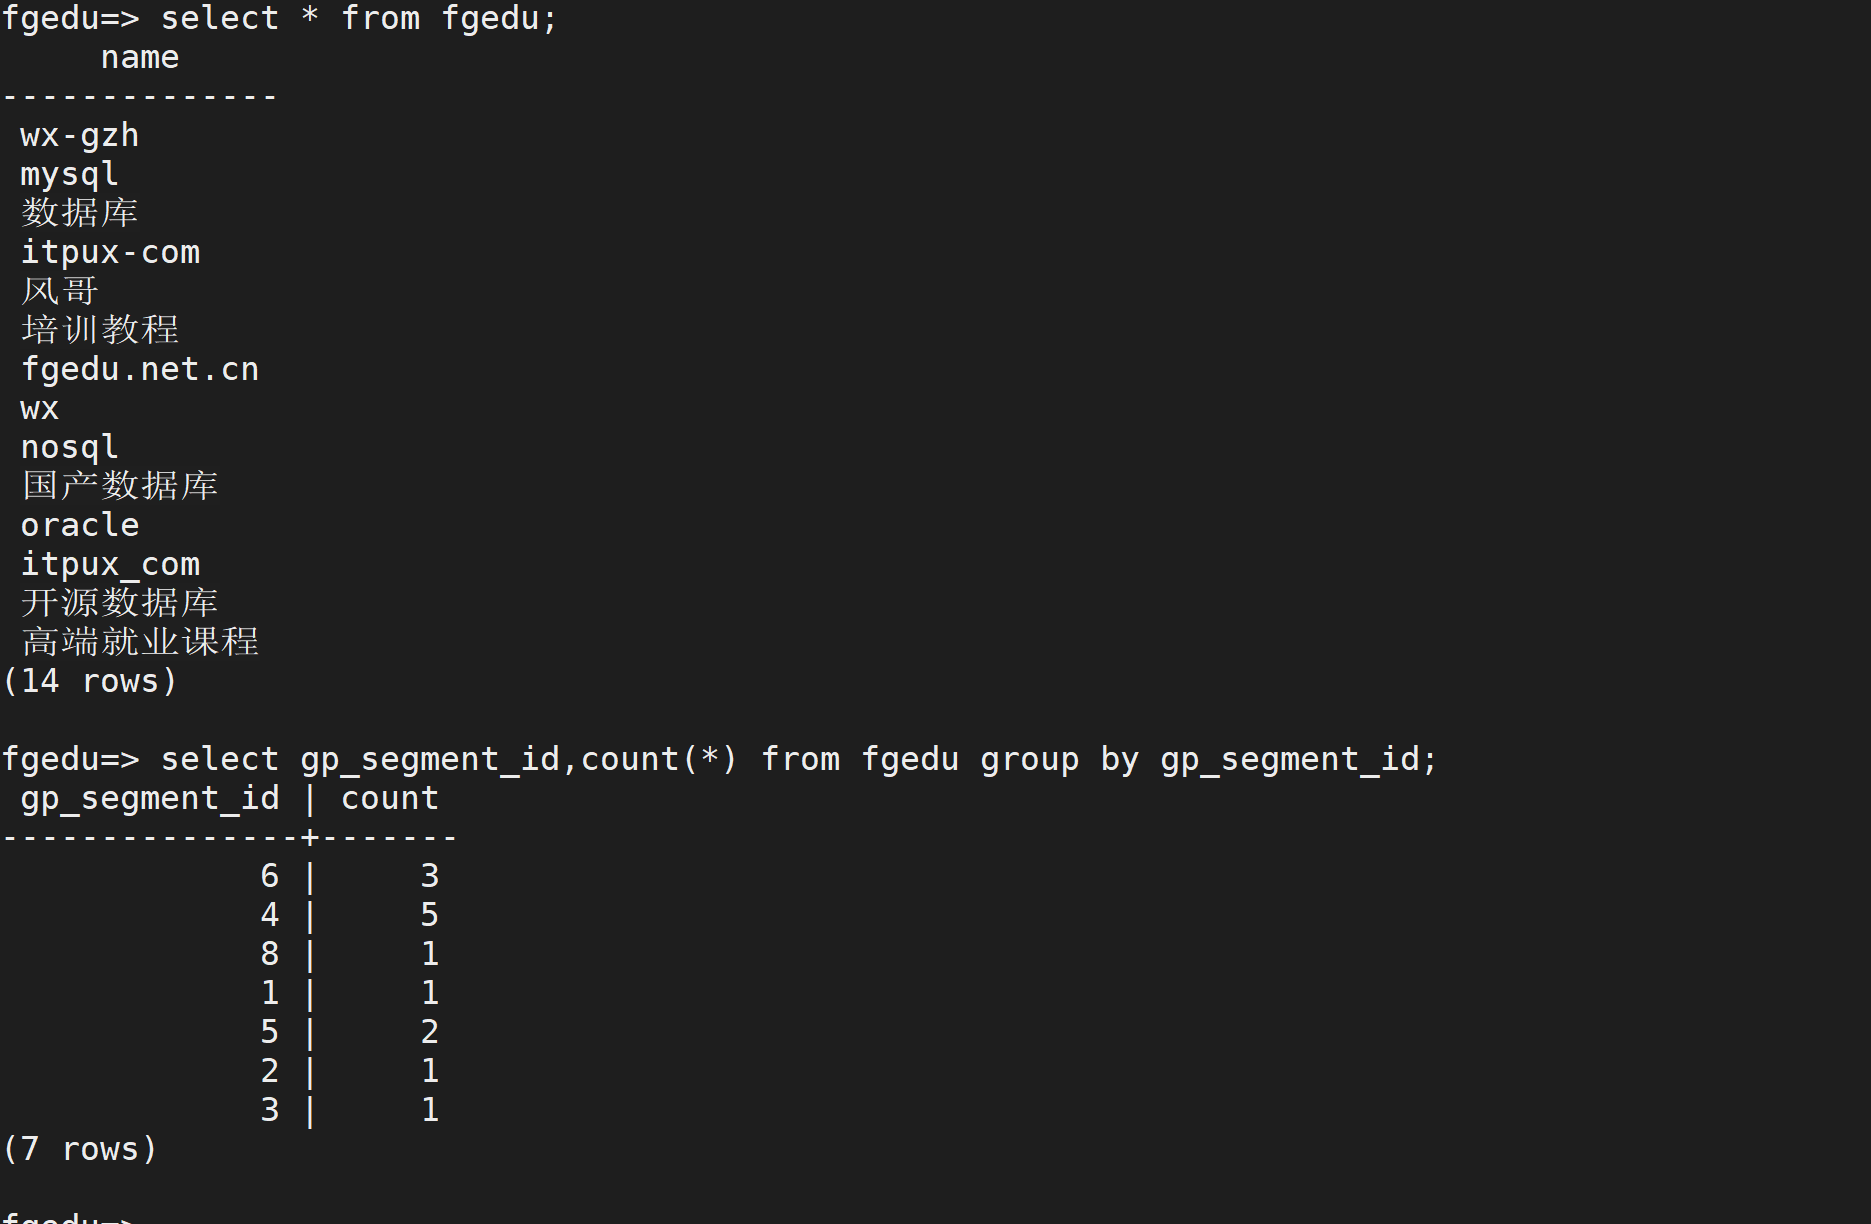
create table fgedu (name varchar(50));insert into fgedu values('风哥');insert into fgedu values('数据库');insert into fgedu values('培训教程');insert into fgedu values('fgedu.net.cn');insert into fgedu values('wx');insert into fgedu values('itpux-com');insert into fgedu values('wx-gzh');insert into fgedu values('itpux_com');insert into fgedu values('oracle');insert into fgedu values('mysql');insert into fgedu values('nosql');insert into fgedu values('国产数据库');insert into fgedu values('开源数据库');insert into fgedu values('高端就业课程');select * from fgedu;select gp_segment_id,count(*) from fgedu group by gp_segment_id;
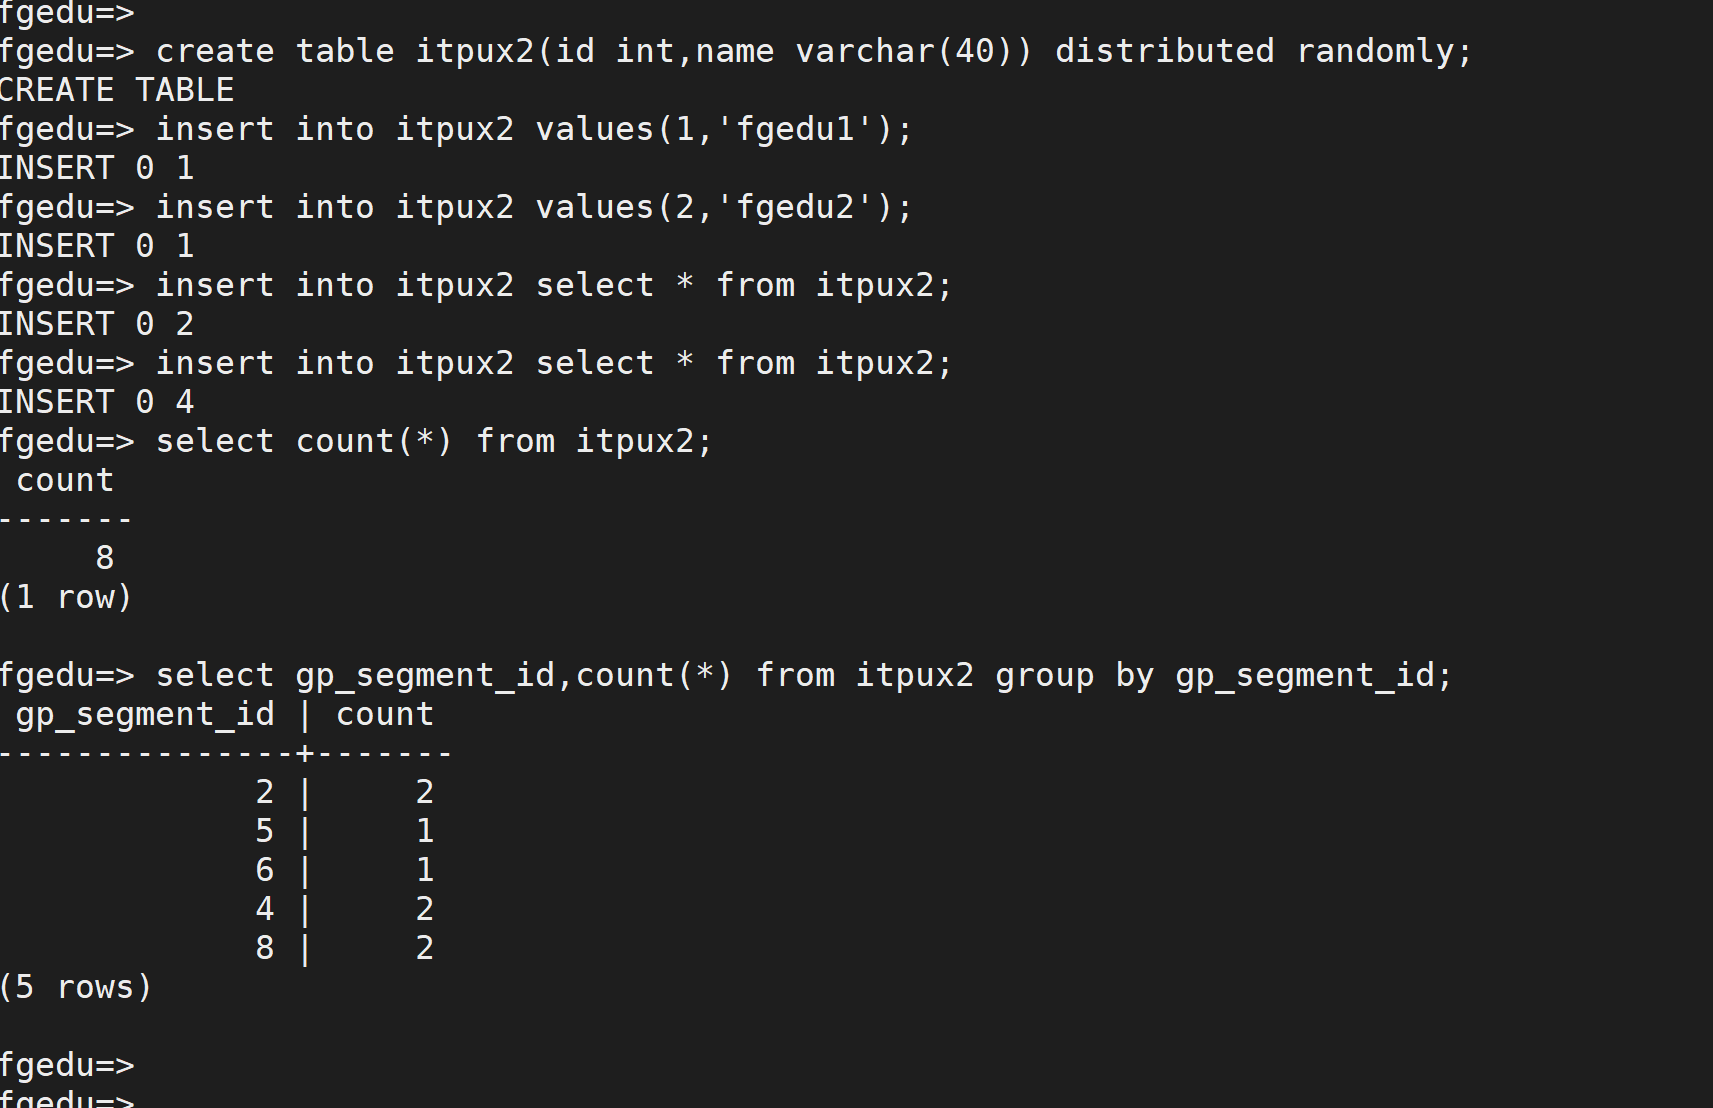
随机分布create table itpux2(id int,name varchar(40)) distributed randomly;insert into itpux2 values(1,'fgedu1');insert into itpux2 values(2,'fgedu2');insert into itpux2 select * from itpux2;insert into itpux2 select * from itpux2;select count(*) from itpux2;select gp_segment_id,count(*) from itpux2 group by gp_segment_id;
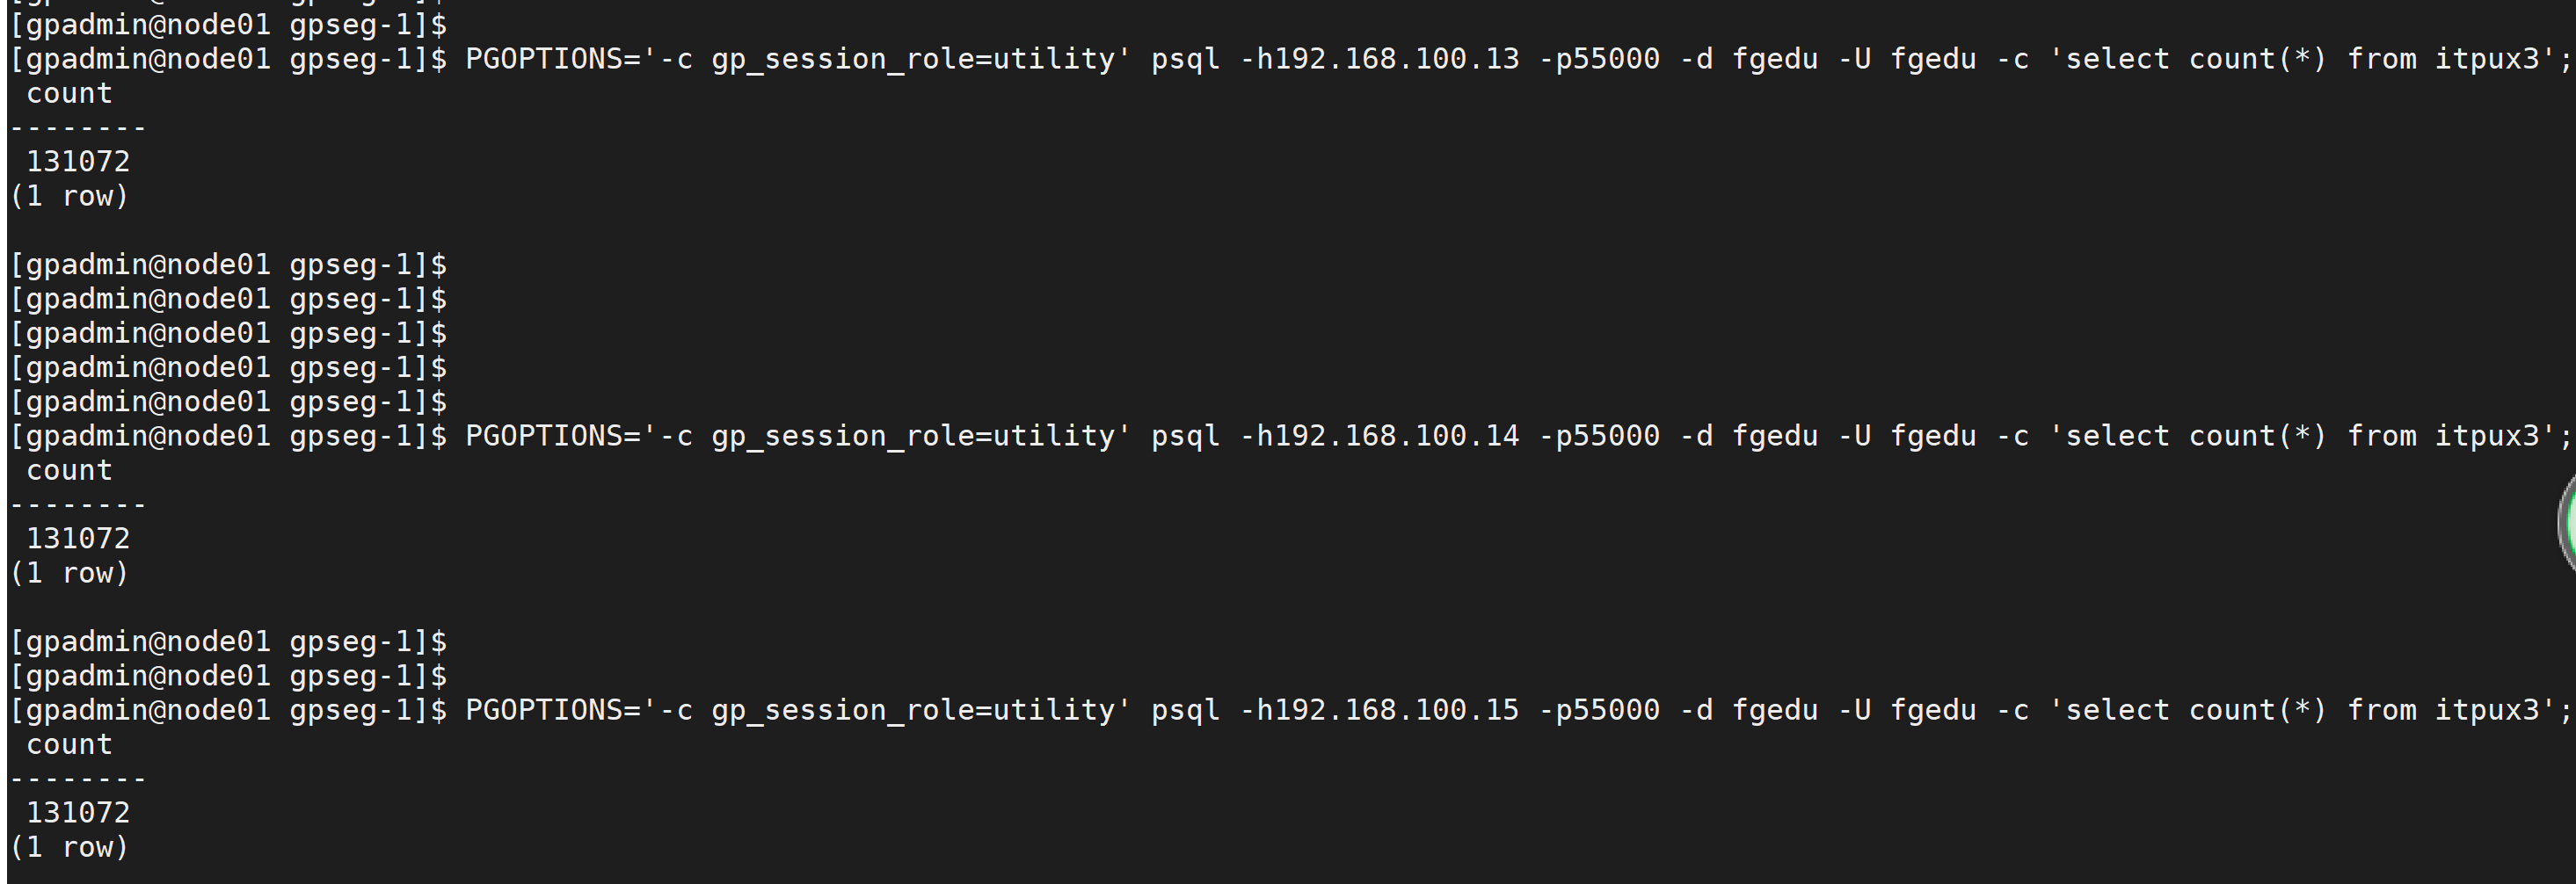
复制表create table itpux3(id int,name varchar(40)) distributed replicated;insert into itpux3 values(1,'fgedu1');insert into itpux3 values(2,'fgedu2');insert into itpux3 select * from itpux3;insert into itpux3 select * from itpux3;select count(*) from itpux3;PGOPTIONS='-c gp_session_role=utility' psql -h192.168.100.13 -p55002 -d fgedu -U fgedu -c 'select count(*) from itpux3';PGOPTIONS='-c gp_session_role=utility' psql -h192.168.100.14 -p55002 -d fgedu -U fgedu -c'select count(*) from itpux3';PGOPTIONS='-c gp_session_role=utility' psql -h192.168.100.14 -p55001 -d fgedu -U fgedu -c'select count(*) from itpux3';复制表 每个节点 表的 是一样的
十: greenplum 的 监控配置
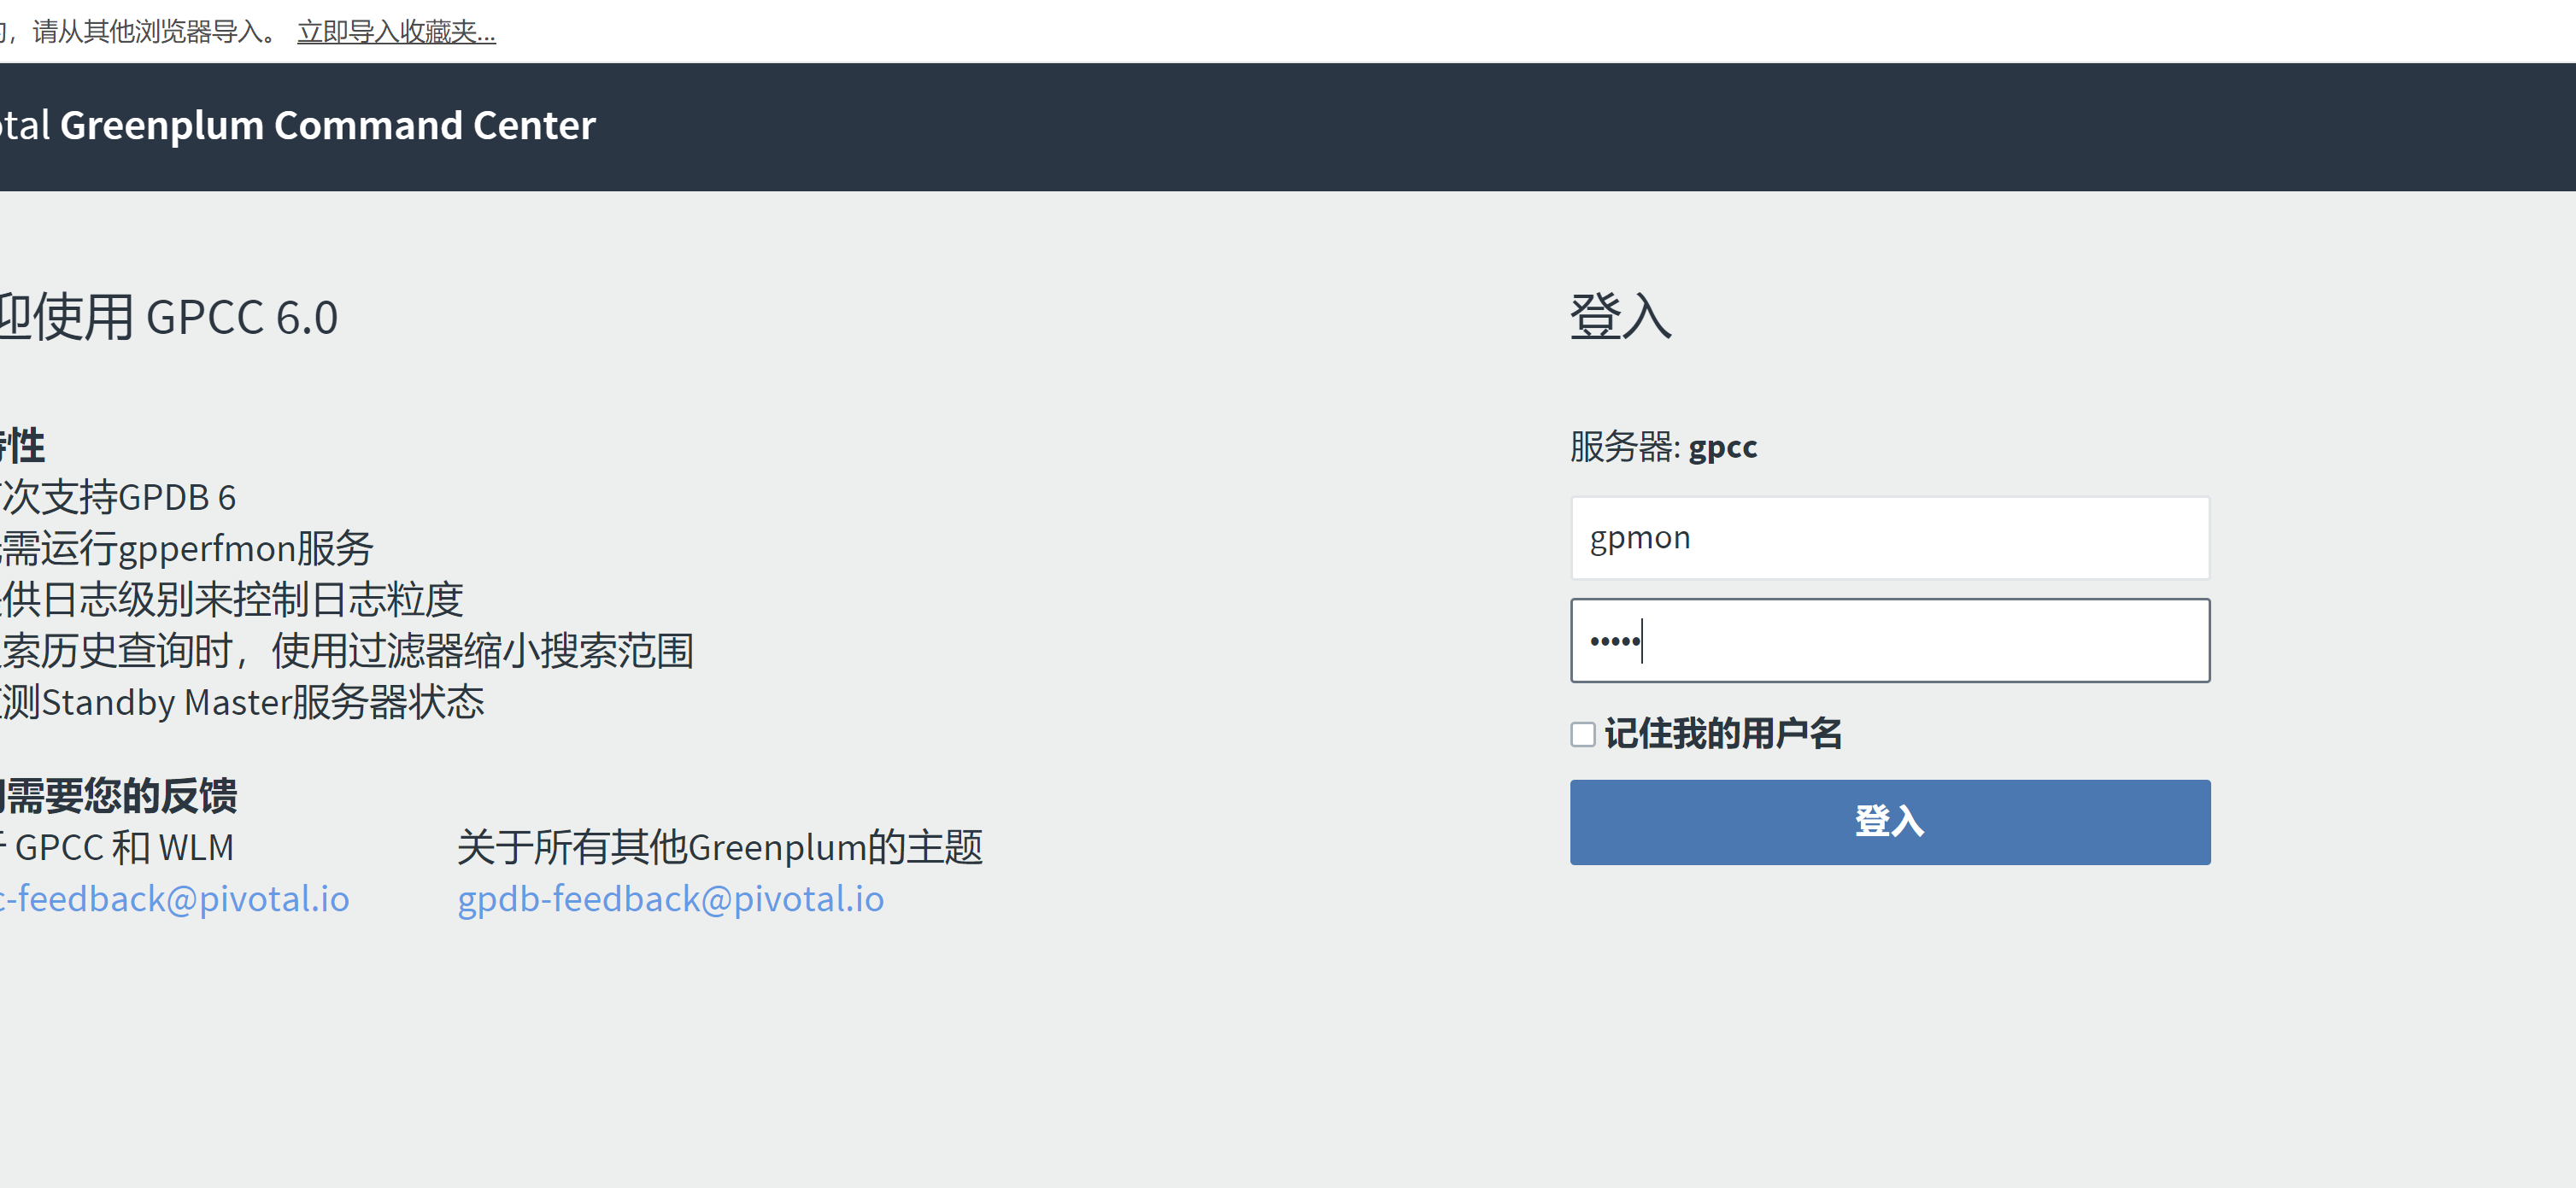
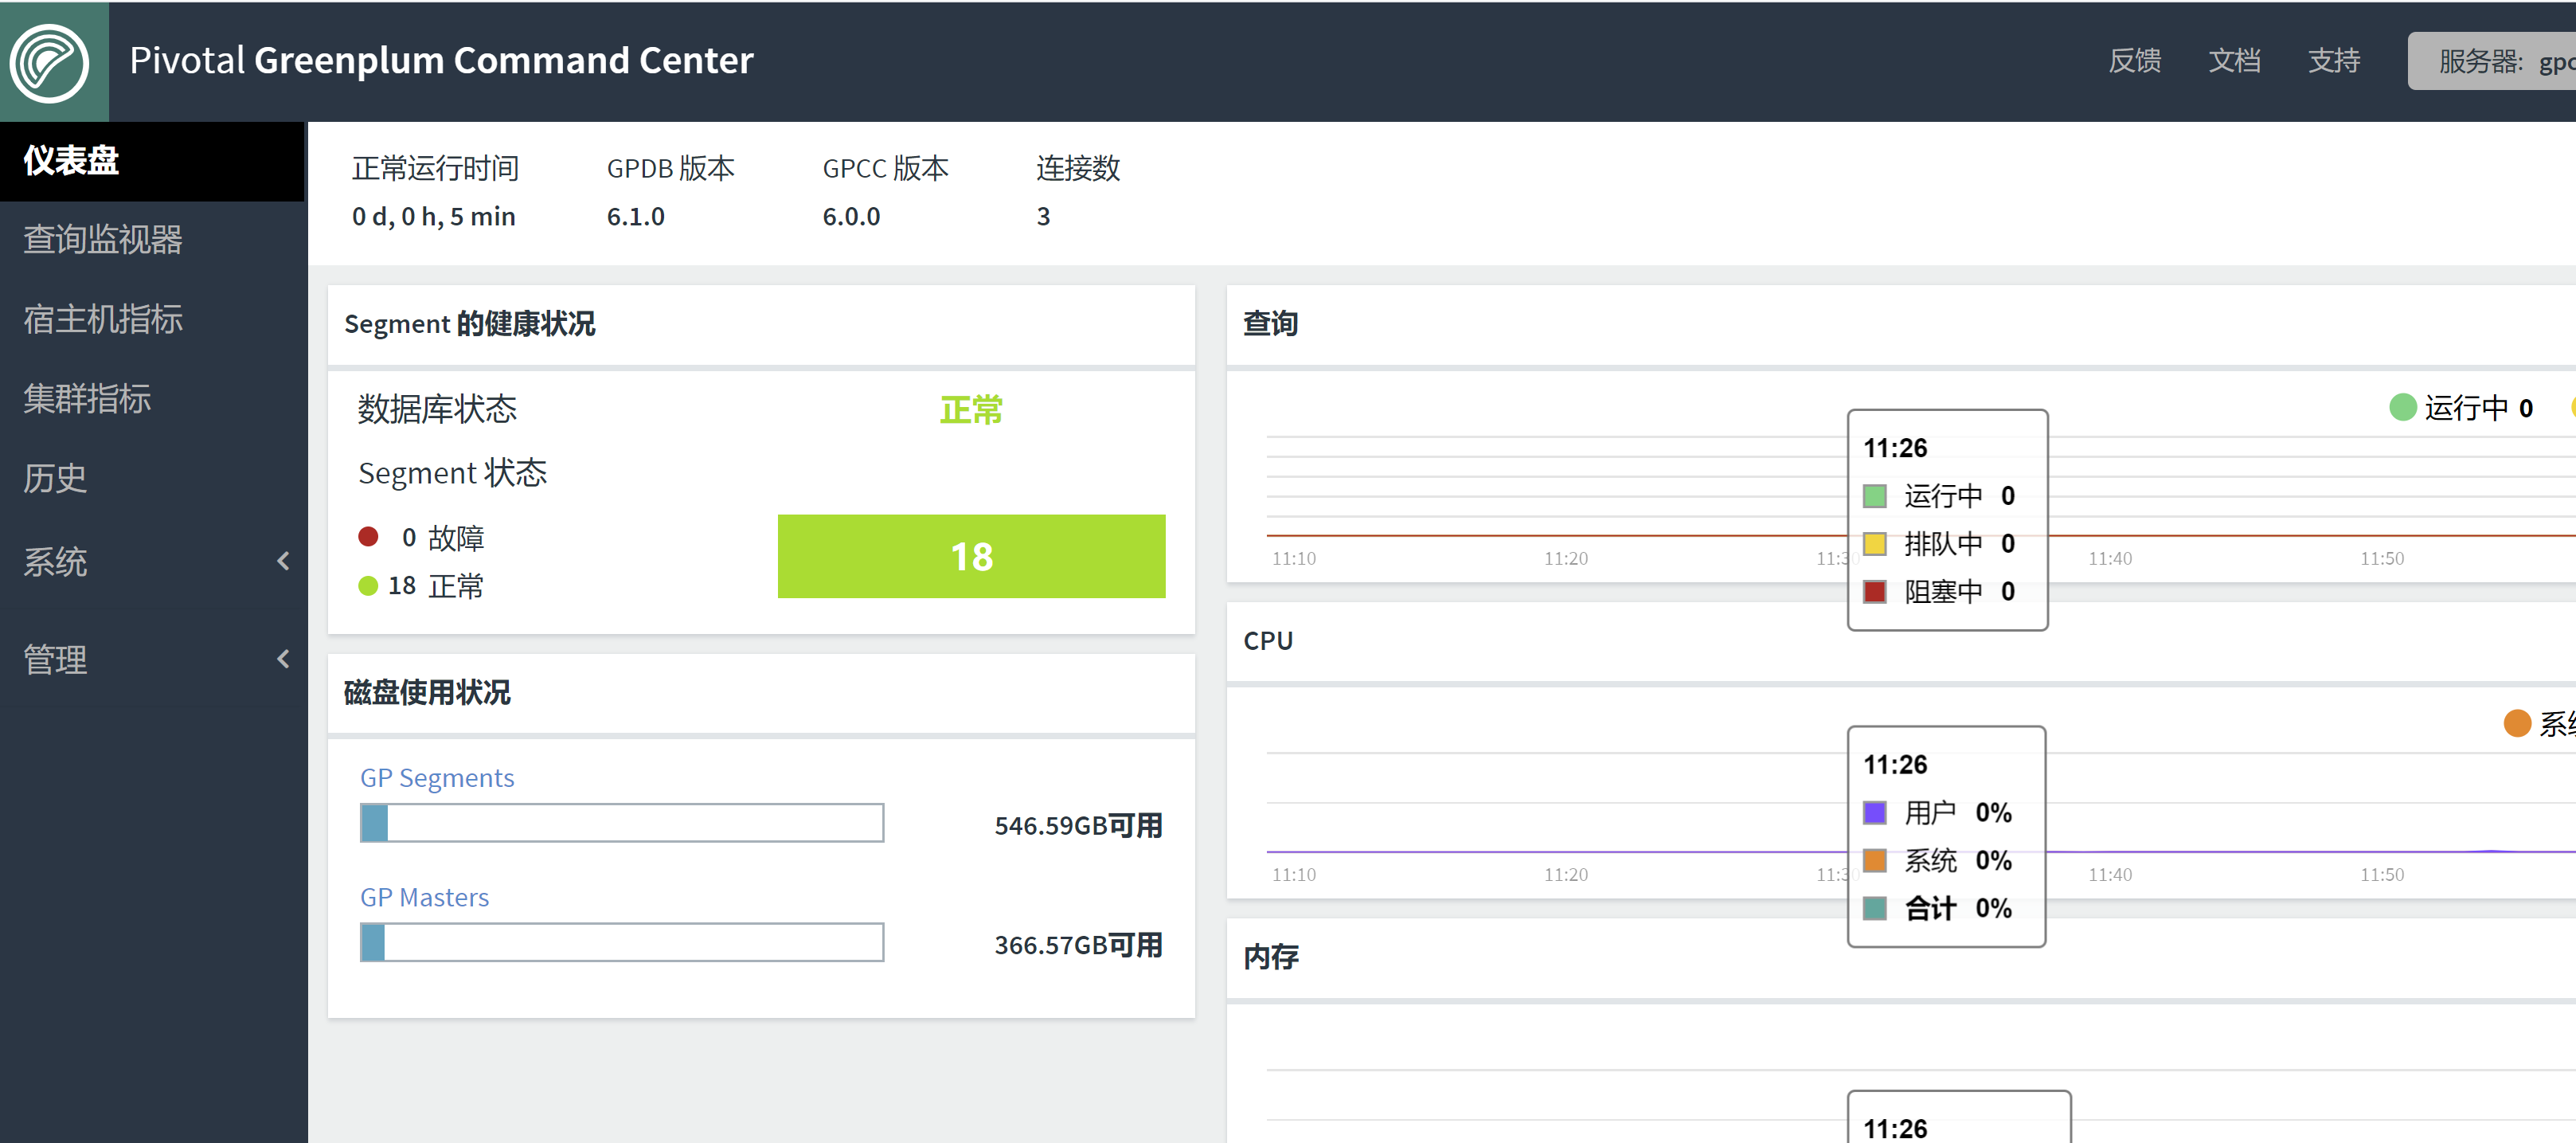
Pivotal Greenplum Command Center6.3 (gpcc 监控平台)下载地址:https://network.pivotal.io/products/pivotal-gpdb/
gpperfmon_install --enable --password gpmon --port 5432
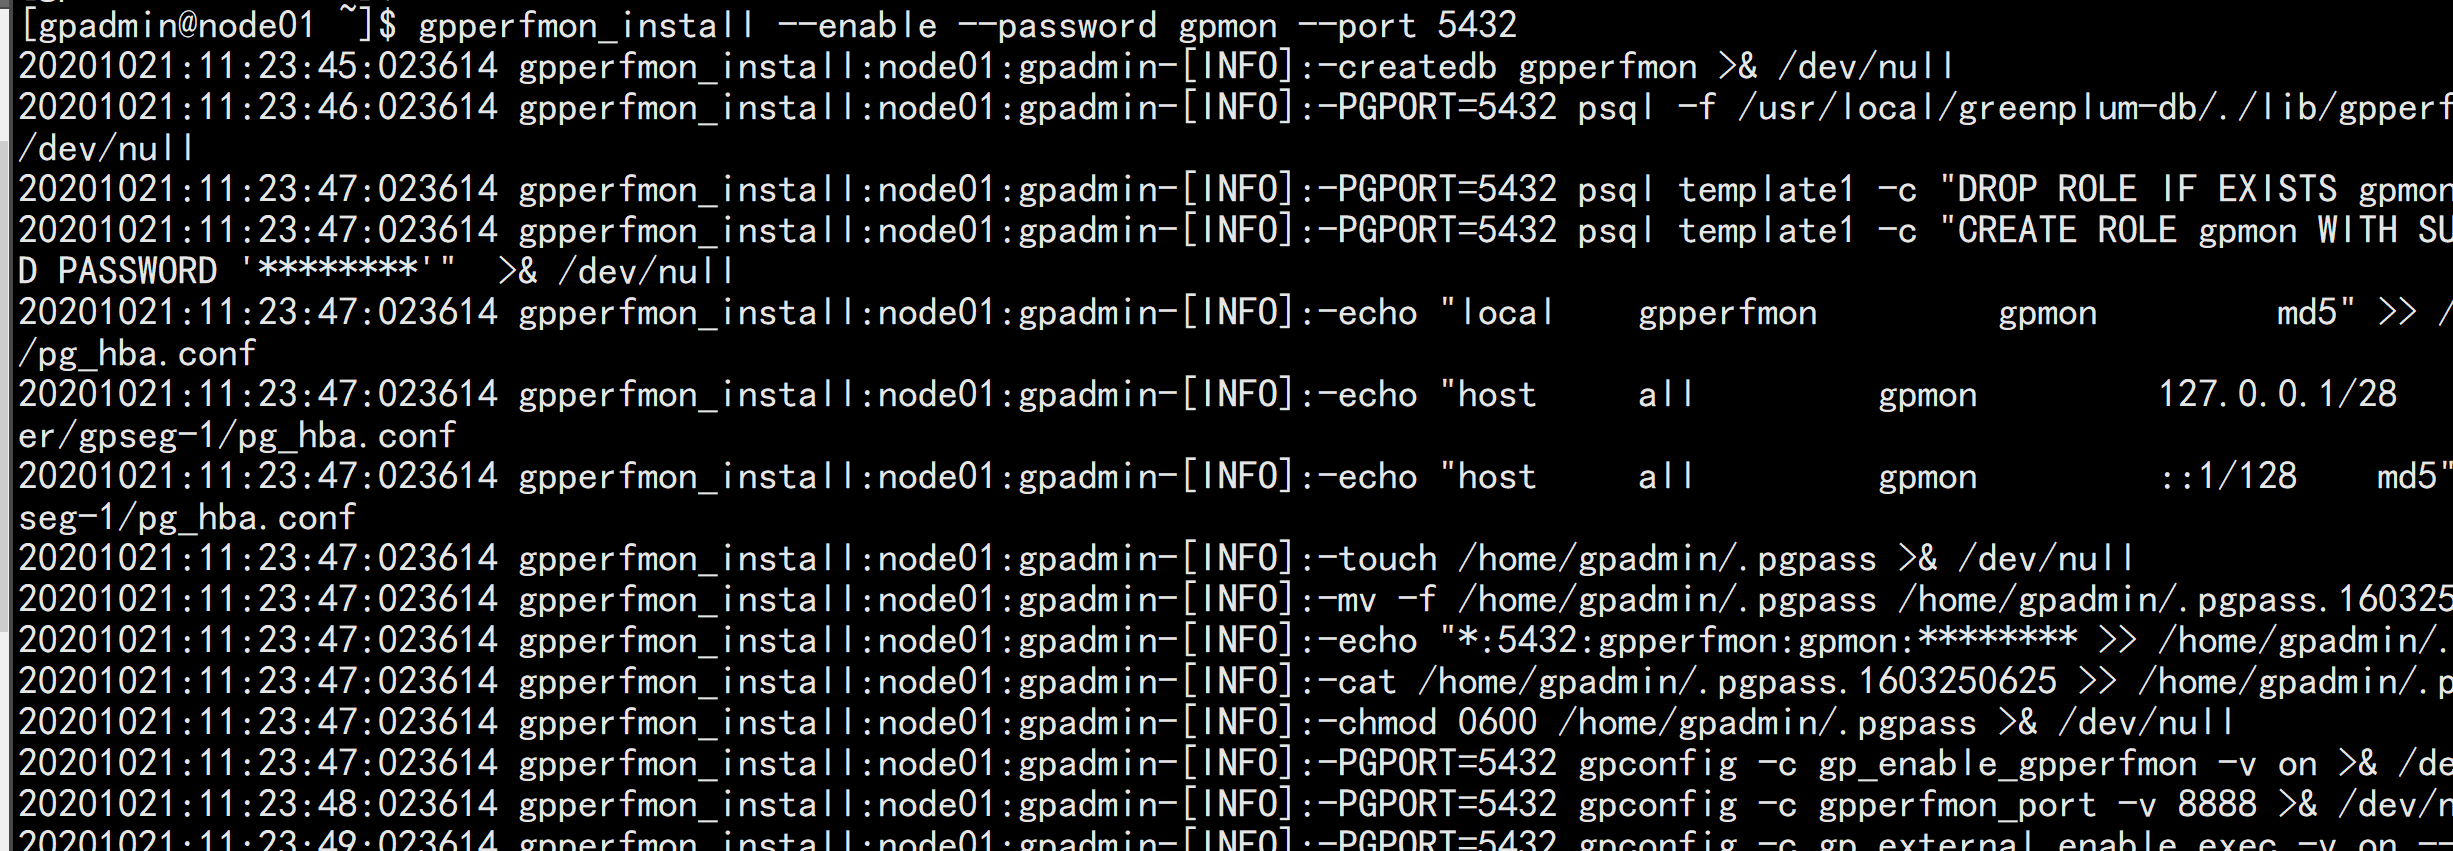
主要是改了如下东西
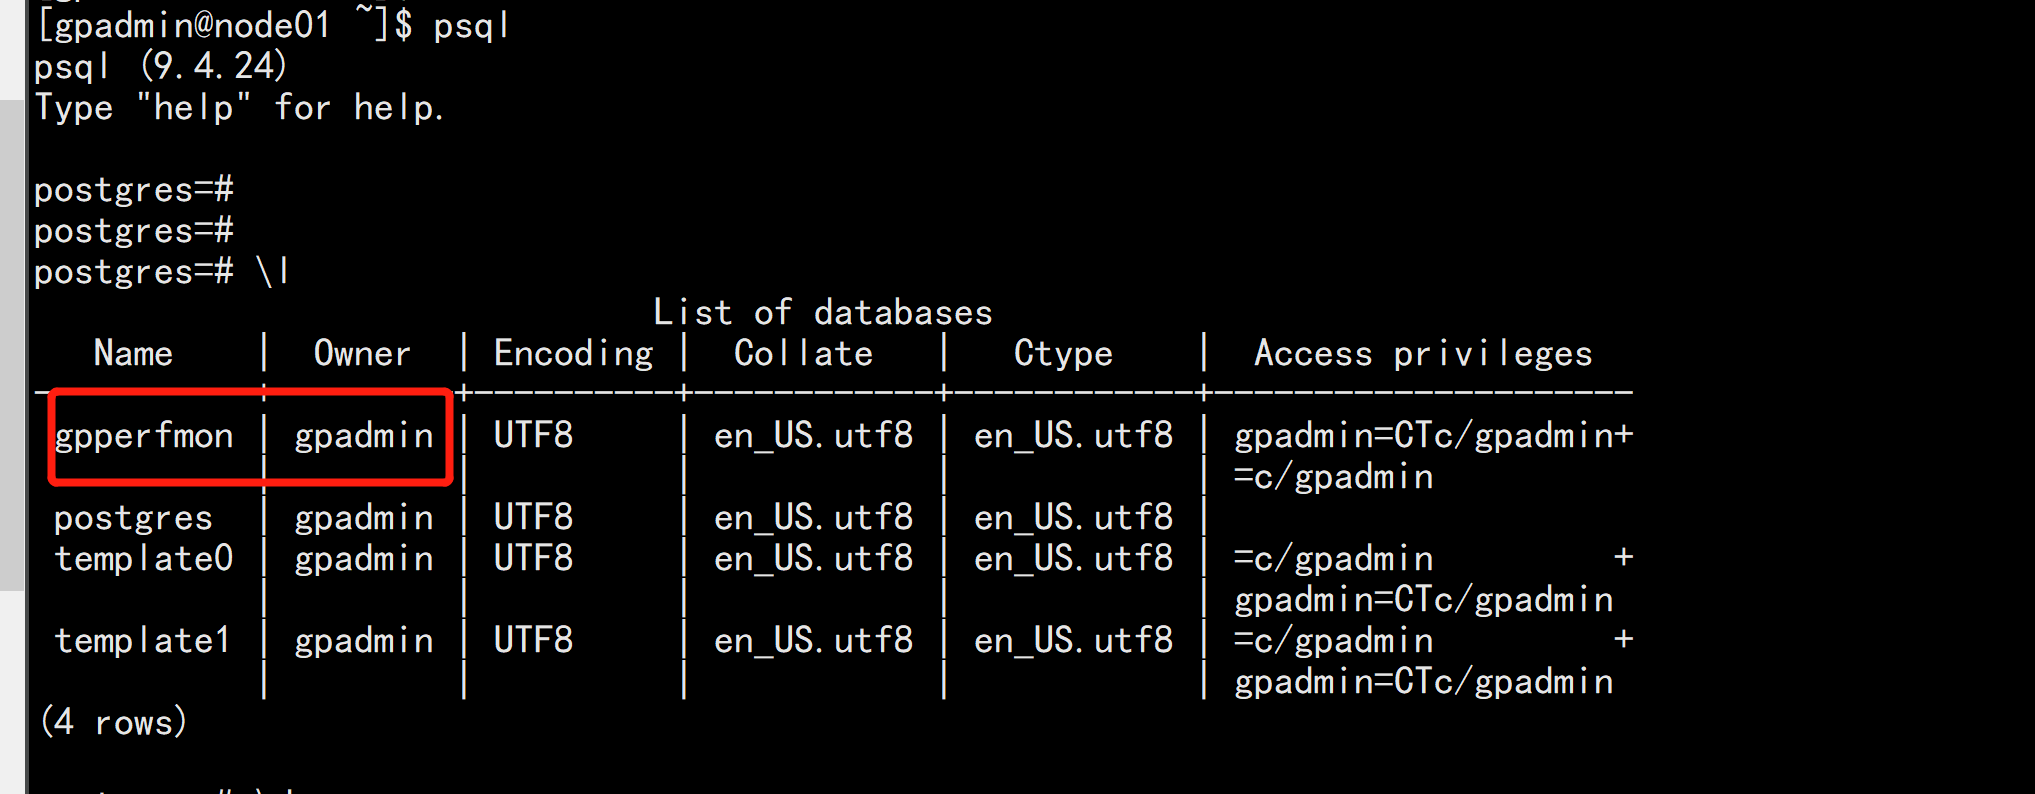
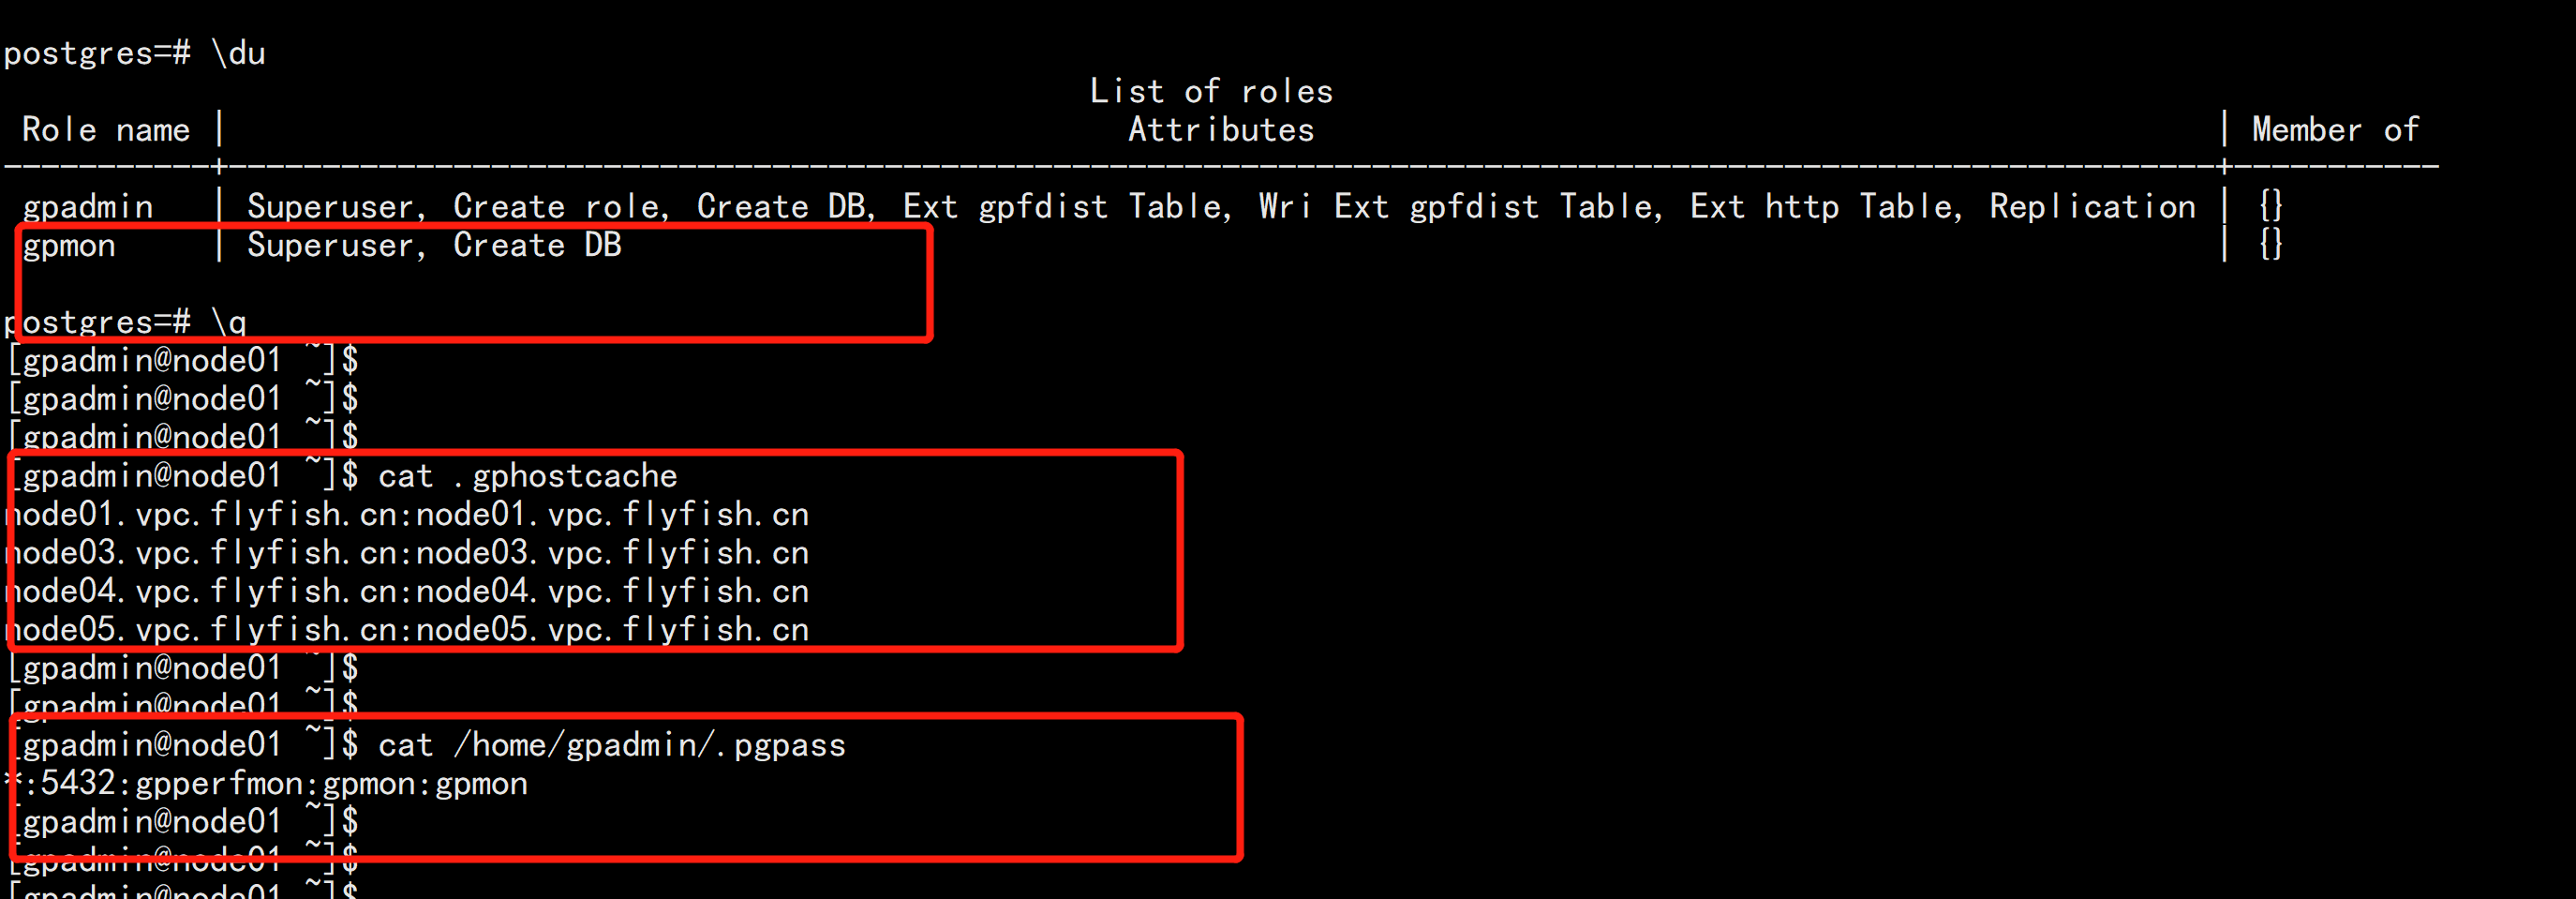
配置文件/greenplum/gpdata/master/gpseg-1/postgresql.conf访问权限/greenplum/gpdata/master/gpseg-1/pg_hba.conf


重启GP数据库gpstop -r -a


ps -ef |grep gp/greenplum/gpdata/master/gpseg-1/gpperfmon/conf/生成一个配置文件gpperfmon.conf/greenplum/gpdata/master/gpseg-1/gpperfmon/logs 日志路径

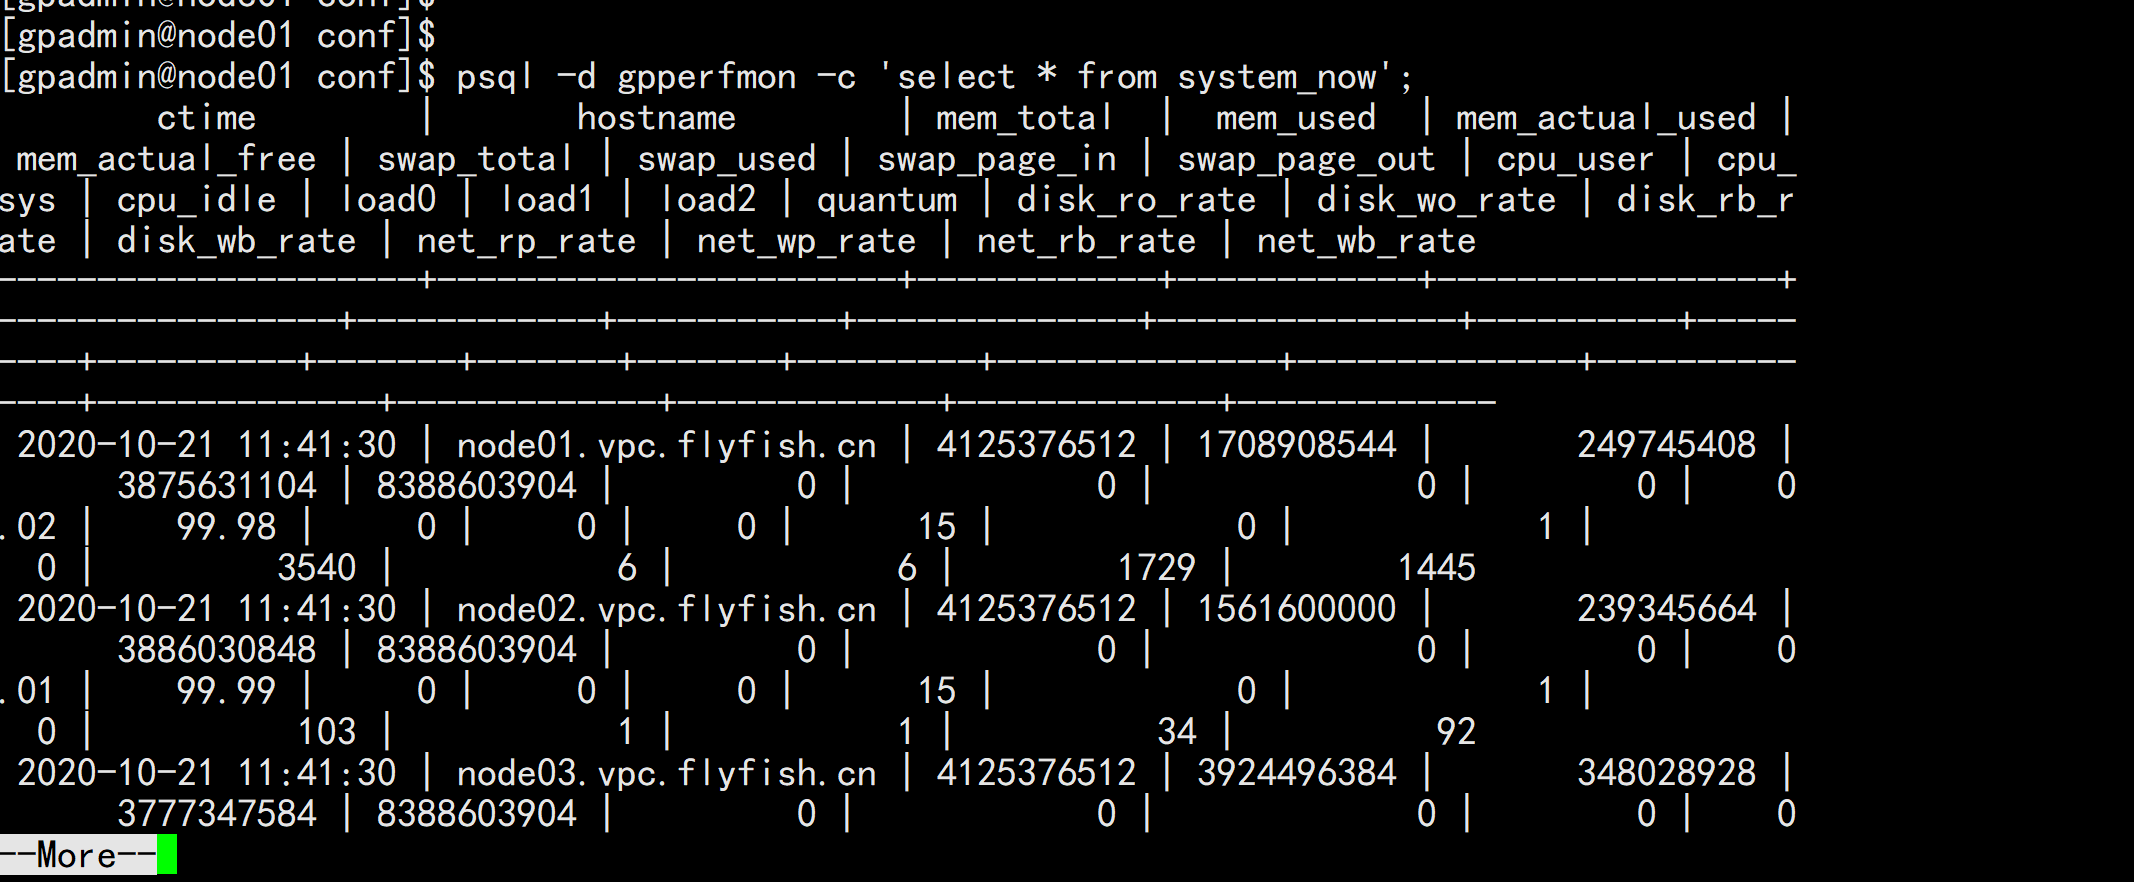
psql -d gpperfmon -c 'select * from system_now';
当master 挂掉之后启用 standby 的时候涉及同步问题cd /greenplum/gpdata/master/gpseg-1scp pg_hba.conf gpadmin@192.168.100.12:/greenplum/gpdata/master/gpseg-1/scp ~/.pgpass gpadmin@192.168.100.12:~/

下面安装 greenplum-cc-web 配置 使用gpadmin用户安装cd /greenplum/soft/unzip greenplum-cc-web-6.0.0-rhel7_x86_64.zip

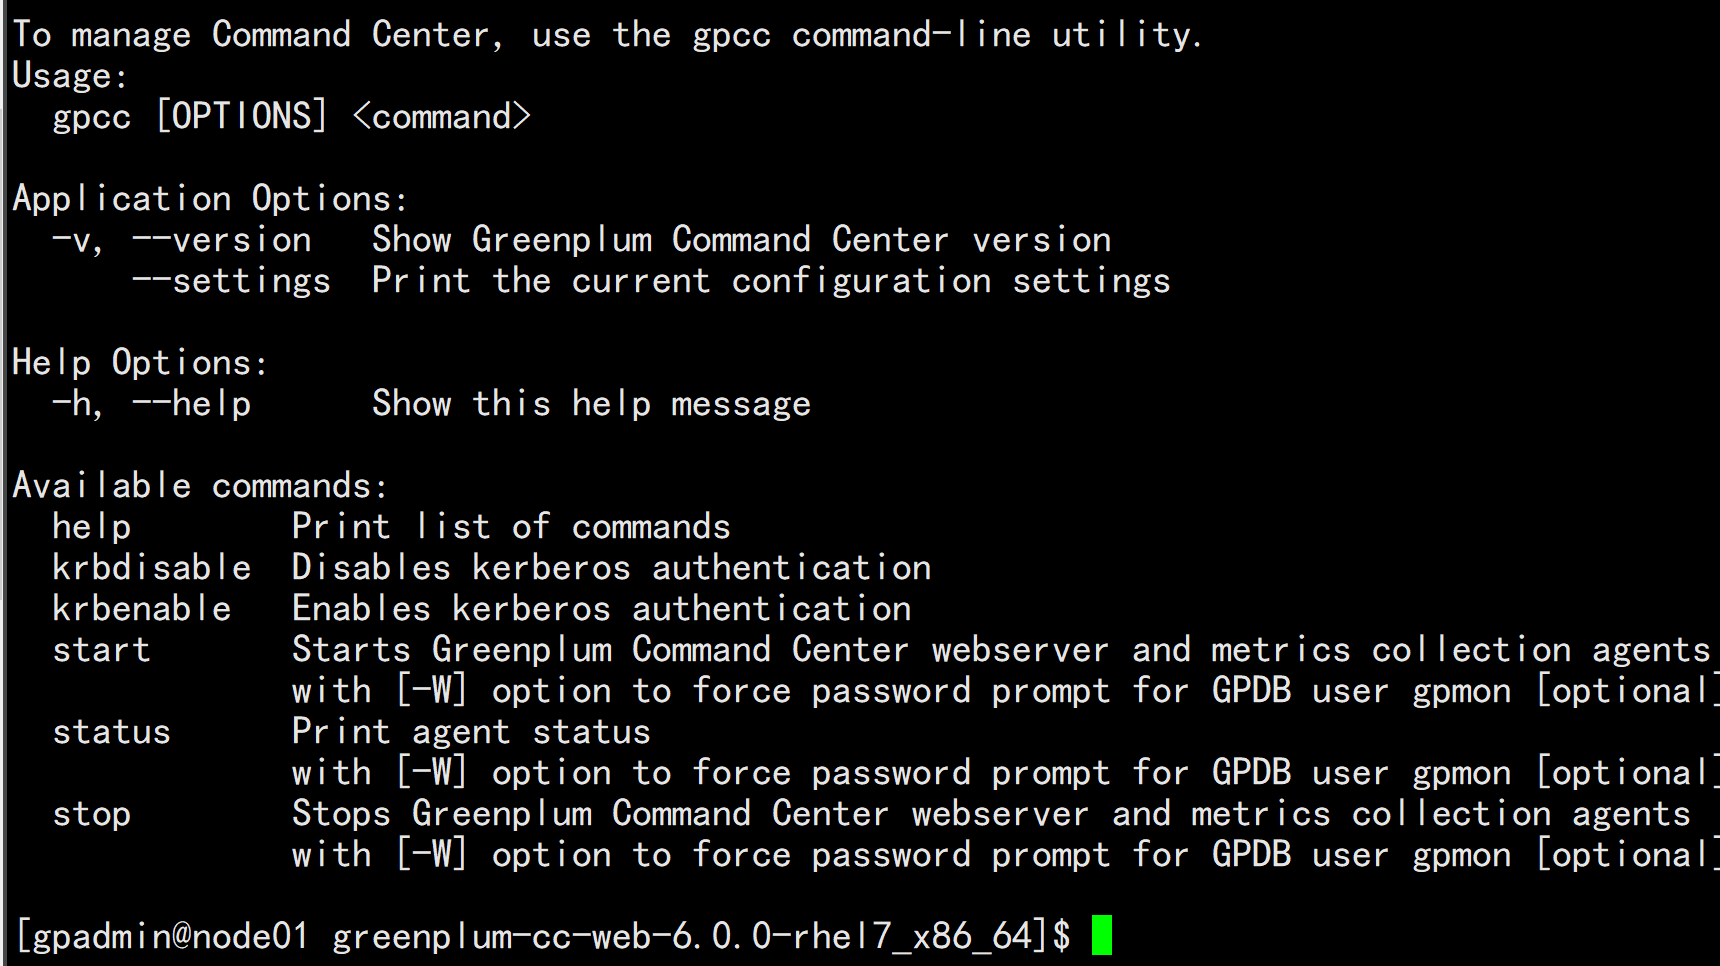
cd greenplum-cc-web-6.0.0-rhel7_x86_64./gpccinstall-6.0.0会在所有的主机上面安装安装目录为 /greenplum/greenplum-cc-web-6.0.0

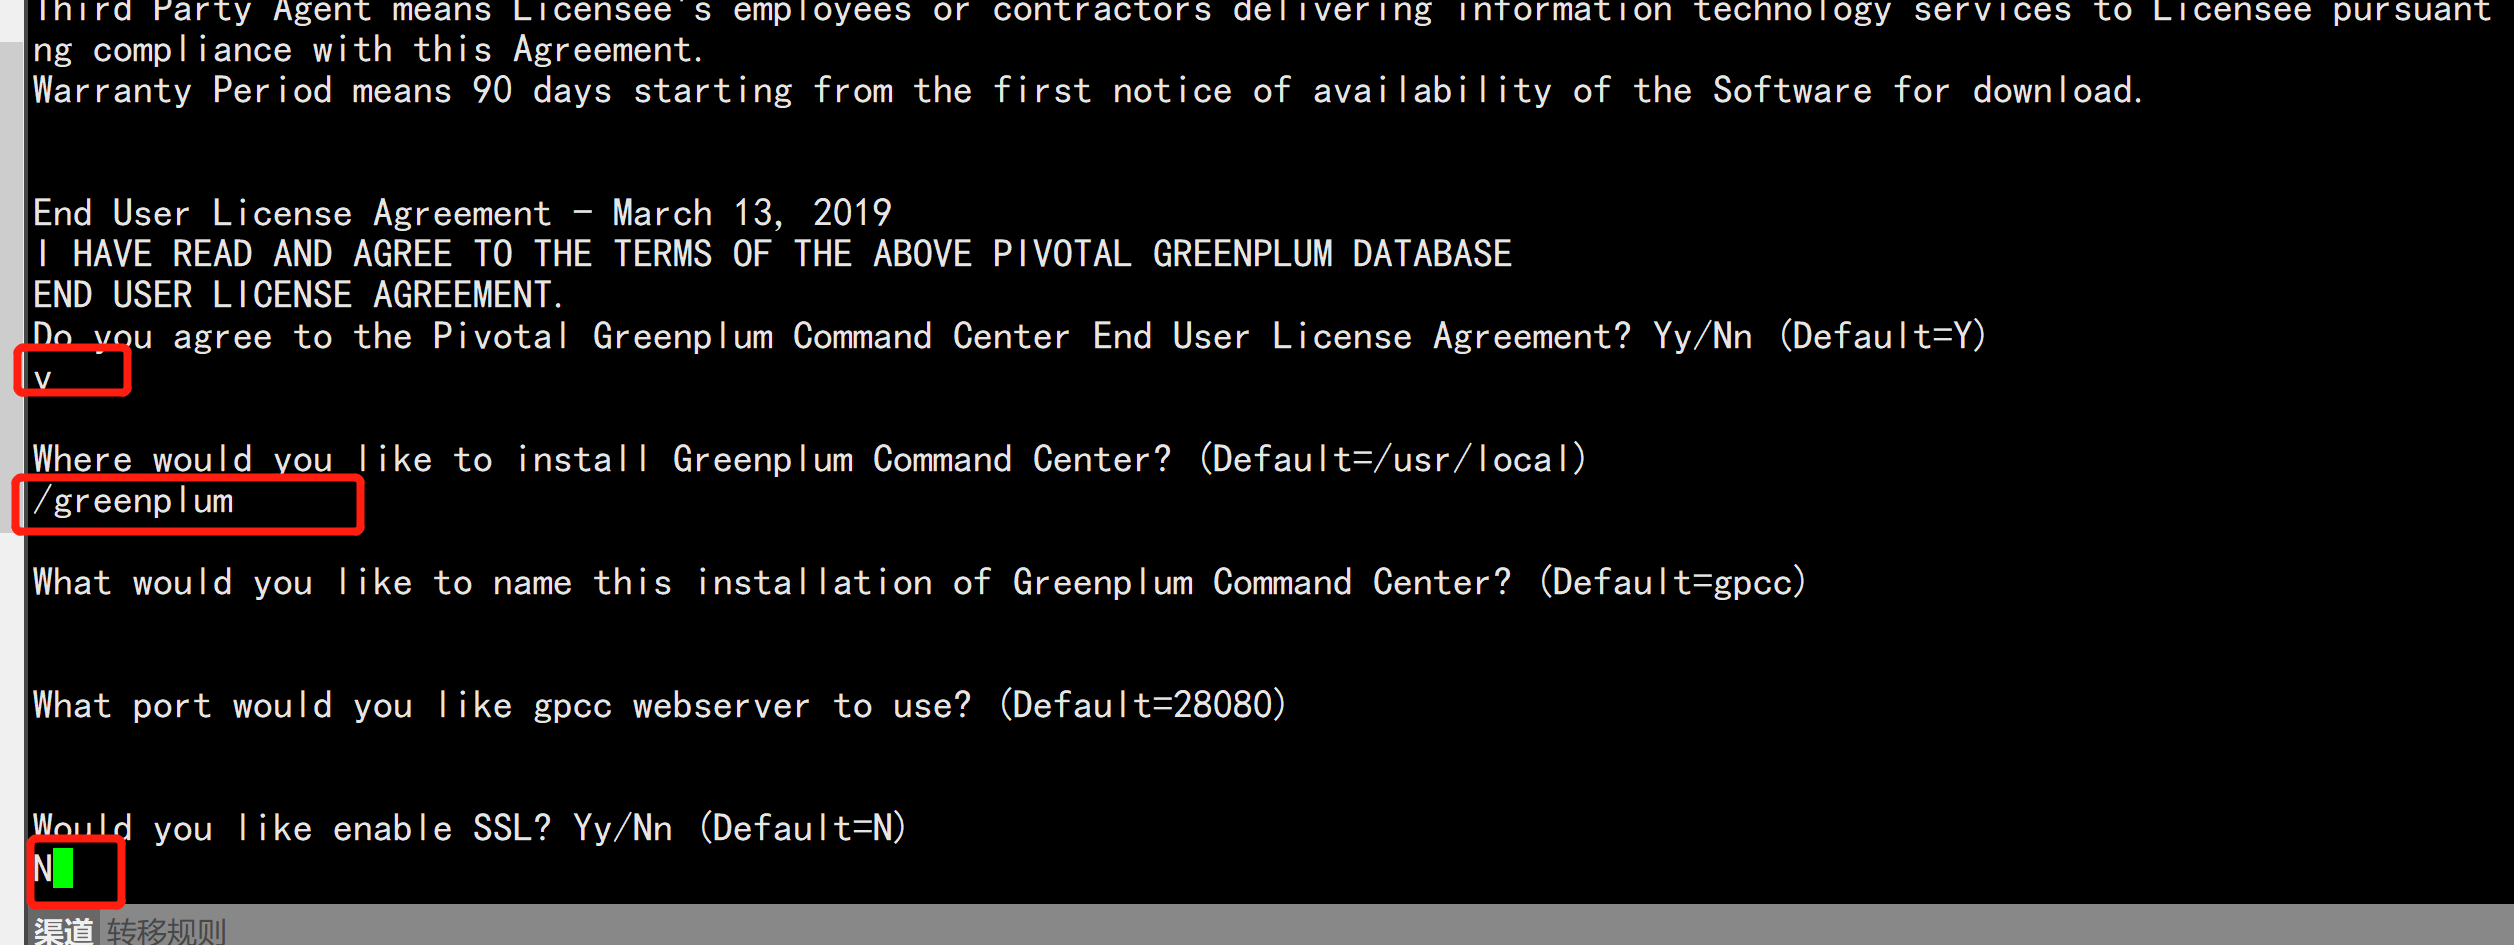
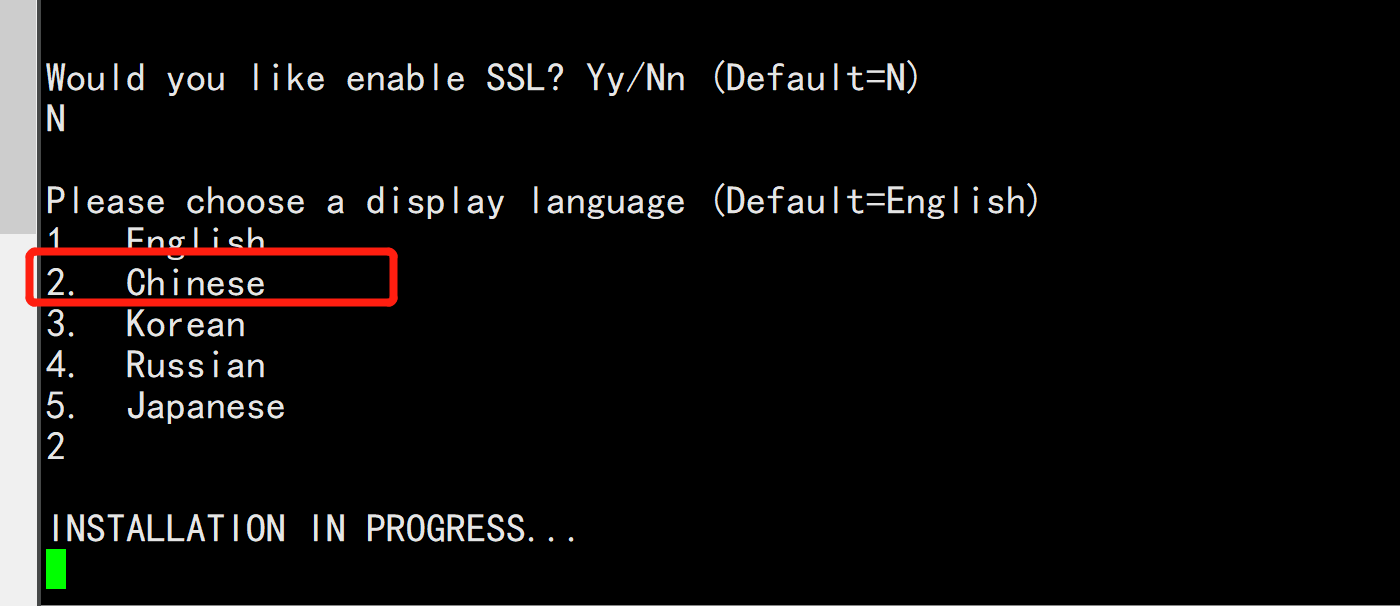
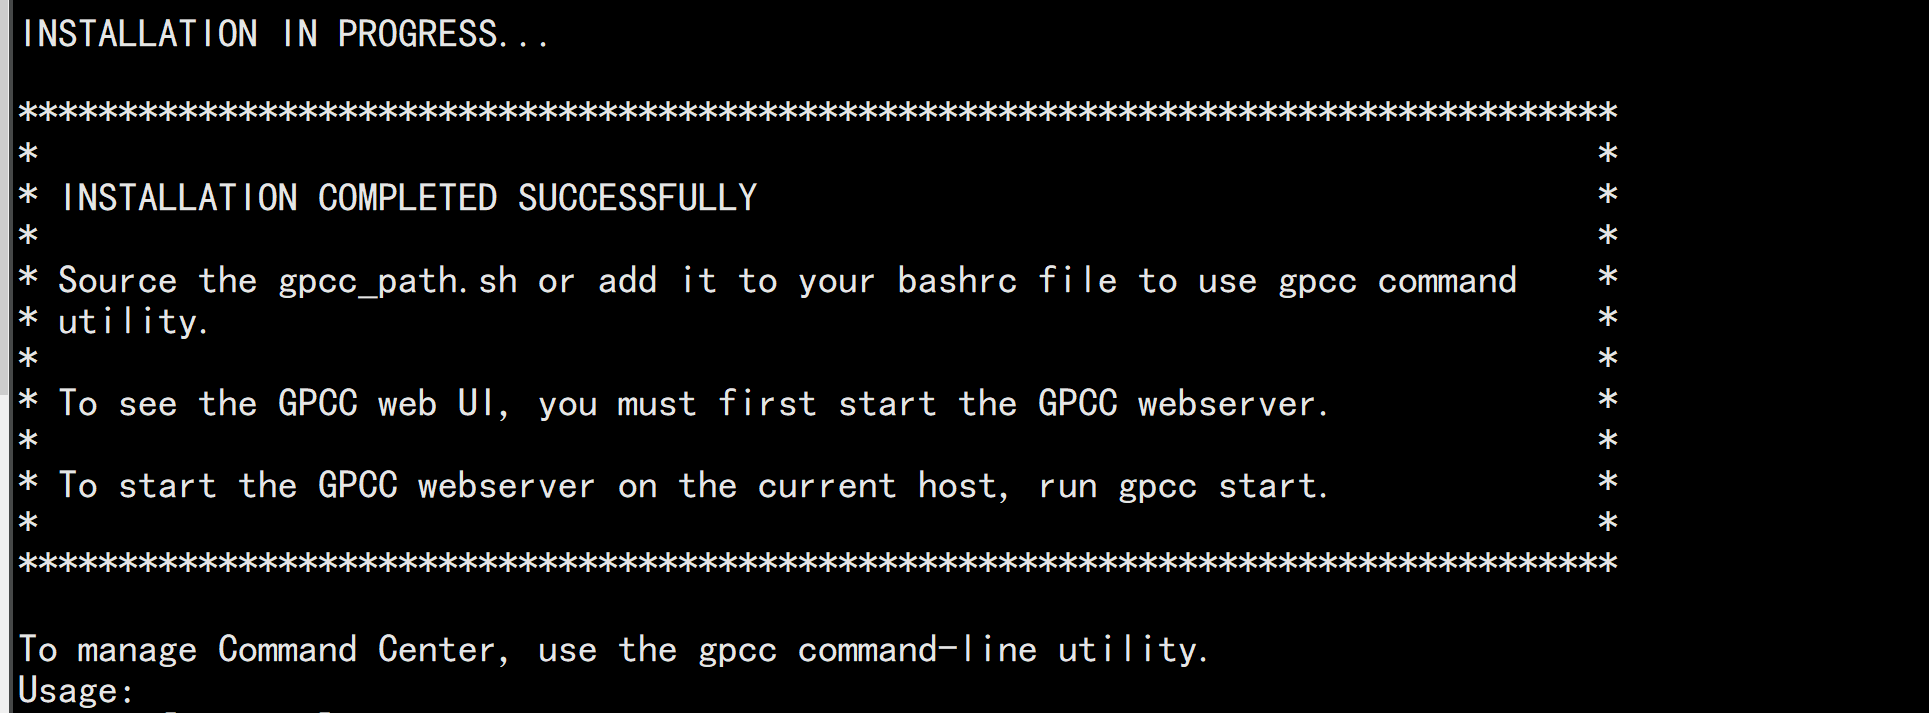
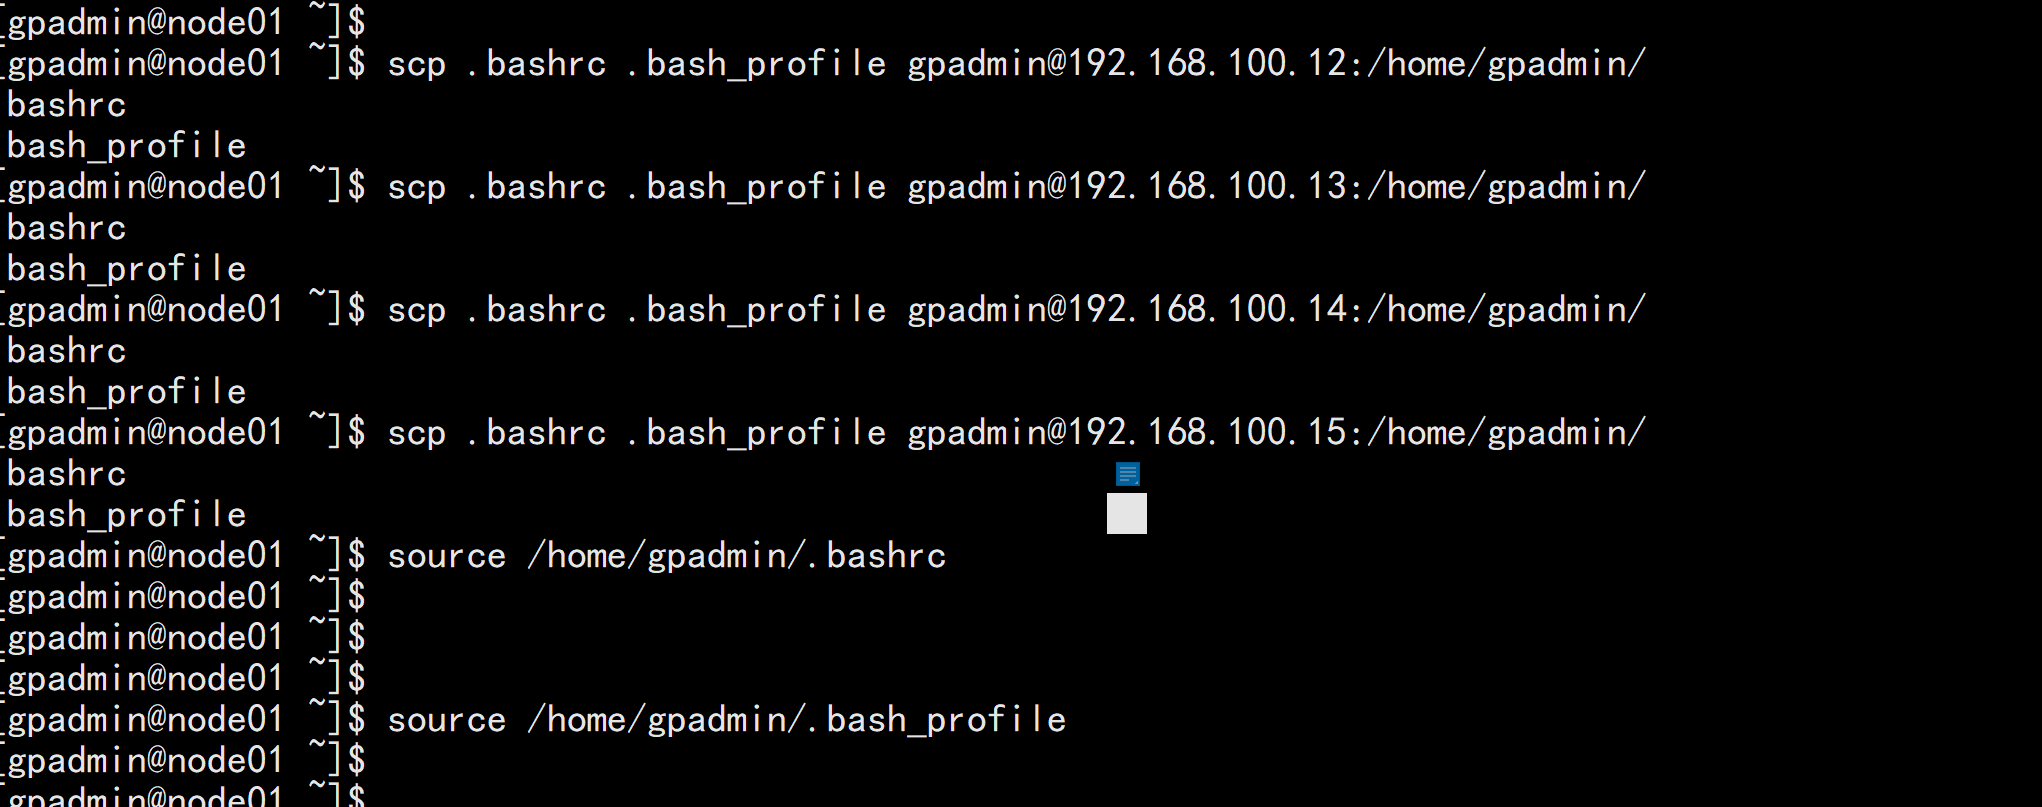
加载gpcc_path.sh 文件---vim .bash_profilesource /greenplum/greenplum-cc-web-6.0.0/gpcc_path.sh------vim .bashrcsource /greenplum/greenplum-cc-web-6.0.0/gpcc_path.sh---同步所有主机scp .bashrc .bash_profile gpadmin@192.168.100.12:/home/gpadmin/scp .bashrc .bash_profile gpadmin@192.168.100.13:/home/gpadmin/scp .bashrc .bash_profile gpadmin@192.168.100.14:/home/gpadmin/scp .bashrc .bash_profile gpadmin@192.168.100.15:/home/gpadmin/source /home/gpadmin/.bash_profilesource /home/gpadmin/.bashrc
cd /greenplum/gpdata/master/gpseg-1/vim pg-hba.conf增加一行授权---host gpperfmon gpmon 192.168.100.11/32 md5---

gpcc start


gpconfig -s gp_enable_gpperfmon修改gpconfig -c gp_enable_gpperfmon -v off

浏览器打开http://192.168.100.11:28080/用户名、密码 cat /home/gpadmin/.pgpassgpmon/gpmon


