@zhangyy
2020-05-18T07:45:44.000000Z
字数 5835
阅读 585
大数据平台 CDH6.1.0 安装配置
大数据平台构建
- 一: 关于CDH6.1.0 的介绍
- 二: 系统环境初始化
- 三: 安装CDH6.1.0所需环境
- 四: 配置CDH6.1.0的cloudera-manager安装
一:关于CDH6.1.0 的介绍
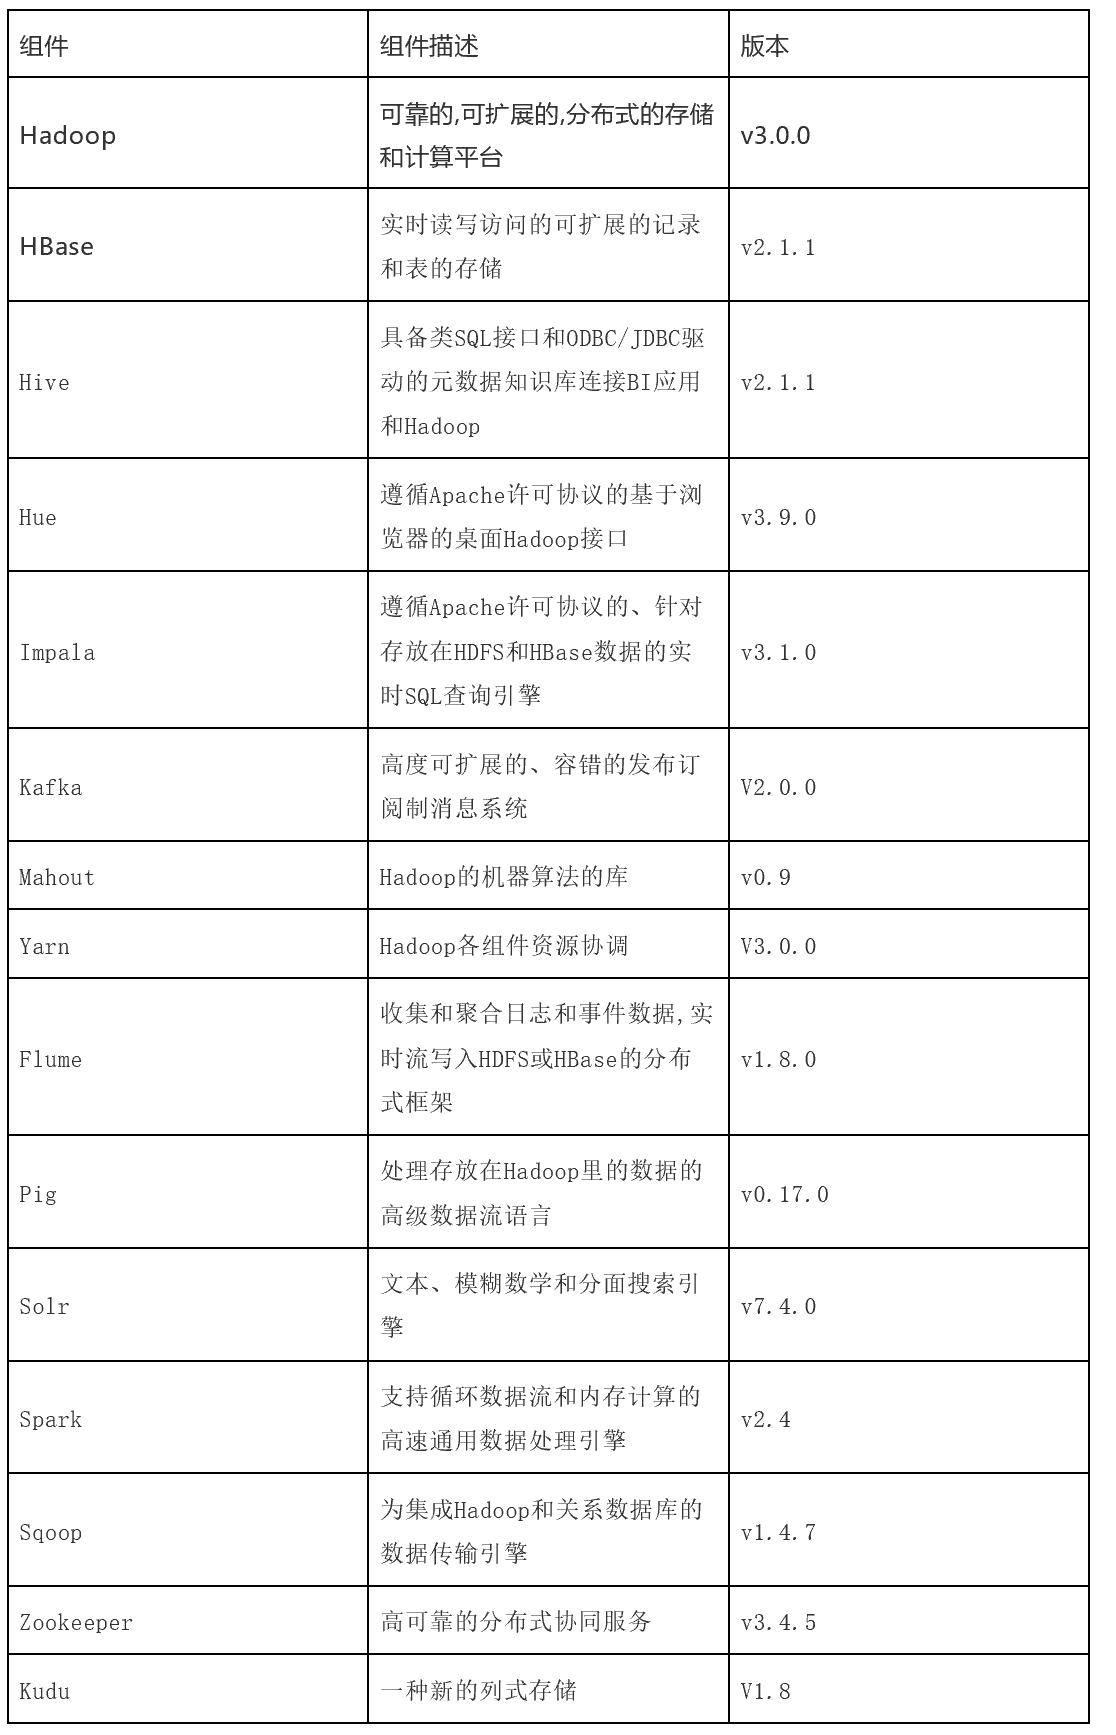
Cloudera在前天12月19日,对外宣布正式发布Cloudera Enterprise 6.1包含大数据生态版本如下:1.组件版本:Kafka 2.0, Spark 2.4, HBase 2.1.1, Accumulo 1.9.2, SOLR 7.42.CDH免费版限制100个节点内3.HDFS的纠删码完全支持,包括Hive,Navigator(auditing),BDR,MR,Spark4.对象存储支持:On-prem (Ceph), Cloud (ADLS gen 2)5.Impala的多个distinct语句支持6.Sqoop的HiveServer2与导入Parquet文件支持7.OpenJDK支持
二:系统环境初始化
2.1: 系统环境介绍
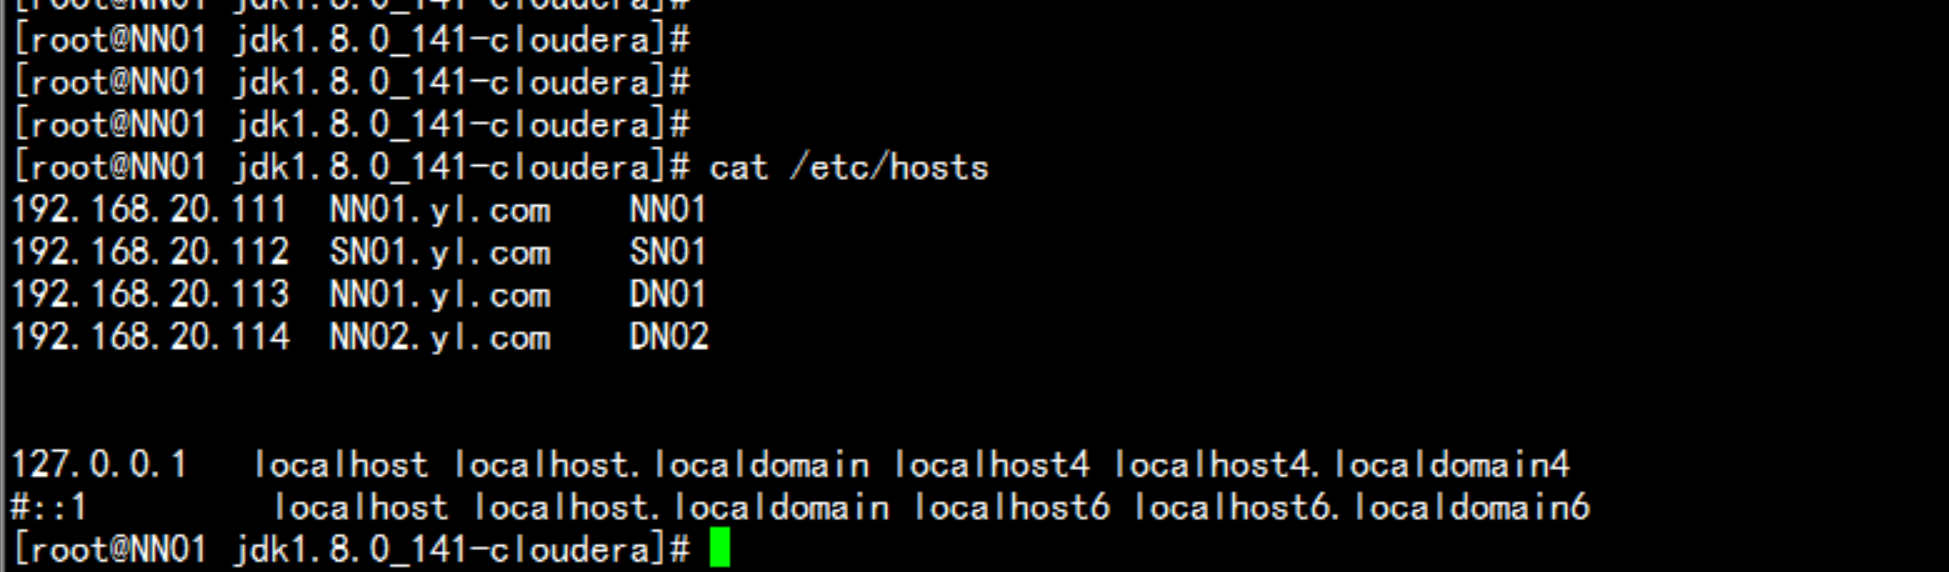
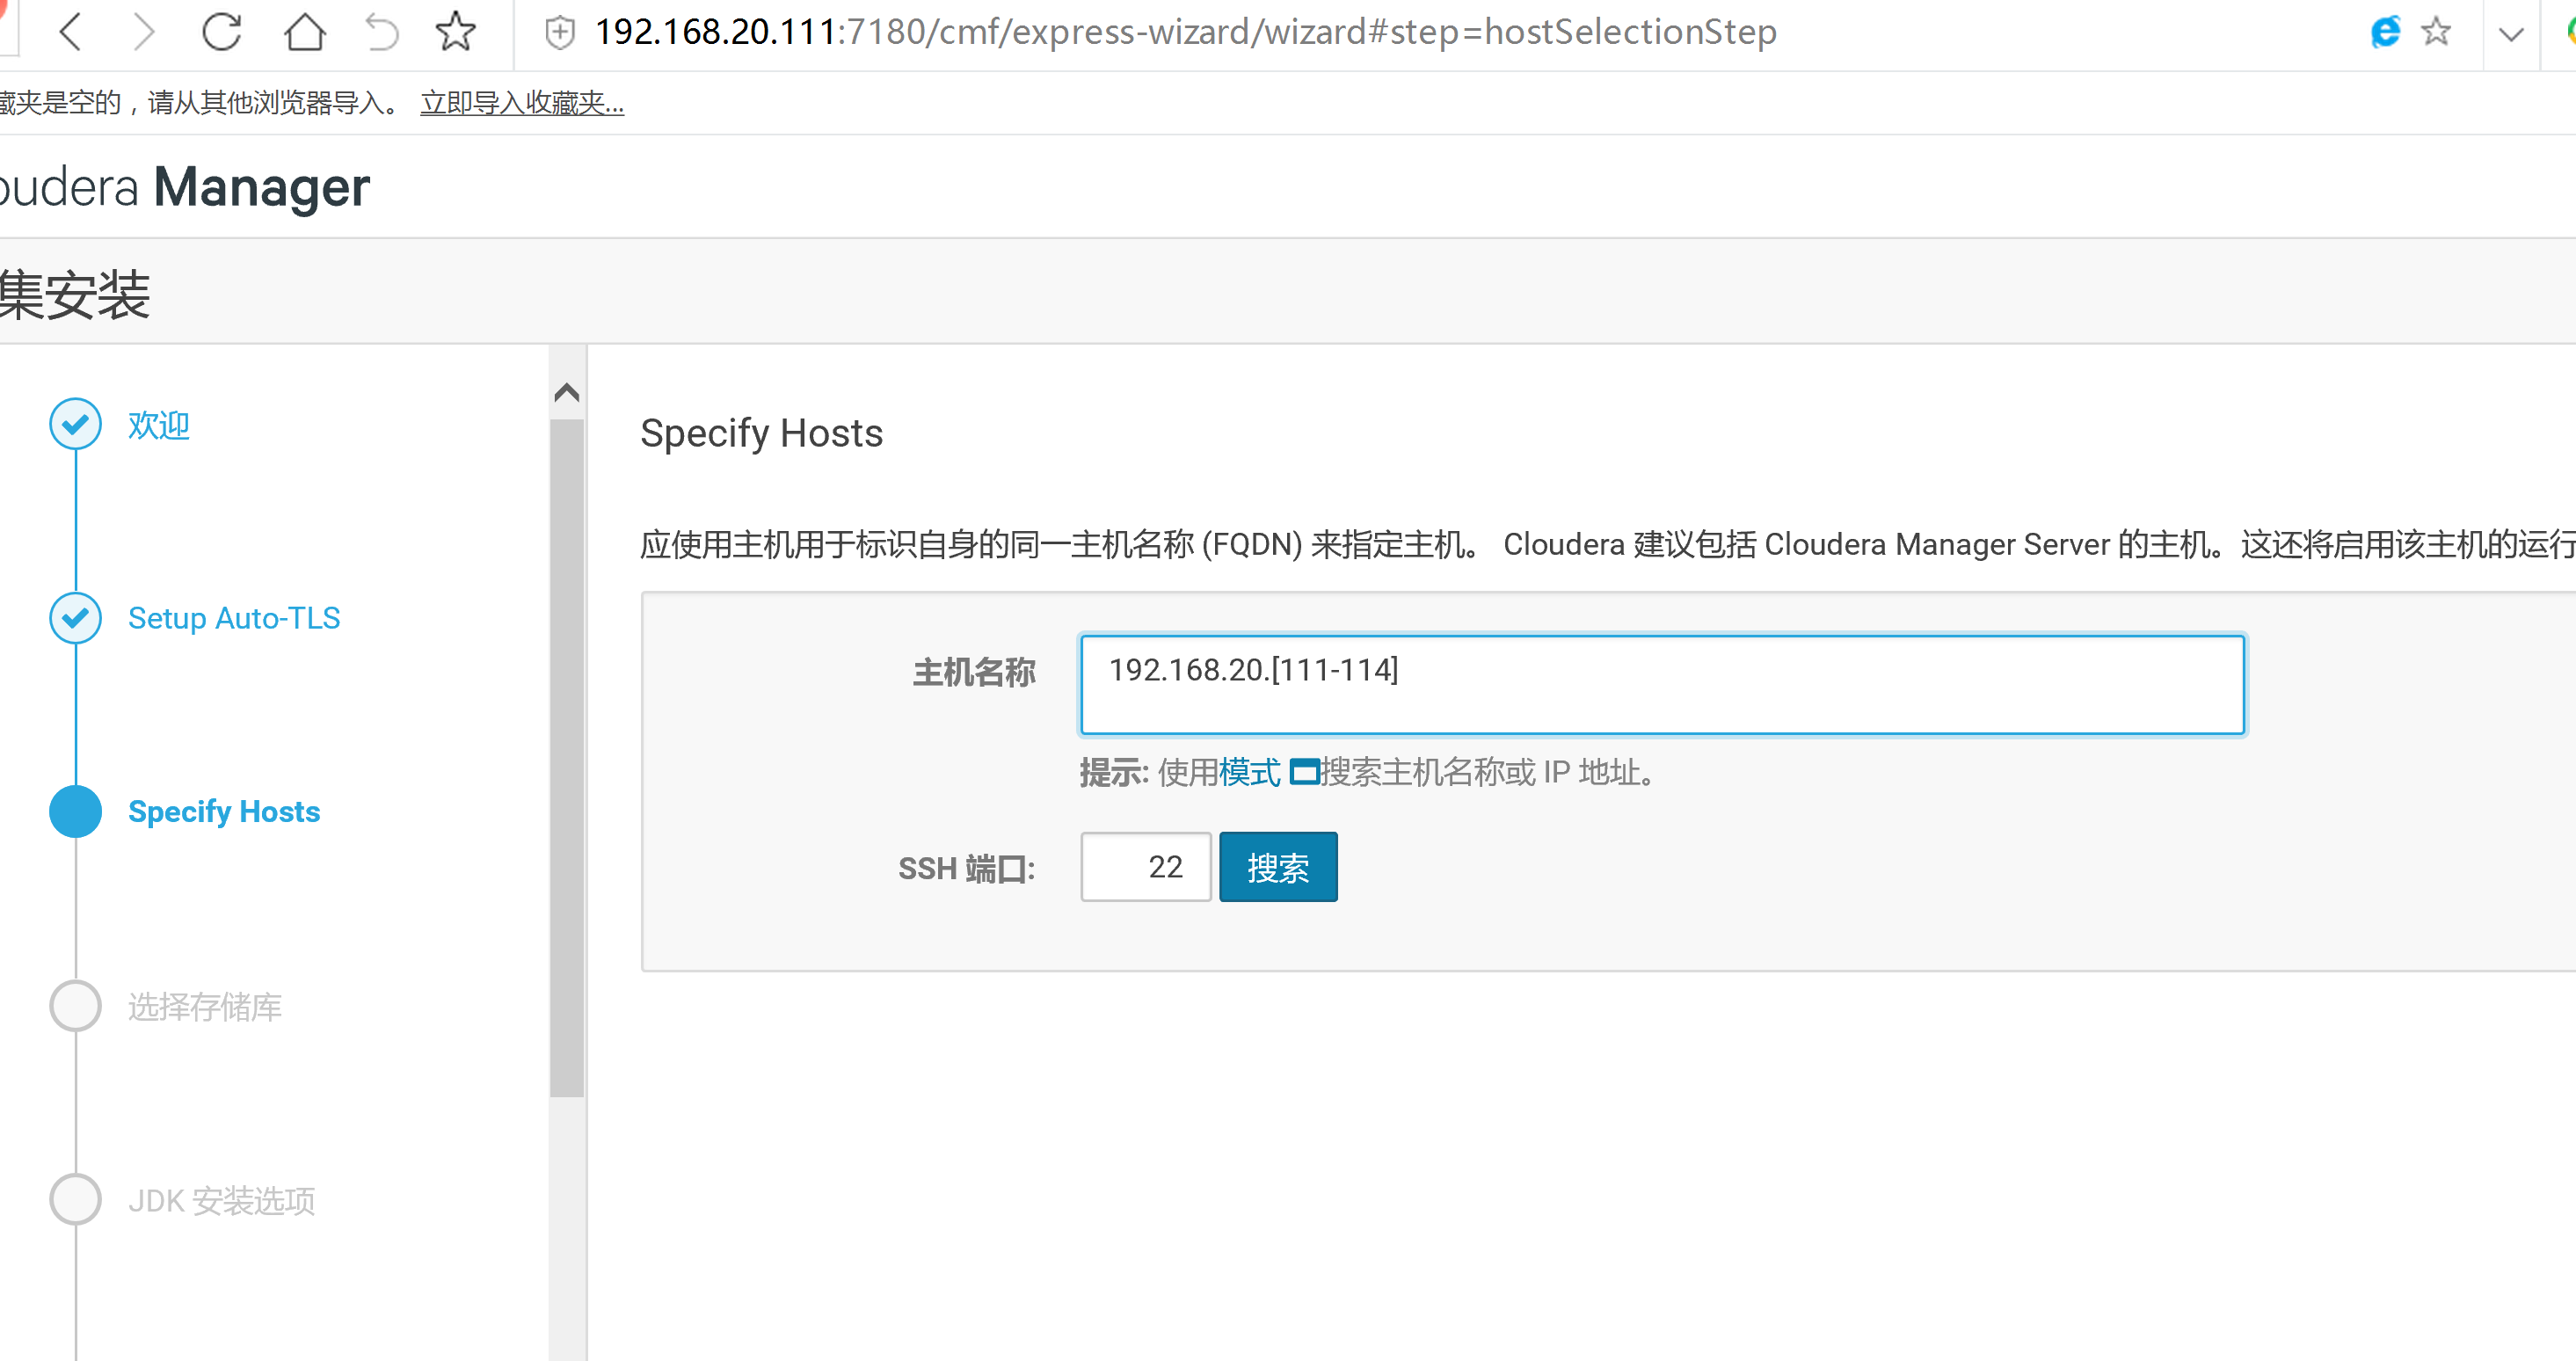
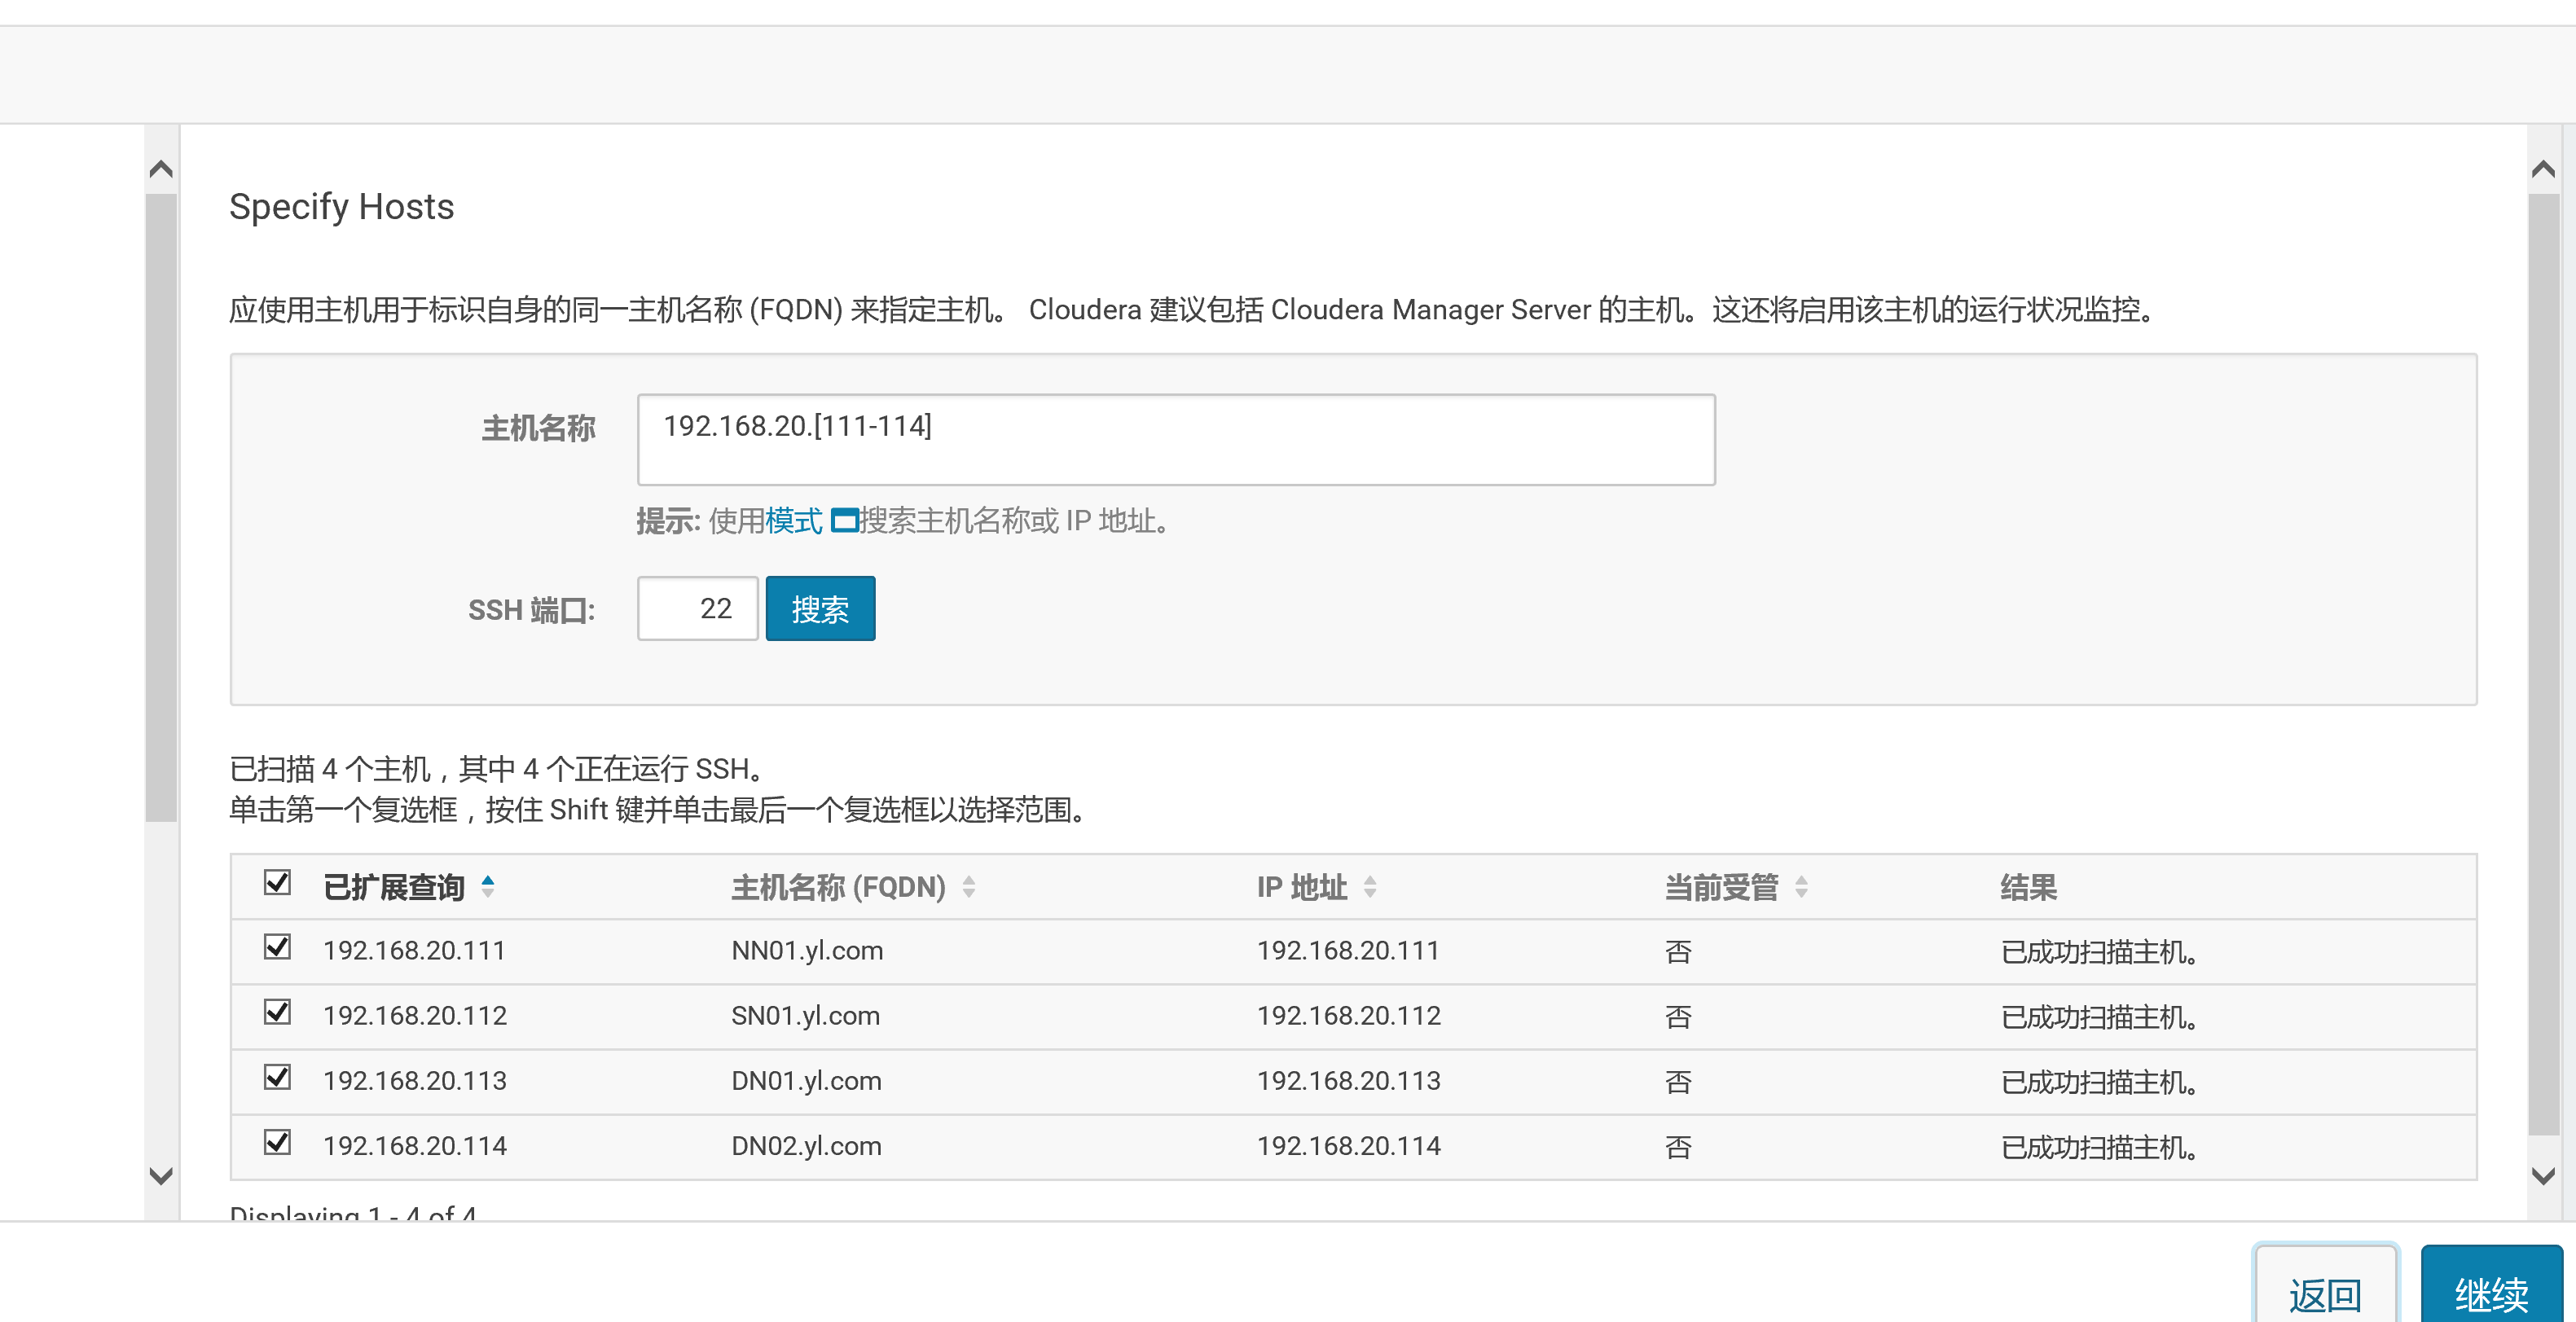
系统:CentOS7.5X64cat /etc/hosts192.168.20.111 NN01.yl.com NN01192.168.20.112 SN01.yl.com SN01192.168.20.113 NN01.yl.com DN01192.168.20.114 NN02.yl.com DN02
2.2:无密钥登录配置
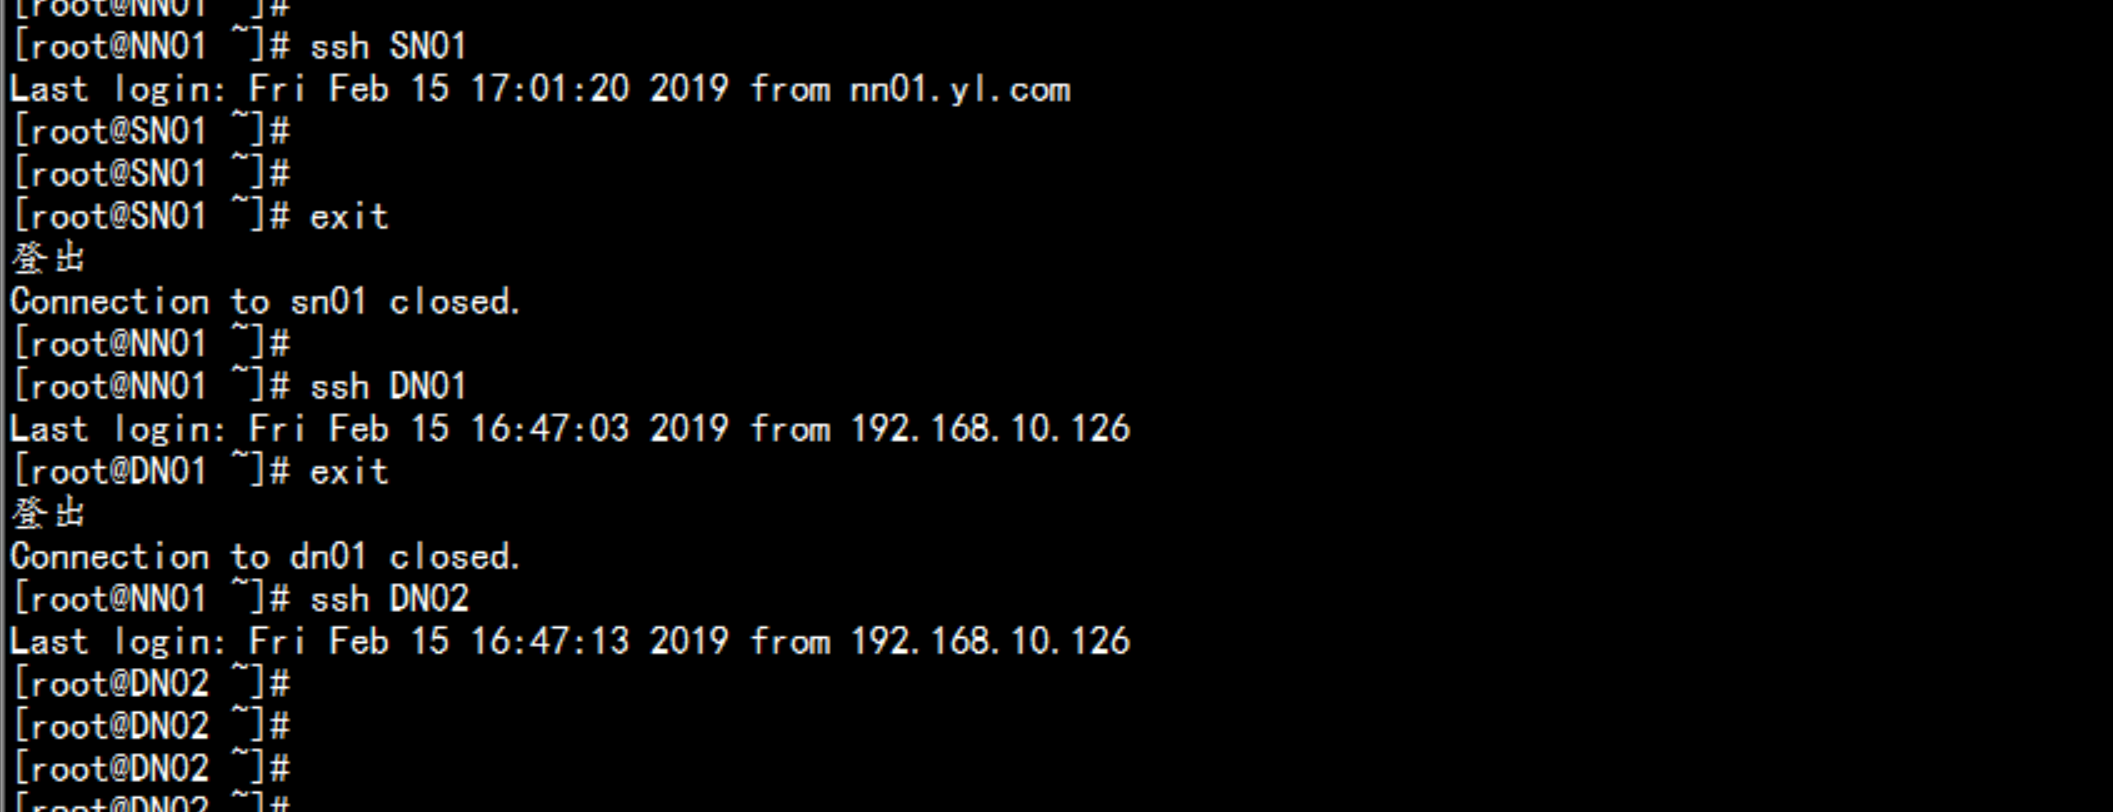
做root用户无密钥认证ssh-keygen ---一直敲回车到最后cat id_rsa.pub >> authorized_keys将所有的公钥导入authorized_keys 分发到 所有的 机器的.ssh/ 下面然后测试
2.3:关闭 firewalld,iptables 与 selinux
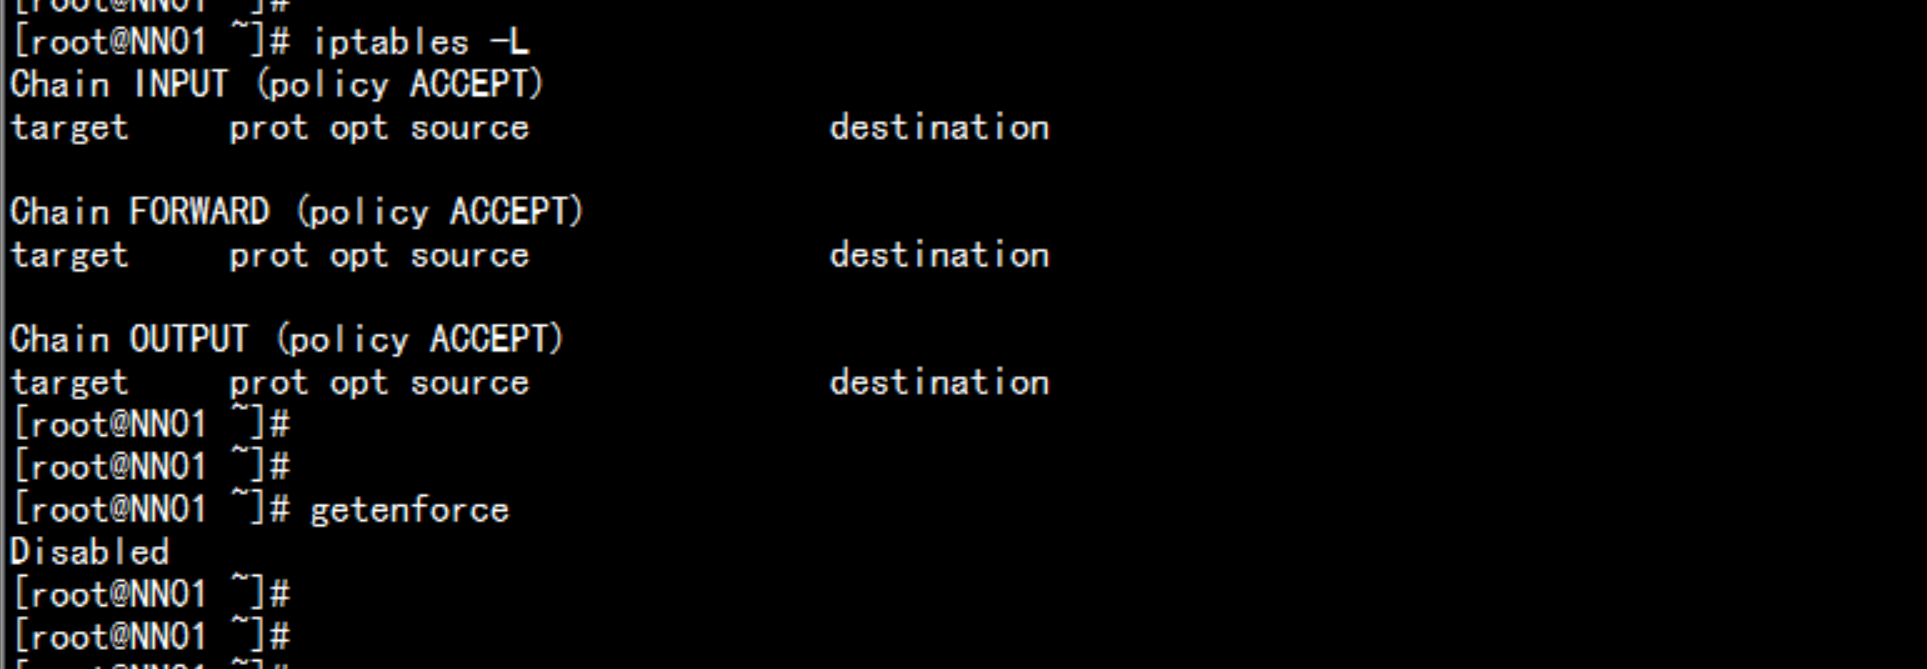
所有节点都要配置:yum install -y firewall* iptable*(1) 关闭firewalldsystemctl stop firewalld.servicesystemctl disable firewalld.servicefirewall-cmd --state(2) 关闭iptablesiptables -Fsystemctl stop iptables.serviceservice iptables savesystemctl disable iptables.service(3) 禁用 selinuxsed -i '/SELINUX/s/enforcing/disabled/' /etc/selinux/configsetenforce 0getenforce 0sestatus重启机器reboot
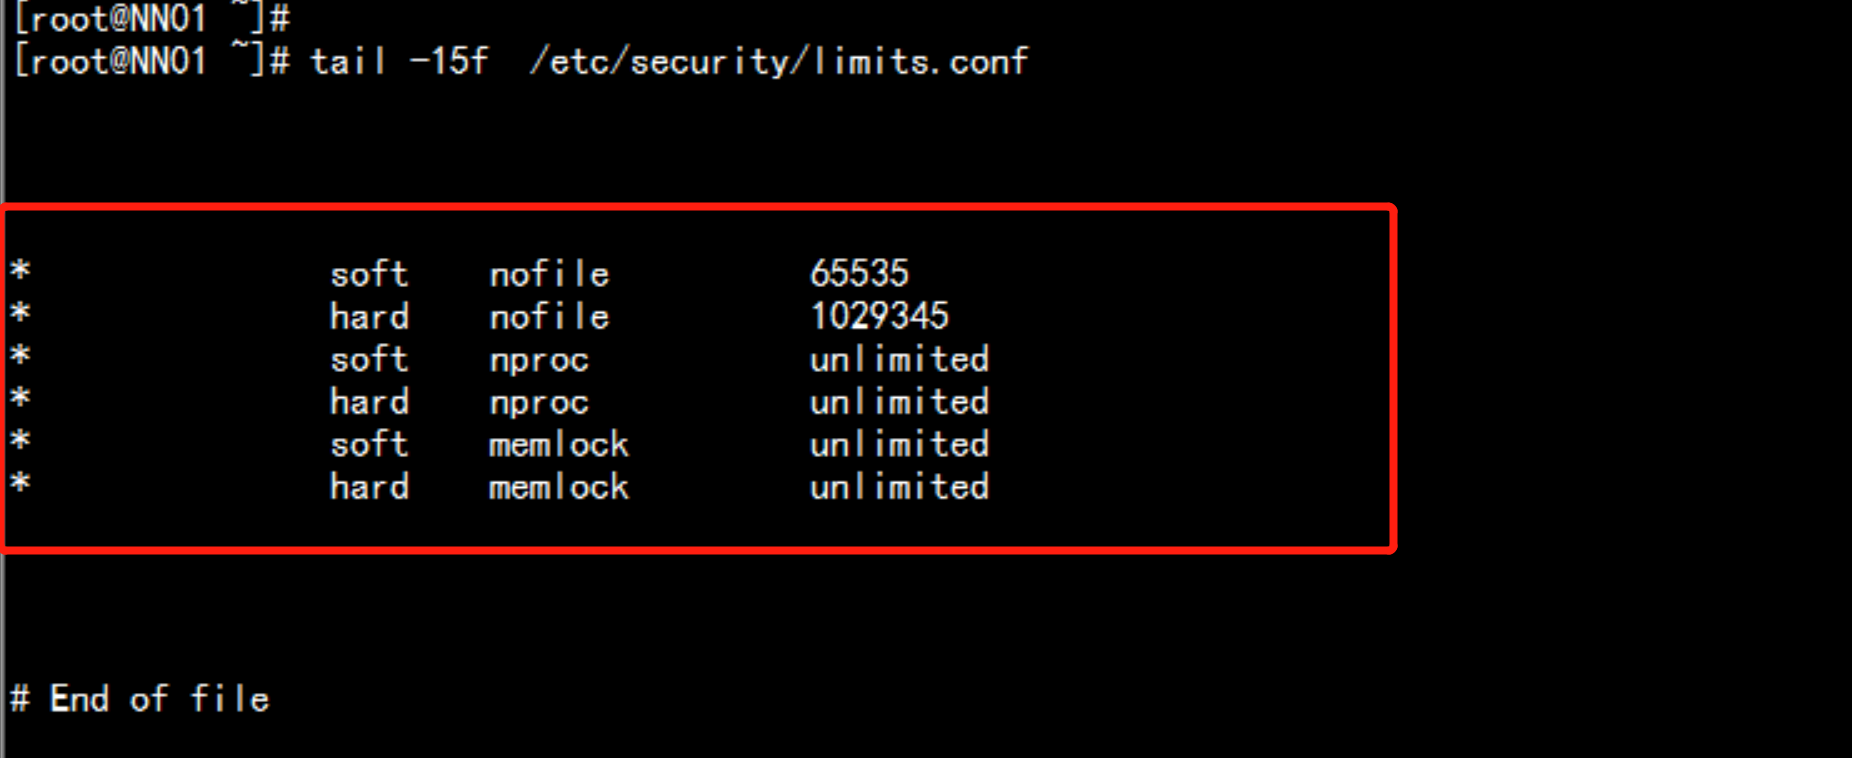
2.4:所有机器更改CentOS7.5x64的文件句柄数
vim /etc/security/limits.conf---* soft nofile 65535* hard nofile 1029345* soft nproc unlimited* hard nproc unlimited* soft memlock unlimited* hard memlock unlimited
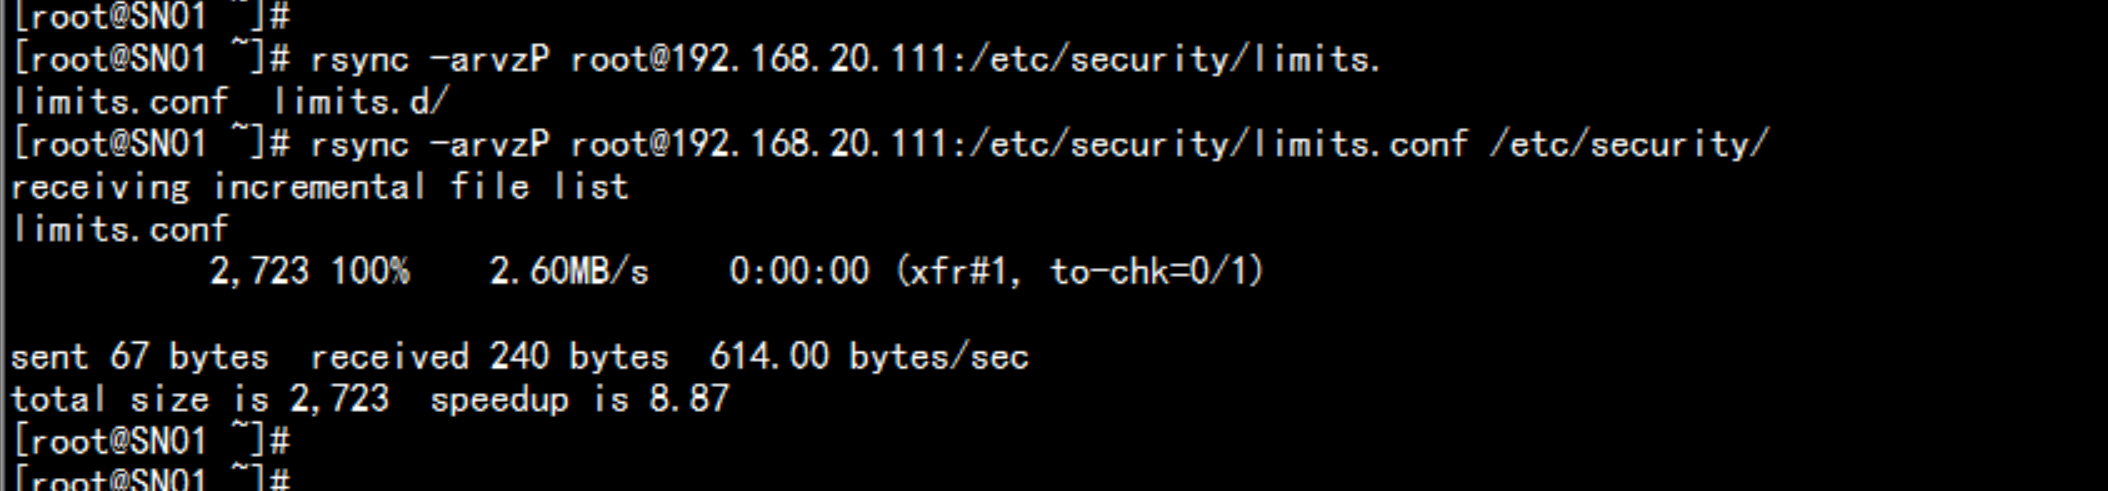
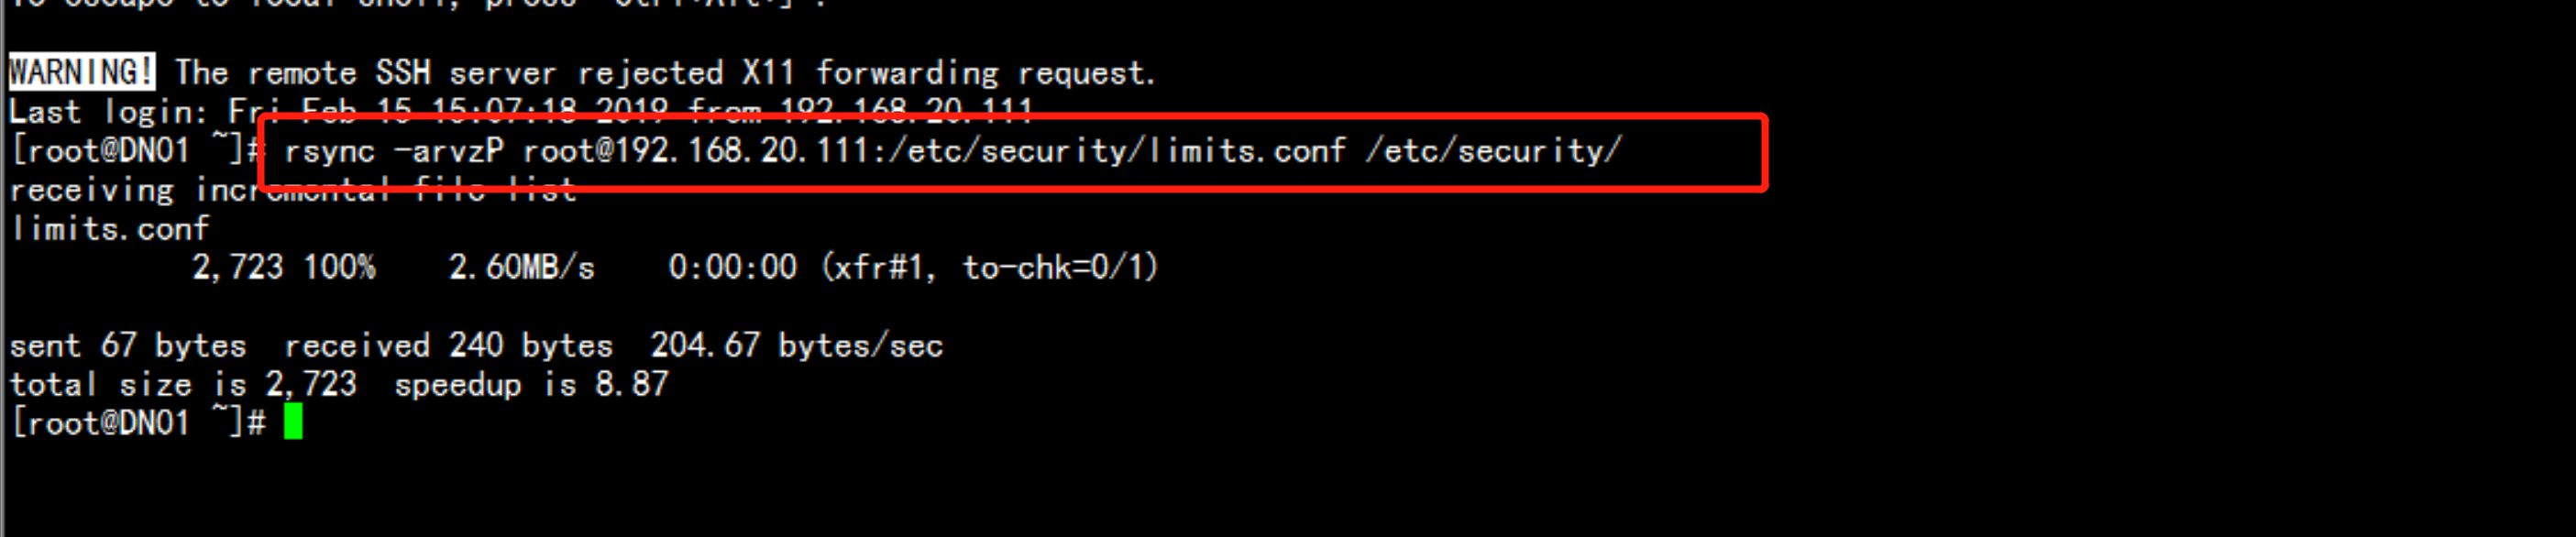
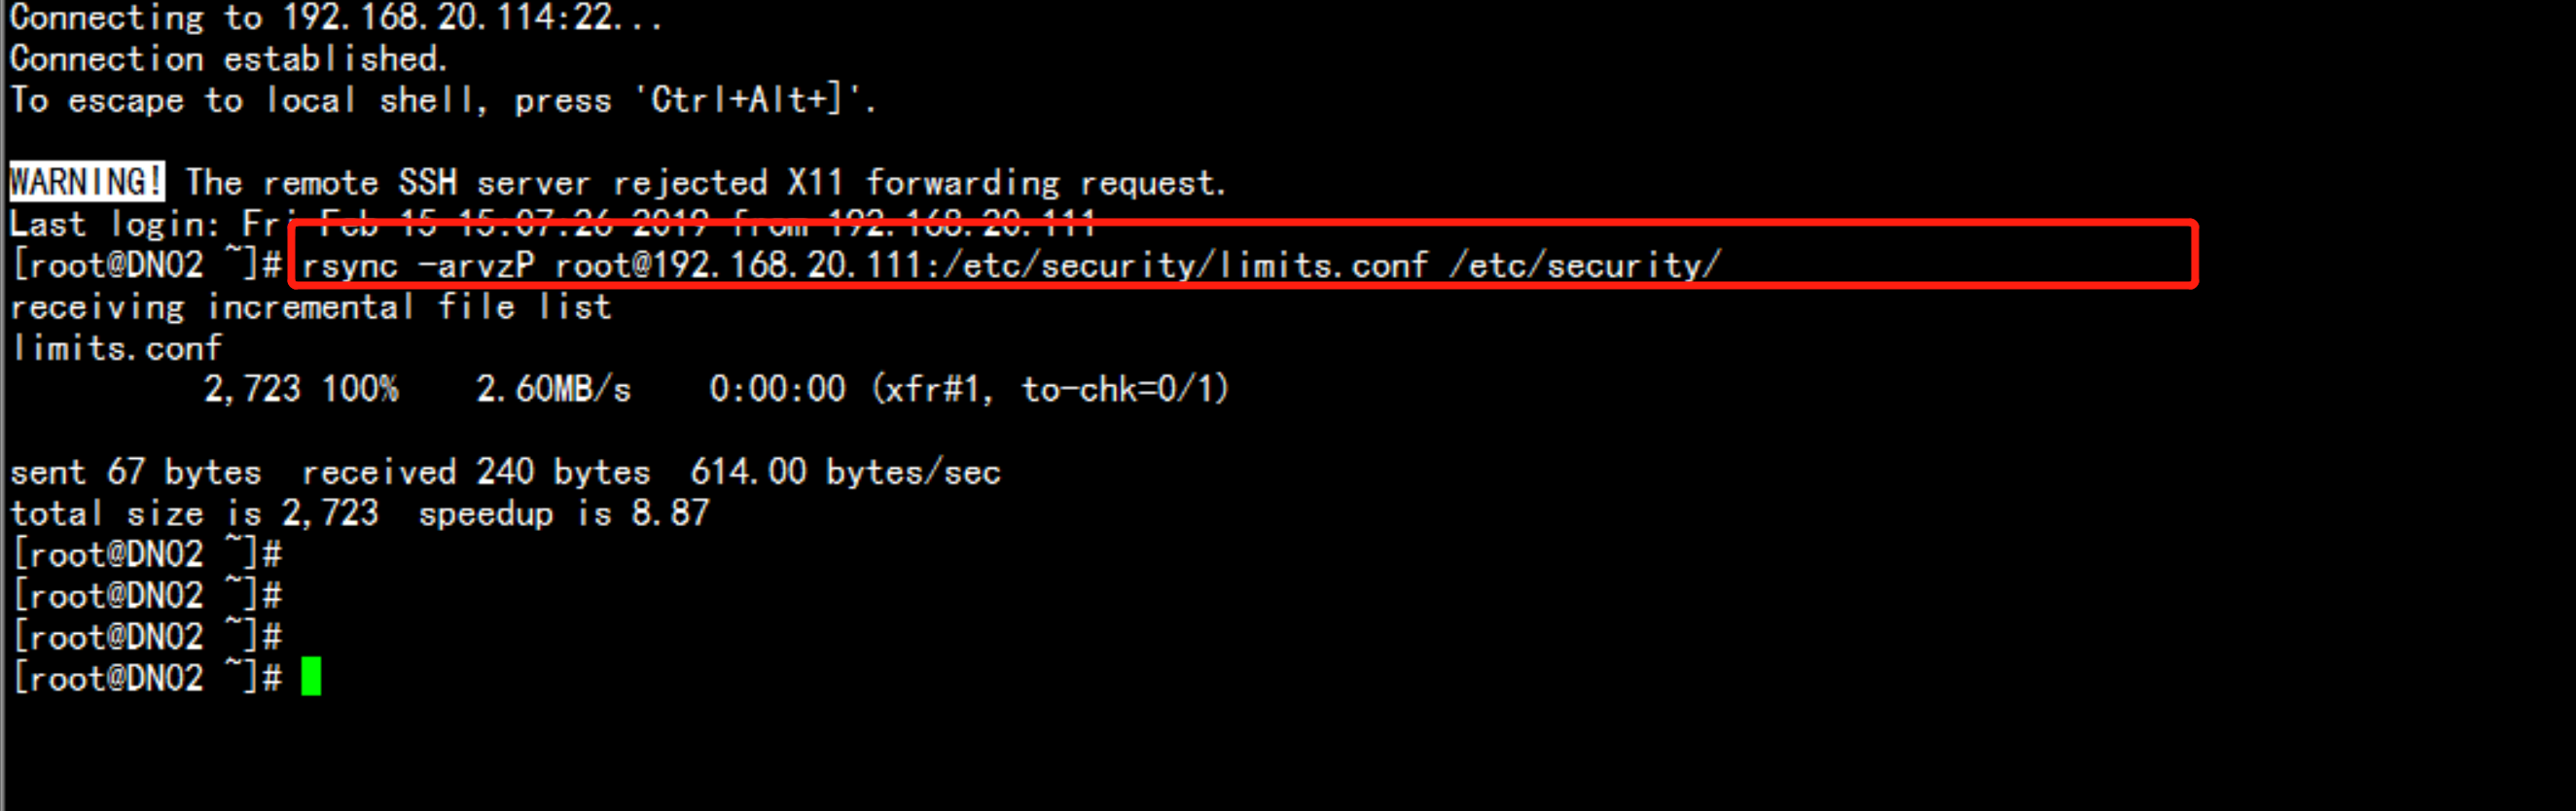
在其它 节点上面执行命令:rsync -arvzP root@192.168.20.111:/etc/security/limits.conf /etc/security/同步limits.conf 文件
2.5 时间同步:
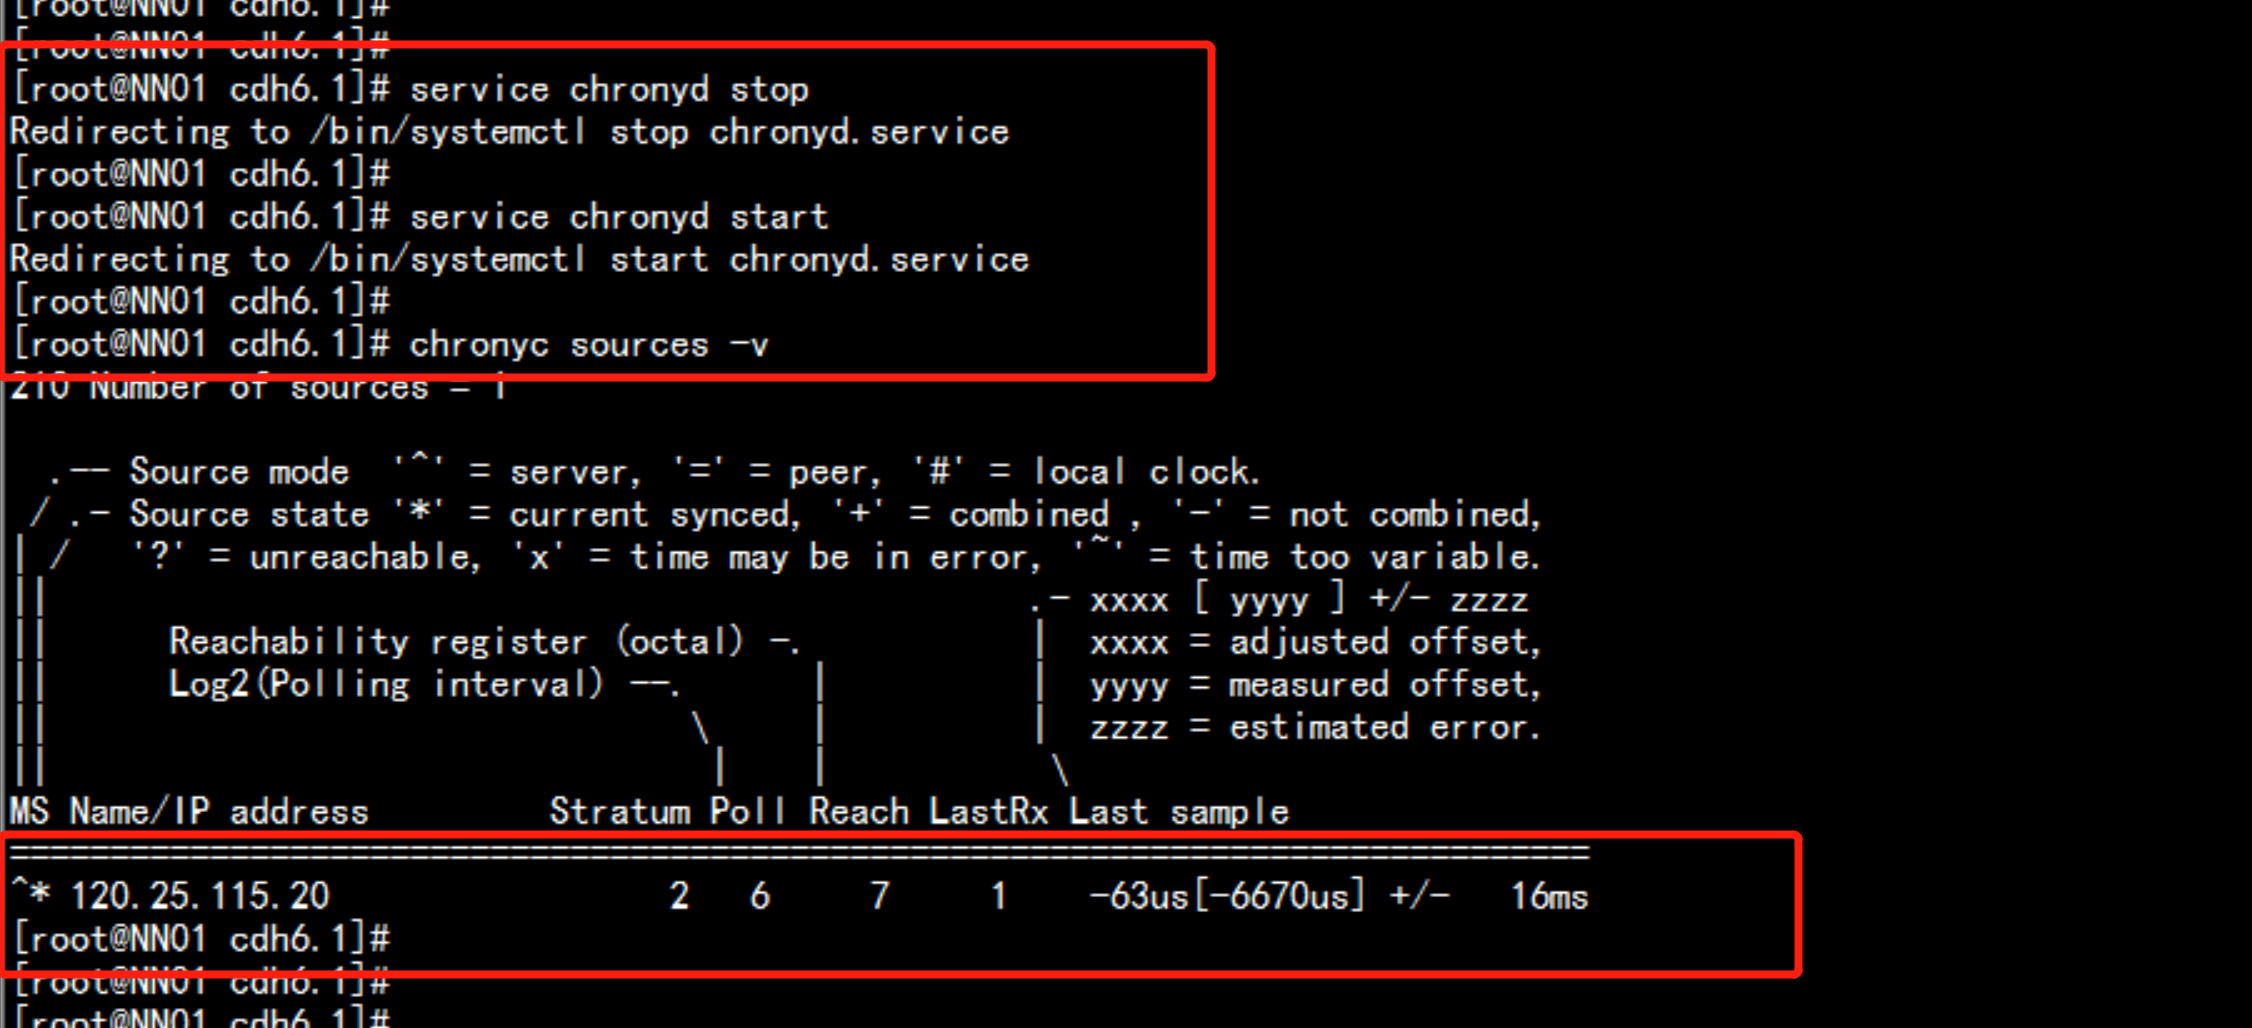
所有机器 yum install chrony*1. NN01.yl.com:vim /etc/chrony.conf 增加----注释掉相关默认的serverserver ntp1.aliyun.com iburstallow 192.168.20.111/16service chronyd startchkconfig chronyd on2. SN01.yl.com---DN01.yl.com 同步NN01.yl.comvim /etc/chrony.conf----注释掉默认的serverserver 192.168.20.111 iburst----service chronyd stopservice chronyd startchkconfig chronyd on

2.6: cdh6.1.0 安装所需文件下载
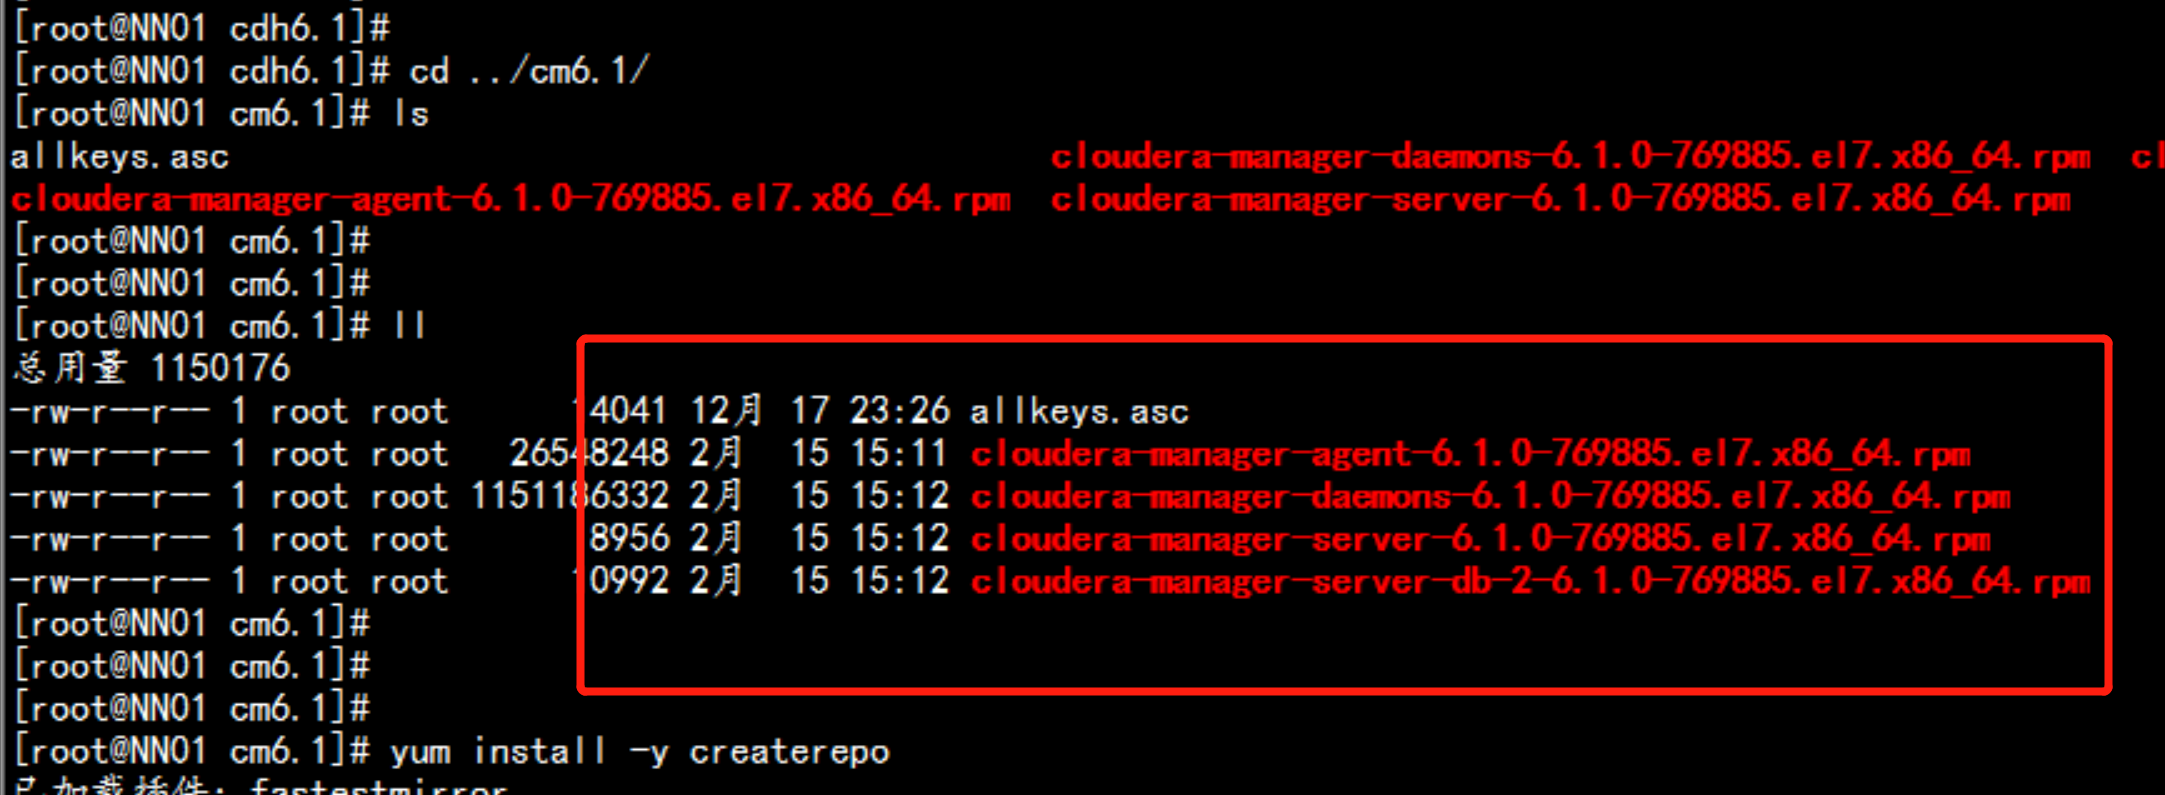
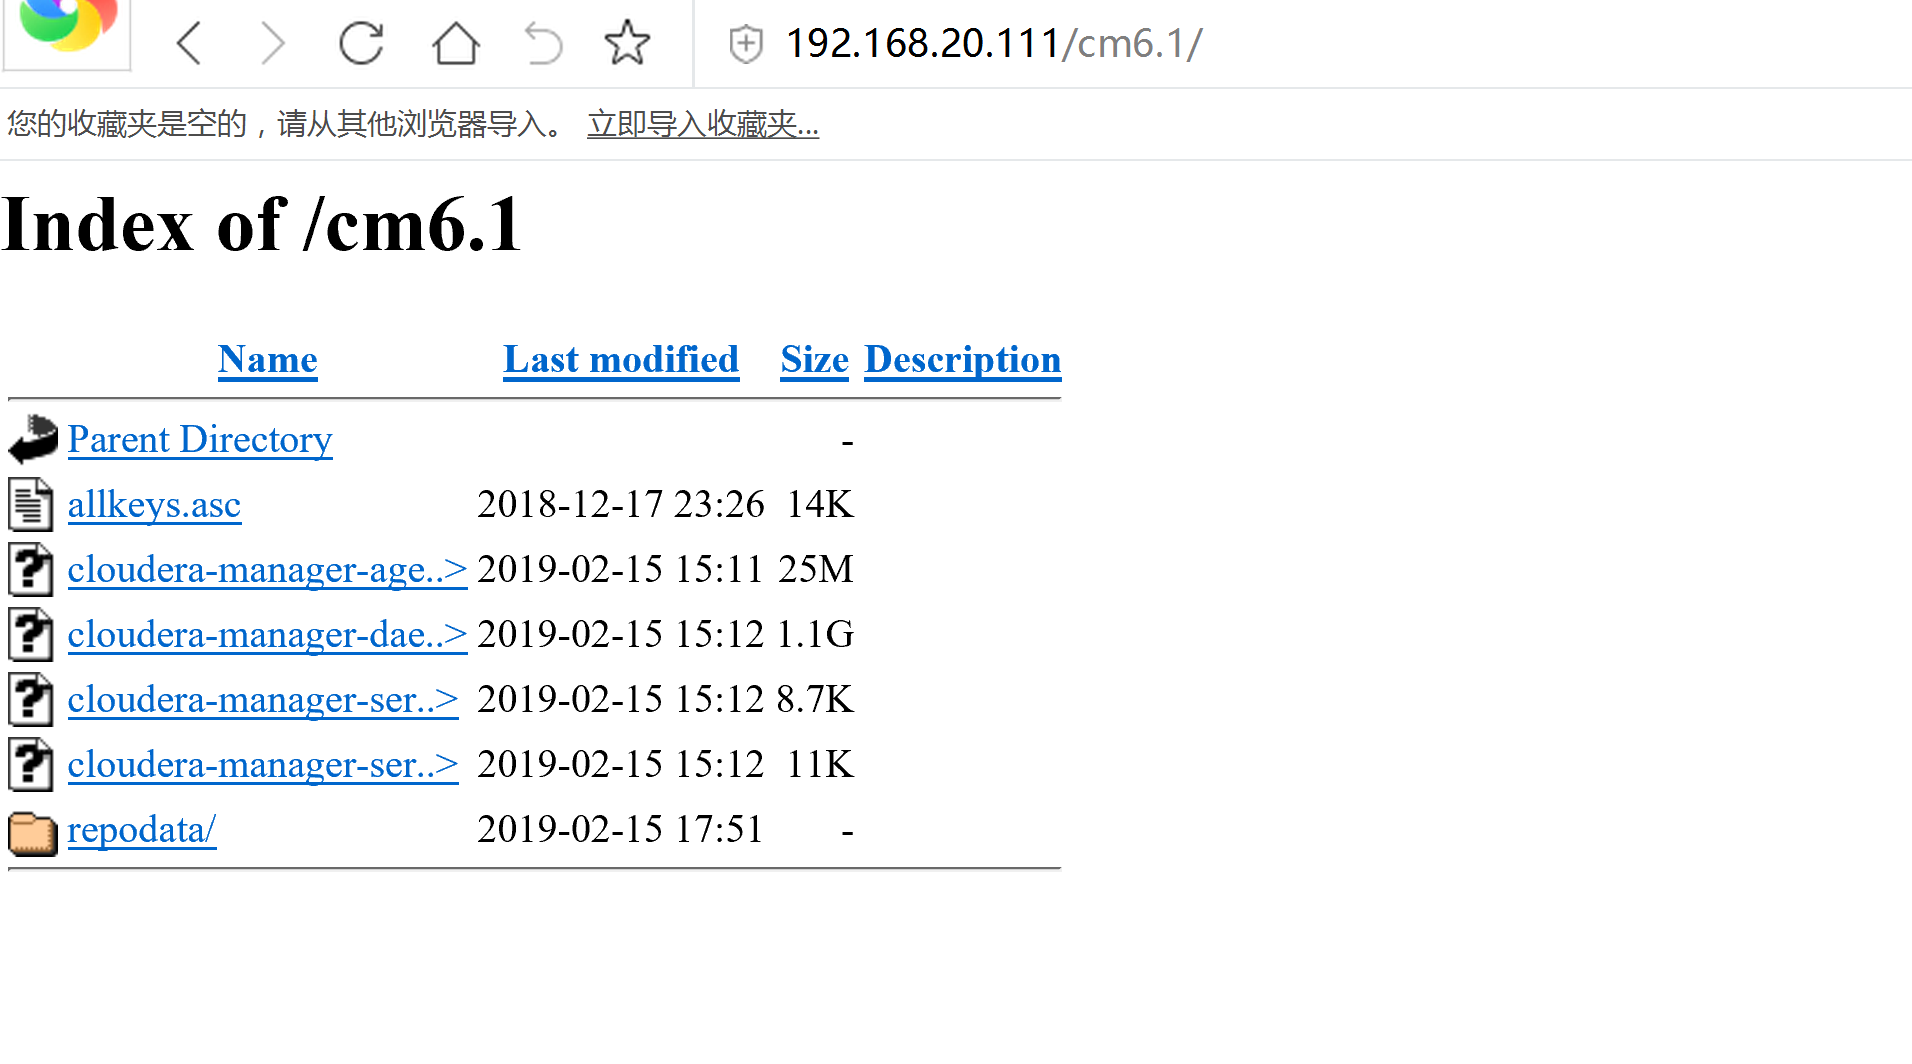
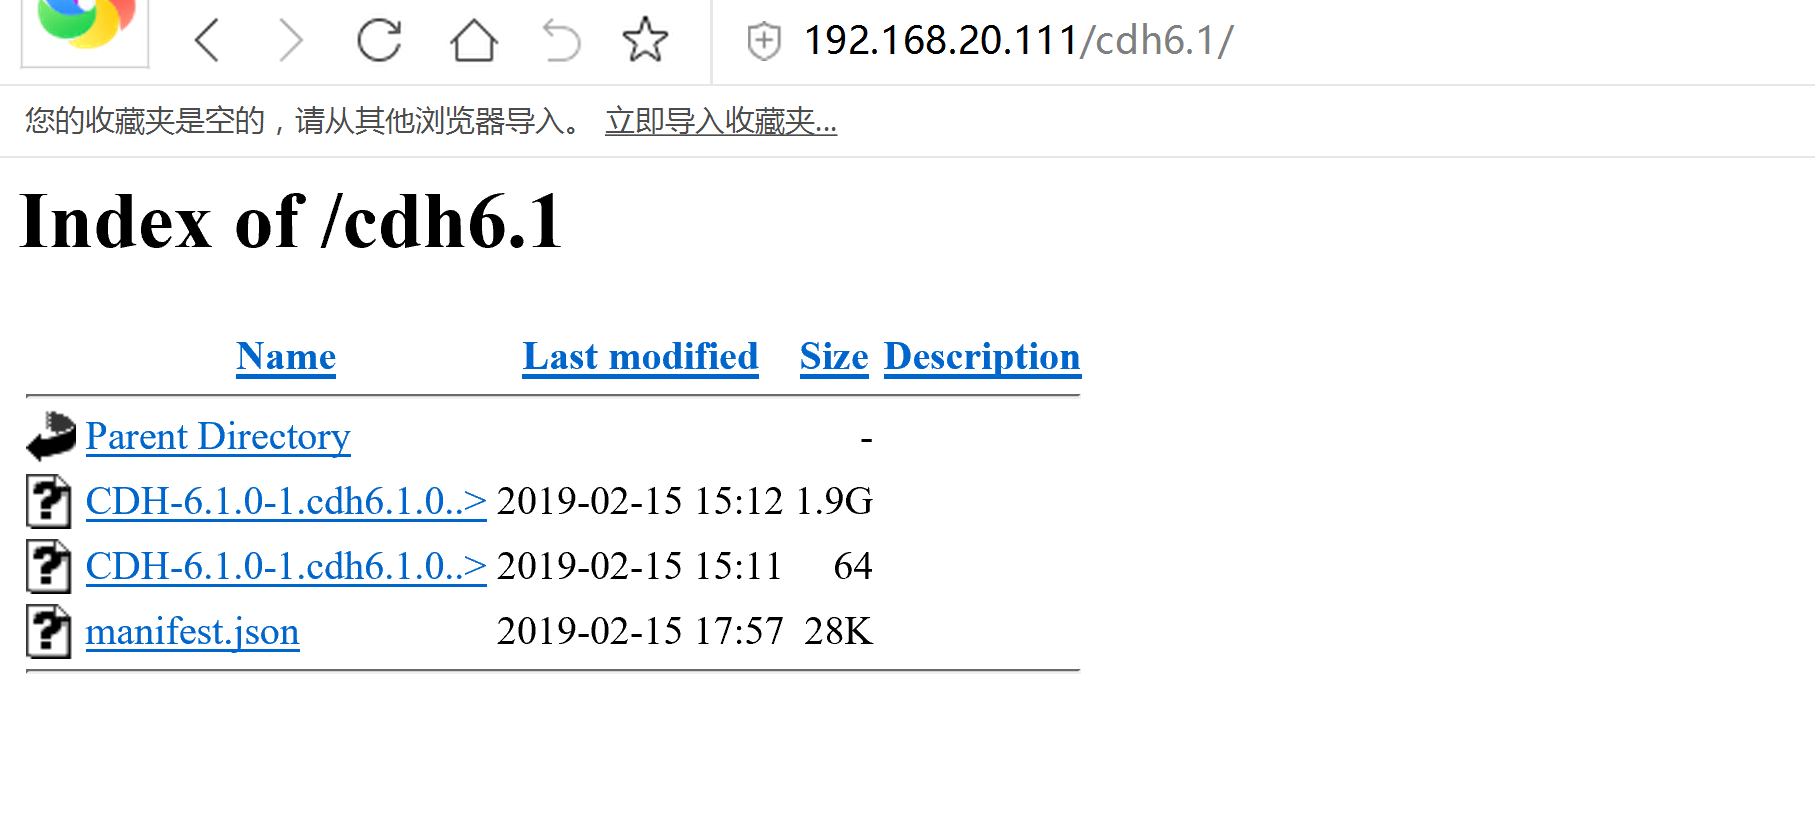
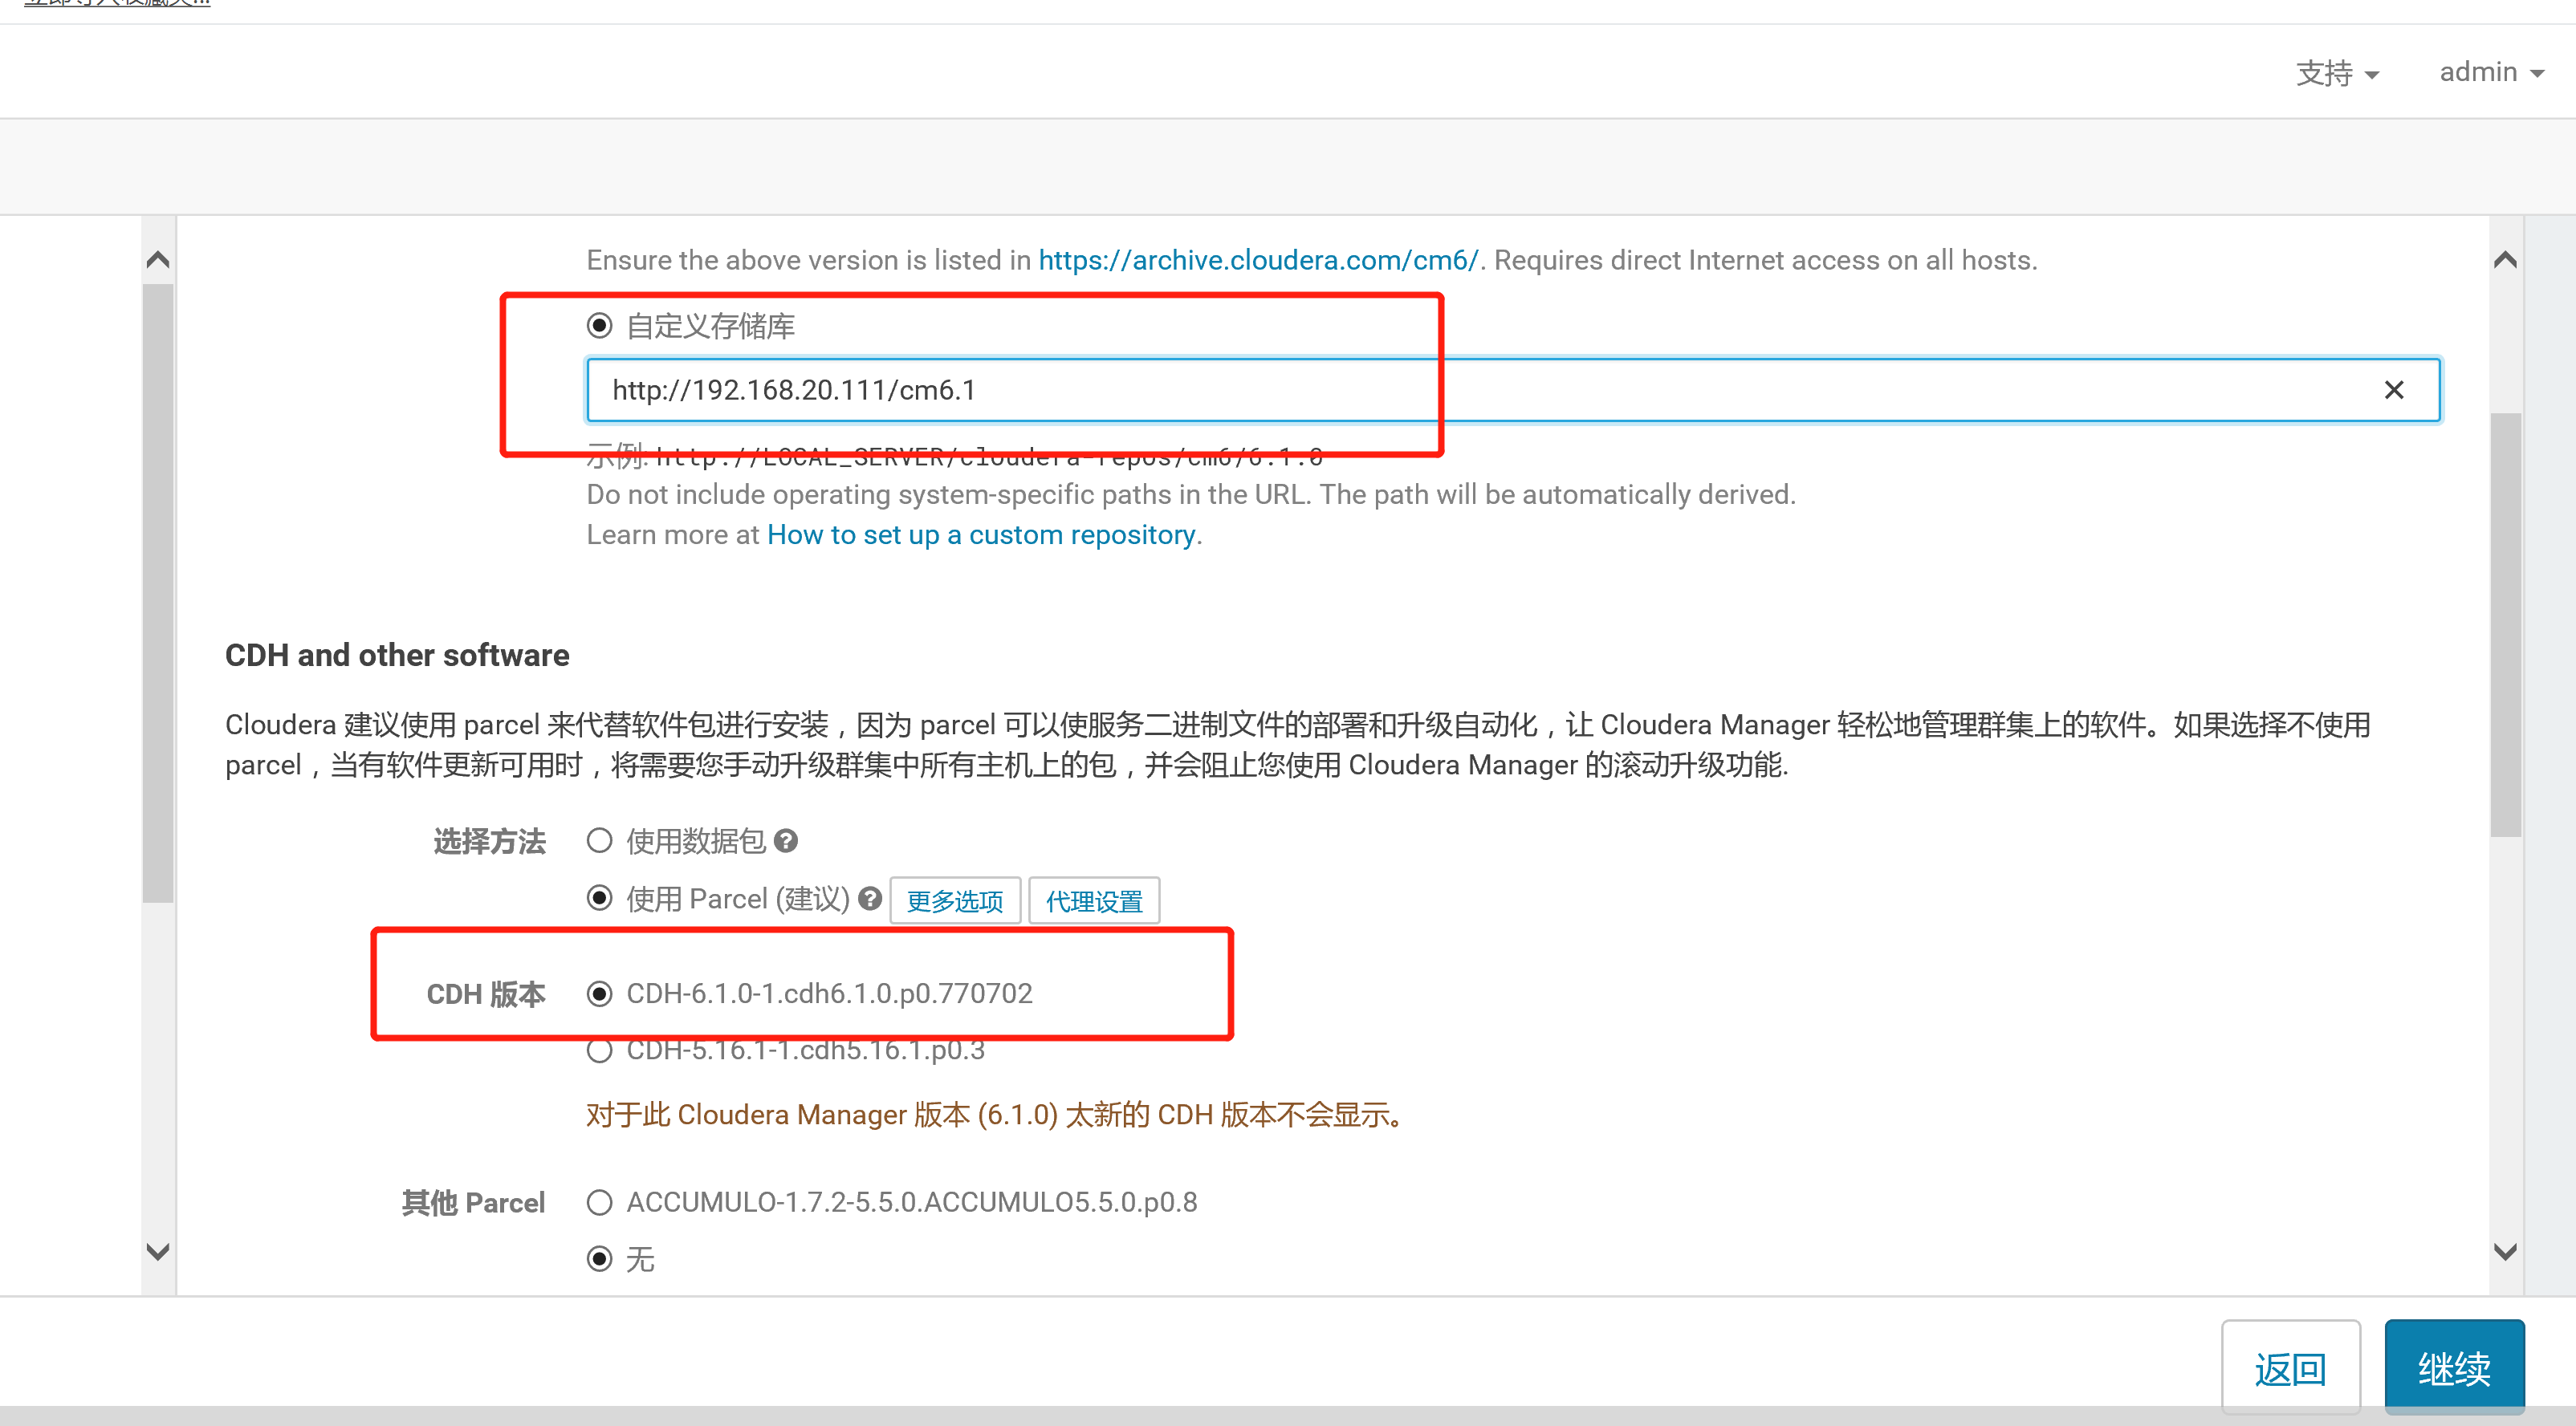
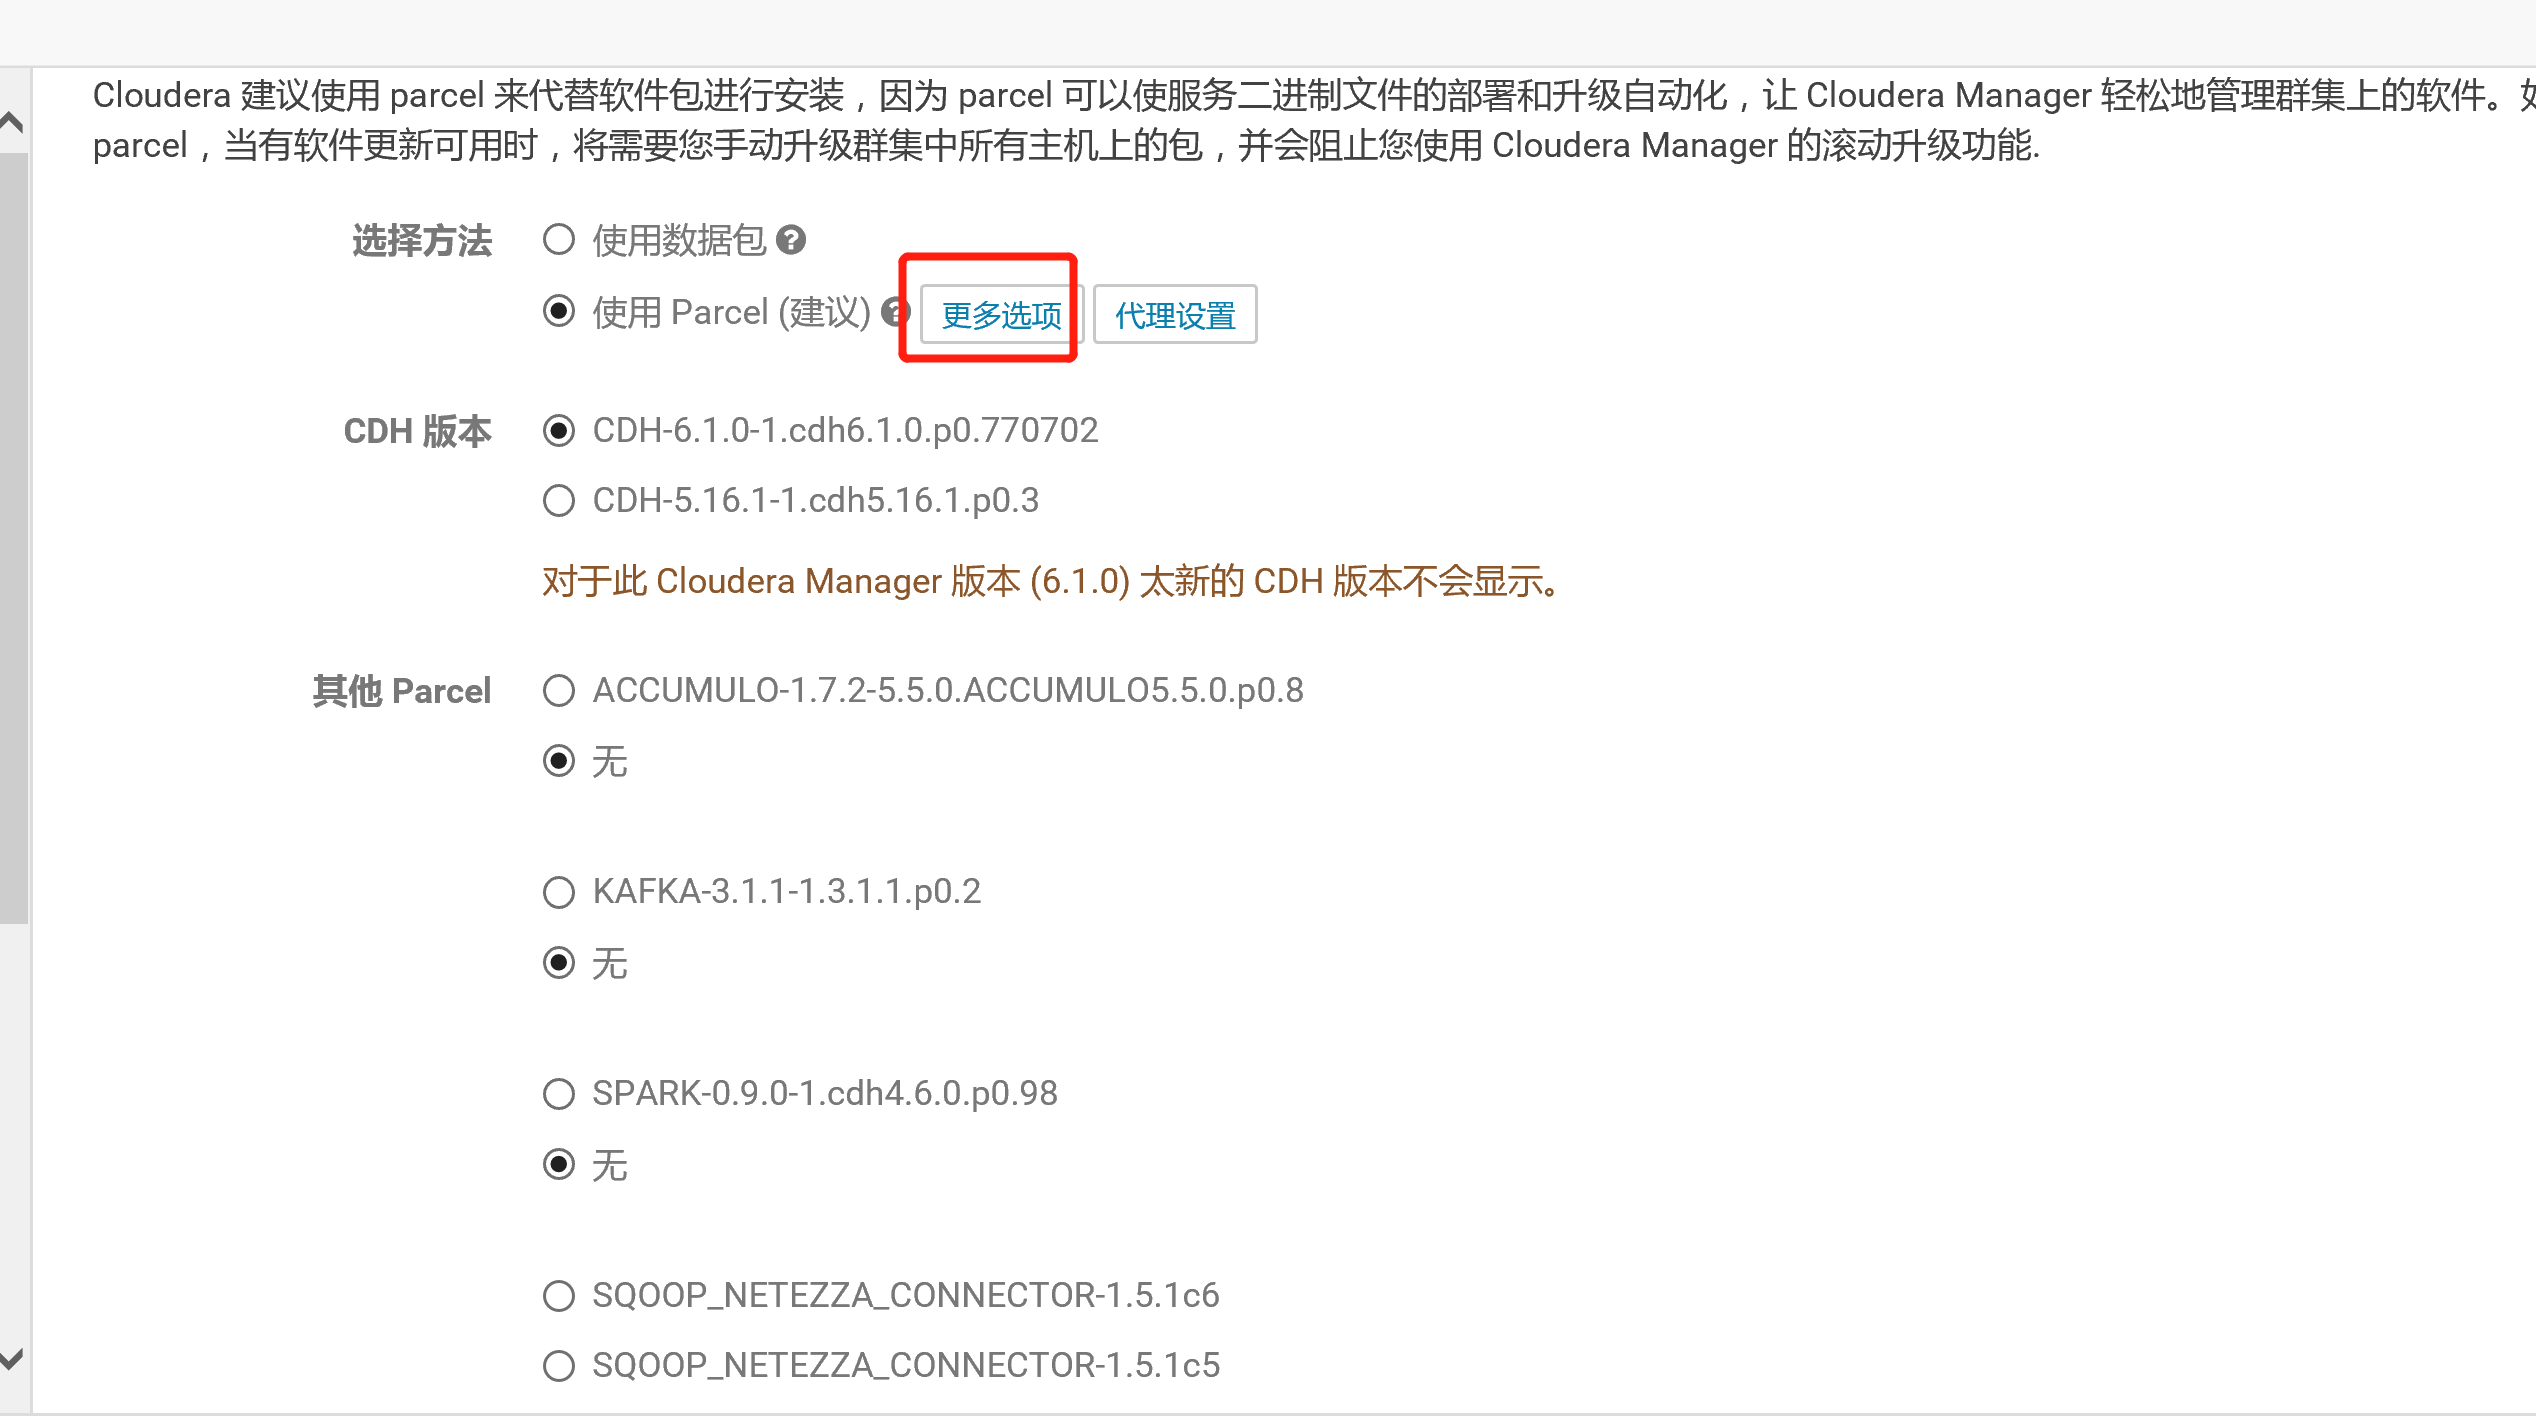
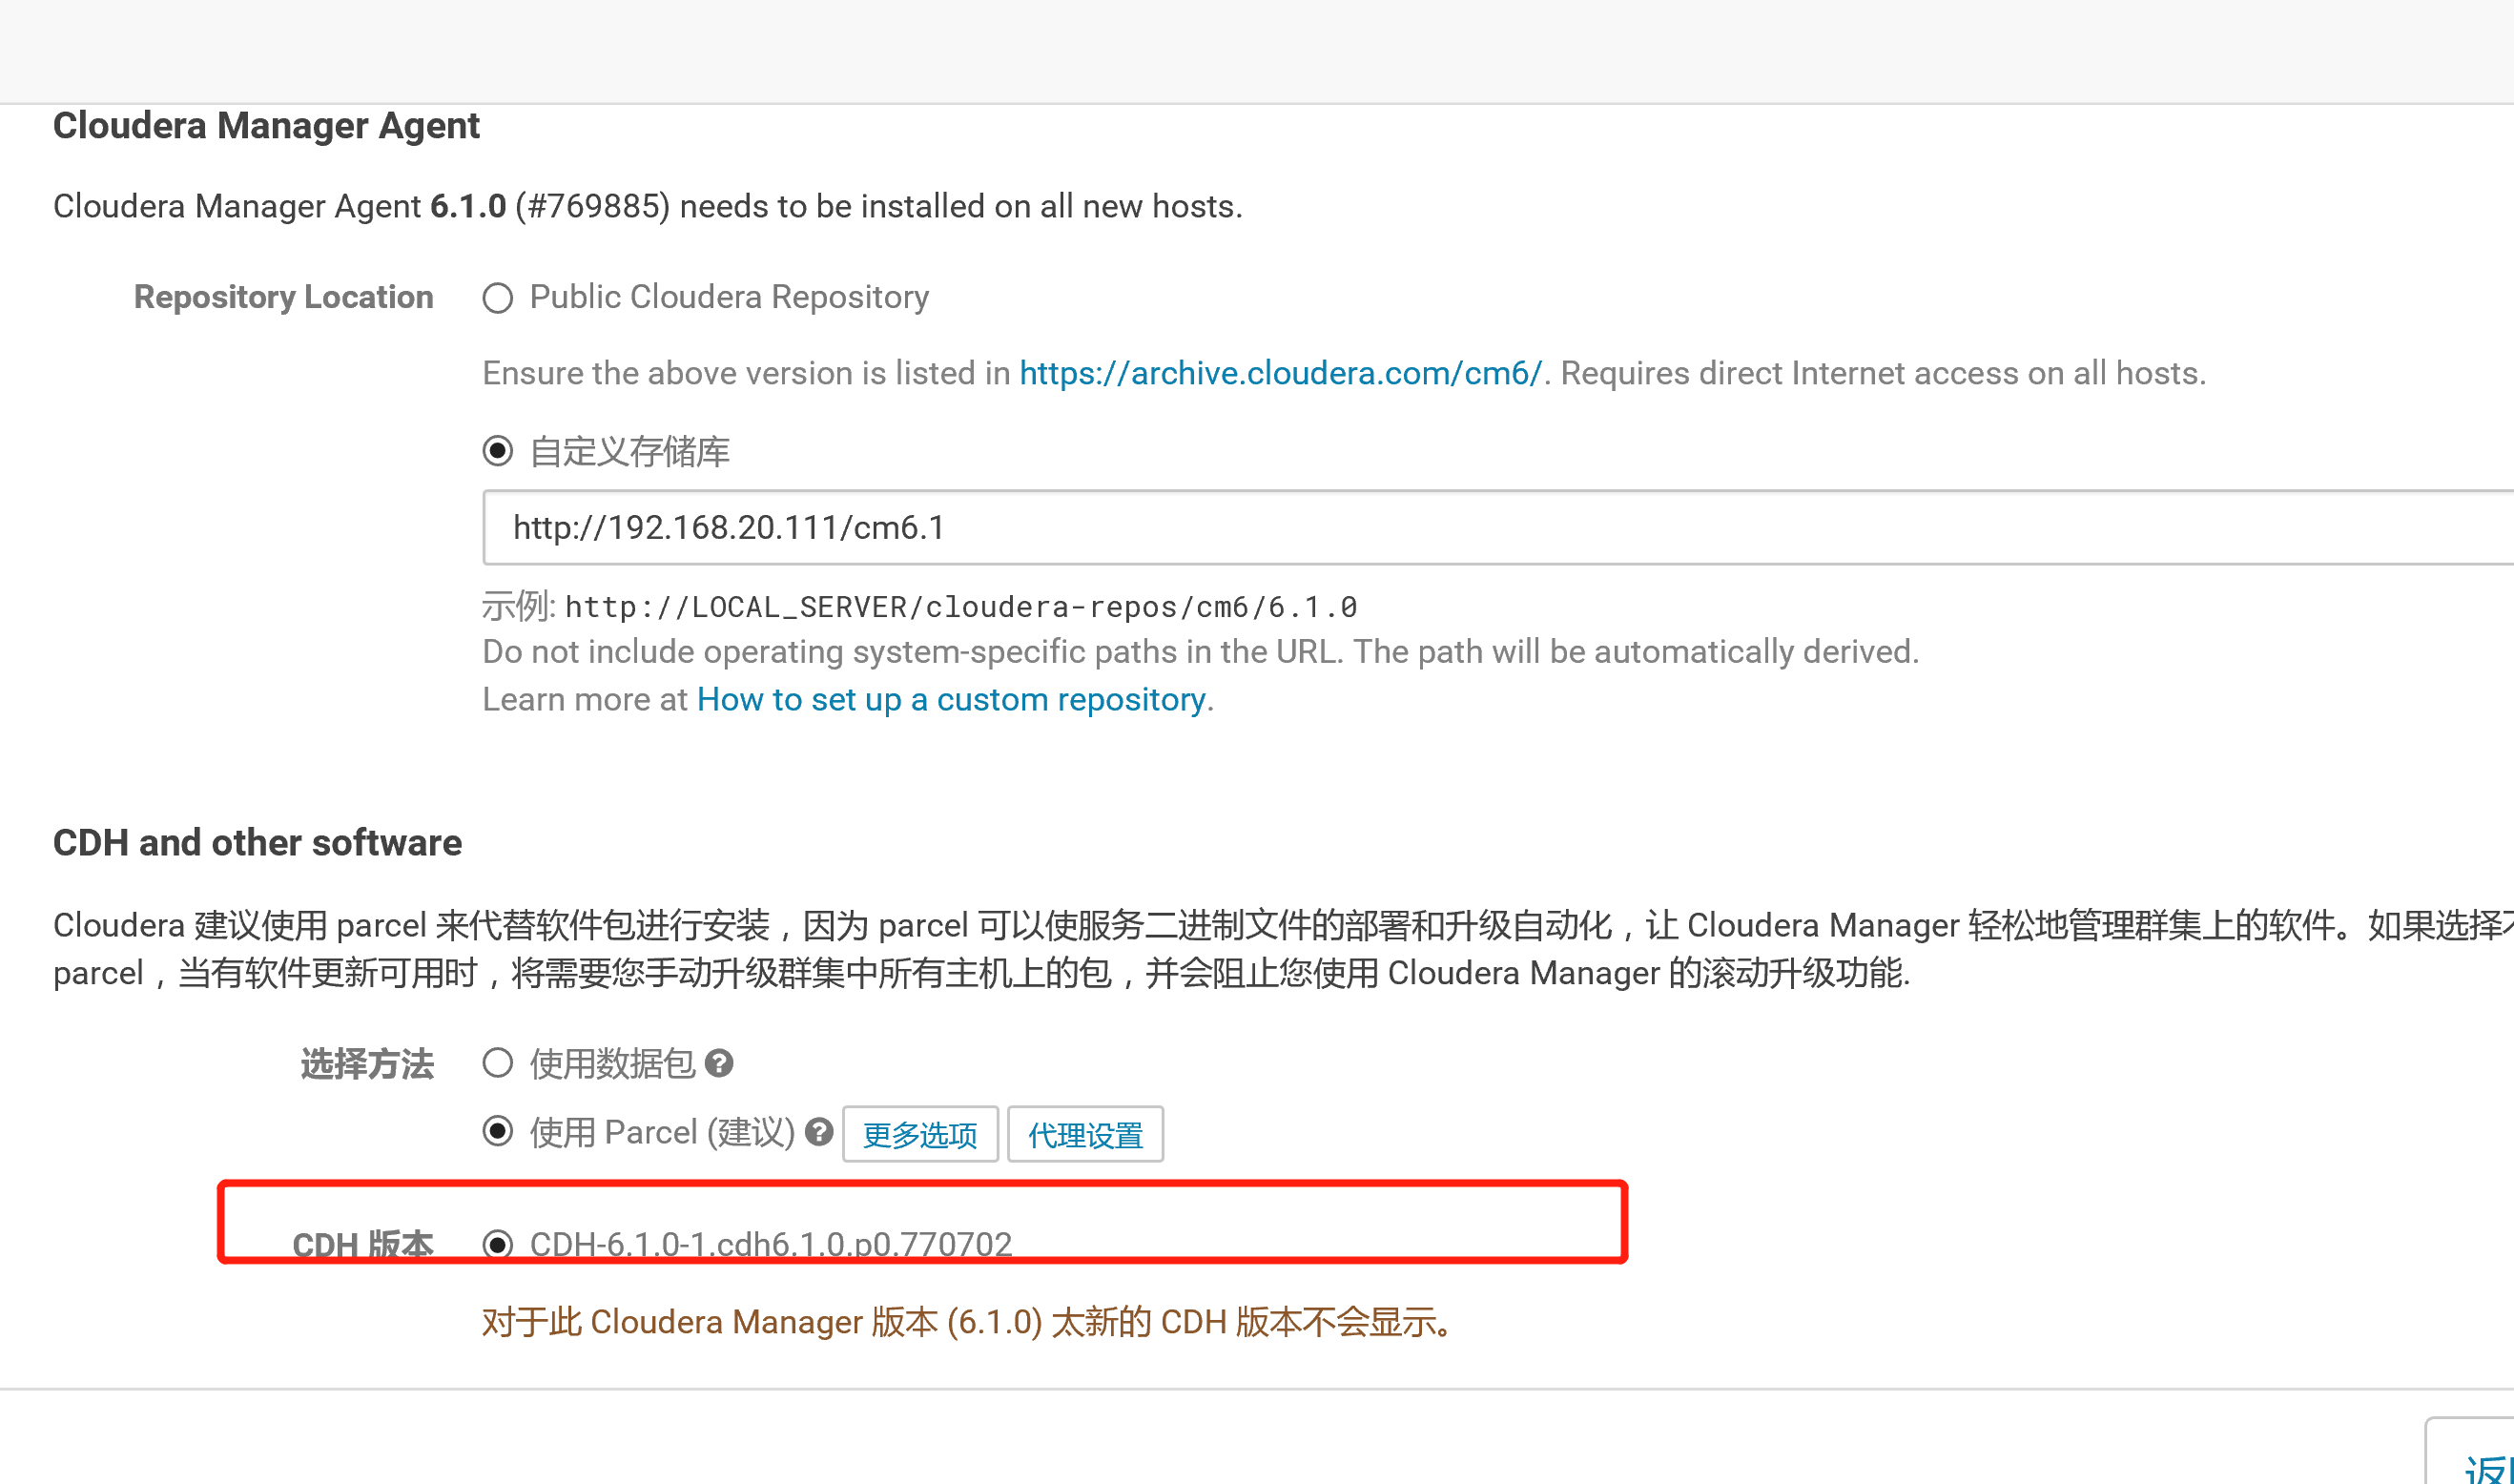
cdh6.1.0 离线包:CDH-6.1.0-1.cdh6.1.0.p0.770702-el7.parcelCDH-6.1.0-1.cdh6.1.0.p0.770702-el7.parcel.sha256manifest.json下载: https://archive.cloudera.com/cdh6/6.1.0/parcels/cdh6 的CM 包:cloudera-manager-agent-6.1.0-769885.el7.x86_64.rpmcloudera-manager-daemons-6.1.0-769885.el7.x86_64.rpmcloudera-manager-server-6.1.0-769885.el7.x86_64.rpmcloudera-manager-server-db-2-6.1.0-769885.el7.x86_64.rpmoracle-j2sdk1.8-1.8.0+update141-1.x86_64.rpmallkeys.asc下载地址:https://archive.cloudera.com/cm6/6.1.0/redhat7/yum/RPMS/x86_64/jdbc 驱动:mysql-connector-java-8.0.15-1.el7.noarch.rpm下载:mysql官网下载
2.7:安装jdk
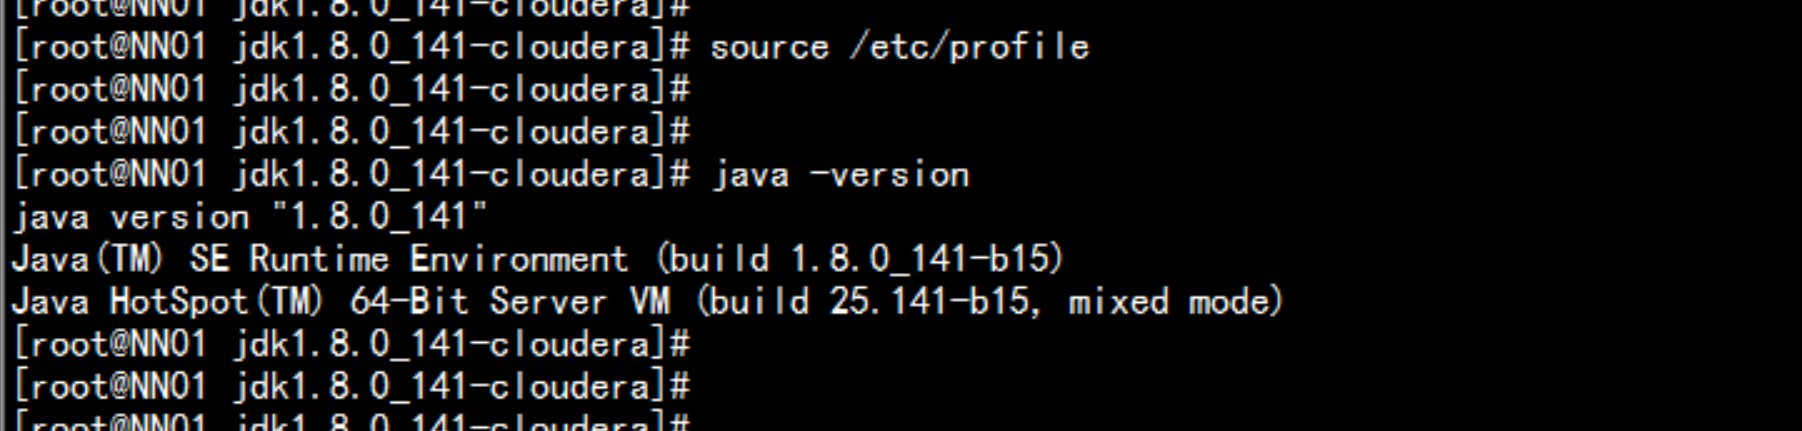
所用大数据节点都要配置:jdkrpm -ivh oracle-j2sdk1.8-1.8.0+update141-1.x86_64.rpmvim /etc/profile---export JAVA_HOME=/usr/java/jdk1.8.0_141-clouderaexport CLASSPATH=.:$JAVA_HOME/jre/lib:$JAVA_HOME/lib:$JAVA_HOME/lib/tools.jarPATH=$PATH:$HOME/bin:$JAVA_HOME/bin---source /etc/profilejava -version
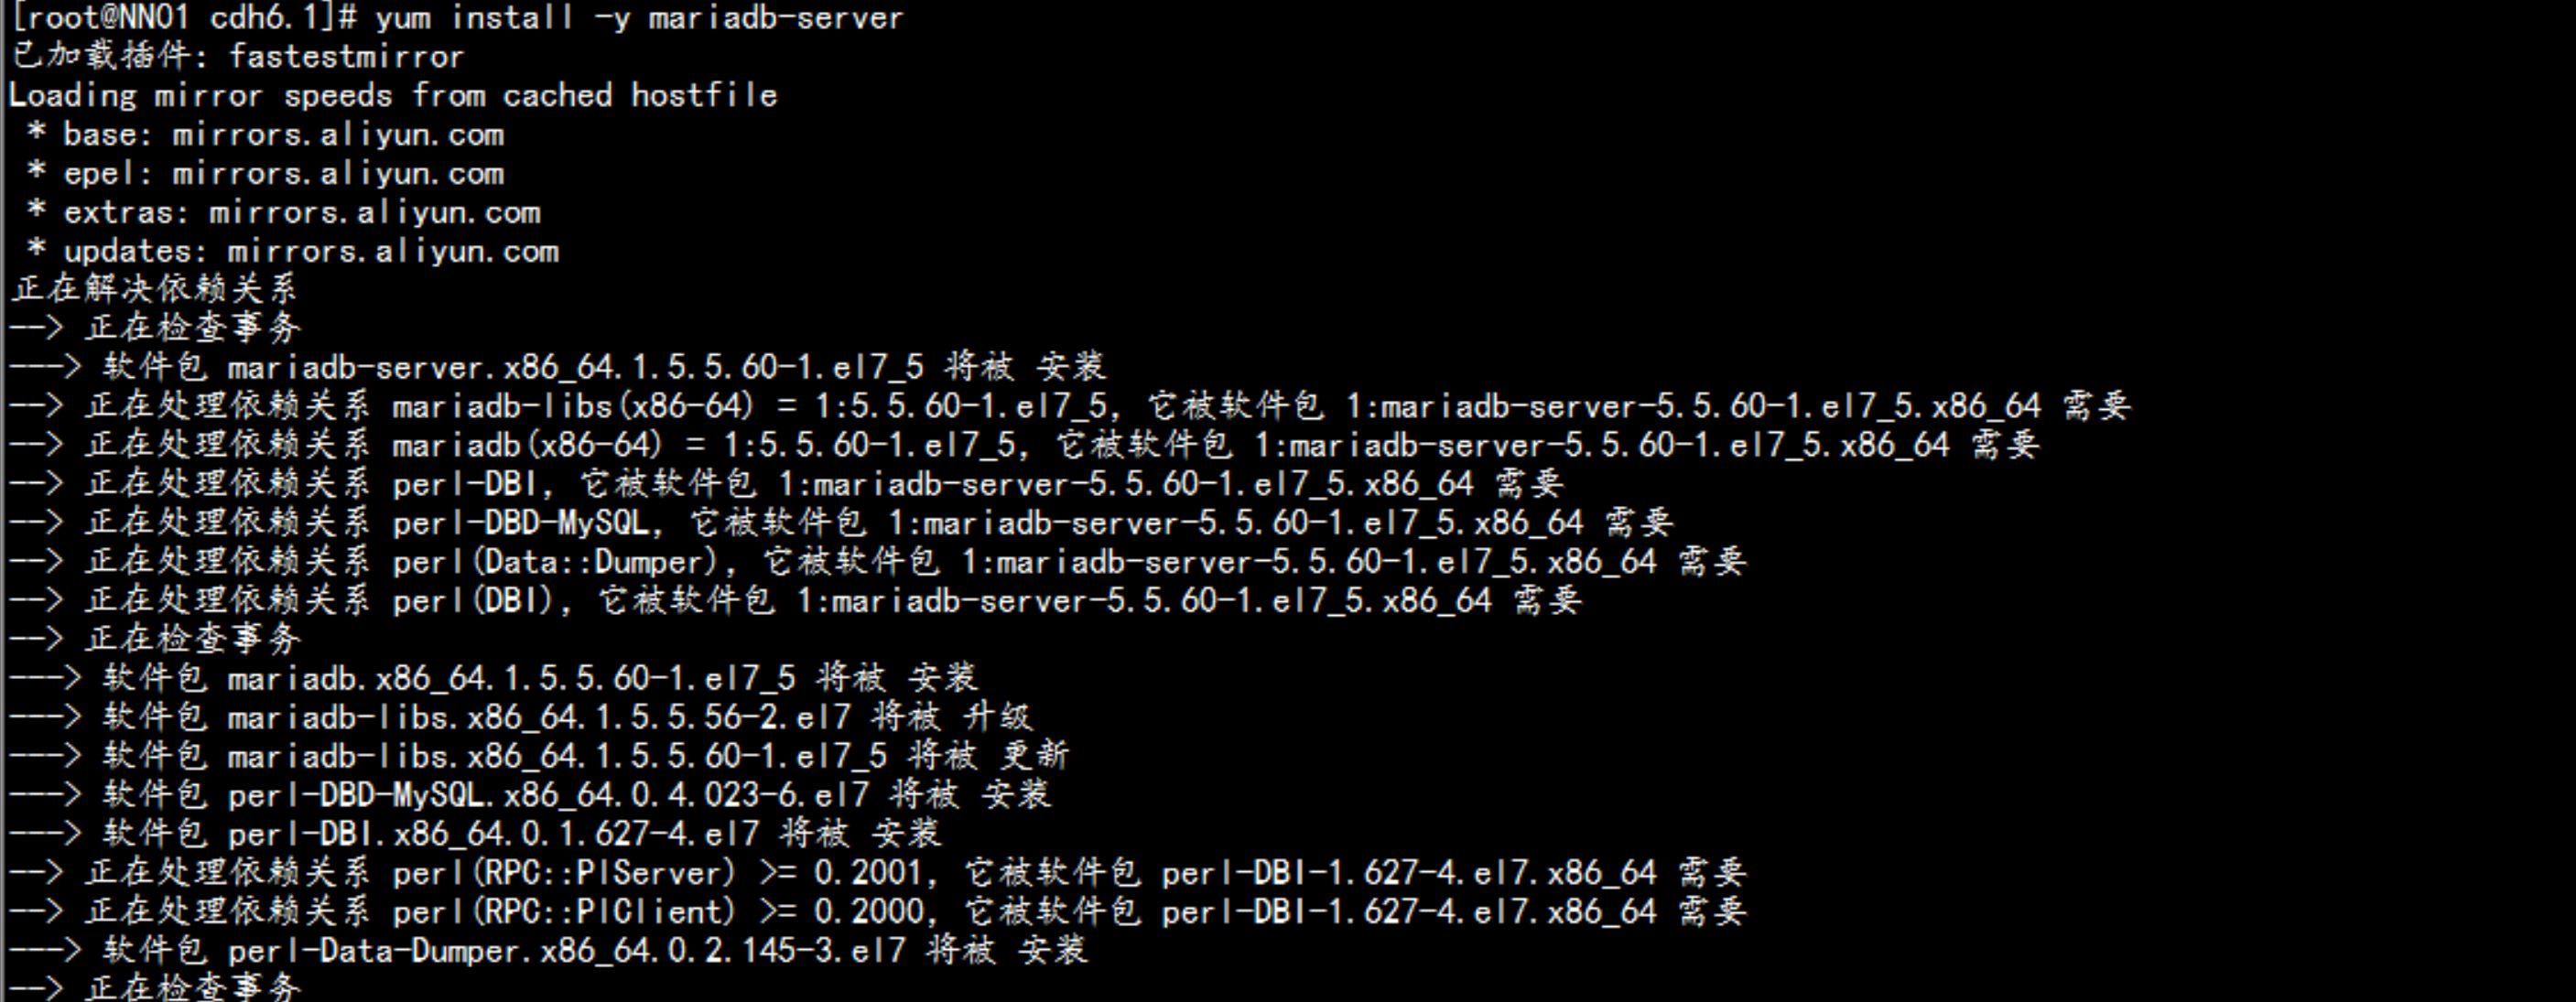
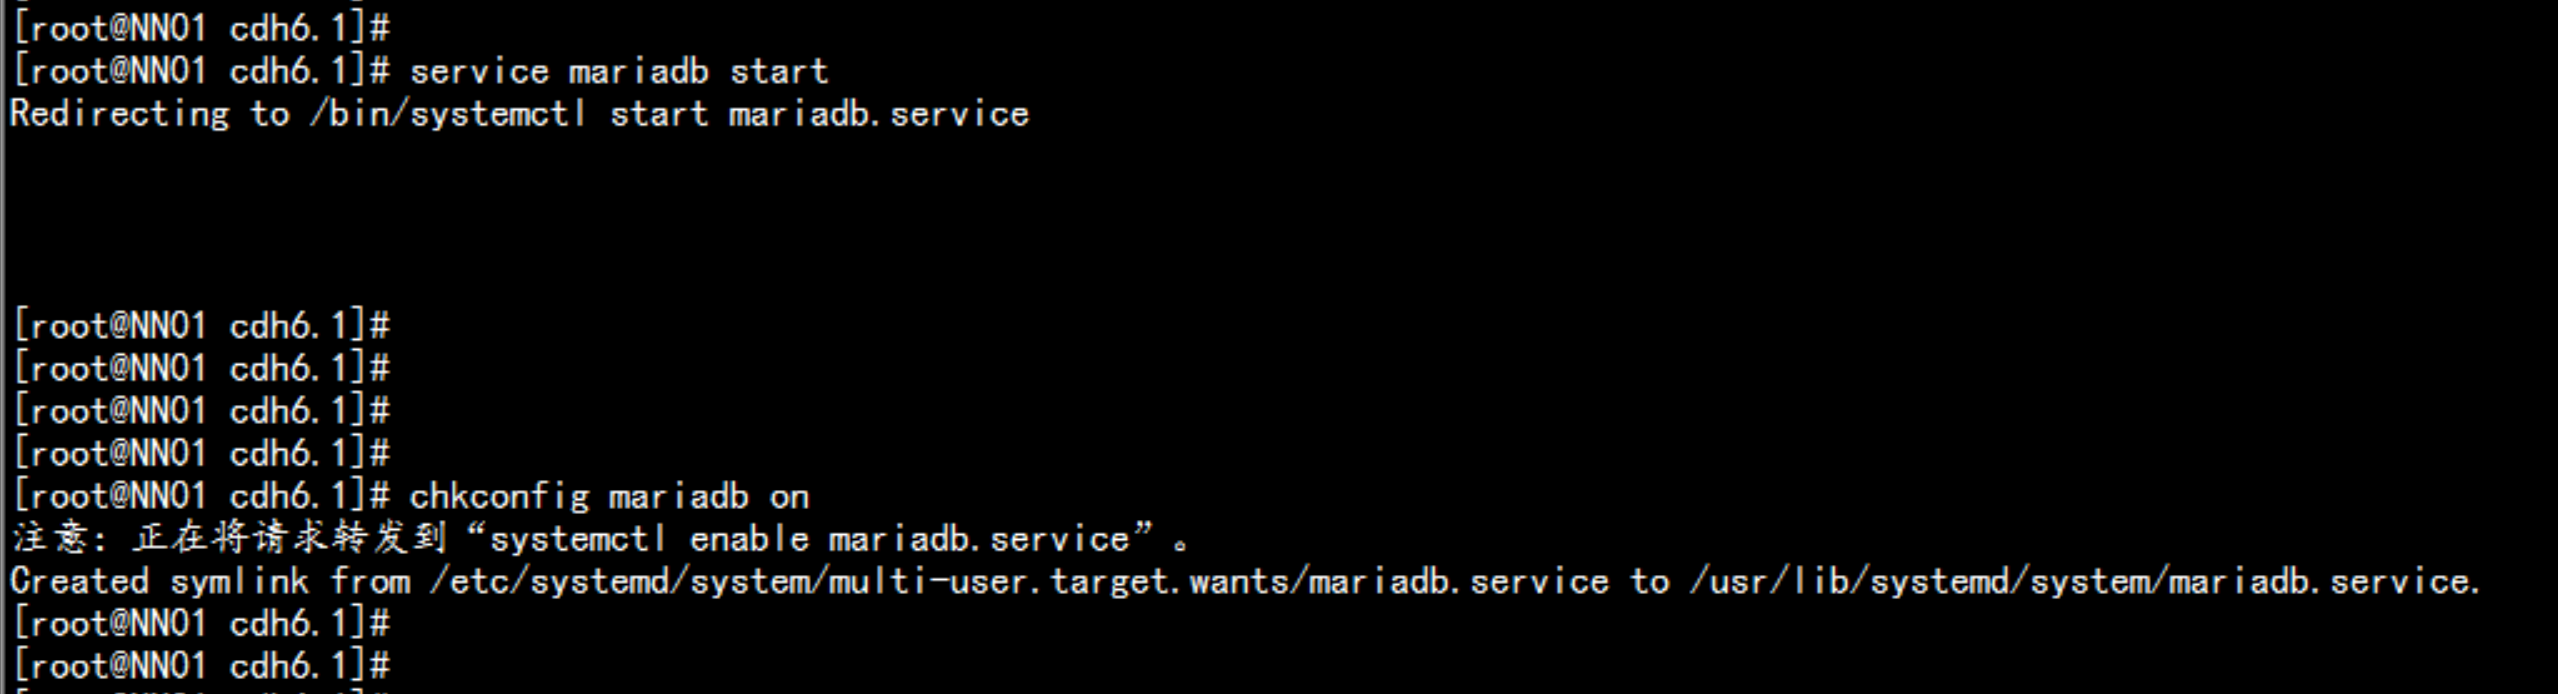
2.8 安装mariadb-server
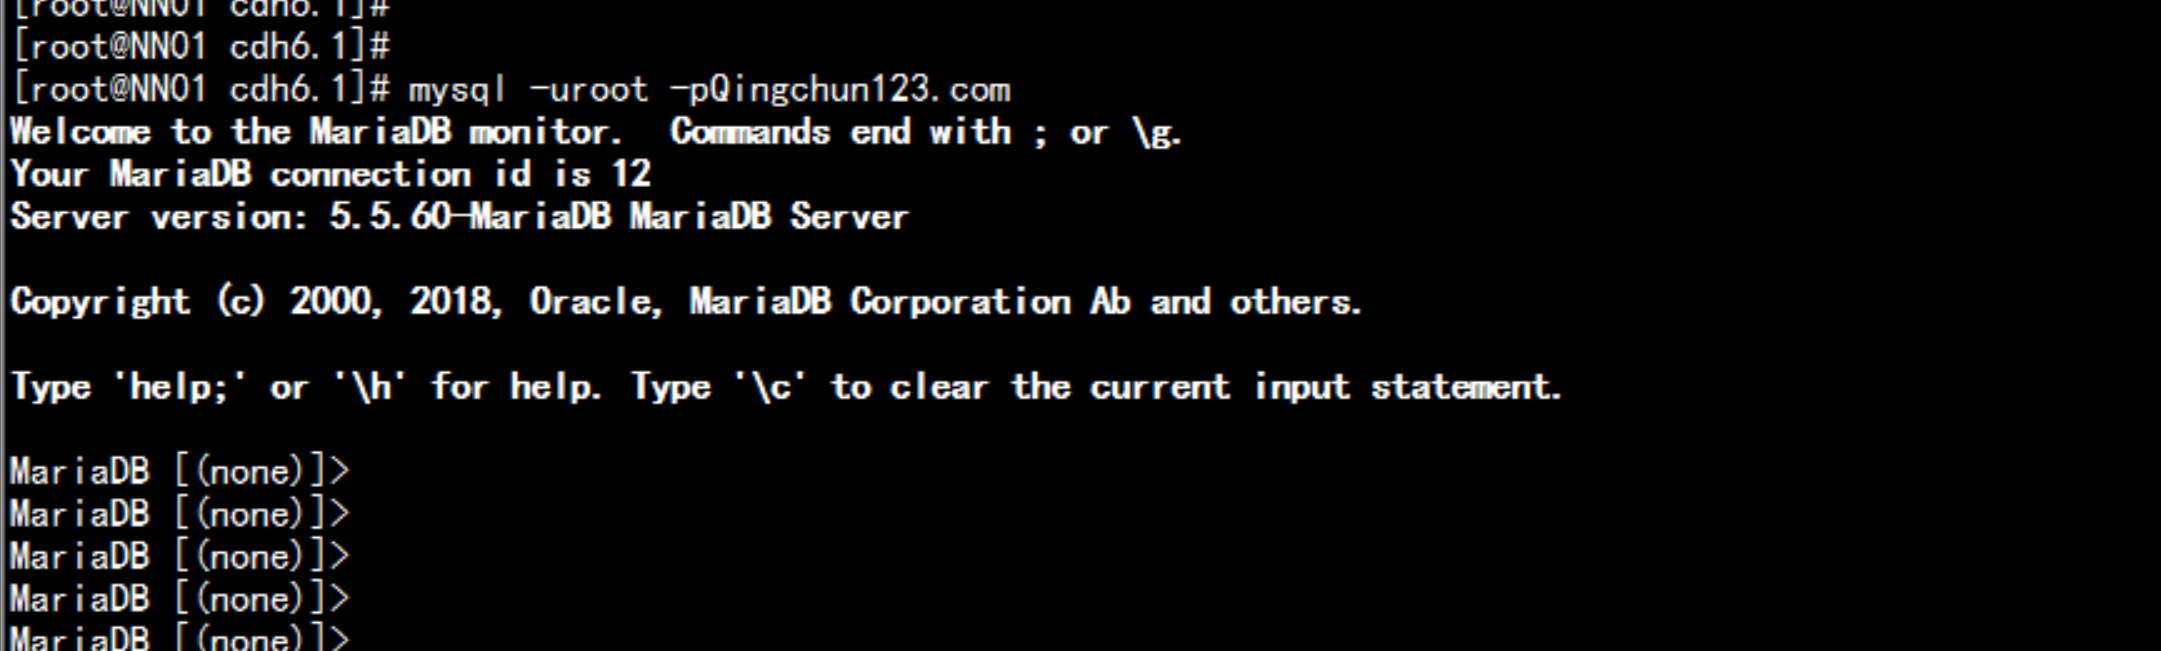
yum install -y mariadb-serverservice mariadb startchkconfig mariadb onmysql_secure_installationmysql -uroot -pQingchun123.com

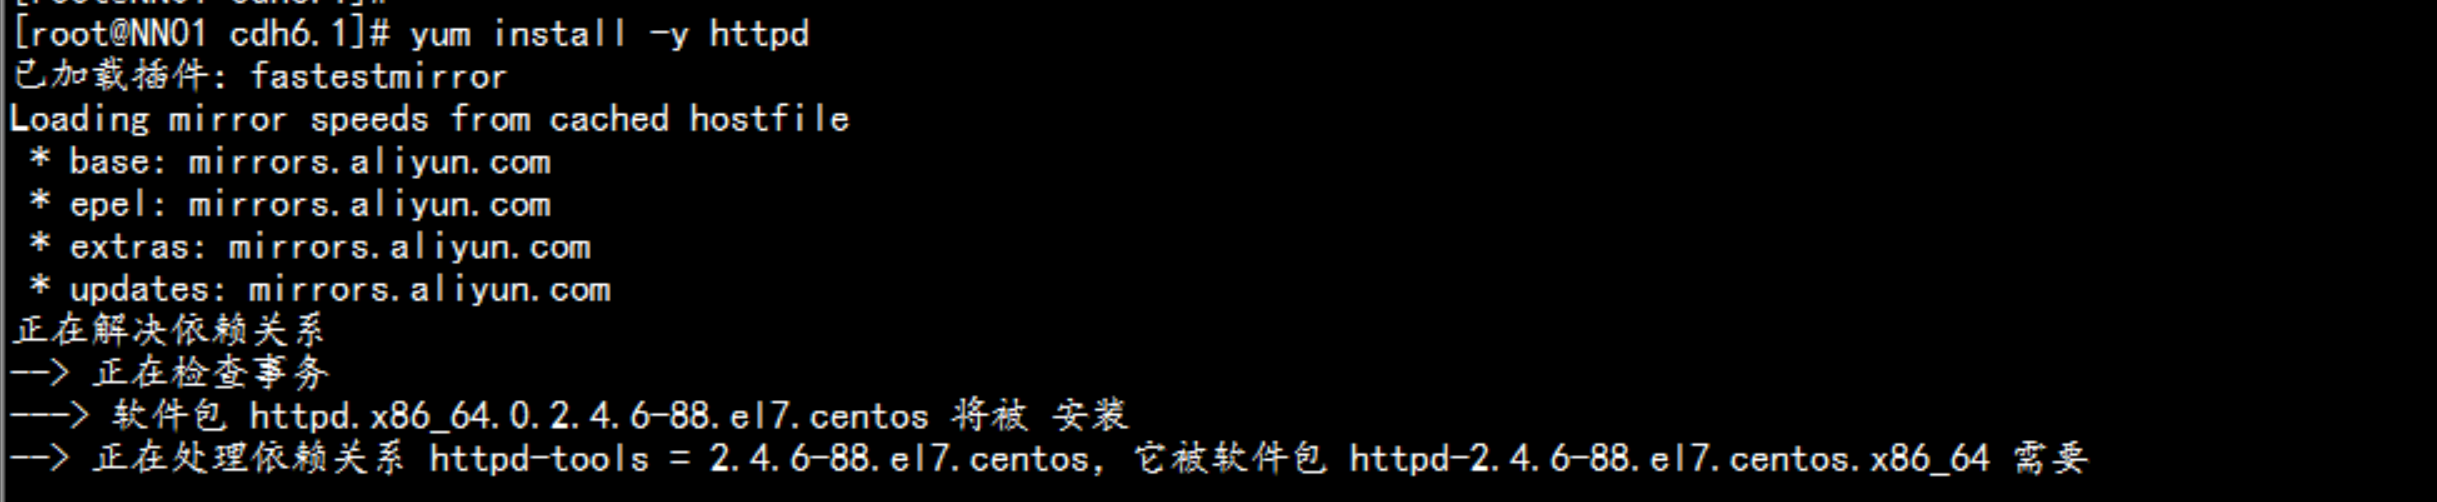
2.9配置 httpd 分发服务器
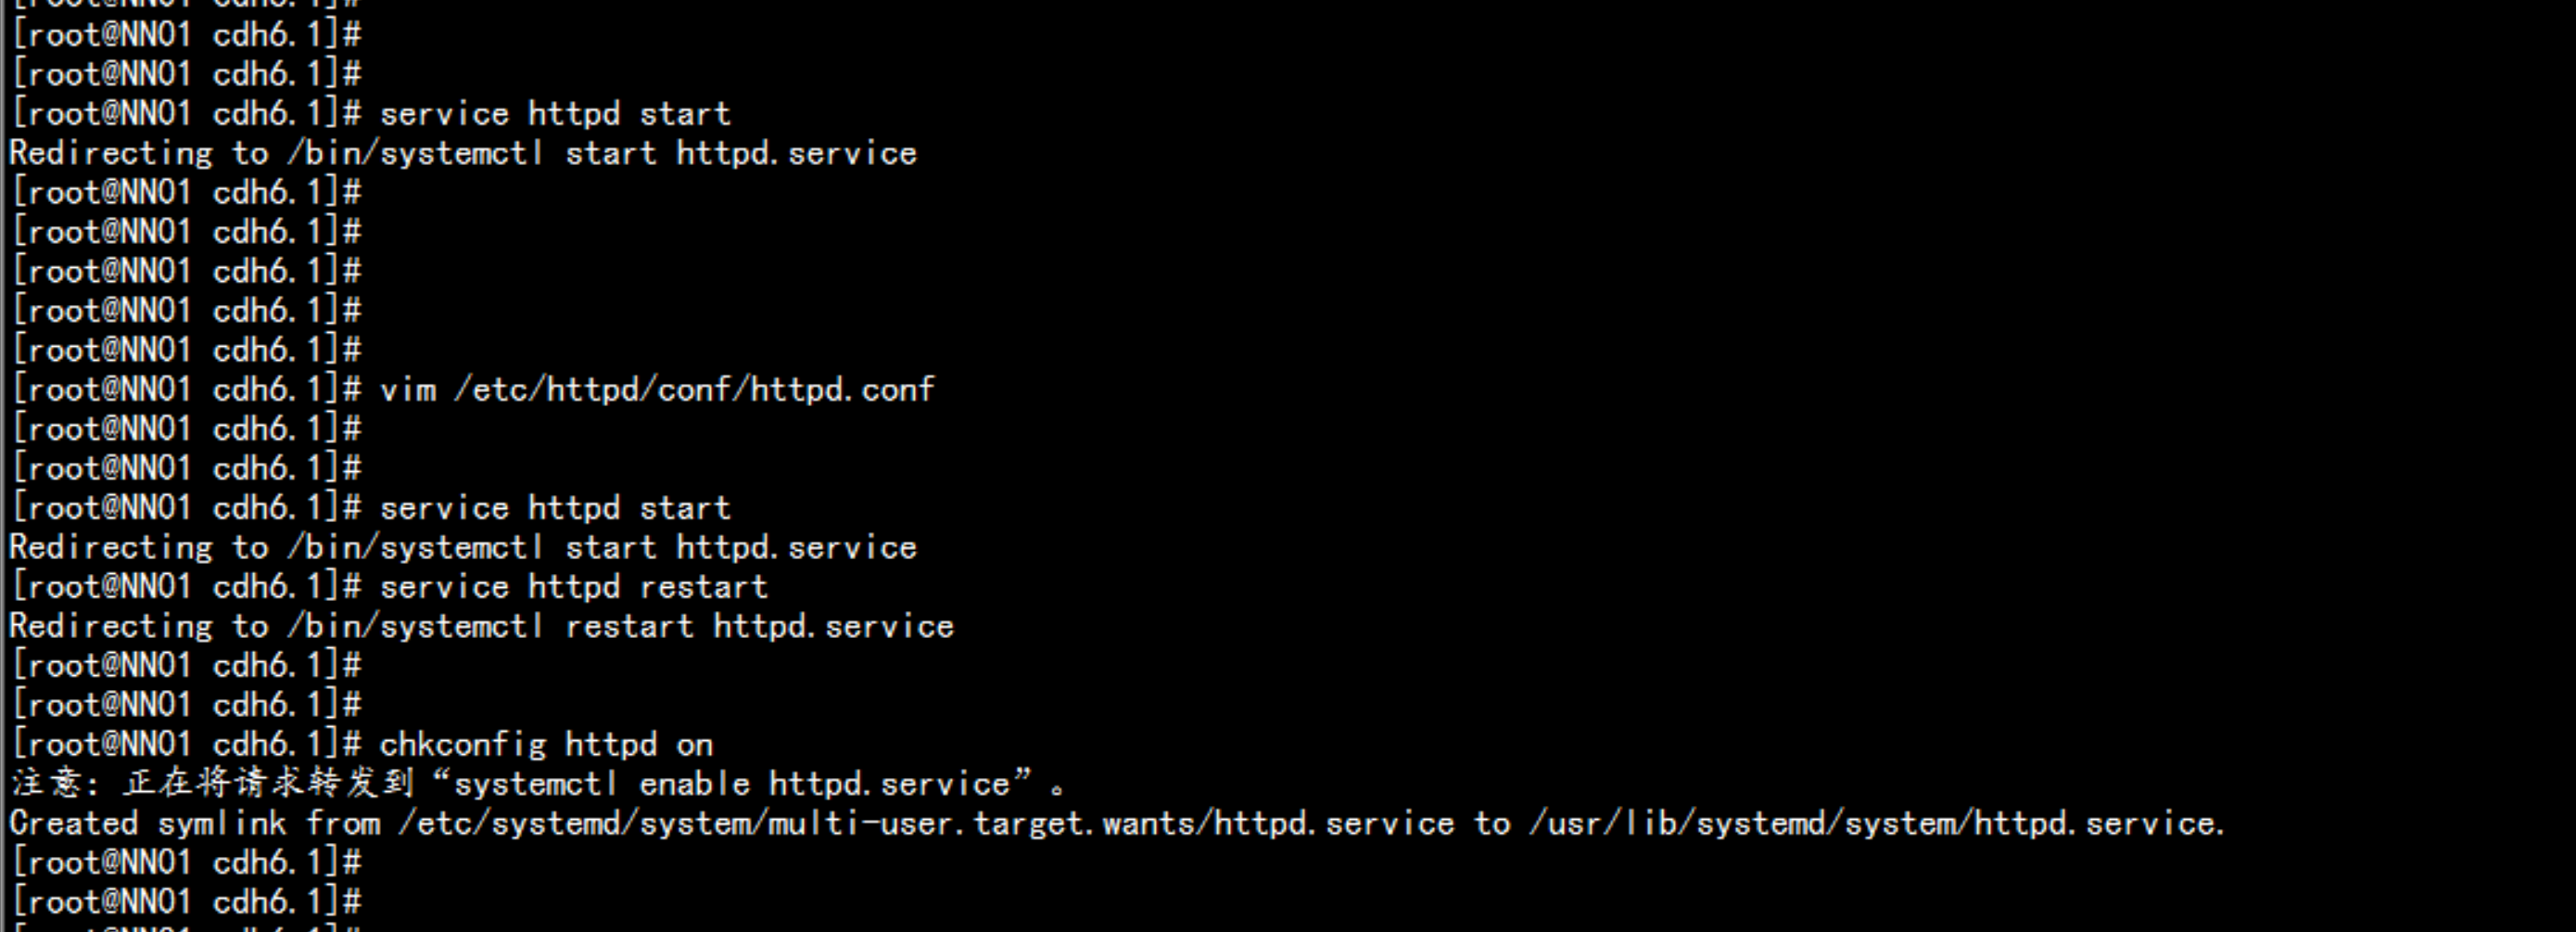
NN01.yl.com:yum install -y httpd
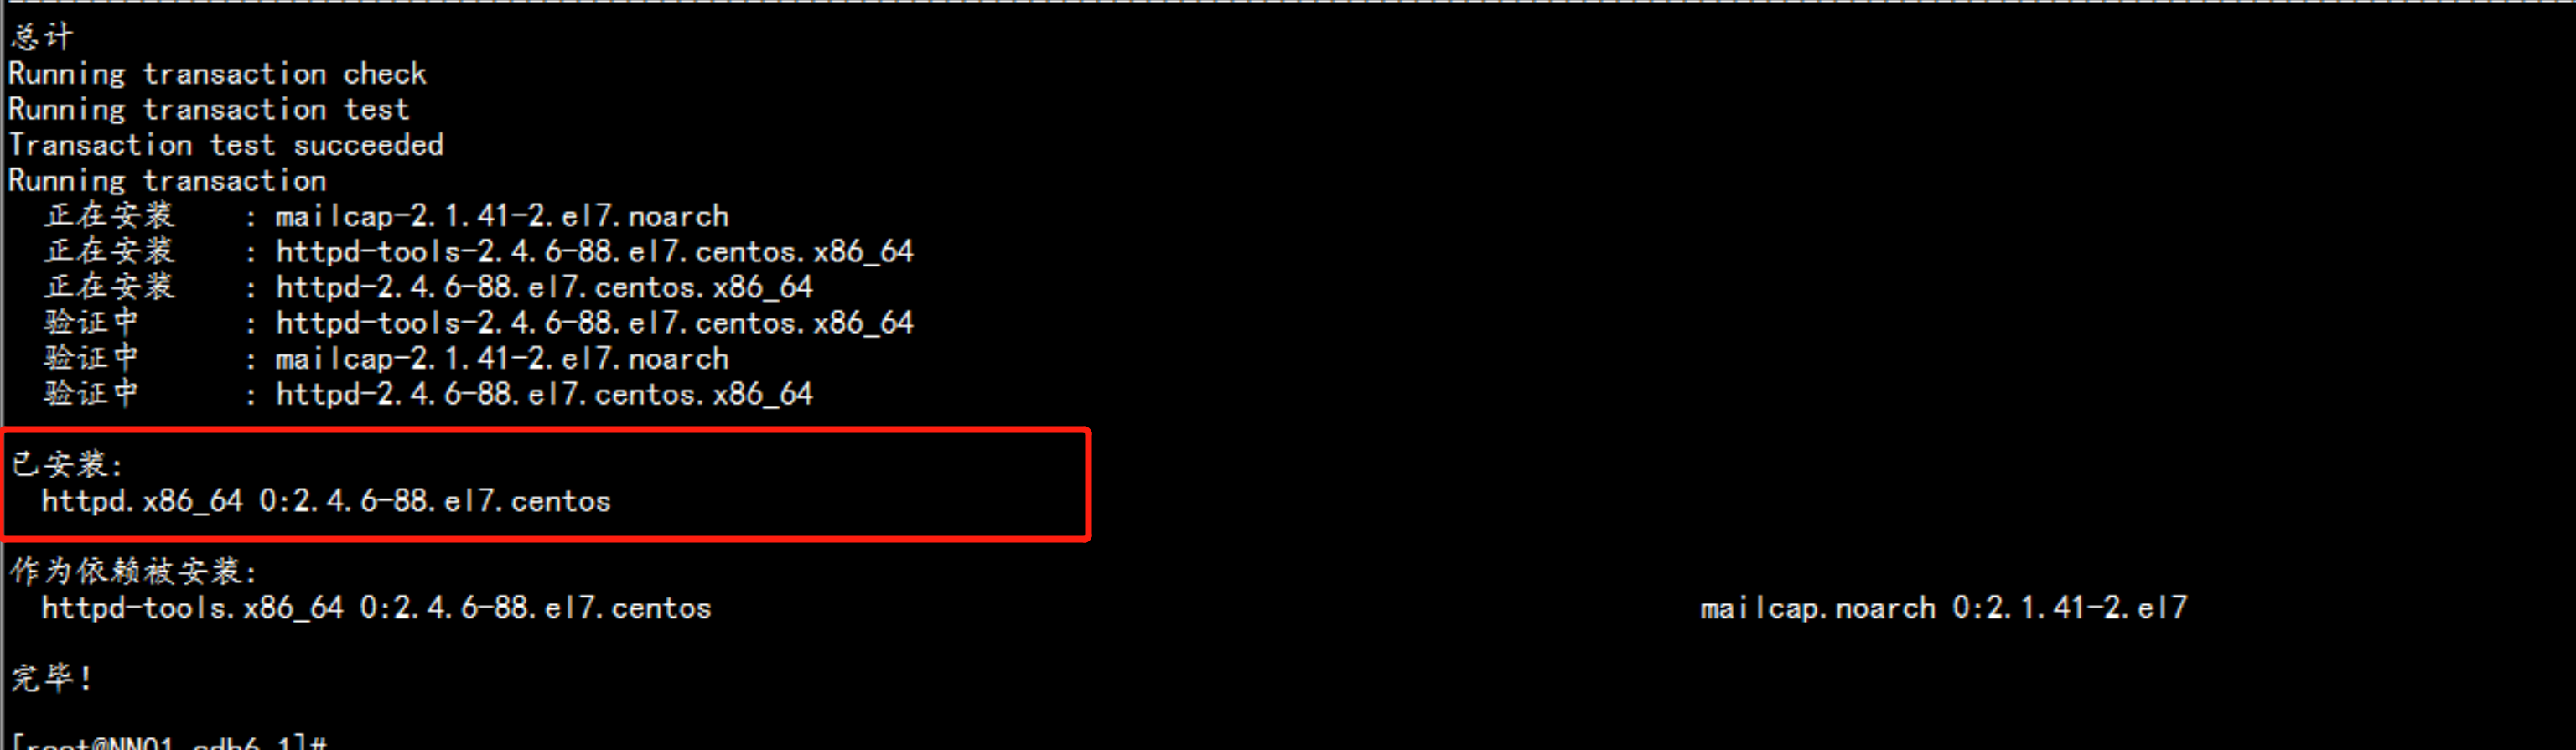
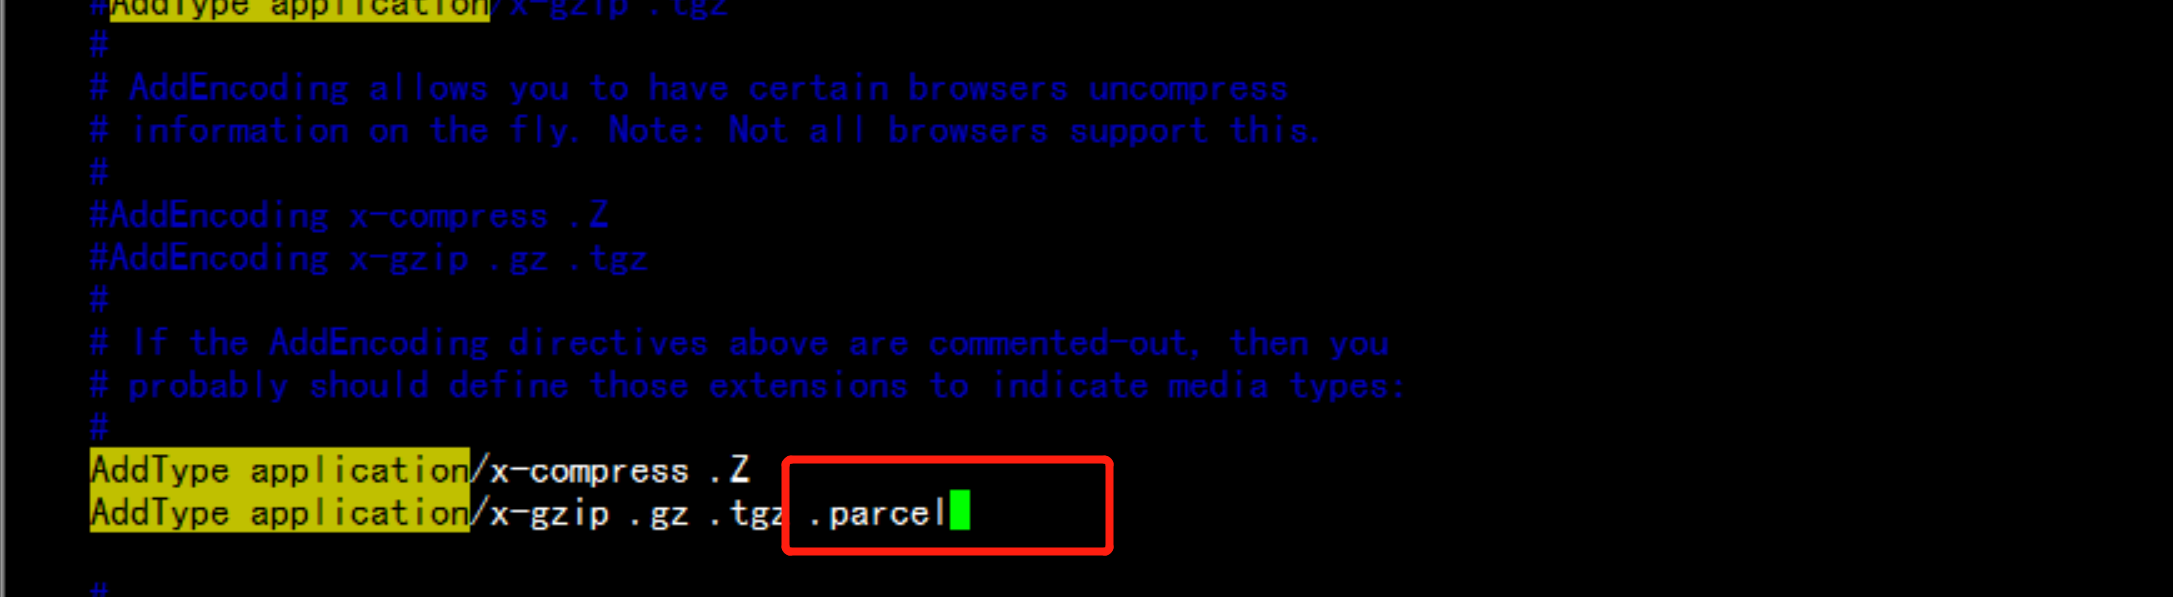
vim /etc/httpd/conf/httpd.conf----修改/etc/httpd/conf/httpd.conf配置文件,在<IfModule mime_module>中修改以下内容AddType application/x-gzip .gz .tgz .parcel----service httpd startchkconfig httpd start
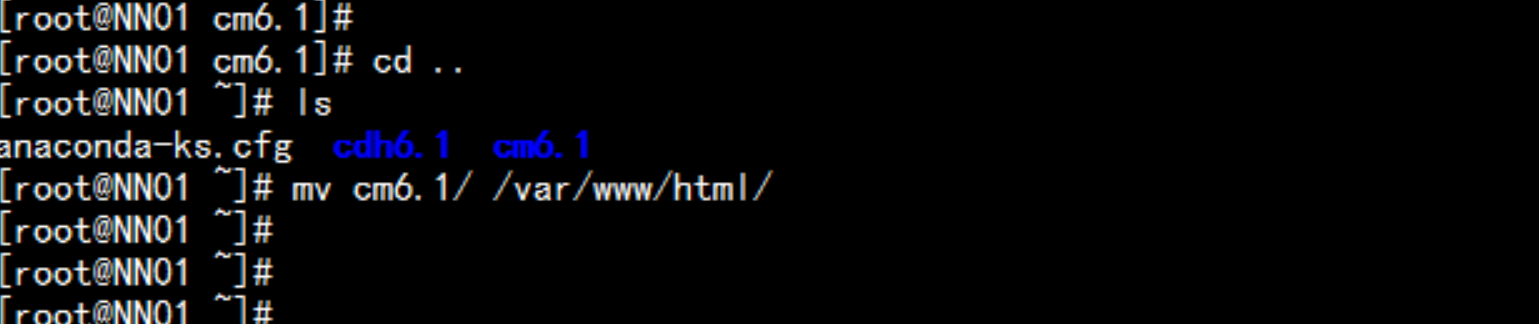
做CM6.1 的 分发源yum install -y createrepocd /root/cm6.1/createrepo .mv /root/cm6.1/ /var/www/html/mv /root/cdh6.1/ /var/www/html/

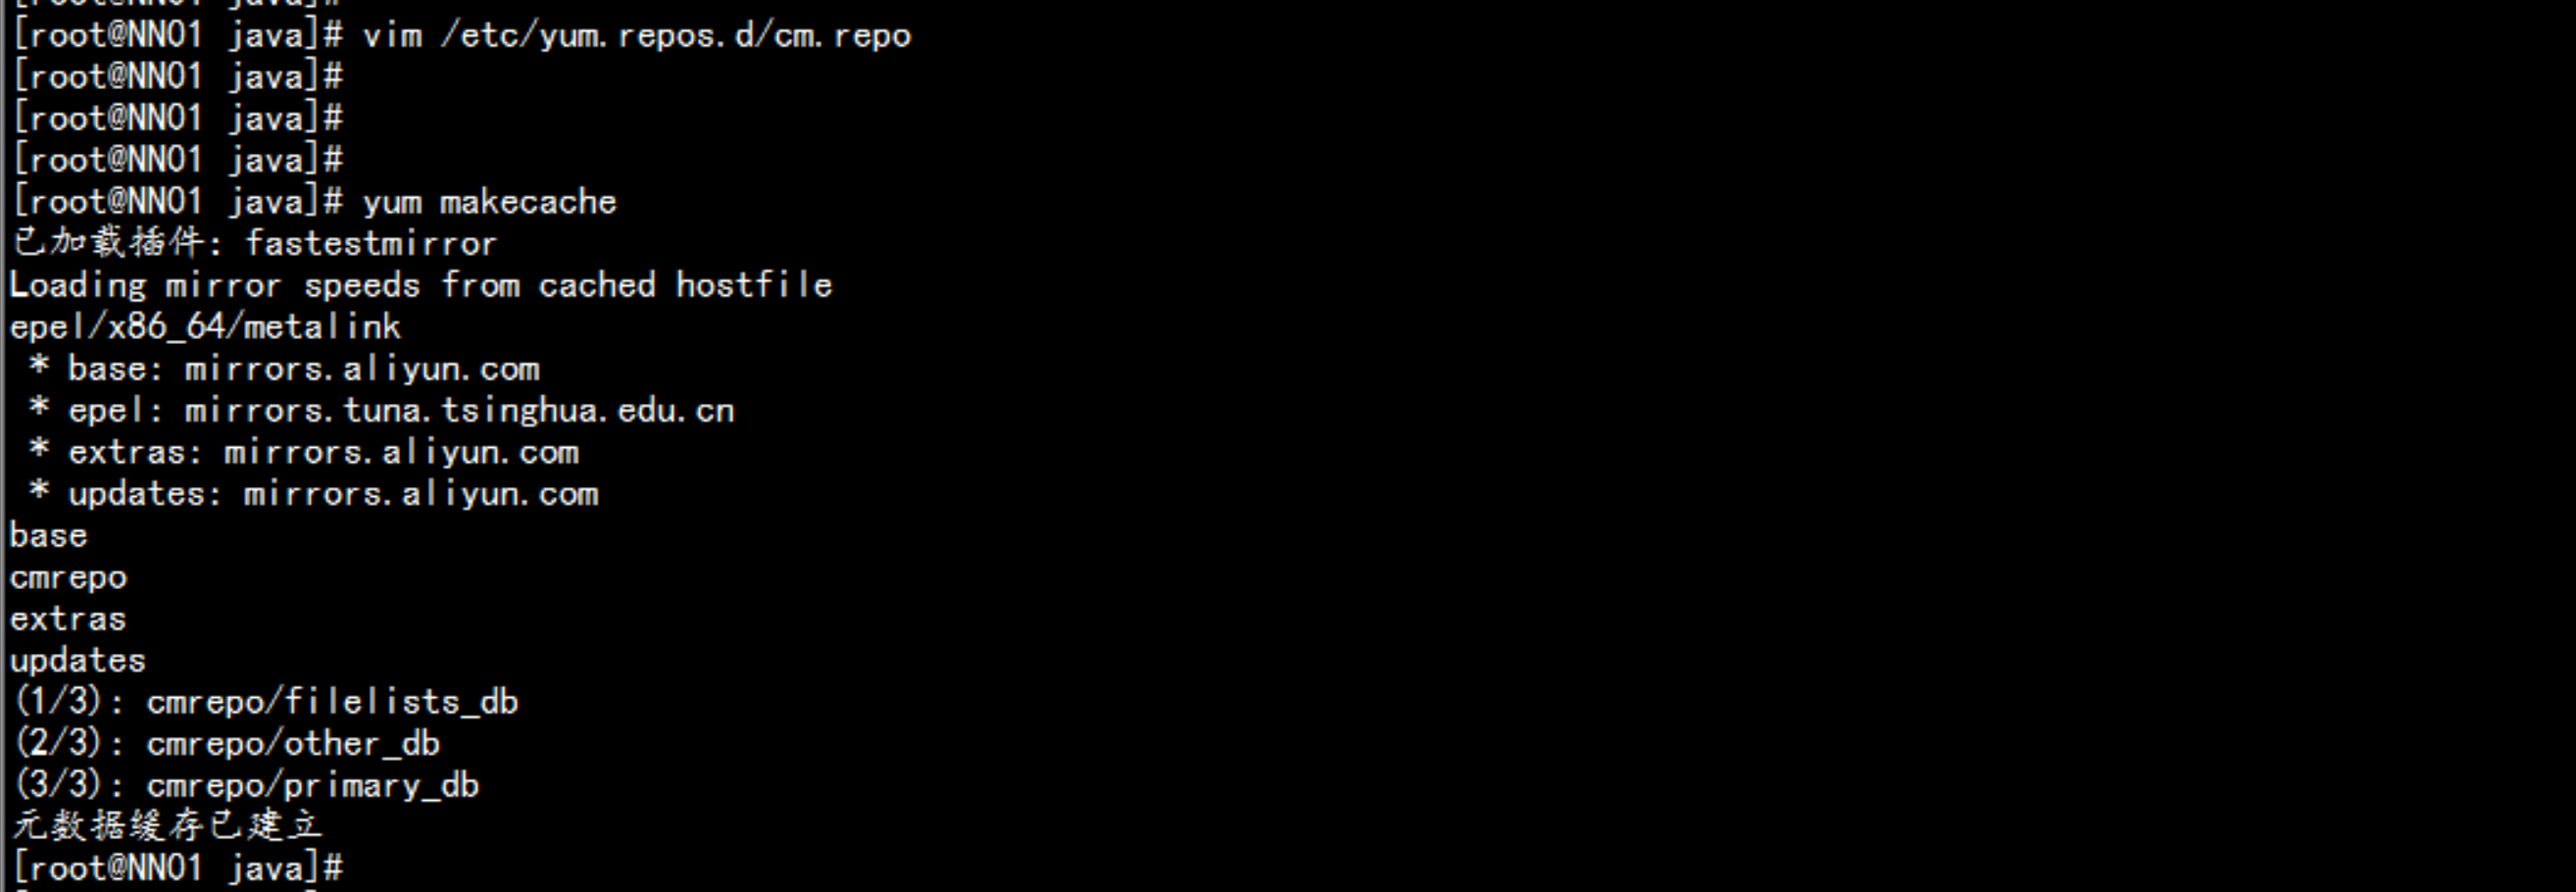
vim /etc/yum.repos.d/cm.repo------[cmrepo]name = cm_repobaseurl =http://192.168.20.111/cm6.1enable = truegpgcheck = false-----yum makecache
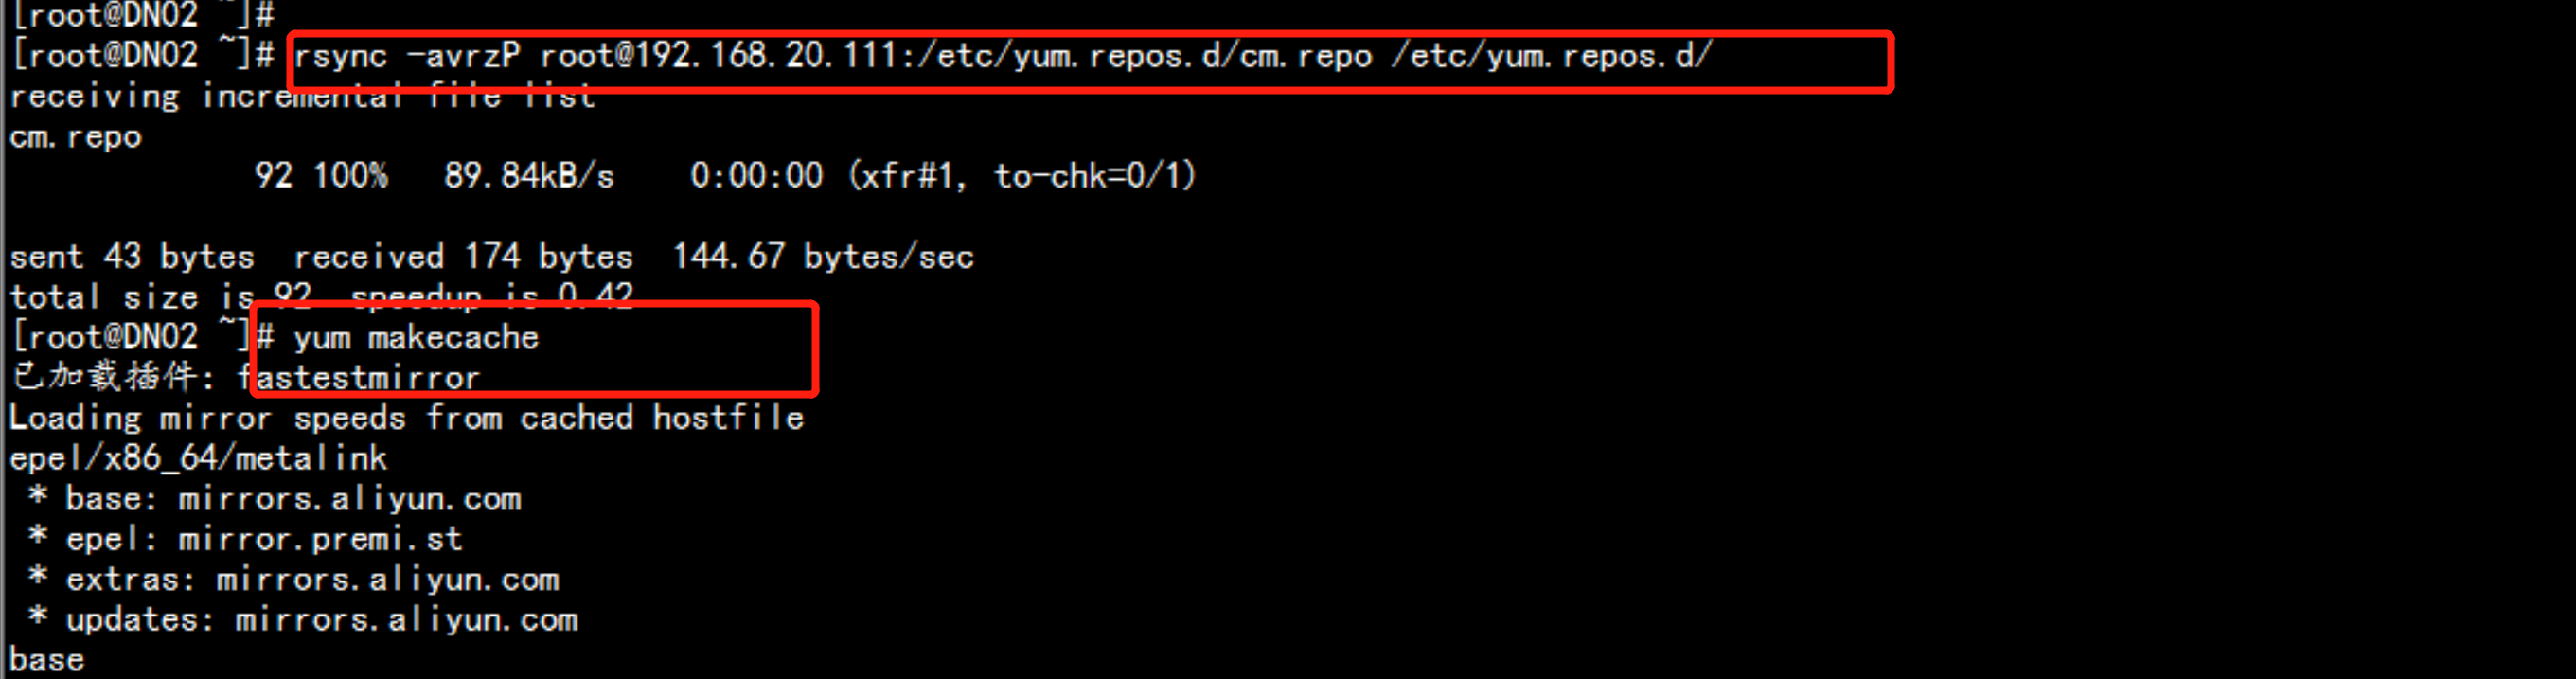
所有主机执行命令同步:rsync -avrzP root@192.168.20.111:/etc/yum.repos.d/cm.repo /etc/yum.repos.d/yum makecache
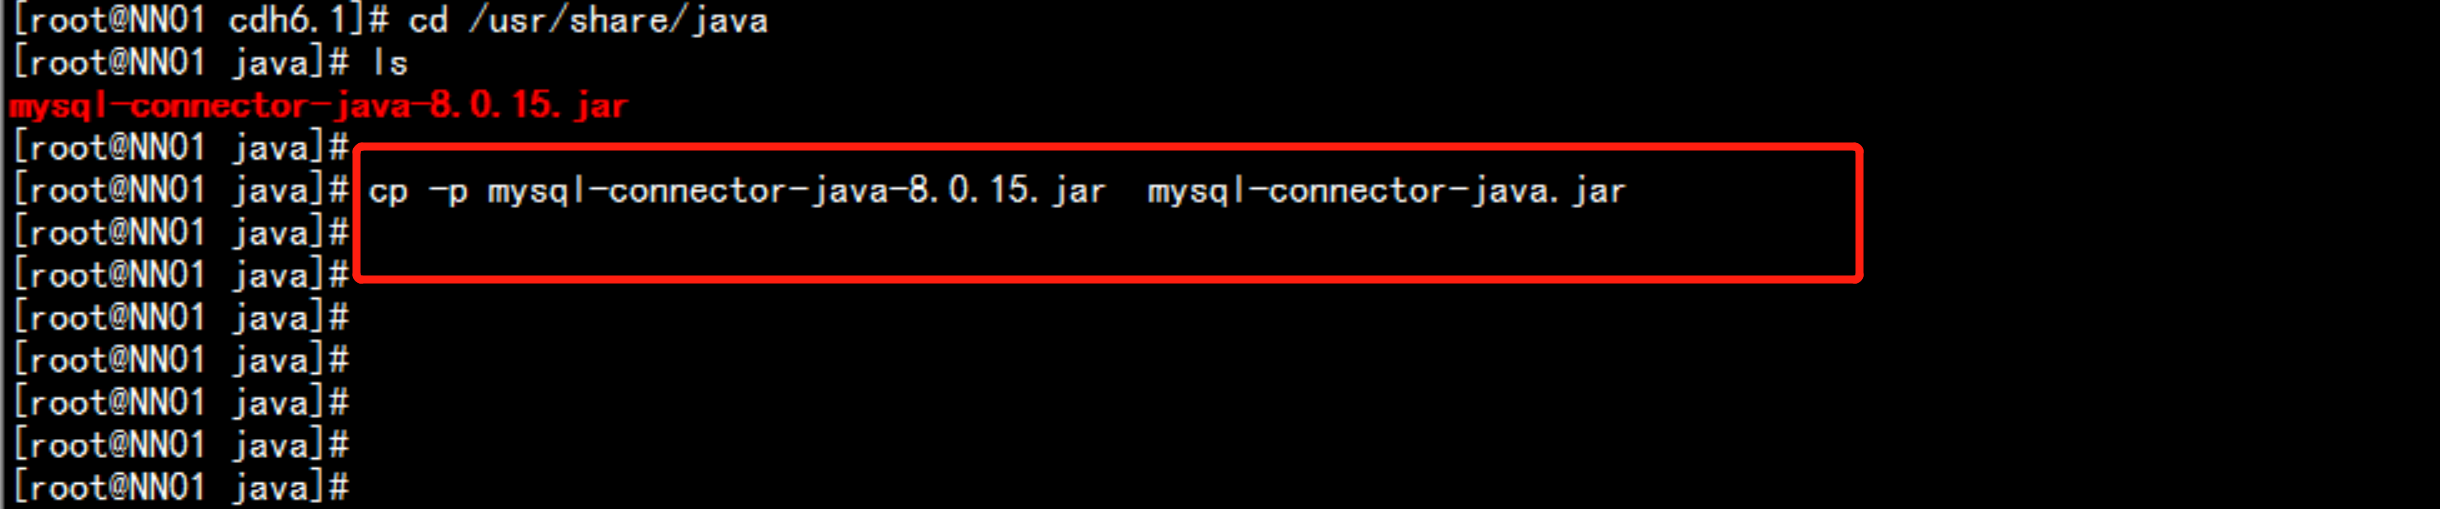
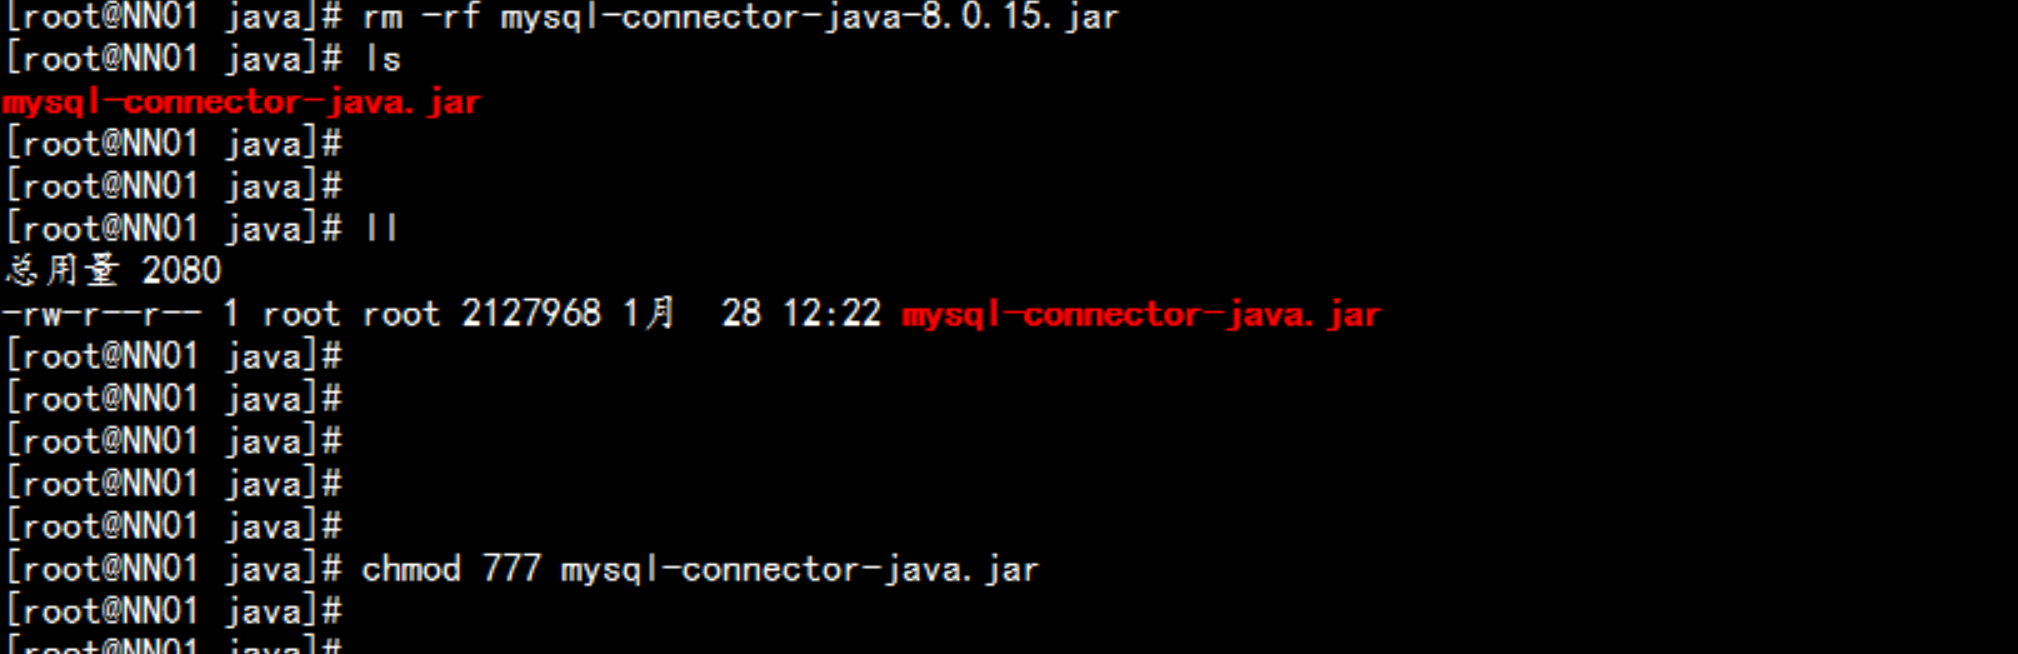
2.10 配置mysql-jdbc
rpm -ivh mysql-connector-java-8.0.15-1.el7.noarch.rpmcd /usr/share/java/cp -p mysql-connector-java-8.0.15.jar mysql-connector-java.jar

三: 安装CDH6.1所需环境
3.1:安装所需依赖包
所有大数据节点都要安装:yum -y install chkconfig python bind-utils psmisc libxslt zlib sqlite cyrus-sasl-plain cyrus-sasl-gssapi fuse fuse-libs redhat-lsb postgresql* portmap mod_ssl openssl-devel python-psycopg2 MySQL-python

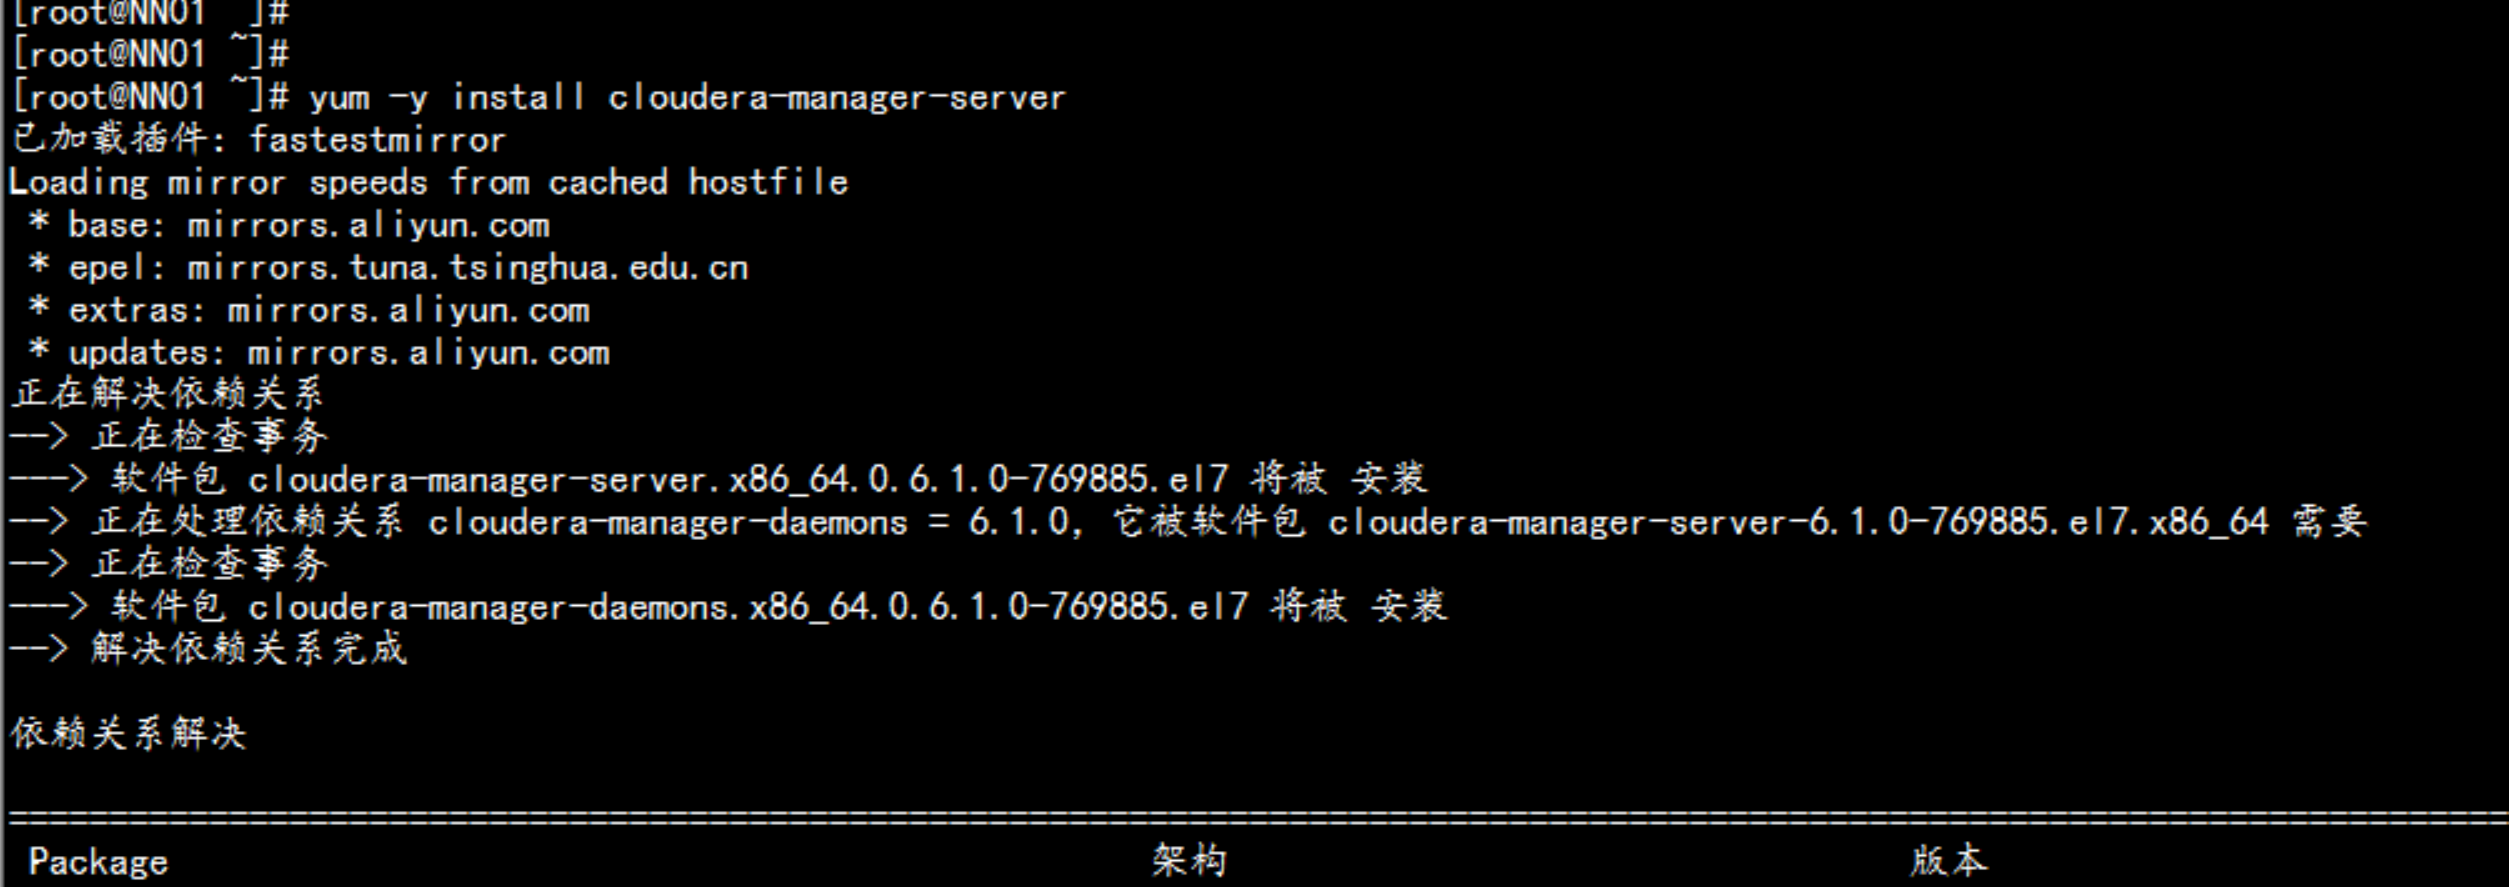
3.2 安装cloudera-server
yum install -y cloudera-manager-server
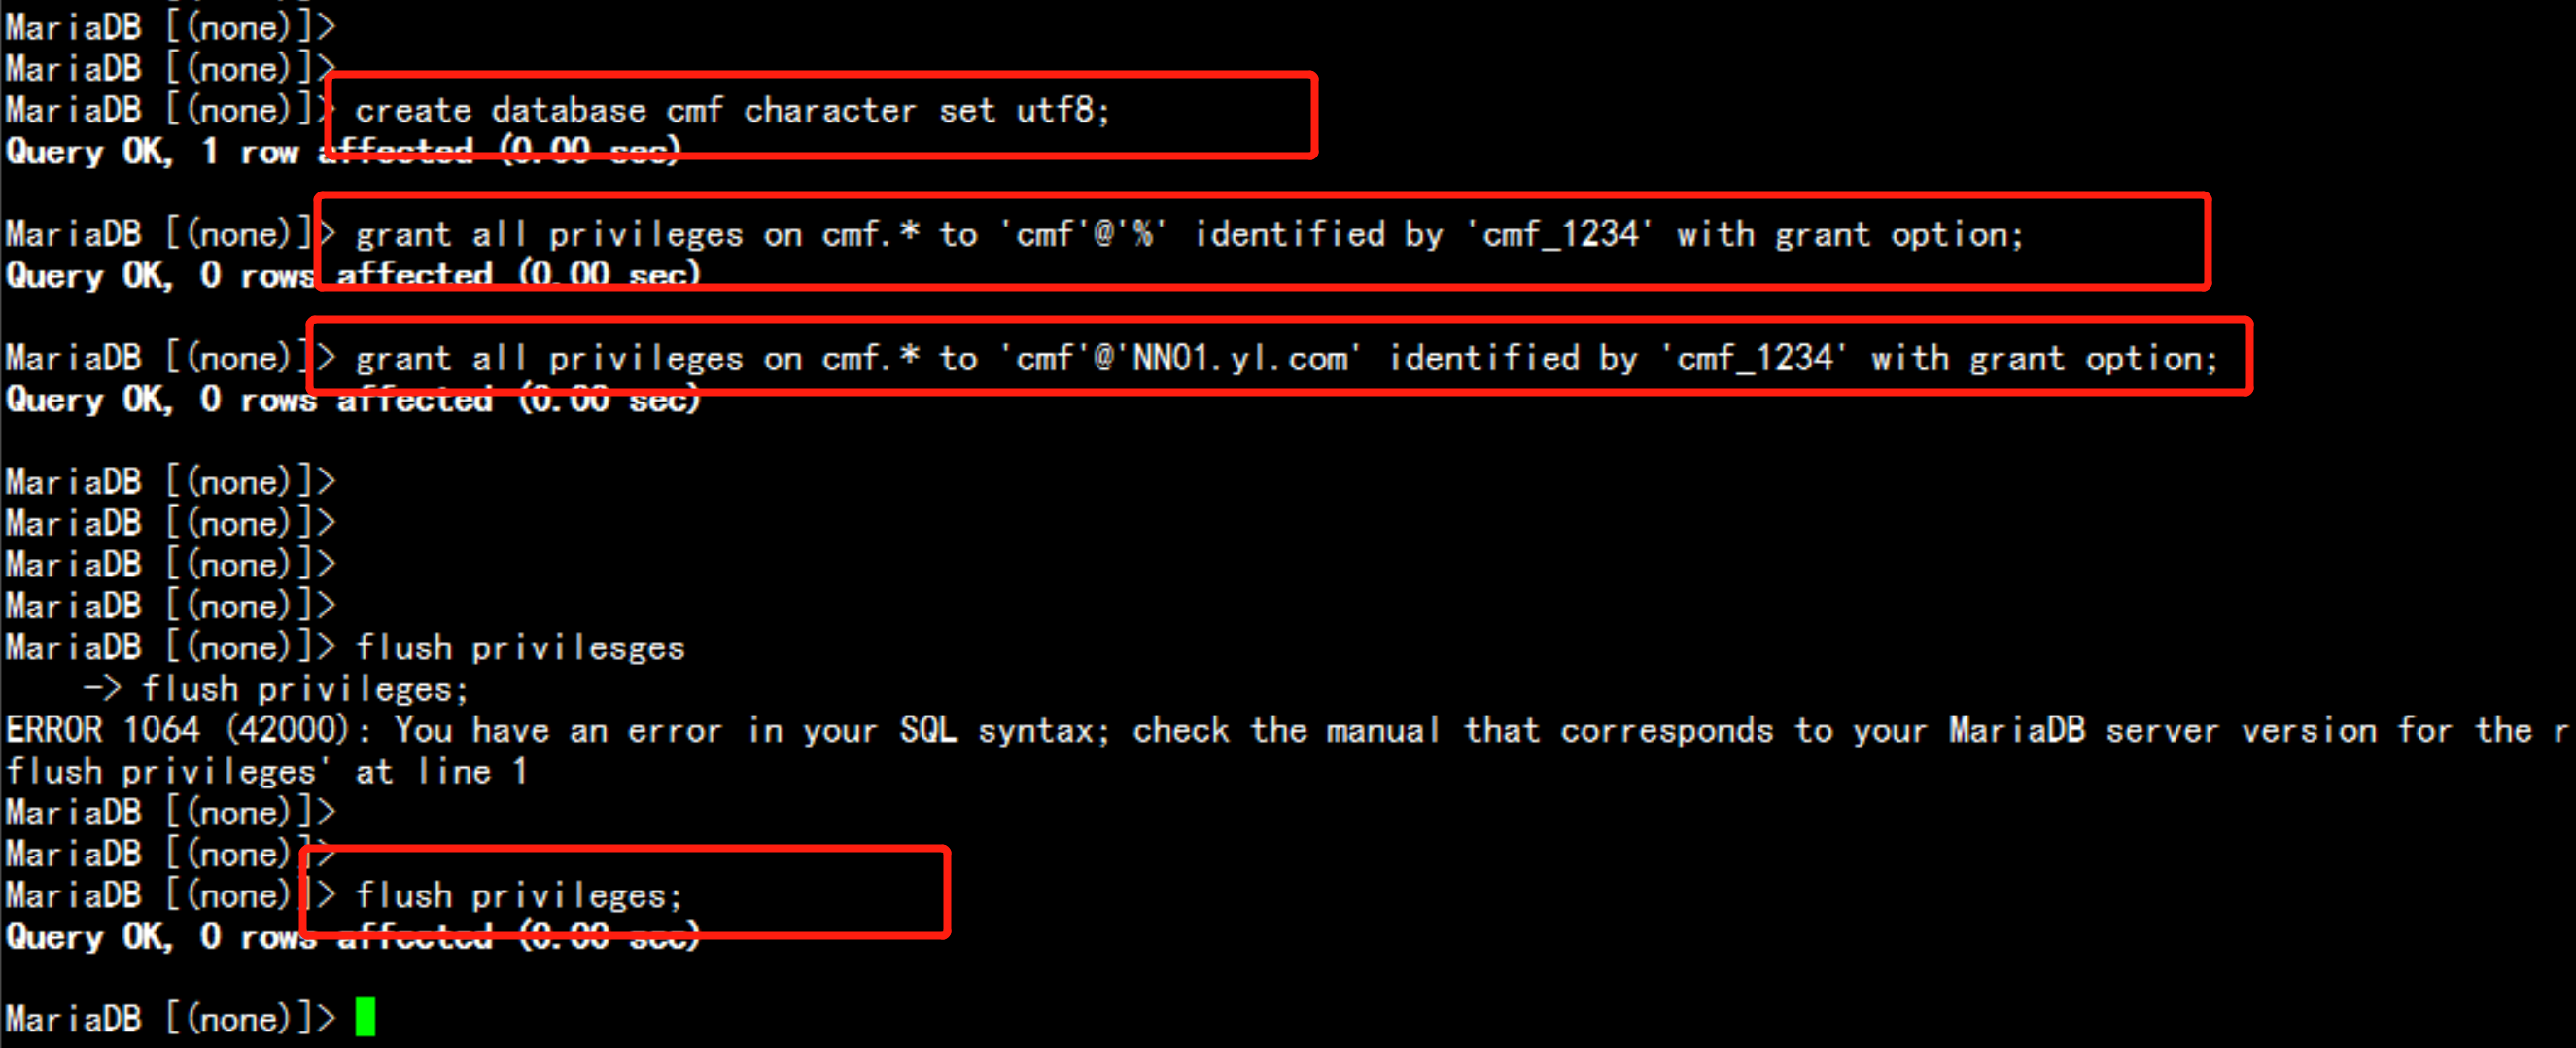
3.3 在 mysql 当中创建 CM 需要的注册库
# mysql -uroot -pQingchun123.commysql> create database cmf character set utf8;mysql> grant all privileges on cmf.* to 'cmf'@'%' identified by 'cmf_1234' with grant option;mysql> grant all privileges on cmf.* to 'cmf'@'NN01.yl.com' identified by 'cmf_1234' with grant option;mysql> flush privileges;
3.4 注入CM-server库 与 CM-agent端的server
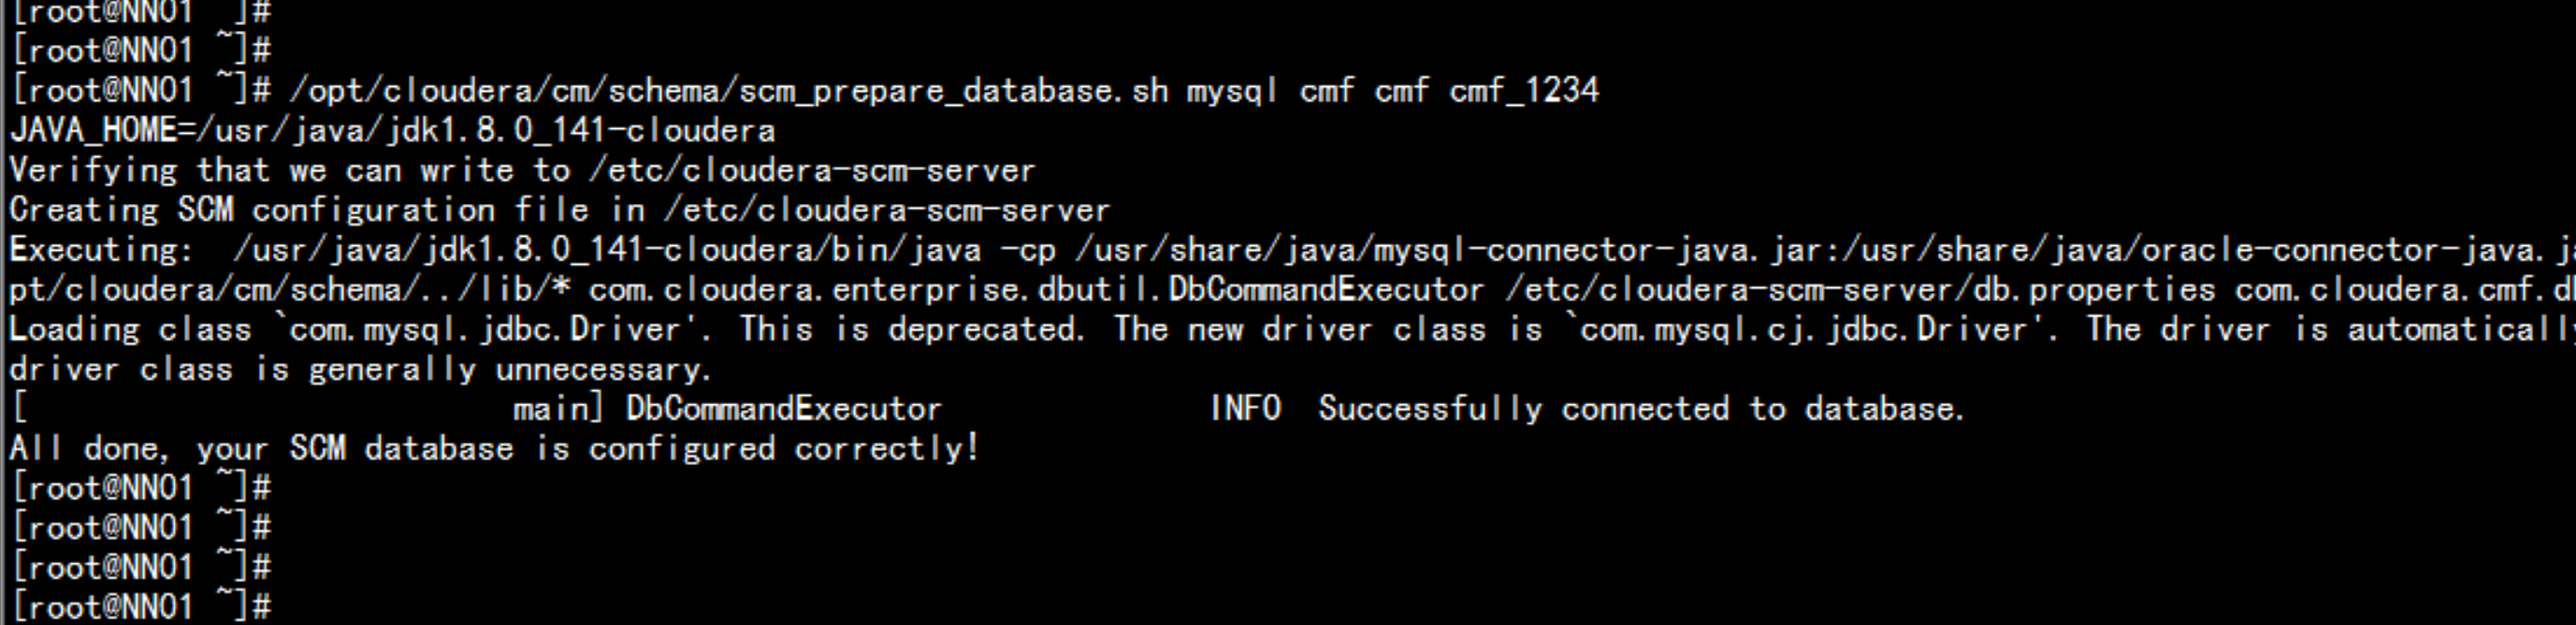
/opt/cloudera/cm/schema/scm_prepare_database.sh mysql cmf cmf cmf_1234
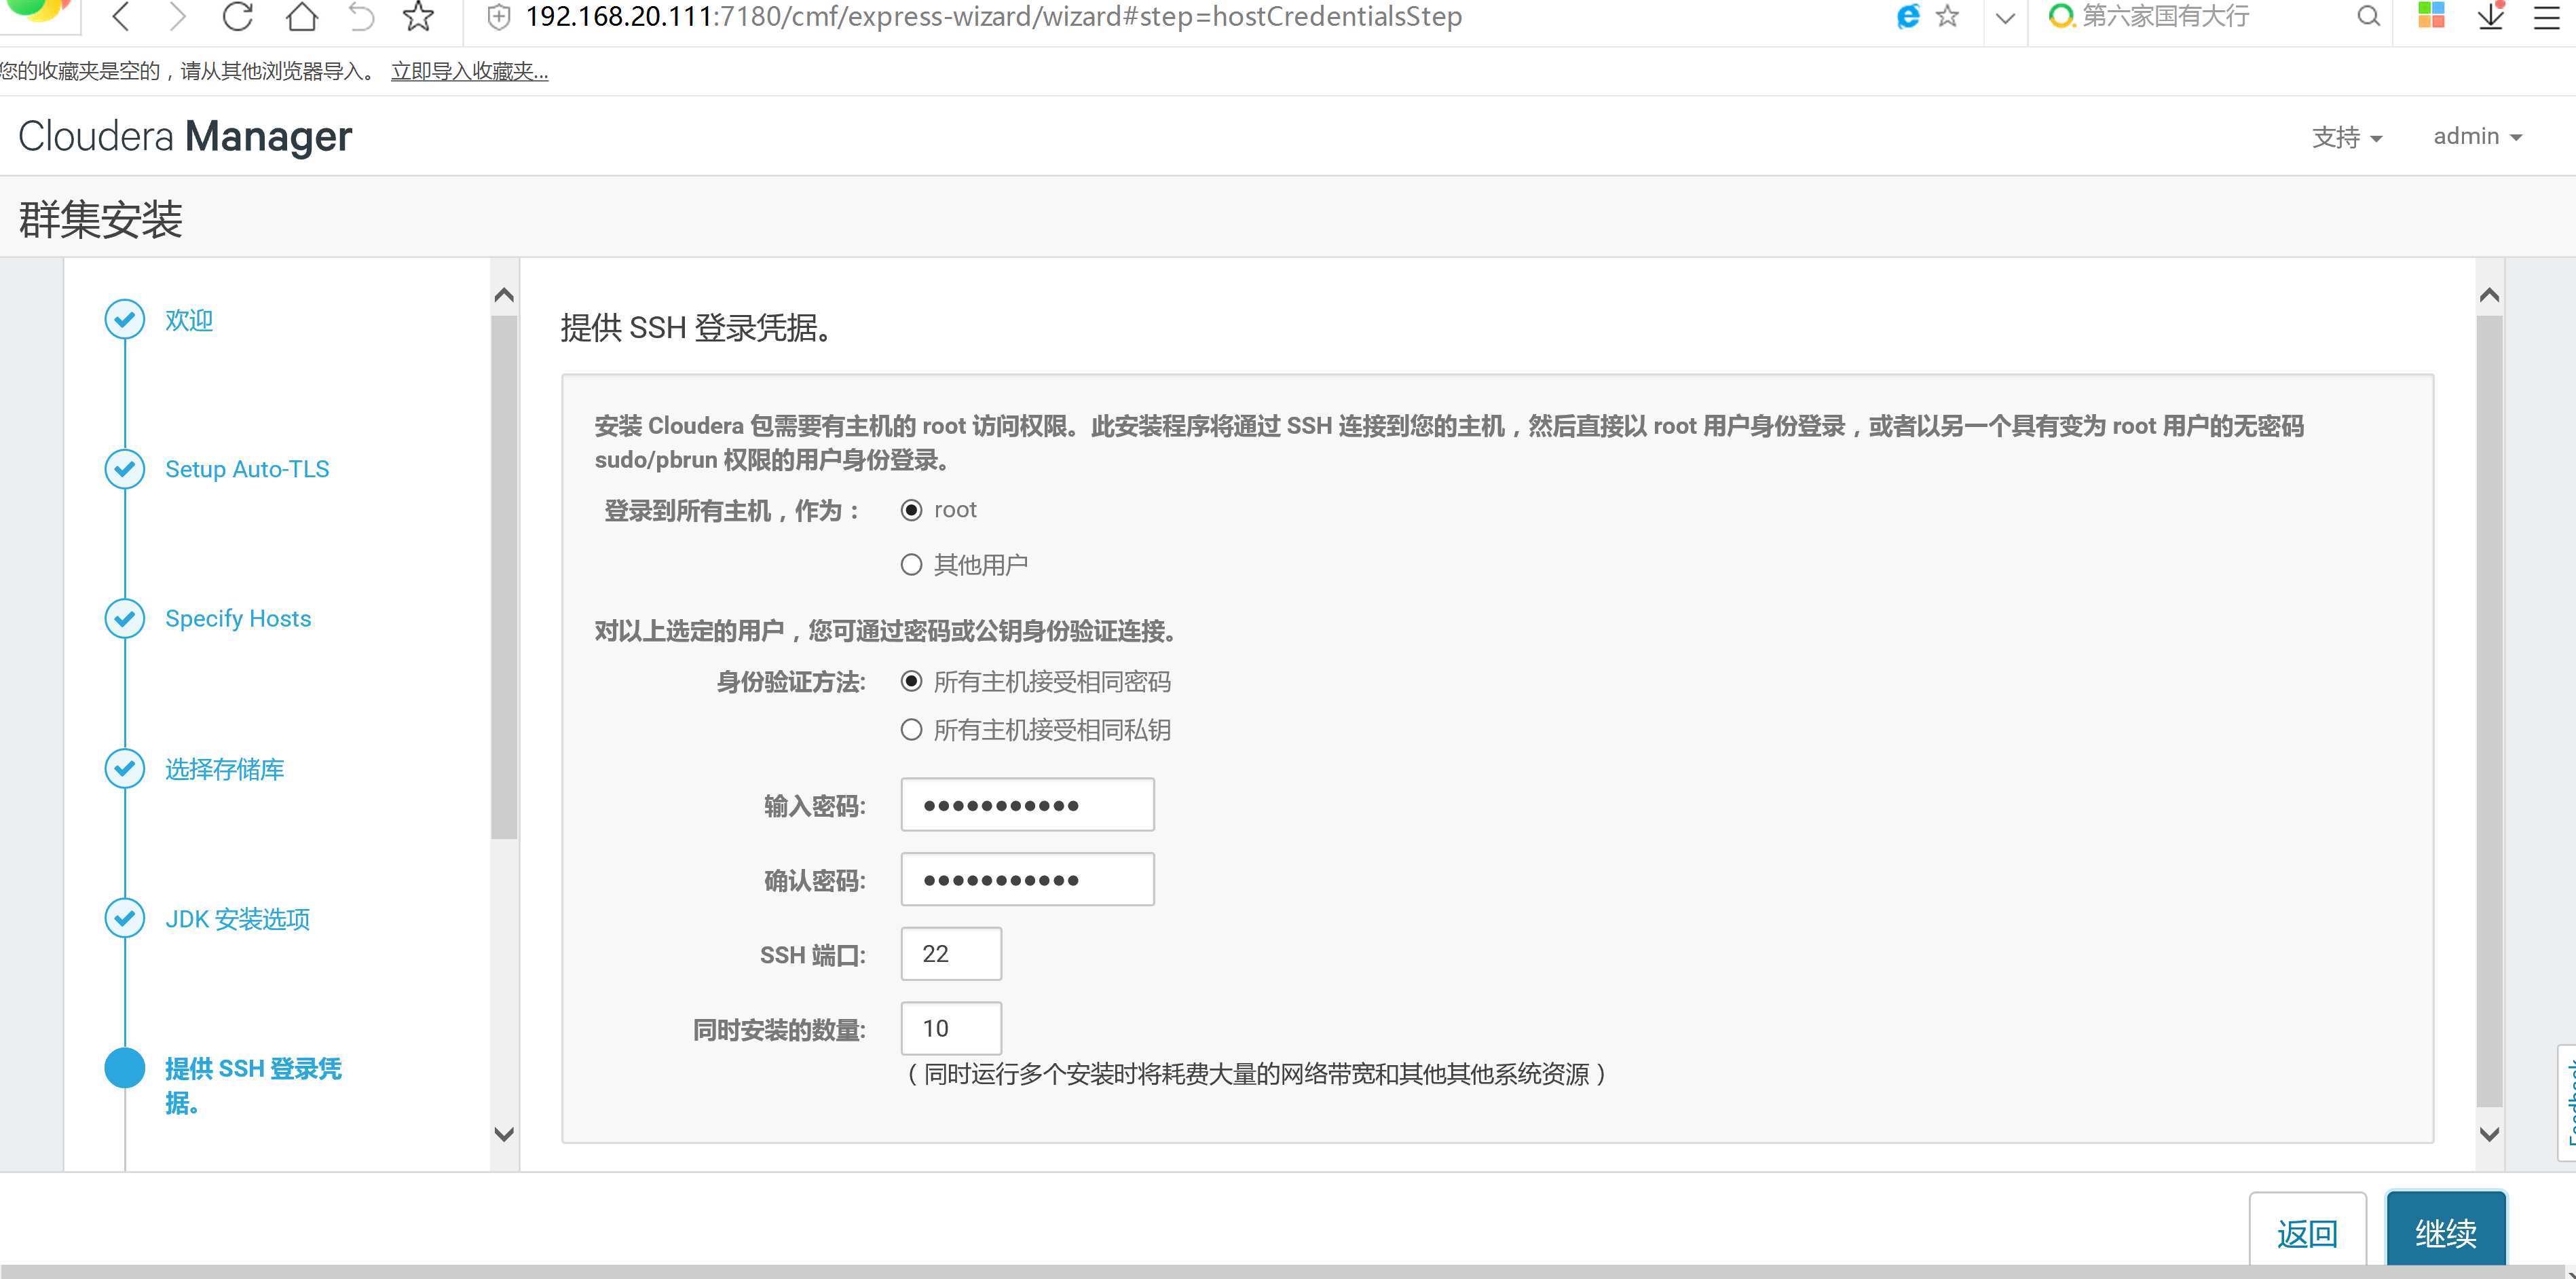
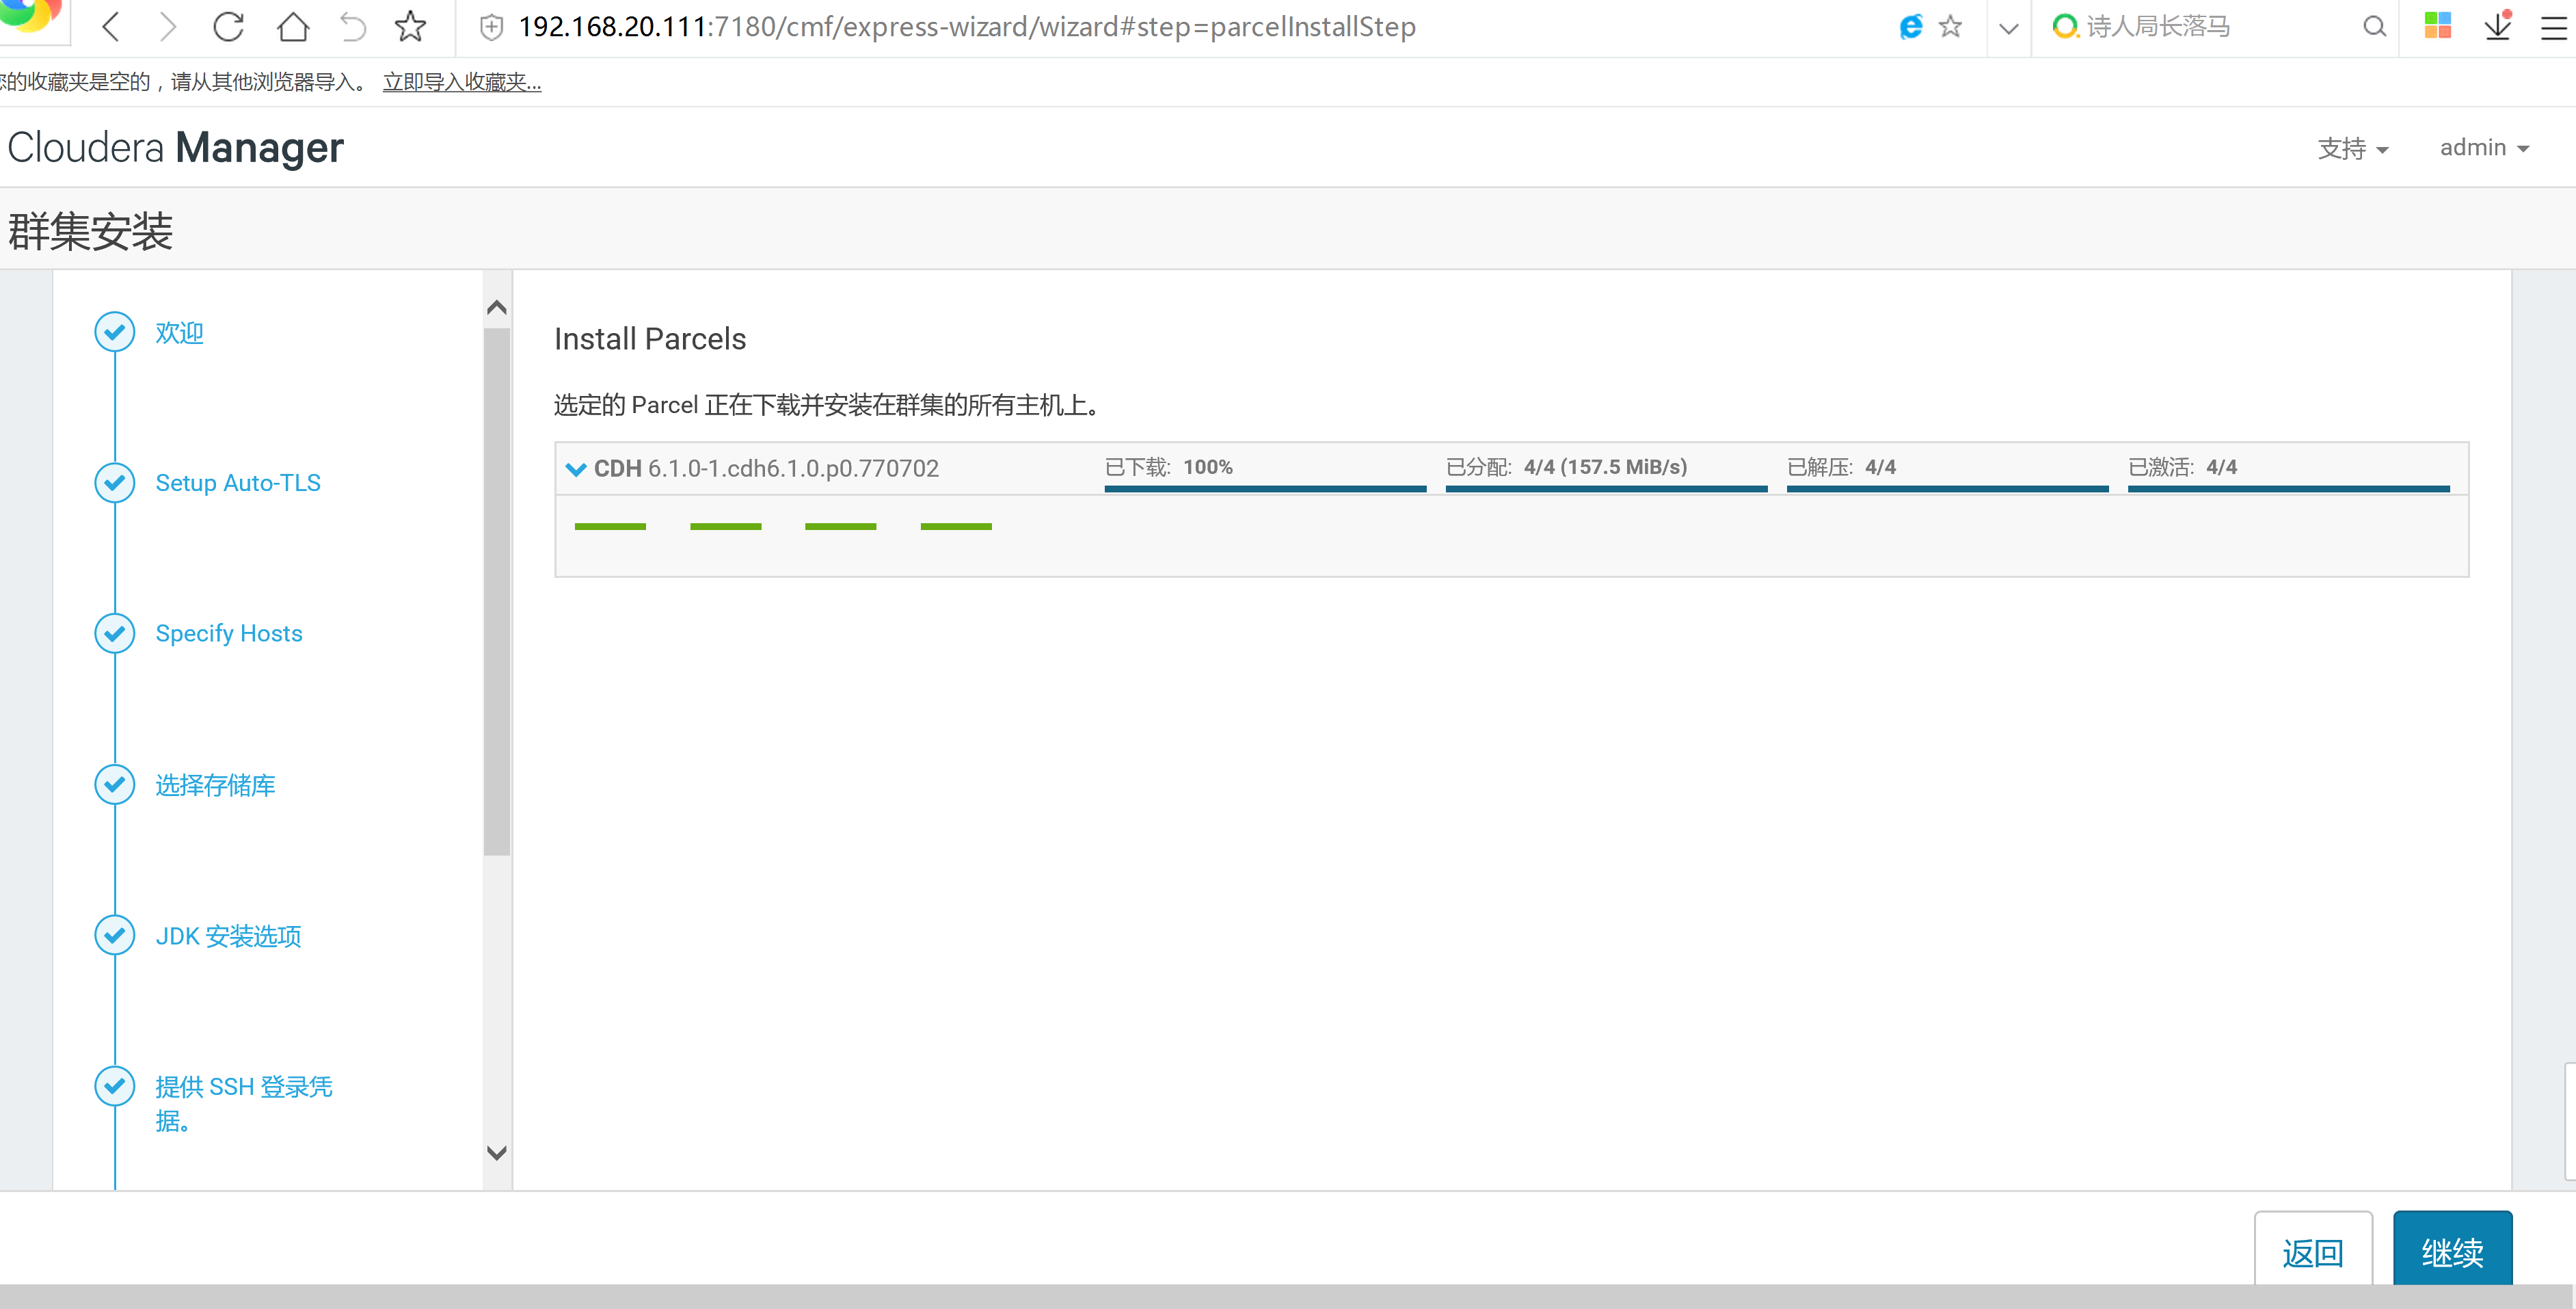
四: 配置CDH6.1的cloudera-manager安装
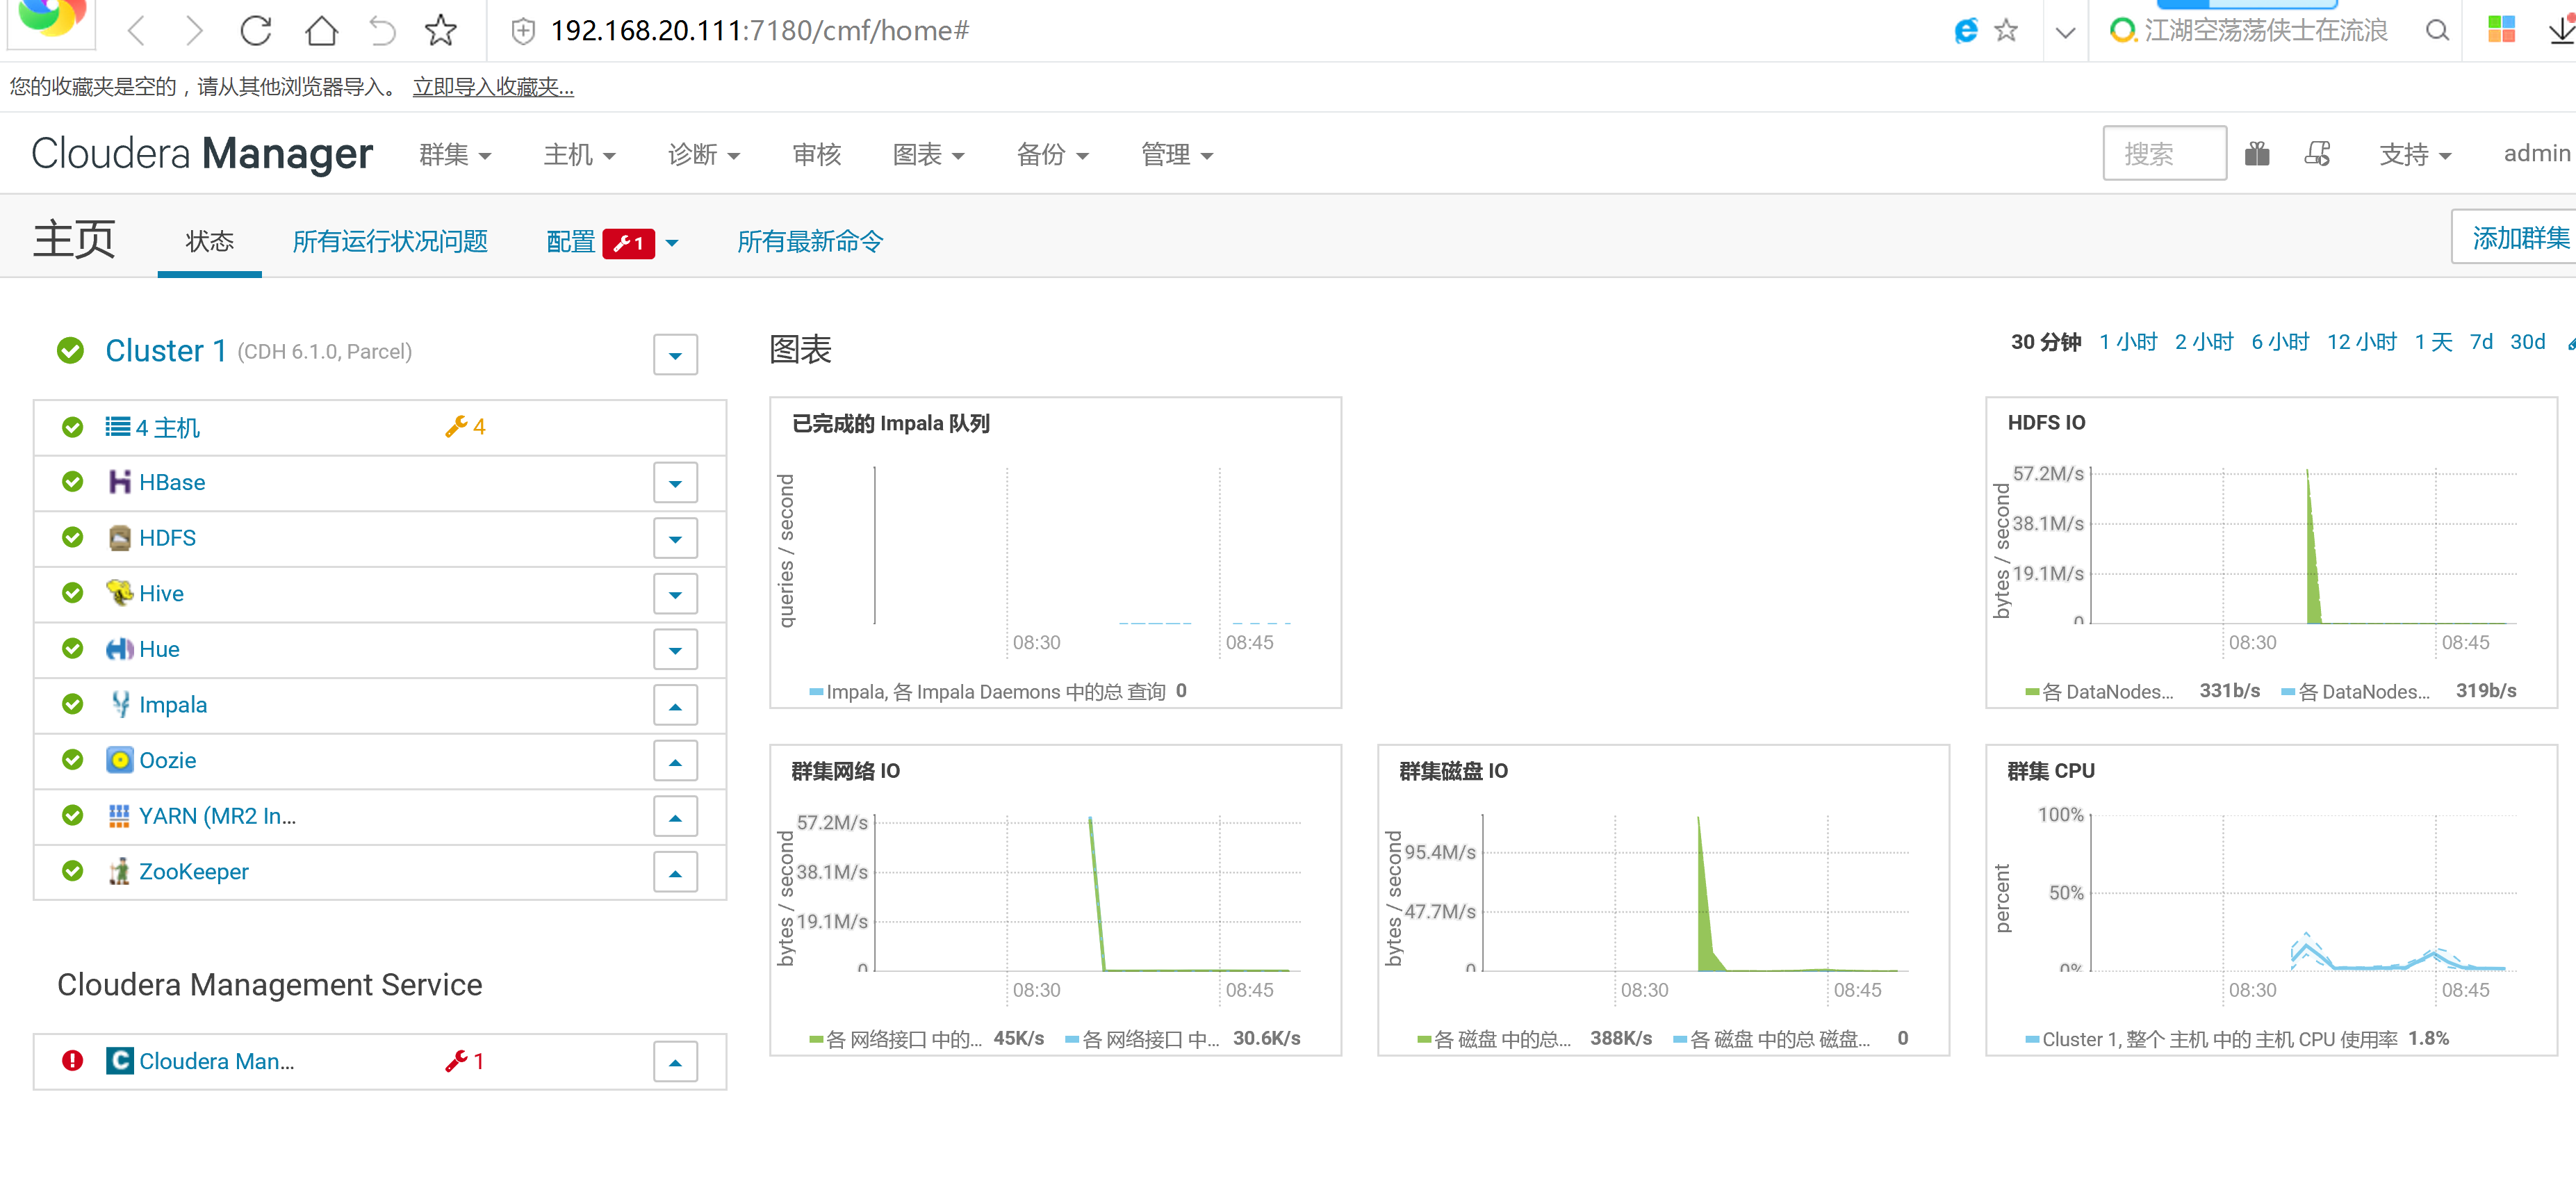
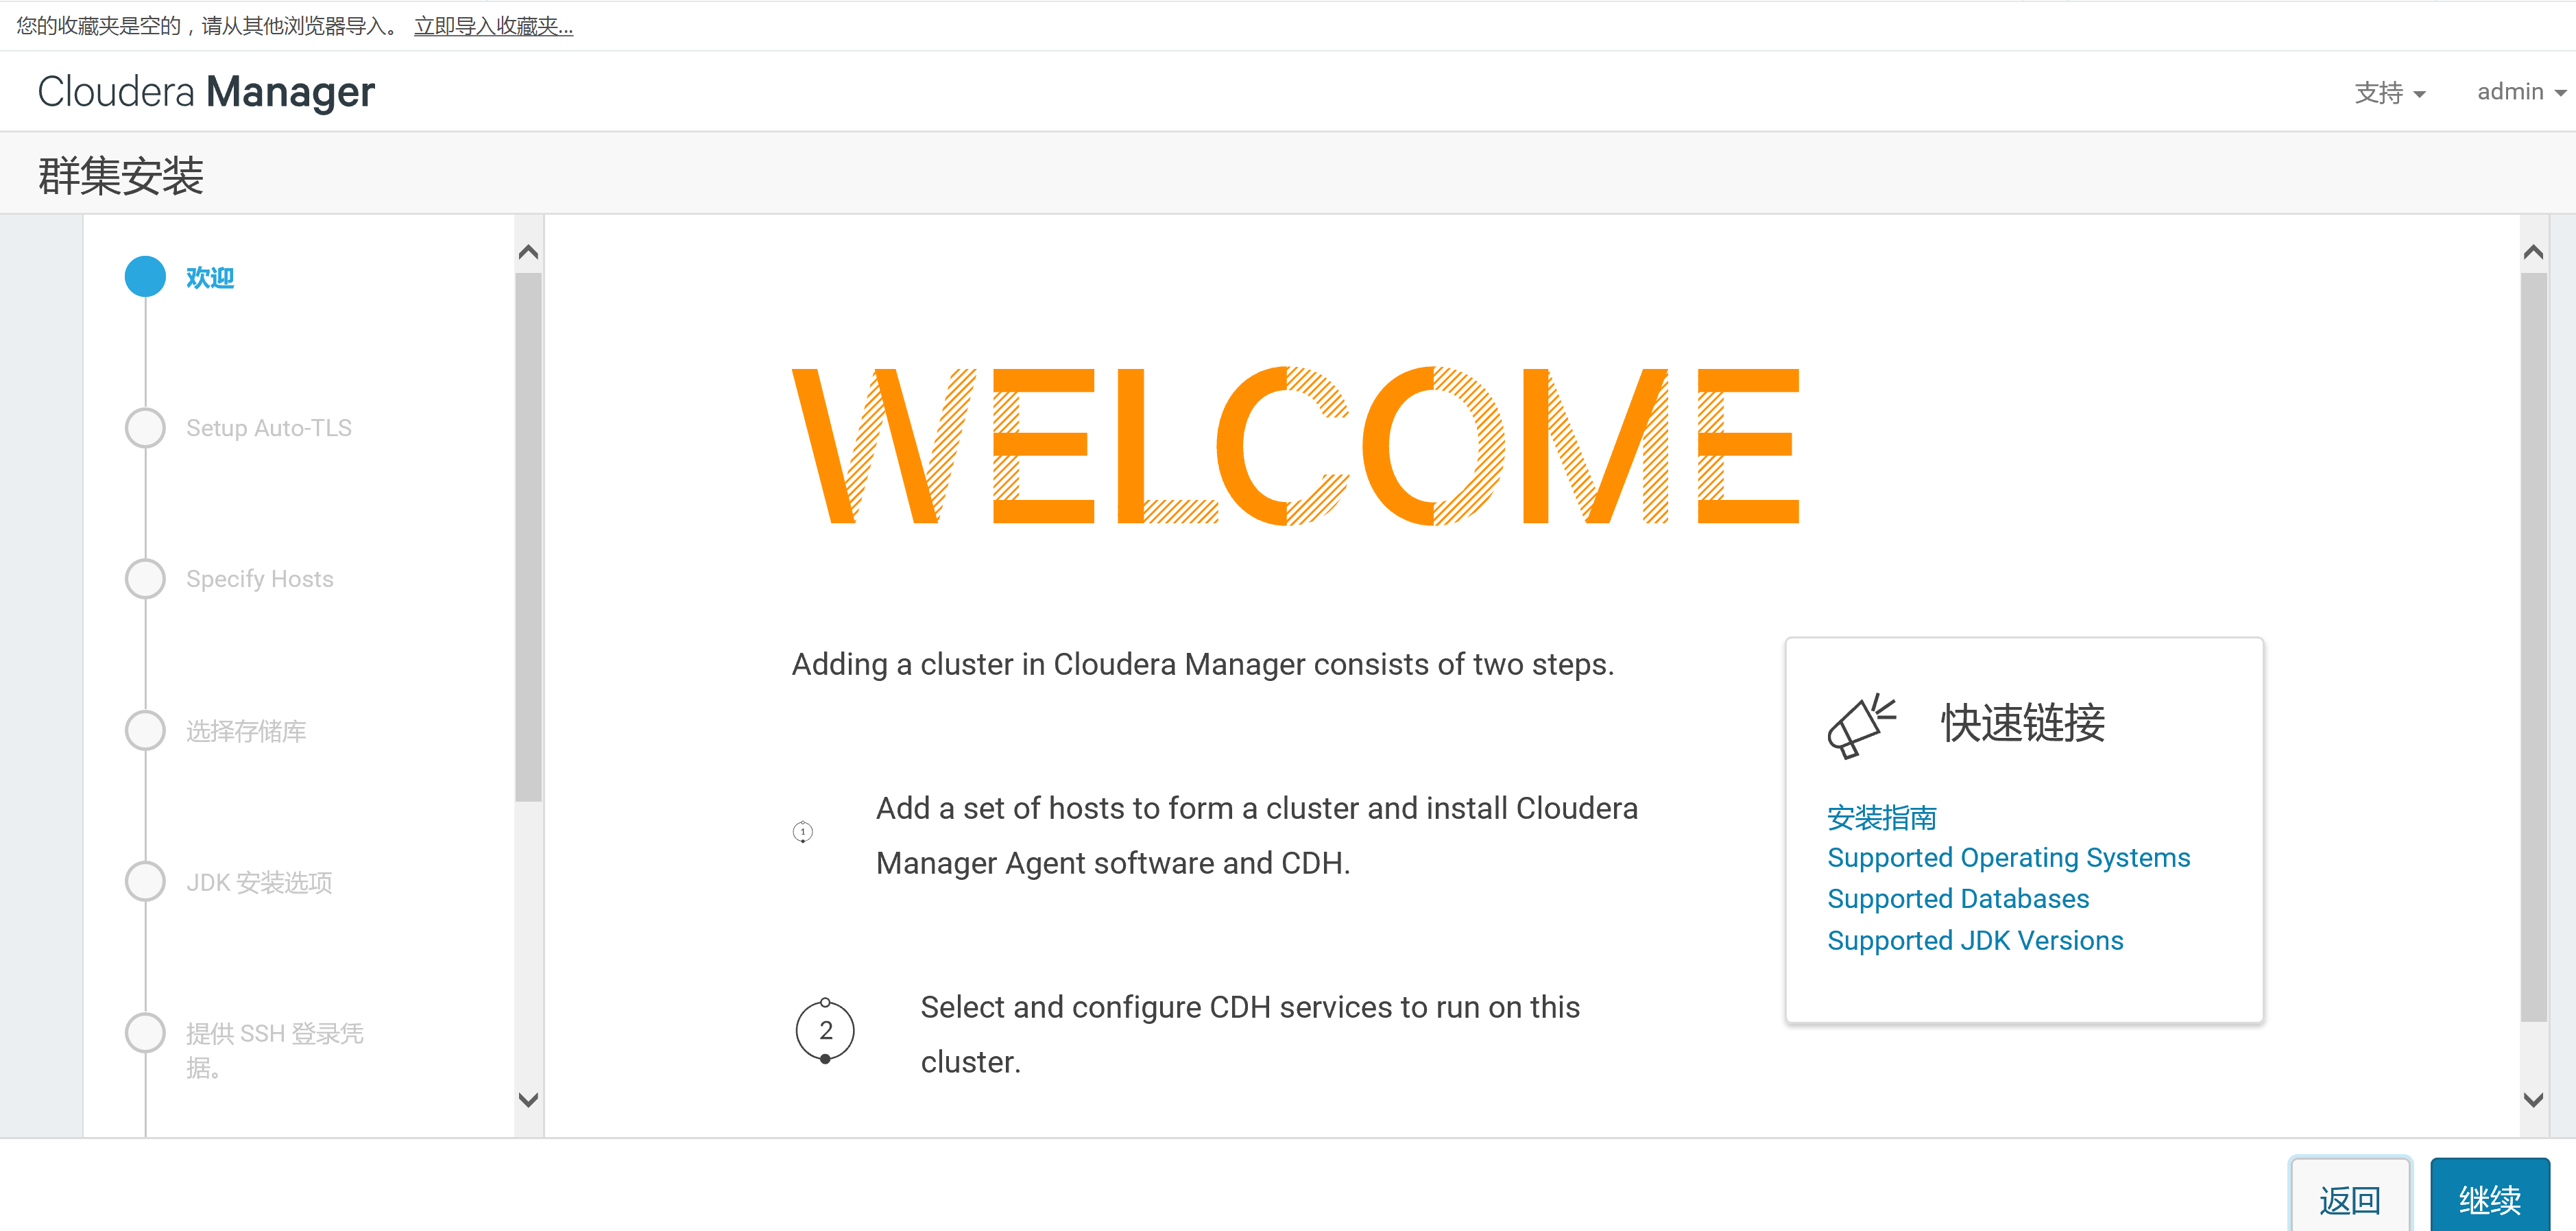
4.1 安装启动CM
service cloudera-scm-server startcd /var/log/cloudera-scm-server/tail -f cloudera-scm-server.log


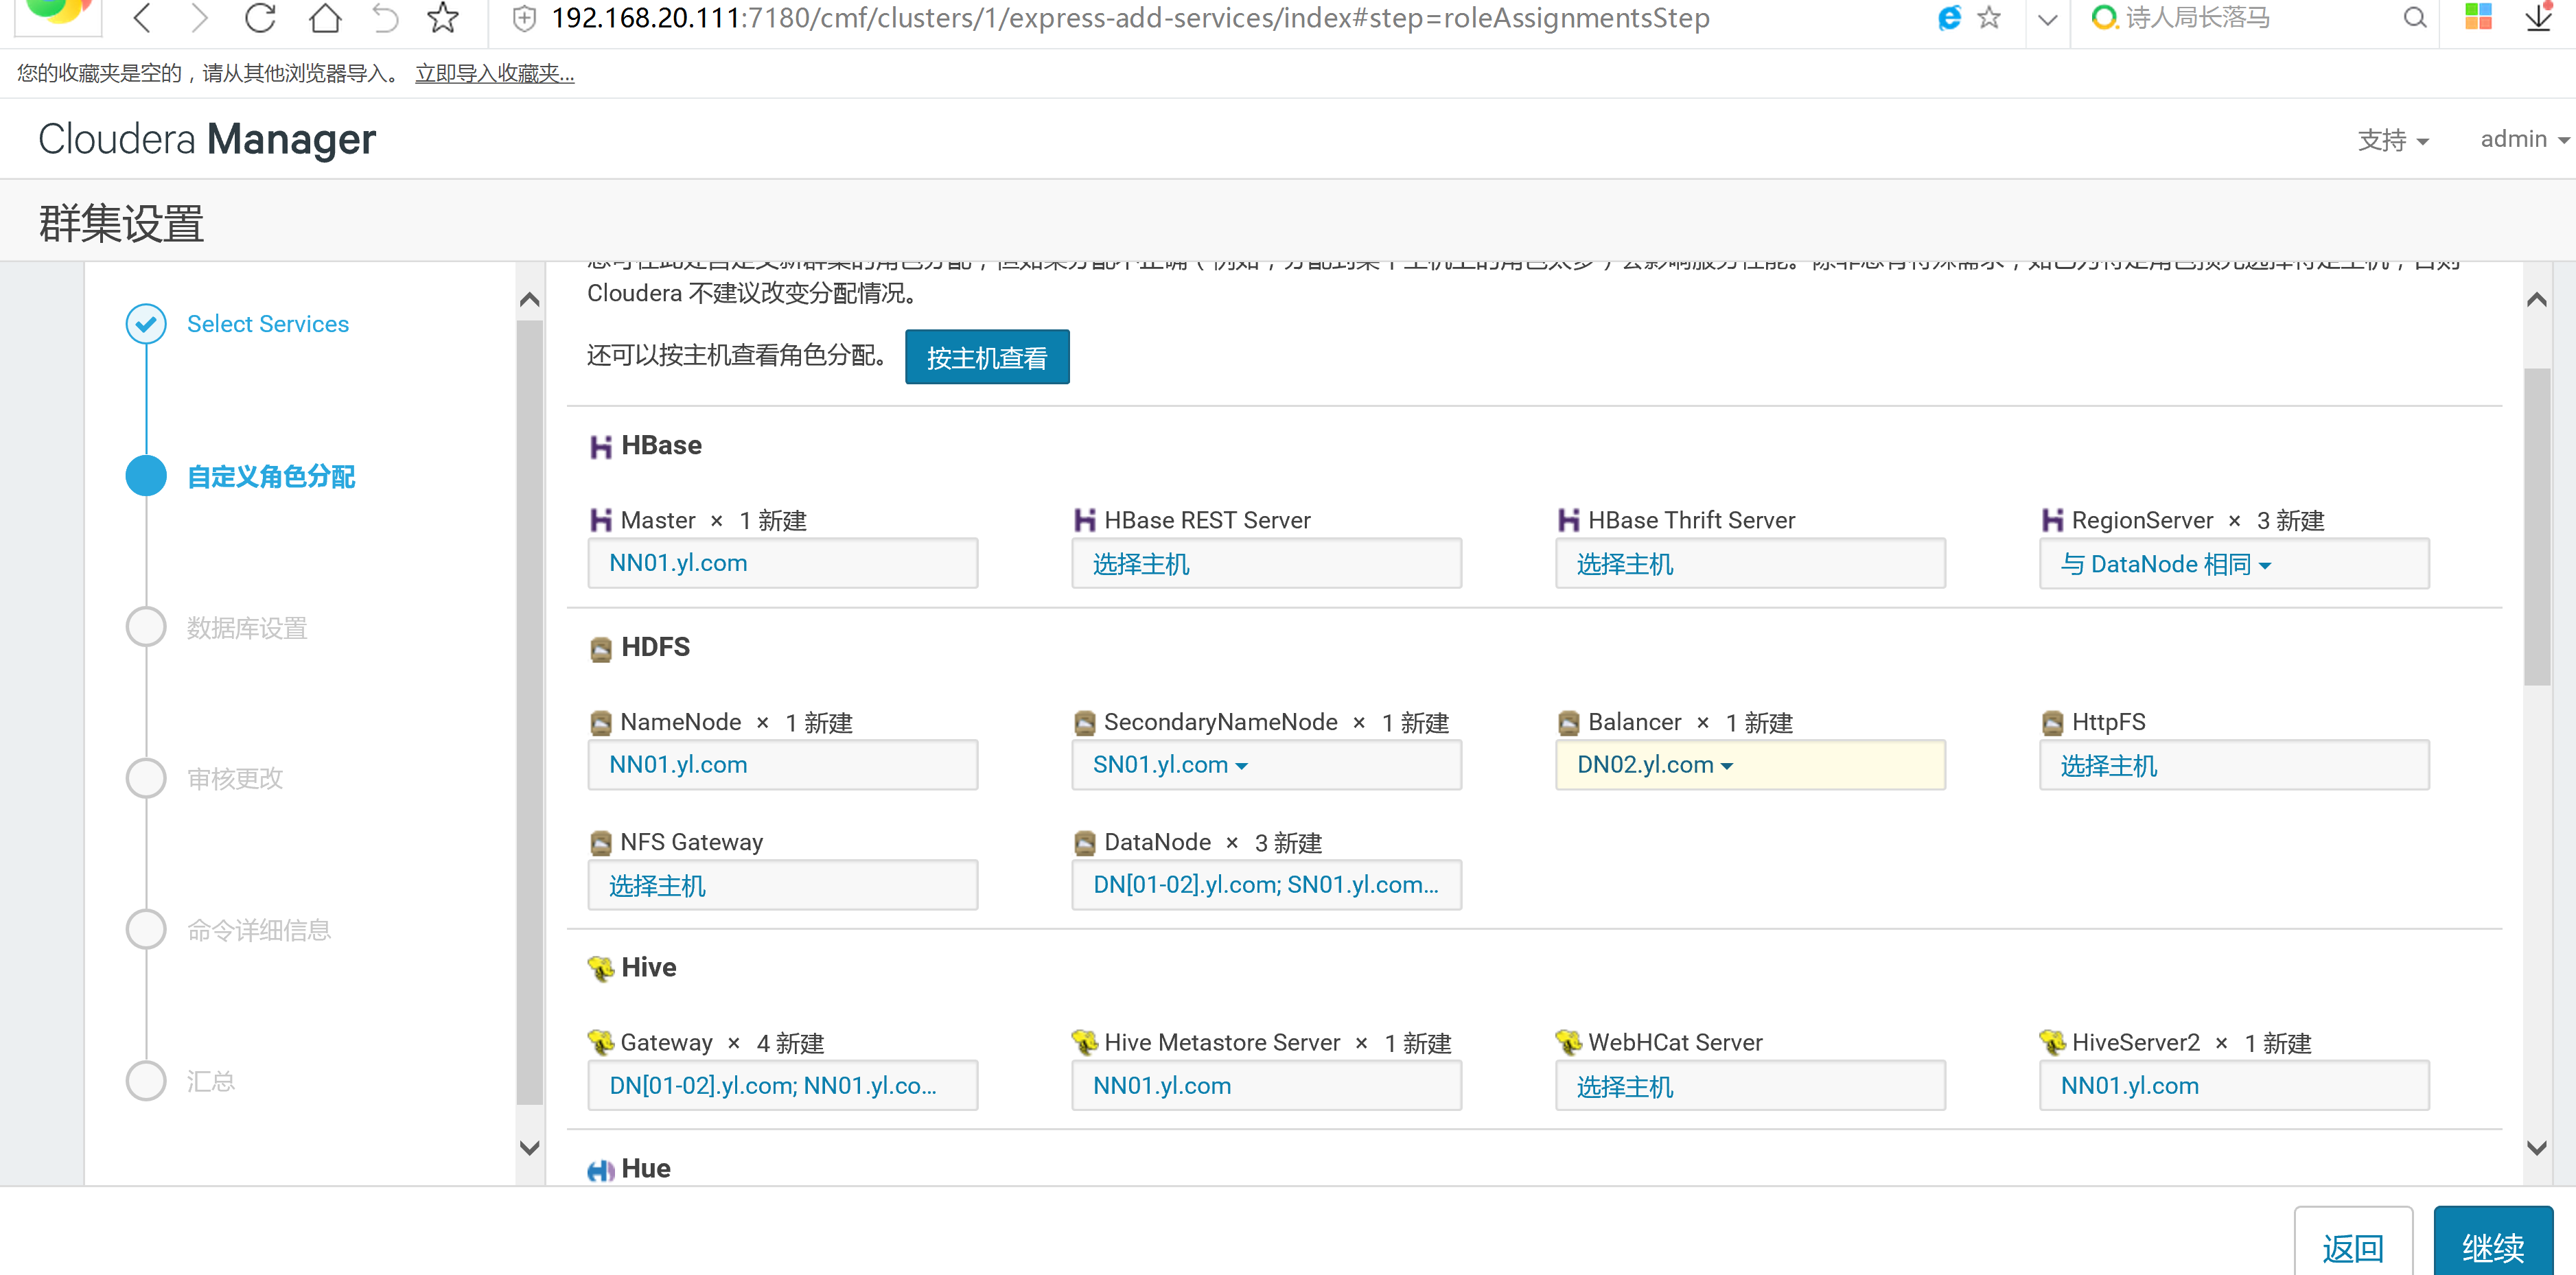
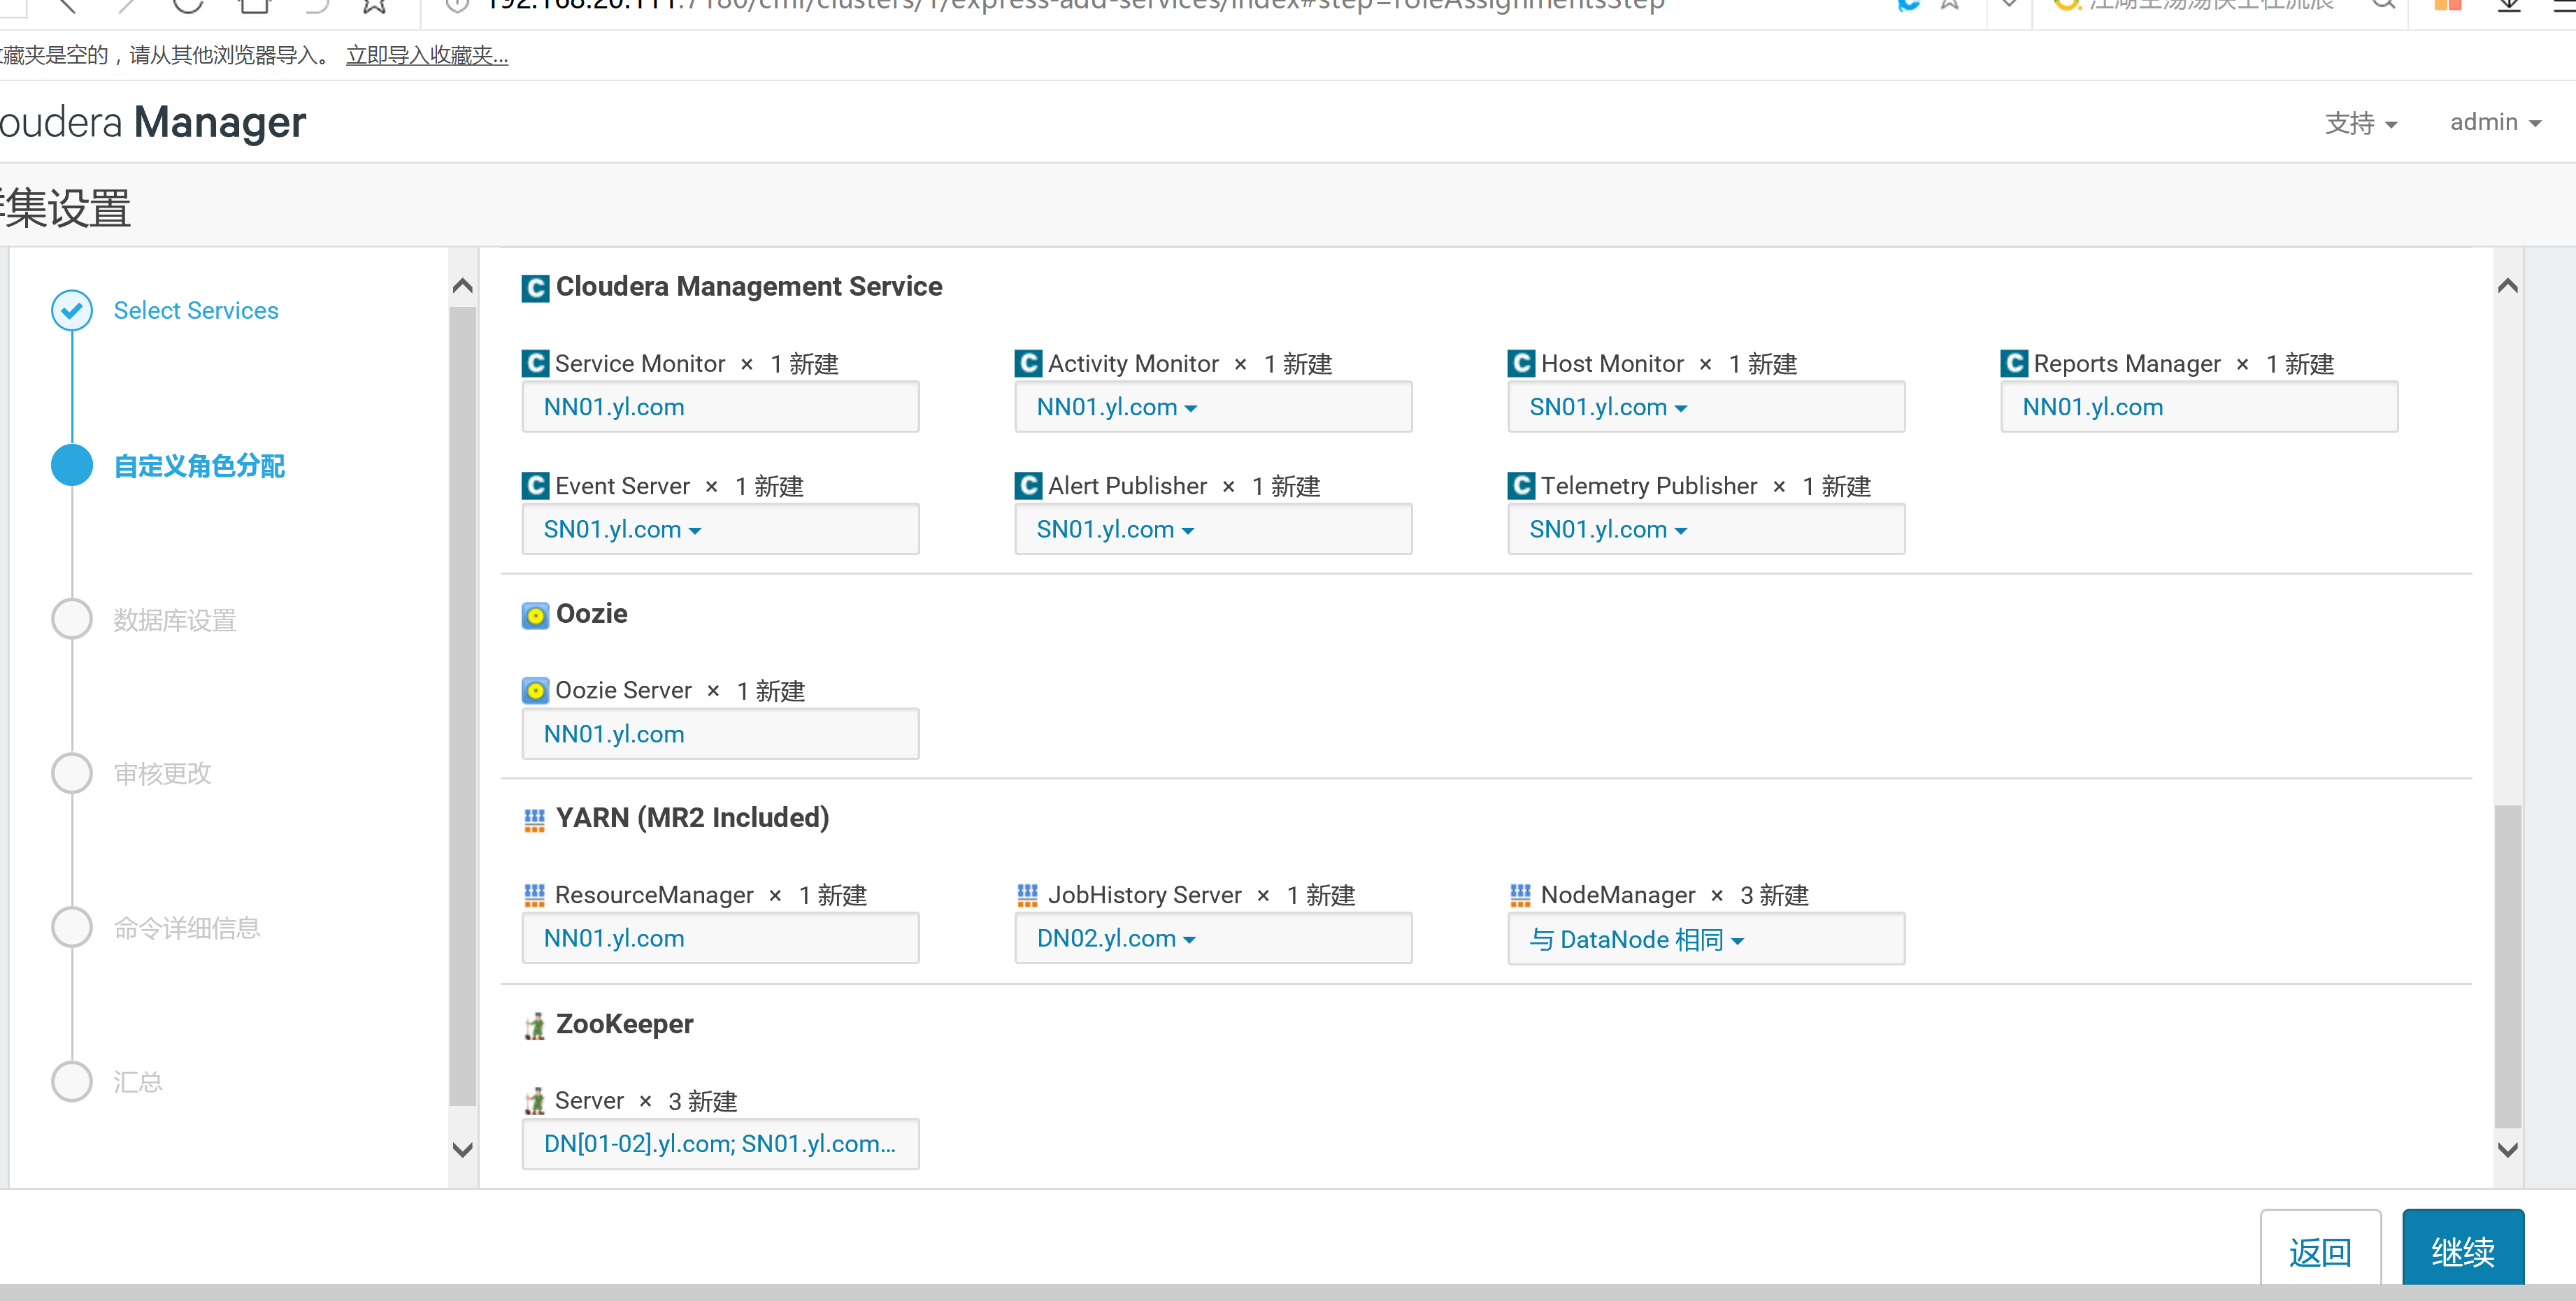
选择更多parcel

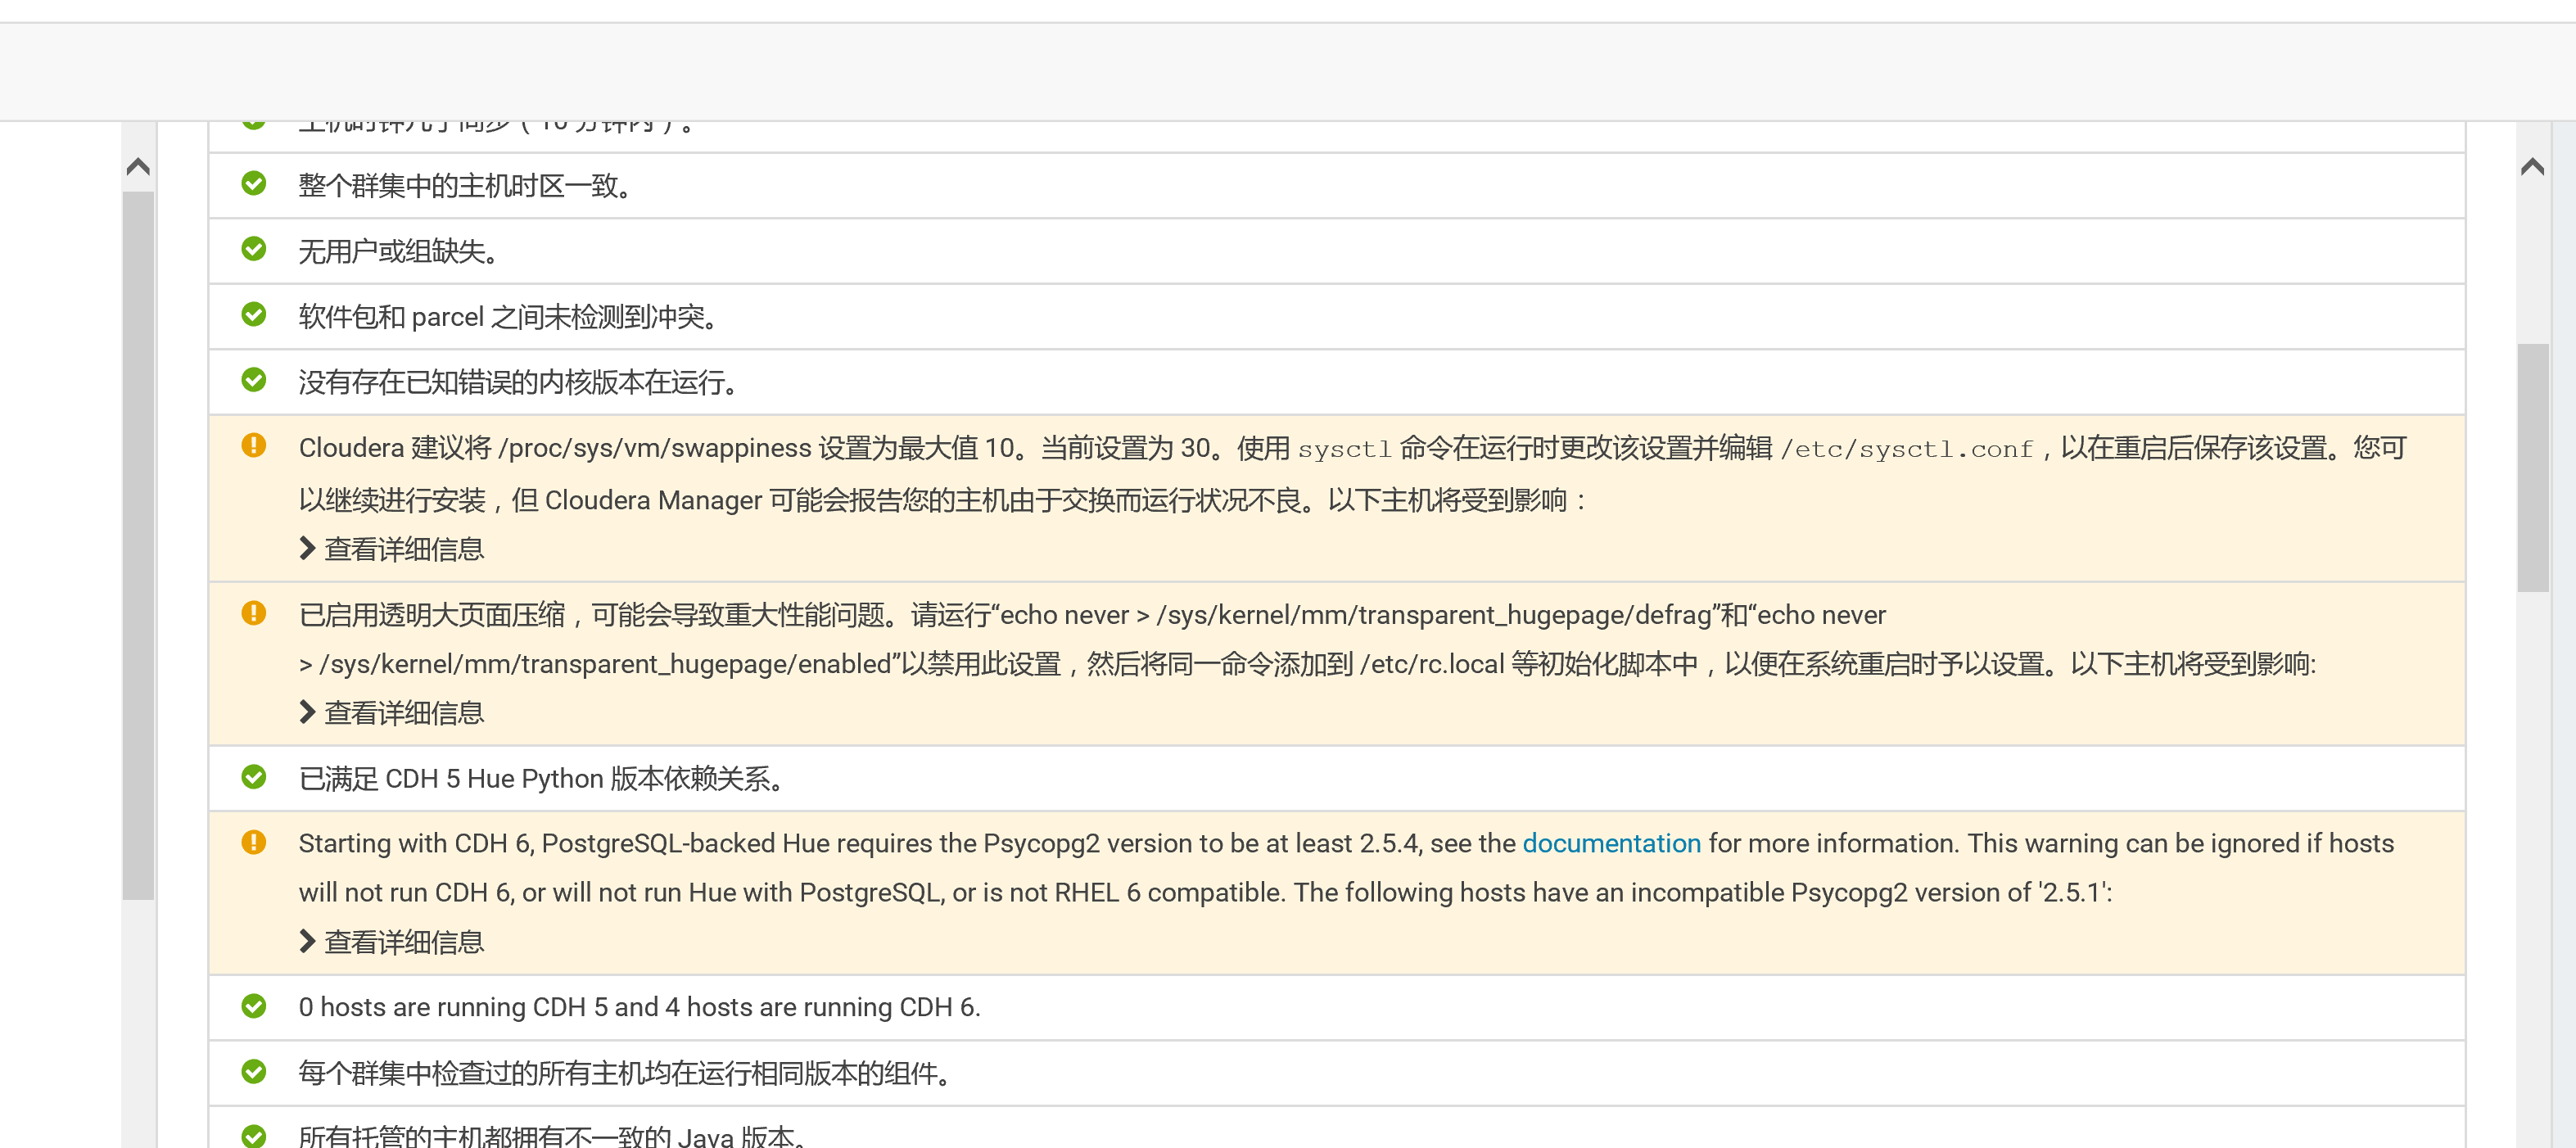
所有节点执行:echo vm.swappiness = 10 >> /etc/sysctl.confecho 10 > /proc/sys/vm/swappinessecho never > /sys/kernel/mm/transparent_hugepage/defragecho never > /sys/kernel/mm/transparent_hugepage/enabled将下面 两条命令

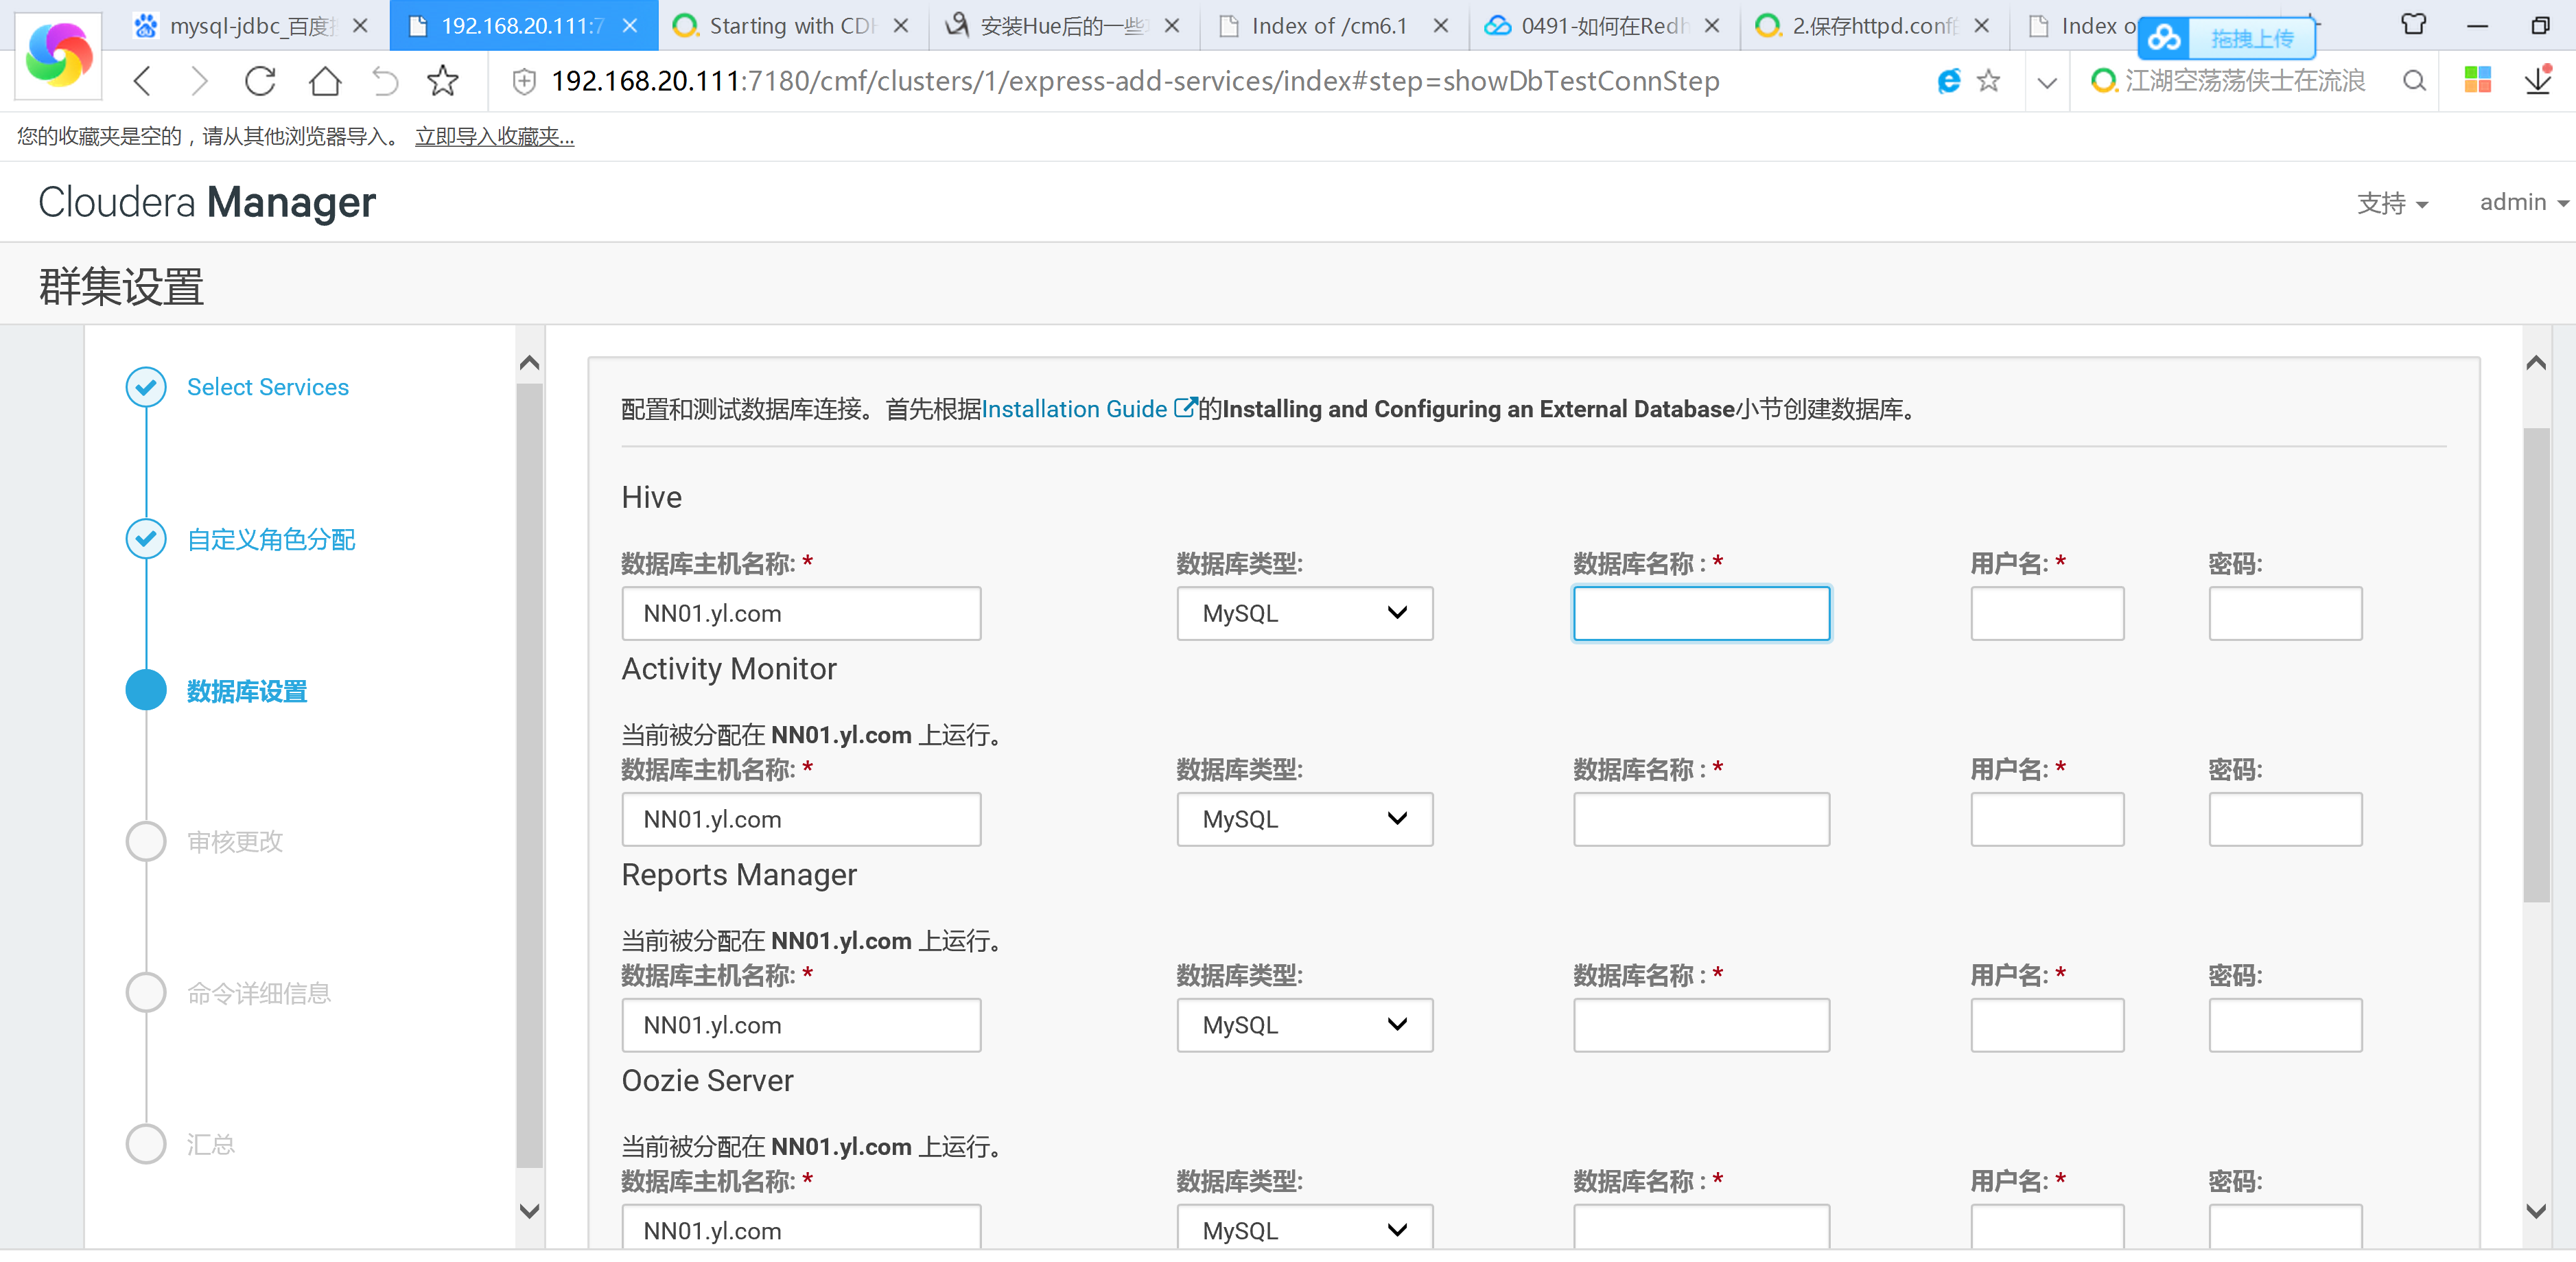
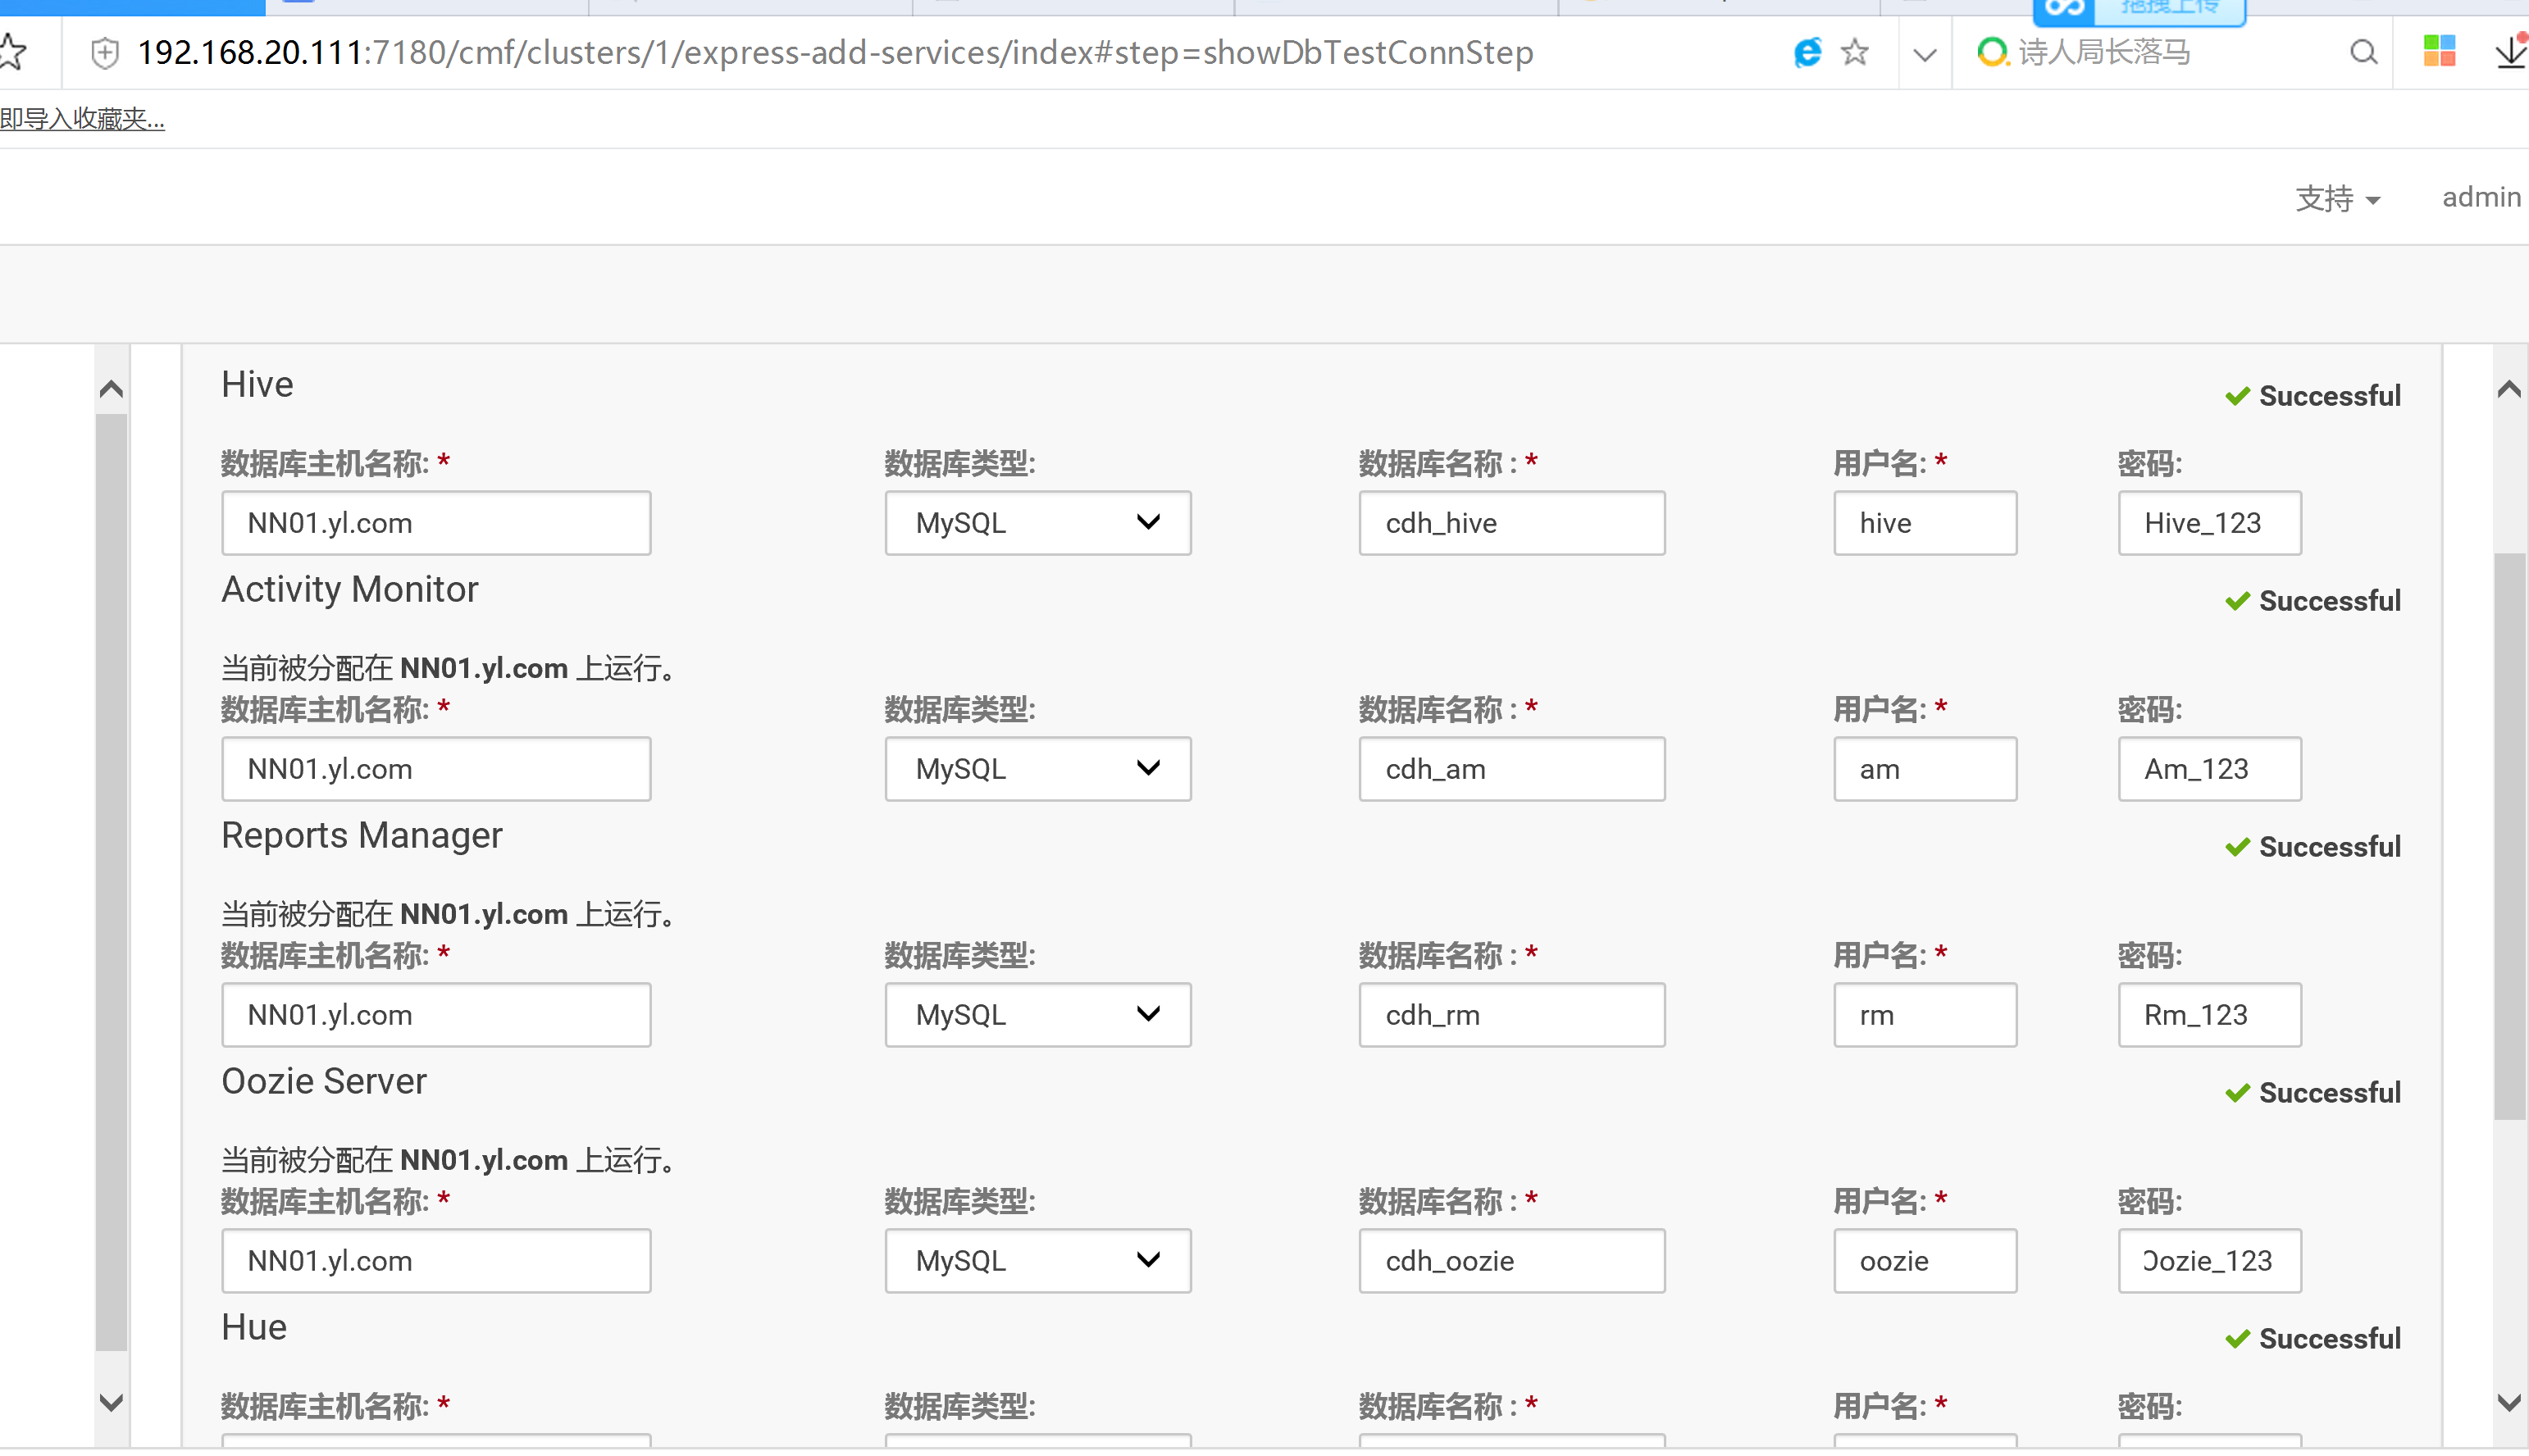
mysql 授权的配置数据库授权:mysql -uroot -pQingchun123.com---创建hive 所需要的库并授权:mysql >create database cdh_hive default character set latin1;字符必须为拉丁(latin1),如果uft8可能会报错Specified key was too long; max key length is 767 bytesmysql >grant all privileges on cdh_hive.* to 'hive'@'%' identified by 'Hive_123' with grant option;mysql >grant all privileges on cdh_hive.* to 'hive'@'NN01.yl.com' identified by 'Hive_123' with grant option;mysql >flush privileges;创建oozie 所需要的库mysql >create database cdh_oozie default character set utf8;mysql >grant all privileges on cdh_oozie.* to 'oozie'@'%' identified by 'Oozie_123' with grant option;mysql >grant all privileges on cdh_oozie.* to 'oozie'@'NN01.yl.com' identified by 'Oozie_123' with grant option;mysql >flush privileges;创建hue所需要的库:mysql >create database cdh_hue default character set utf8;mysql >grant all privileges on cdh_hue.* to 'hue'@'%' identified by 'Hue_123' with grant option;mysql >grant all privileges on cdh_hue.* to 'hue'@'NN01.yl.com' identified by 'Hue_123' with grant option;mysql >flush privileges;创建CM 的 监控端Activity Monitor 的库Activity Monitor:mysql >create database cdh_am default character set utf8;mysql >grant all privileges on cdh_am.* to 'am'@'%' identified by 'Am_123' with grant option;mysql >grant all privileges on cdh_am.* to 'am'@'NN01.yl.com' identified by 'Am_123' with grant option;mysql >flush privileges;创建RM 的 监控端 Reports Manager 的库Reports Managermysql >create database cdh_rm default character set utf8;mysql >grant all privileges on cdh_rm.* to 'rm'@'%' identified by 'Rm_123' with grant option;mysql >grant all privileges on cdh_rm.* to 'rm'@'NN01.yl.com' identified by 'Rm_123' with grant option;mysql >flush privileges;