@Yano
2017-07-15T13:41:40.000000Z
字数 5823
阅读 2583
Caffe MNIST 简要分析
deeplearning
说明
要训练 MNIST,实际上只需要 3 个脚本文件即可完成:
cd $CAFFE_ROOT./data/mnist/get_mnist.sh./examples/mnist/create_mnist.sh./examples/mnist/train_lenet.sh
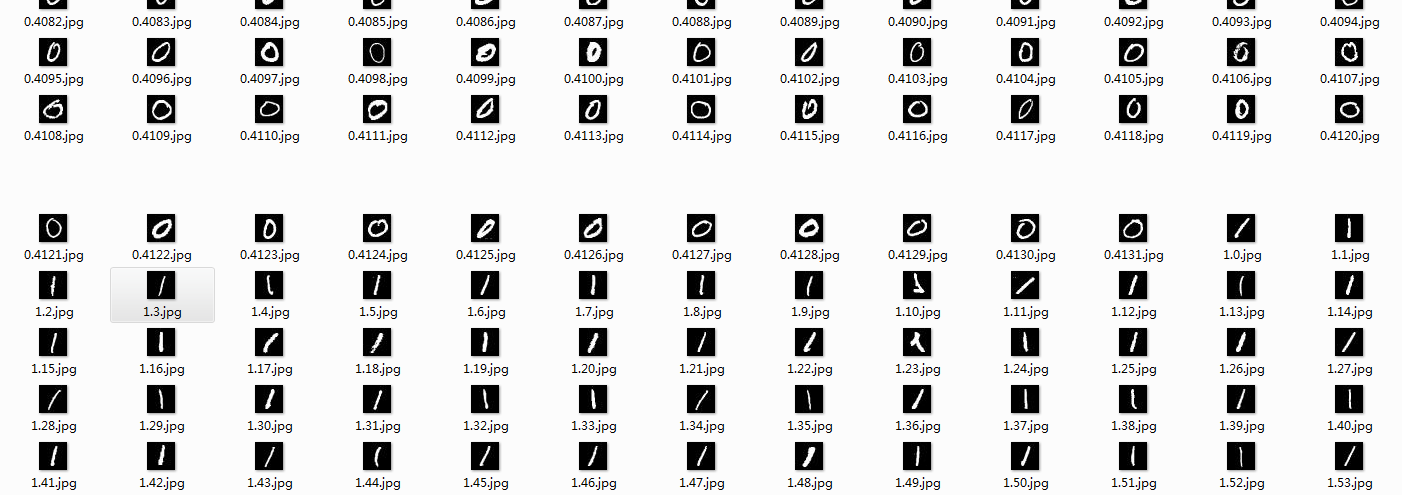
MNIST database,一个手写数字的图片数据库,每一张图片都是0到9中的单个数字。每一张都是抗锯齿(Anti-aliasing)的灰度图,图片大小28*28像素,数字部分被归一化为20*20大小,位于图片的中间位置,保持了原来形状的比例.
官方链接是没有提供jpg图片格式的,如果我们想对数据有个直观的了解,可以通过此链接下载 jpg 图片。
数据分布
MNIST数据库的来源是两个数据库的混合,一个来自Census Bureau employees(SD-3),一个来自high-school students(SD-1);有训练样本60000个,测试样本10000个.训练样本和测试样本中,employee和student写的都是各占一半.60000个训练样本一共大概250个人写的.训练样本和测试样本的来源人群没有交集.
MNIST数据库也保留了手写数字与身份的对应关系.
./data/mnist/get_mnist.sh
#!/usr/bin/env sh# This scripts downloads the mnist data and unzips it.DIR="$( cd "$(dirname "$0")" ; pwd -P )"cd "$DIR"echo "Downloading..."for fname in train-images-idx3-ubyte train-labels-idx1-ubyte t10k-images-idx3-ubyte t10k-labels-idx1-ubytedoif [ ! -e $fname ]; thenwget --no-check-certificate http://yann.lecun.com/exdb/mnist/${fname}.gzgunzip ${fname}.gzfidone
这个脚本仅仅是把官网上的 mnist 的文件下载下来,其中 4 个文件分别是(测试数据和训练数据):
train-images-idx3-ubytetrain-labels-idx1-ubytet10k-images-idx3-ubytet10k-labels-idx1-ubyte
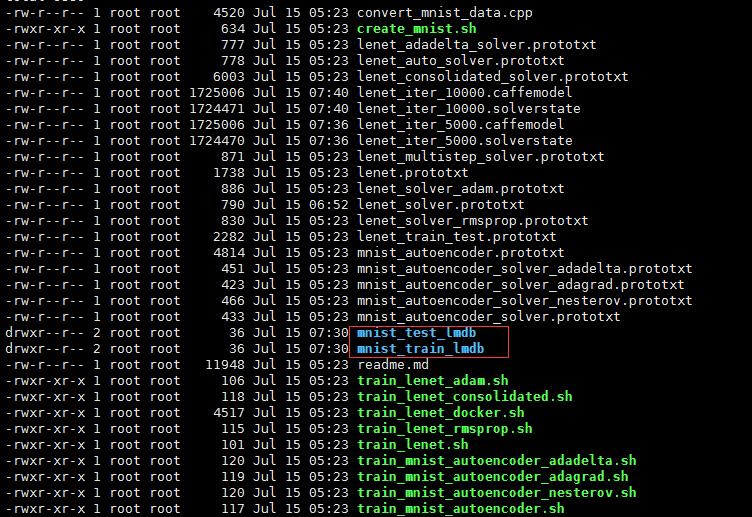
./examples/mnist/create_mnist.sh
#!/usr/bin/env sh# This script converts the mnist data into lmdb/leveldb format,# depending on the value assigned to $BACKEND.set -eEXAMPLE=examples/mnistDATA=data/mnistBUILD=build/examples/mnistBACKEND="lmdb"echo "Creating ${BACKEND}..."rm -rf $EXAMPLE/mnist_train_${BACKEND}rm -rf $EXAMPLE/mnist_test_${BACKEND}$BUILD/convert_mnist_data.bin $DATA/train-images-idx3-ubyte \$DATA/train-labels-idx1-ubyte $EXAMPLE/mnist_train_${BACKEND} --backend=${BACKEND}$BUILD/convert_mnist_data.bin $DATA/t10k-images-idx3-ubyte \$DATA/t10k-labels-idx1-ubyte $EXAMPLE/mnist_test_${BACKEND} --backend=${BACKEND}echo "Done."
步骤:
- 删除 examples/mnist 目录下的 mnist_train_lmdb 和 mnist_test_lmdb,其中BACKEND="lmdb"指定了数据格式,数据格式除了lmdb,还有leveldb。
- 将第一步下载好的文件,转换成lmdb格式,保存在examples/mnist 目录下。
最终会出现下面的两个文件:
./examples/mnist/train_lenet.sh
#!/usr/bin/env shset -e./build/tools/caffe train --solver=examples/mnist/lenet_solver.prototxt $@
使用编译好的caffe,用lenet_solver.prototxt这个proto文件的规则来训练,如果使用CPU的话,需要将最后一行的solver_mode改为CPU。
# The train/test net protocol buffer definitionnet: "examples/mnist/lenet_train_test.prototxt"# test_iter specifies how many forward passes the test should carry out.# In the case of MNIST, we have test batch size 100 and 100 test iterations,# covering the full 10,000 testing images.test_iter: 100# Carry out testing every 500 training iterations.test_interval: 500# The base learning rate, momentum and the weight decay of the network.base_lr: 0.01momentum: 0.9weight_decay: 0.0005# The learning rate policylr_policy: "inv"gamma: 0.0001power: 0.75# Display every 100 iterationsdisplay: 100# The maximum number of iterationsmax_iter: 10000# snapshot intermediate resultssnapshot: 5000snapshot_prefix: "examples/mnist/lenet"# solver mode: CPU or GPUsolver_mode: CPU
这里面是详细的参数,并且附有详细的注释~~~w(゚Д゚)w 其中最重要的应该是下面这句话:
# The train/test net protocol buffer definitionnet: "examples/mnist/lenet_train_test.prototxt"
把lenet_train_test.prototxt全部贴出来,不做深入分析,对于 proto 语法,可以参考:Google Protocol Buffers 数据交换协议。
name: "LeNet"layer {name: "mnist"type: "Data"top: "data"top: "label"include {phase: TRAIN}transform_param {scale: 0.00390625}data_param {source: "examples/mnist/mnist_train_lmdb"batch_size: 64backend: LMDB}}layer {name: "mnist"type: "Data"top: "data"top: "label"include {phase: TEST}transform_param {scale: 0.00390625}data_param {source: "examples/mnist/mnist_test_lmdb"batch_size: 100backend: LMDB}}layer {name: "conv1"type: "Convolution"bottom: "data"top: "conv1"param {lr_mult: 1}param {lr_mult: 2}convolution_param {num_output: 20kernel_size: 5stride: 1weight_filler {type: "xavier"}bias_filler {type: "constant"}}}layer {name: "pool1"type: "Pooling"bottom: "conv1"top: "pool1"pooling_param {pool: MAXkernel_size: 2stride: 2}}layer {name: "conv2"type: "Convolution"bottom: "pool1"top: "conv2"param {lr_mult: 1}param {lr_mult: 2}convolution_param {num_output: 50kernel_size: 5stride: 1weight_filler {type: "xavier"}bias_filler {type: "constant"}}}layer {name: "pool2"type: "Pooling"bottom: "conv2"top: "pool2"pooling_param {pool: MAXkernel_size: 2stride: 2}}layer {name: "ip1"type: "InnerProduct"bottom: "pool2"top: "ip1"param {lr_mult: 1}param {lr_mult: 2}inner_product_param {num_output: 500weight_filler {type: "xavier"}bias_filler {type: "constant"}}}layer {name: "relu1"type: "ReLU"bottom: "ip1"top: "ip1"}layer {name: "ip2"type: "InnerProduct"bottom: "ip1"top: "ip2"param {lr_mult: 1}param {lr_mult: 2}inner_product_param {num_output: 10weight_filler {type: "xavier"}bias_filler {type: "constant"}}}layer {name: "accuracy"type: "Accuracy"bottom: "ip2"bottom: "label"top: "accuracy"include {phase: TEST}}layer {name: "loss"type: "SoftmaxWithLoss"bottom: "ip2"bottom: "label"top: "loss"}
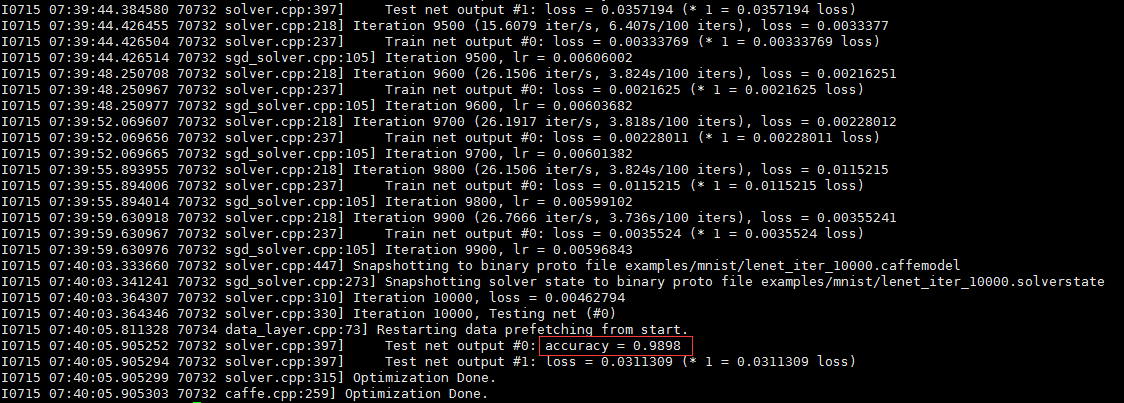
训练结果
最终的训练结果,准确率竟然高达 98.98% w(゚Д゚)w
测试自己的手写数字图片
在训练好模型之后,如何才能应用到实际当中呢?对于MNIST,就是要把符合格式的图片输入给神经网络,然后看预测是否符合标准。参考caffe笔记:测试自己的手写数字图片,用 caffe 测试自己的图片。在这里具体过程就不详细介绍,仅展示下最终结果(前面的链接写得非常全):
./build/examples/cpp_classification/classification.bin \> examples/mnist/classificat_net.prototxt \> examples/mnist/lenet_iter_10000.caffemodel \> examples/mnist/mean.binaryproto \> examples/mnist/label.txt \> examples/mnist/0.png
注意一下,classificat_net.prototxt是 examples/mnist/lenet_train_test.prototxt的副本,但是要删掉
layer {name: "mnist"type: "Data"top: "data"top: "label"include {phase: TRAIN}transform_param {scale: 0.00390625}data_param {source: "examples/mnist/mnist_train_lmdb"batch_size: 64backend: LMDB}}layer {name: "mnist"type: "Data"top: "data"top: "label"include {phase: TEST}transform_param {scale: 0.00390625}data_param {source: "examples/mnist/mnist_test_lmdb"batch_size: 100backend: LMDB}}
以及
layer {name: "accuracy"type: "Accuracy"bottom: "ip2"bottom: "label"top: "accuracy"include {phase: TEST}}layer {name: "loss"type: "SoftmaxWithLoss"bottom: "ip2"bottom: "label"top: "loss"}
并在最后增加一层:
layer {name: "prob"type: "Softmax"bottom: "ip2"top: "prob"}
最终的预测结果如下,可以看到模型100%确定数字是0,预测正确:
---------- Prediction for examples/mnist/0.png ----------1.0000 - "0"0.0000 - "1"0.0000 - "3"0.0000 - "4"0.0000 - "2"
总结
对于模型及原理,网上已经有很多好的文章,这里不作介绍。今天在 centos 上安装 caffe,实在太费劲了…… 我在编译的时候,把 leveldb 和 lmdb 全部都取消了,这就导致 MNIST 的数据格式不能识别!解决方法:更改配置,重新编译。
参考了那么多的 caffe 安装教程,这篇文章最好:caffe 安装(centos 7)
