@cxm-2016
2016-08-30T08:15:53.000000Z
字数 6355
阅读 2082
Android中创建下拉View的简单示例
android no
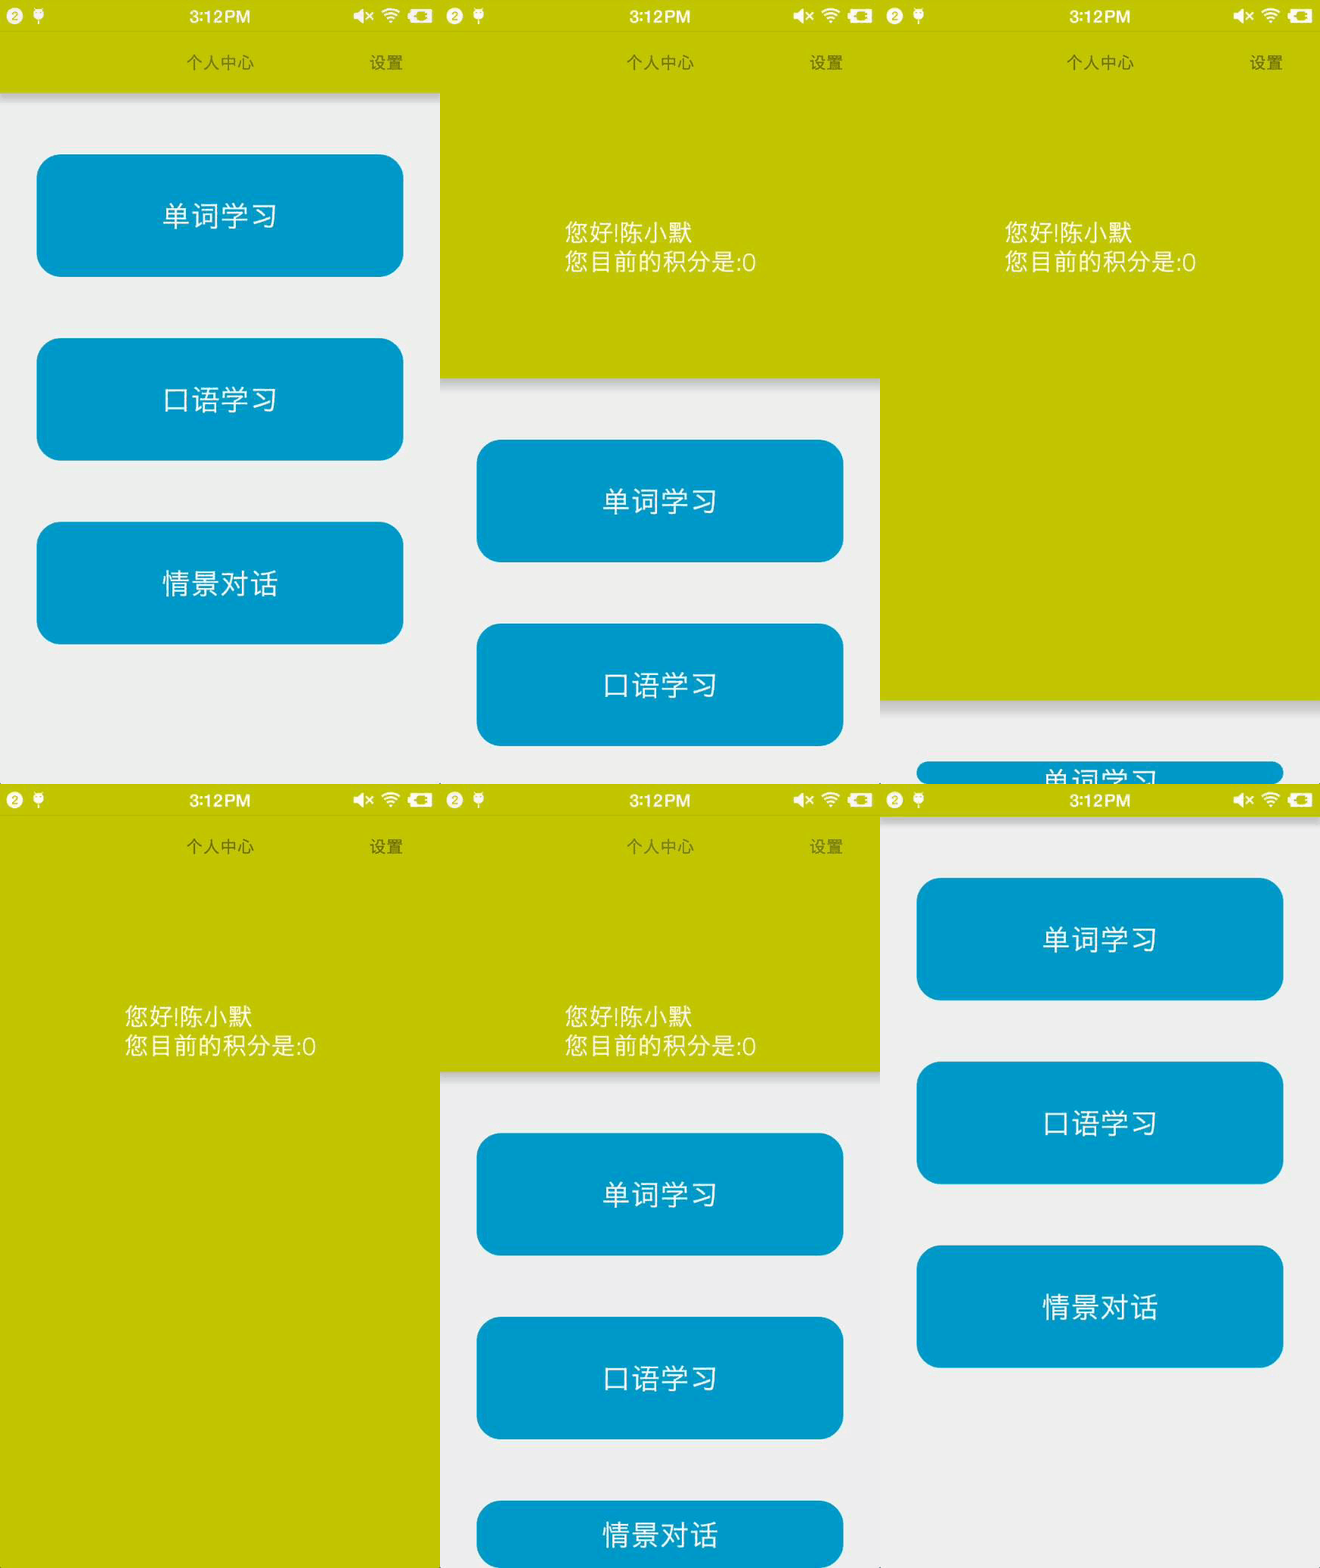
先看效果

这里没有使用v7包下的内容,仅仅是为了学习,并没有太大的实用价值.现在我们来分析一下思路.
我们采用简单的观察者模式来思考这个问题,当我的手指在屏幕上滑动的时候会产生一个事件源,而下拉View的一个功能就是监听事件源.下面我们来定义接口
定义接口
1,定义事件源接口,该接口的功能就是注册一个观察者,注销观察者和处理事件源
/*** 事件源接口* 陈小默 16/8/30.*/interface IEventSource<Subscriber> {//向事件源中注册观察者fun register(subscriber: Subscriber)//给事件源发送事件fun event(event: MotionEvent): Boolean//取消注册fun unregister()}
2,定义观察者View,该接口定义了观察者的基本功能,开始观察和结束观察
/*** View的消息订阅者接口*/interface IViewSubscriber<Queue> {//开始观察数据源fun start(queue: Queue)//停止观察数据源fun stop()}
实现事件源
这里事件源的作用就是监听手指在屏幕上的滑动事件,并将相应的事件加入队列
/*** 下拉容器事件源实现类* 陈小默 16/8/30.*/class DropEventSource : IEventSource<DropLayout> {private var subscriber: DropLayout? = nullprivate val queue: LinkedList<Int> = LinkedList()override fun register(subscriber: DropLayout) {this.subscriber = subscriber}override fun event(event: MotionEvent): Boolean {when (event.action) {MotionEvent.ACTION_DOWN -> start()MotionEvent.ACTION_MOVE -> move(event)MotionEvent.ACTION_UP -> stop()else->return false}return true}fun start() {subscriber!!.start(queue)}fun move(event: MotionEvent) {val height = event.y.toInt()queue.addLast(height)}fun stop() {subscriber!!.stop()}override fun unregister() {subscriber = null}}
因为面向接口的特性使得我们不需要知道对到具体是如何实现的只需要知道接口中定义的方法意义即可.下面拆看分析代码
override fun event(event: MotionEvent): Boolean {when (event.action) {MotionEvent.ACTION_DOWN -> start()MotionEvent.ACTION_MOVE -> move(event)MotionEvent.ACTION_UP -> stop()else->return false}return true}
这个方法接受外部传来的事件,并按照事件的类型分发给不同的方法处理,下面我们来实现一下具体的方法:
1,start()当接收到手指按下的操作时,通知观察者开始观察事件源
fun start() {subscriber!!.start(queue)}
2,move()当手指处于滑动状态时,将滑动坐标存放进事件源
fun move(event: MotionEvent) {val height = event.y.toInt()queue.addLast(height)}
3,stop()当手指离开屏幕的时候通知观察者停止观察
fun stop() {subscriber!!.stop()}
实现观察者
为了使用方便,这里采用了RelativeLayout作为容器基类并实现了观察者接口
/*** 下拉容器* 陈小默 16/8/30.*/class DropLayout : RelativeLayout, IViewSubscriber<LinkedList<Int>> {constructor(context: Context?) : super(context)constructor(context: Context?, attrs: AttributeSet?) : super(context, attrs)constructor(context: Context?, attrs: AttributeSet?, defStyleAttr: Int) : super(context, attrs, defStyleAttr)var isStop: Boolean = truevar drop_top = 0var drop_bottom = resources.displayMetrics.heightPixelsvar fixed = falseoverride fun start(queue: LinkedList<Int>) {isStop = falseThread({while (!isStop)if (queue.size > 0) {val site = queue.removeFirst()if (site != null) {post { height = site }}}}).start()}override fun stop() {isStop = truefinish()}fun finish() {val h = heightval screen_height = resources.displayMetrics.heightPixelsif (!fixed)if (h > screen_height / 2) {moveToBottom()} else {moveToTop()}}fun setHeight(height: Int) {val param = layoutParamsparam.height = heightlayoutParams = param}private fun moveToTop() {ObjectAnimator.ofInt(this, "height", drop_top).setDuration(500).start()}private fun moveToBottom() {val animator = ObjectAnimator.ofInt(this, "height", drop_bottom).setDuration(1000)animator.interpolator = BounceInterpolator()animator.start()}}
这个类实现的方法较多,我们一步一步的去分析:
1,setHeight()方法
这个方法非常重要,因为我们在这里用到了属性动画去处理最后手指离开屏幕的操作.当手指在屏幕的上半部分离开,就让View收缩到原始位置.如果手指在屏幕的下半部分离开,就让View完全落下,并使用弹跳效果.但是属性动画要求View必须提供相应的属性的setter/getter方法,而RelativeLayout只提供了"height"属性的get方法,所以我们必须自己实现一个setHeight方法
fun setHeight(height: Int) {val param = layoutParamsparam.height = heightlayoutParams = param}
2,start()启动观察方法,当该方法被调用的时候表示事件源中即将有事件产生,此处所做的操作就是开启线程,对事件源进行轮询操作.每当取出一个事件,就更新一个当前View
override fun start(queue: LinkedList<Int>) {isStop = falseThread({while (!isStop)if (queue.size > 0) {val site = queue.removeFirst()if (site != null) {post { height = site }}}}).start()}
3,finish()当一次观察完成时,View一般会处于屏幕中间的某一个位置,加入我们设置了fixed=true属性,则手指离开屏幕的时候,View会被固定到结束为止.反之,将会计算当前停止位置在屏幕的上方还是下方
fun finish() {val h = heightval screen_height = resources.displayMetrics.heightPixelsif (!fixed)if (h > screen_height / 2) {moveToBottom()} else {moveToTop()}}
4,移动到顶部或者是底部,在finish方法计算完成之后,会调用下列方法中对应的一种,于是这里就使用了属性动画, 使得View能够平滑的移动到相应的位置.
private fun moveToTop() {ObjectAnimator.ofInt(this, "height", drop_top).setDuration(500).start()}private fun moveToBottom() {val animator = ObjectAnimator.ofInt(this, "height", drop_bottom).setDuration(1000)animator.interpolator = BounceInterpolator()animator.start()}
使用
设置布局文件
include_main_drop.xml
<?xml version="1.0" encoding="utf-8"?><RelativeLayout xmlns:android="http://schemas.android.com/apk/res/android"android:layout_width="match_parent"android:layout_height="match_parent"android:orientation="vertical"><RelativeLayoutandroid:id="@+id/re_layout"android:layout_width="match_parent"android:layout_height="50dp"><TextViewandroid:layout_width="wrap_content"android:layout_height="wrap_content"android:layout_centerInParent="true"android:text="个人中心" /><TextViewandroid:id="@+id/settings"android:layout_width="wrap_content"android:layout_height="wrap_content"android:layout_alignParentRight="true"android:layout_centerVertical="true"android:layout_marginRight="30dp"android:text="设置" /></RelativeLayout><TextViewandroid:id="@+id/score_tv"android:layout_width="wrap_content"android:layout_height="wrap_content"android:layout_below="@+id/re_layout"android:layout_centerHorizontal="true"android:layout_marginTop="100dp"android:text="当前积分"android:textColor="@android:color/white"android:textSize="20sp" /></RelativeLayout>
main_activity.xml
<?xml version="1.0" encoding="utf-8"?><RelativeLayout xmlns:android="http://schemas.android.com/apk/res/android"xmlns:tools="http://schemas.android.com/tools"android:layout_width="match_parent"android:layout_height="match_parent"android:fitsSystemWindows="true"tools:context="com.cccxm.english.mvp.view.activity.MainActivity"><com.cxm.view.DropLayoutandroid:id="@+id/drop_group"android:layout_width="match_parent"android:layout_height="50dp"android:background="#c5c500"android:elevation="10dp"><include layout="@layout/include_main_drop" /></com.cxm.view.DropLayout><TextViewandroid:id="@+id/word_lib"style="@style/text_button"android:layout_marginTop="50dp"android:text="单词学习" /><TextViewandroid:id="@+id/tongue_lib"style="@style/text_button"android:layout_marginTop="200dp"android:text="口语学习" /><TextViewandroid:id="@+id/dialog_lib"style="@style/text_button"android:layout_marginTop="350dp"android:text="情景对话" /></RelativeLayout>
MainActivity实现
我们实现事件源,并将查找到的dropLayout对象注册为观察者,我们设置DropLayout的最小高度为50dp与布局文件一致.然后我们可以将所有在DropLayout中产生的事件全部交给事件源对象统一处理
override fun register() {dropSource.register(dropLayout)dropLayout.drop_top = UnitUtils().dip2px(50F, this)dropLayout.setOnTouchListener { view, motionEvent ->dropSource.event(motionEvent)}}
一般情况我们不会将整个DropLayout上产生的事件作为事件源,比如我们在DropLayout上增加了一个按钮,当点击按钮时才能拖动DropLayout是一种比较好的选择
