@CrazyHenry
2018-04-25T12:49:19.000000Z
字数 3675
阅读 1981
centOS虚拟机、配置常用软件安装过程记录
xxxxLinux命令行
- Author:李英民 | Henry
- E-mail: li
_yingmin@outlookdotcom- Home: https://liyingmin.wixsite.com/henry
快速了解我: About Me
转载请保留上述引用内容,谢谢配合!
- VMware14
- centOS7.5
1.下载镜像
到官网下载镜像
DVD ISO --系统标准安装包
Everything ISO --对完整版安装盘的软件进行补充,集成所有软件
Minimal ISO --这个镜像的目的是安装一个非常基本的系统,具有一个功能系统所需的最少的软件包。
2.VMware的操作
一系列常规VMware的操作,和安装Ubuntu一样。
3.centOS安装
https://jingyan.baidu.com/article/8ebacdf0762b0249f65cd53b.html
选择语言,设置软件Gnome桌面,设置安装位置,开始安装。
设置root、用户名密码(将用户设置为管理员)。
4.安装VMware tools
su rootyum -y update #升级包和内核yum -y install perl gcc gcc-c++ automake make kernel kernel-headers kernel-develyum -y update kernel
重启。
安装Ubuntu的方法安装tools。
5.启用拼音
https://jingyan.baidu.com/article/da1091fb3e7f8a027849d681.html
应用程序-->系统工具-->设置-->语言
6.chrome
gedit /etc/yum.repos.d/google-chrome.repo
添加:
[google-chrome]name=google-chromebaseurl=http://dl.google.com/linux/chrome/rpm/stable/$basearchenabled=1gpgcheck=1gpgkey=https://dl-ssl.google.com/linux/linux_signing_key.pub
yum -y install google-chrome-stable找到chrome路径,并做个软连接,方便使用:which google-chrome-stableln -s xxx /bin/chrome
6.中文目录
export LANG=en_USxdg-user-dirs-gtk-updateexport LANG=zh_CN.UTF-8
7.卸载火狐
suyum remove firefox*
8.修改源
进入目录 、/etc/yum.repos.d
9.安装Clion
注意最后创建快捷方式的时候选择for all users。
改变字体:file-settings-editor font
工具栏不好改字体,不要改了!
CLion安装完后只能在shell中使用./opt/CLion/bin/clion.sh启动,如果想在桌面应用程序列表中创建一个快捷方式,可采用如下方法实现。
sudo gedit /usr/share/applications/clion.desktop
在clion.desktop中编辑如下内容:
[Desktop Entry]Version=1.0Type=ApplicationName=CLionIcon=/home/liyingmin/application/install/clion-2018.1.1/bin/clion.svgExec="/home/liyingmin/application/install/clion-2018.1.1/bin/clion.sh" %fComment=The Drive to DevelopCategories=IDE;Terminal=clionStartupWMClass=jetbrains-clion
保存并退出。
然后将此文件复制到桌面即可!
10.图形化
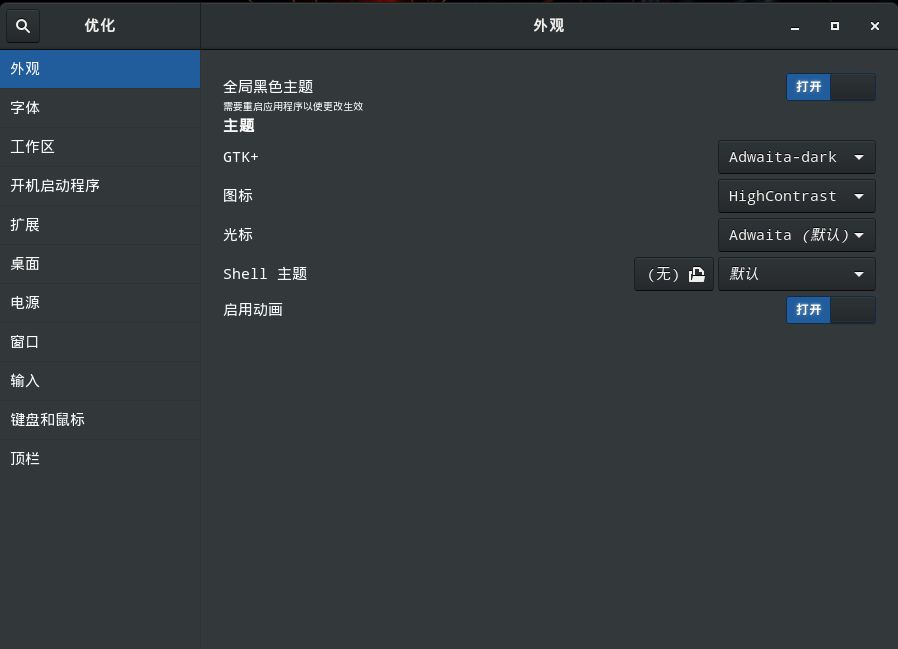
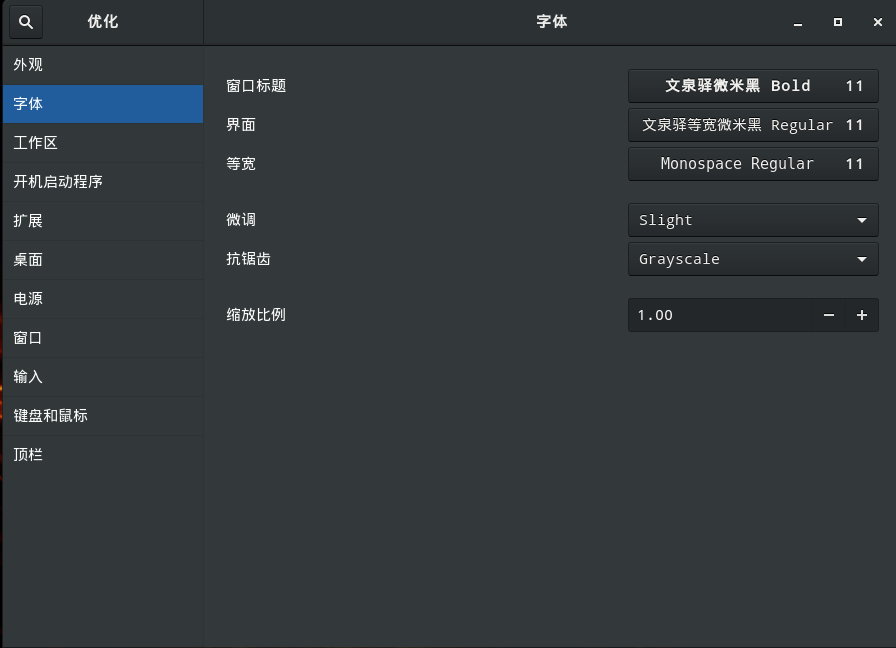
在工具栏中,有个优化工具
11.ssh
yum list installed | grep openssh
12.配置anaconda环境
scp Anaconda3-5.1.0-Linux-x86_64.sh yingmin.li@yz-gpu023.hogpu.cc:/home/users/yingmin.li/installscp -r Anaconda3-5.1.0-Linux-x86_64.sh yingmin.li@yz-gpu023.hogpu.cc:/home/users/yingmin.li/install或者直接:wget https://mirrors.tuna.tsinghua.edu.cn/anaconda/archive/Anaconda3-5.1.0-Linux-x86_64.shbash Anaconda3-5.1.0-Linux-x86_64.sh
echo 'export PATH="/home/users/yingmin.li/anaconda3/bin:$PATH"' >> ~/.bashrcsource ~/.bashrc
继续使用Ubuntu优化anaconda那一套即可。
安装mkl和numpy
conda install mklconda install numpy# CPU version onlyconda install faiss-cpu -c pytorch# Make sure you have CUDA installed before installing faiss-gpu, otherwise it falls back to CPU versionconda install faiss-gpu -c pytorch# [DEFAULT]For CUDA8.0, comes with cudatoolkit8.0
13.vscode
sudo rpm --import https://packages.microsoft.com/keys/microsoft.ascsudo sh -c 'echo -e "[code]\nname=Visual Studio Code\nbaseurl=https://packages.microsoft.com/yumrepos/vscode\nenabled=1\ngpgcheck=1\ngpgkey=https://packages.microsoft.com/keys/microsoft.asc" > /etc/yum.repos.d/vscode.repo'yum check-updatesudo yum install code
之后安装插件,C/C++,Python,vscode-icons。
14.gedit插件(阅读代码)
sudo yum install gedit-plugins
我个人选择了以下插件:插入日期/时间、代码注释、单词补全、括号补全、片段、拼写检查器、文档统计、文件浏览器面板。
片段(快速插入常用的文本片段):
选择工具->Manage Snippet,可以对其进行管理,例如加入常用模板,以便加快coding速度。
/** Author:** Date:** Detail:**/#include <iostream>#include <string>#include <vector>#include <algorithm>//using std:://note: header file do not use using
一定注意不要有中文在里面!!
15.安装shadowsocks
到这里下载源https://copr.fedorainfracloud.org/coprs/librehat/shadowsocks/从Copr下载相应版本的repo文件放到/etc/yum.repos.d/下,然后通过yum安装:sudo yum updatesudo yum install shadowsocks-qt5
不需要配置全局的代理!只需要安装Chrome的扩展即可。
安装好之后,发现配置Chrome并不能通过127.0.0.1, 但是使用localhost即可。
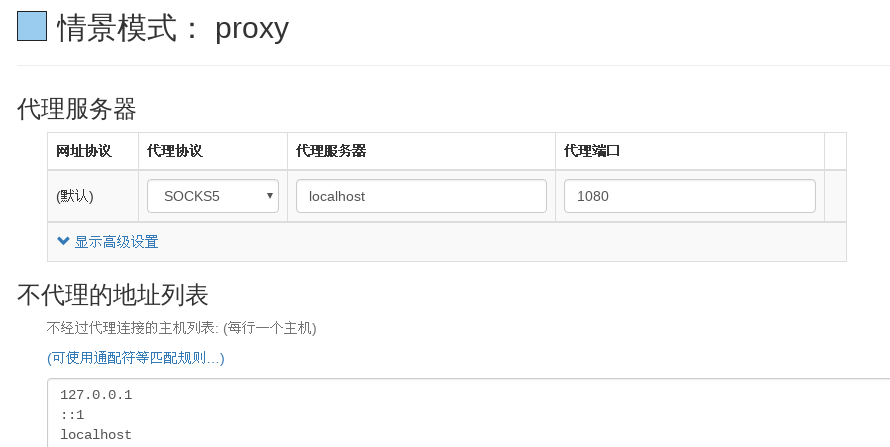
设置auto swith
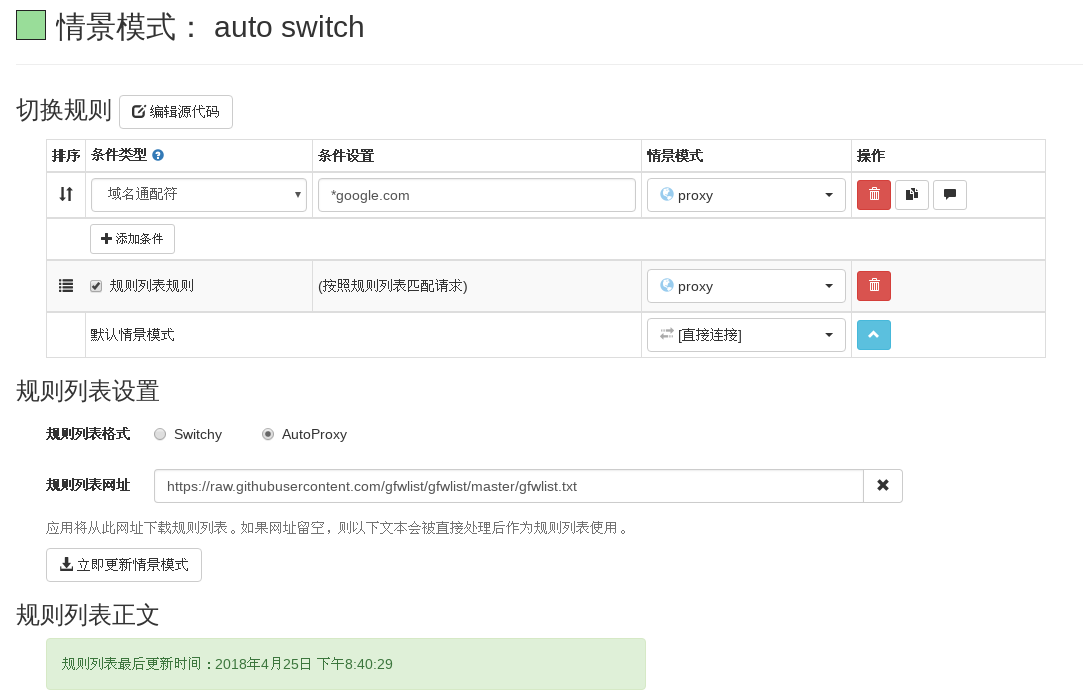
https://raw.githubusercontent.com/gfwlist/gfwlist/master/gfwlist.txt
选择auto switch
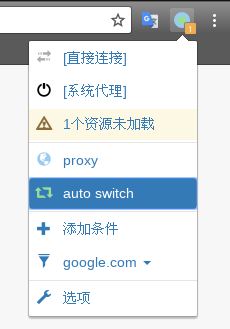
这样就不需要依赖主机的shadowsocks了!!
设置开机自启。
打开终端,输入下面的指令:
gnome-session-properties
点击右边的add,然后选择/usr/bin/ss-qt5,名称随便输,保存即可。
教程结束。
