@a06062125
2017-08-31T08:01:48.000000Z
字数 1228
阅读 366
api-blueprint-docker使用说明
未分类
初始化流程
- 1.安装docker, docker-toolbox: kitematic
- 2.注册一个docker账号,登录
- 3.拉取api-blueprint-docker镜像
docker pull wolfdeng/api-blueprint-docker
4.用api-blueprint-docker镜像创建一个容器
首先, 要有一个API Blueprint文档目录, 这个目录可以是公有的git库, 也可以是私有的git 库, 也可以是本地目录。这个目录下一定要有个index.html
# 从github上拉了一个API Blueprint文档库回来cd ~mkdir githubcd ~/githutbgit clone https://github.com/dozer47528/api-blueprint-test.git
第二步, 从本地API Blueprint文档目录创建容器
docker run --name api-blueprint-test -v "/Users/weimengxi/github/api-blueprint-test:/opt/api-blueprint" -e "aglio=--theme-template triple" -p 80:80 -p 8080:8080 -p 3000:3000 -d wolfdeng/api-blueprint-docker
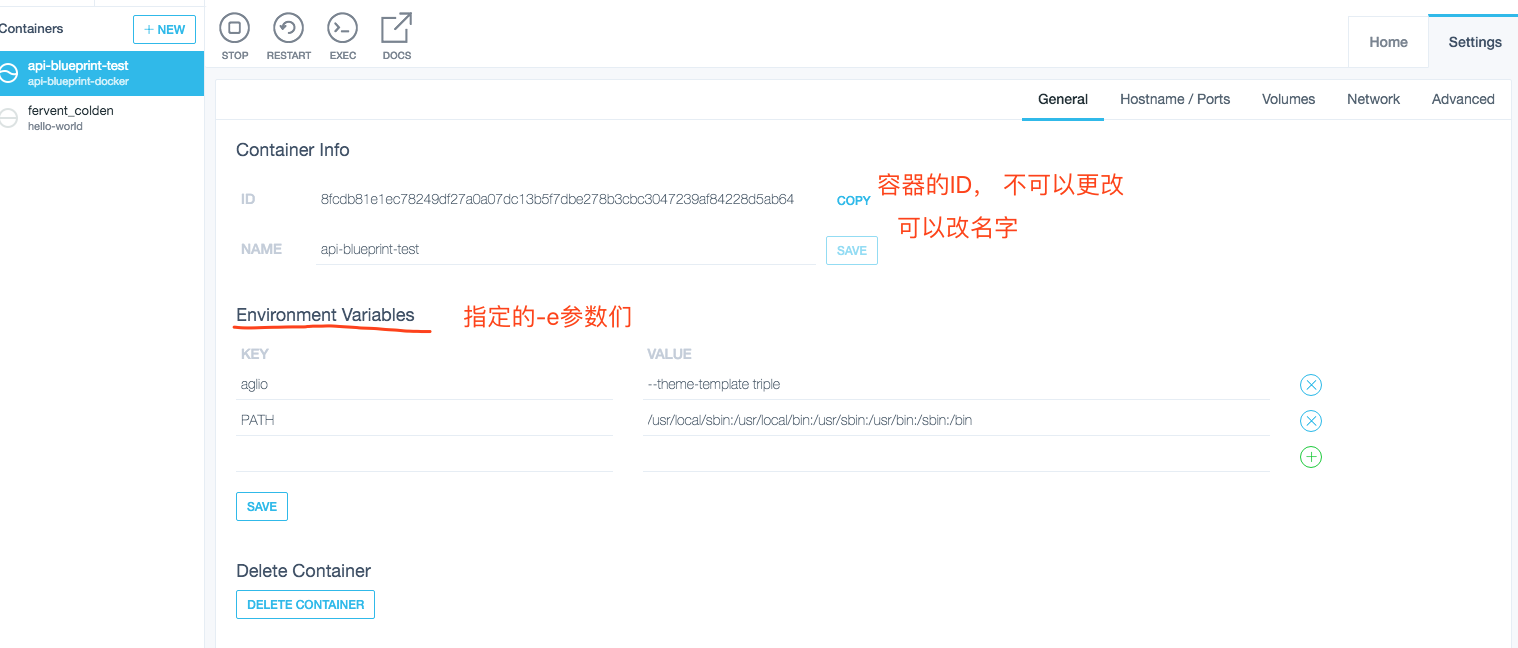
--name容器的名字, 可自定义
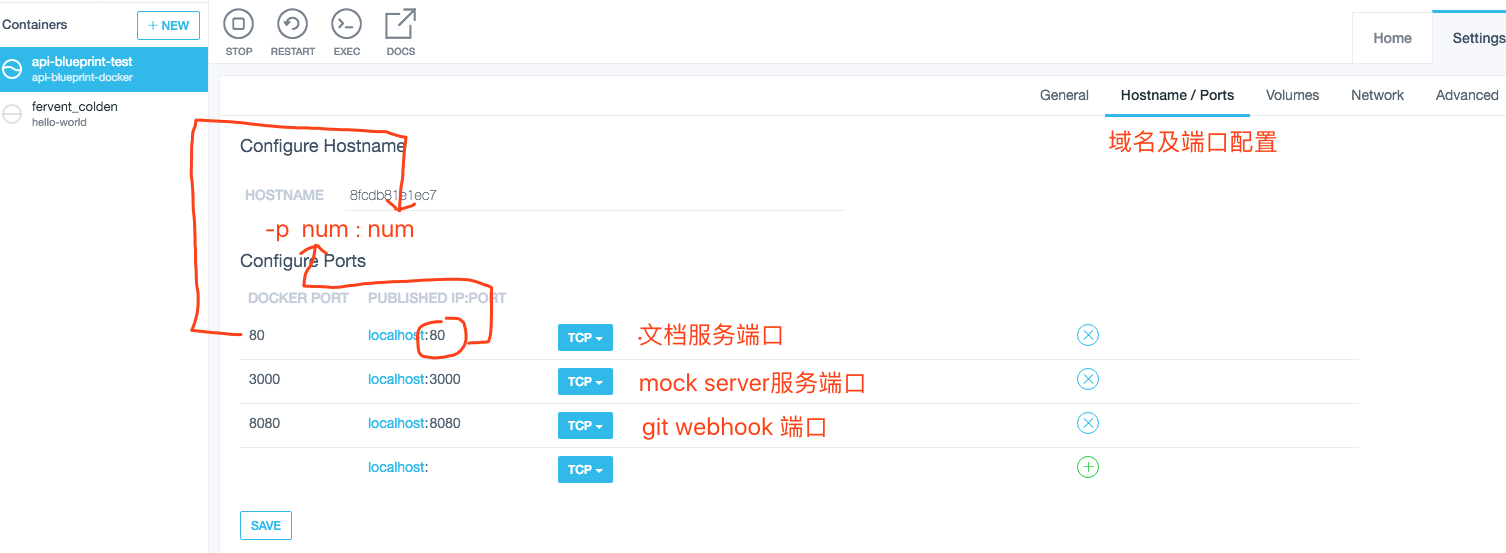
-v冒号前对应的是本地API Blueprint文档目录的绝对路径(取决于存在自己本地的文档路径), 冒号后是对应docker容器中的路径(/opt/api-blueprint已在镜像的布署脚本中写死,这个参数不要改)-p 80:80第一个-p对应的是生成api文档服务端口,
-p 8080:8080第二个-p对应webhook的端口
-p 3000:3000第三个-p对应mock-server的端口
-d wolfdeng/api-blueprint-docker使用的镜像名, 不要改更多说明参考邓涛的原文: https://segmentfault.com/a/1190000004539362
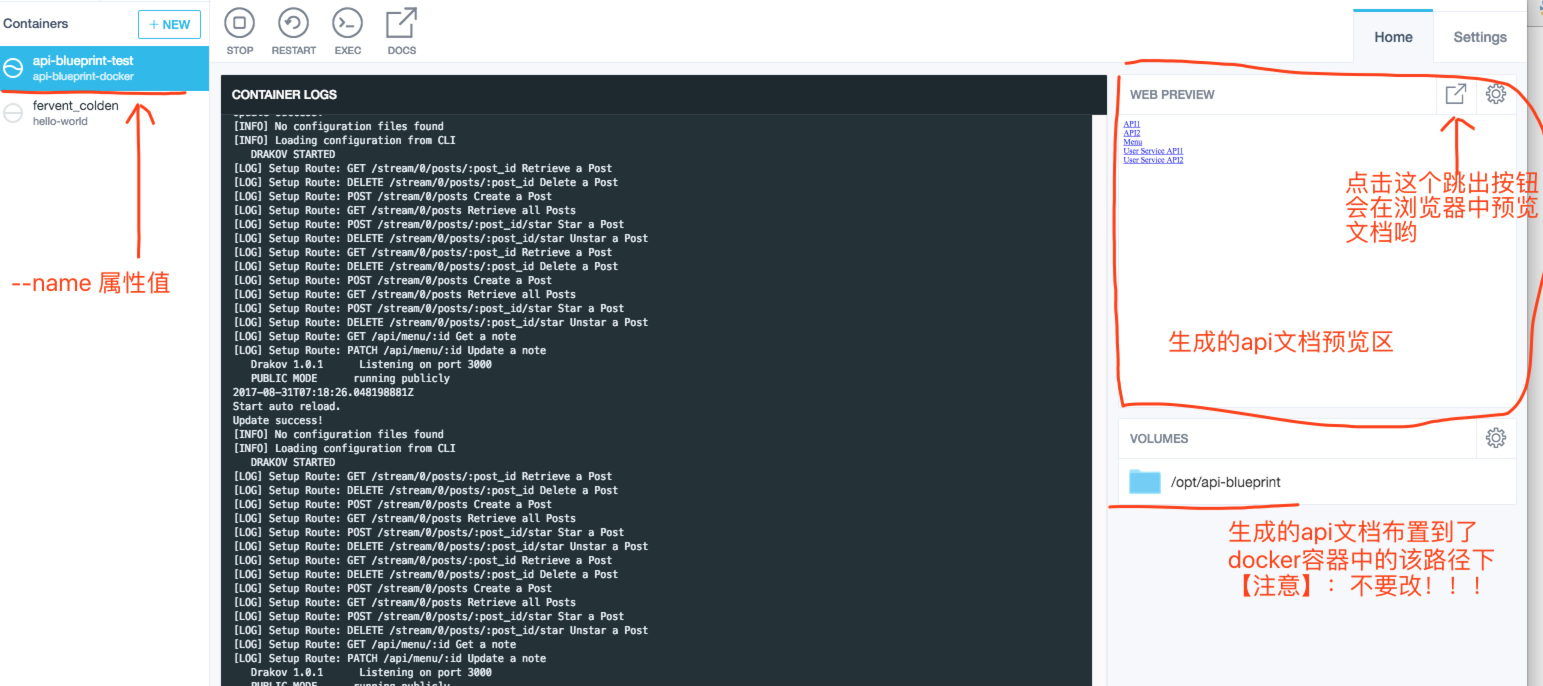
这个镜像就跑起来啦, 可以在docker的GUI 工具Kitematic里看到有关该容器的详细信息了, 也可以做一些配置修改
api文档预览
在浏览器地址框中输入localhost
访问mock接口
在浏览器地址框中输入localhost:3000/stream/0/posts/123
修改或编写API说明文档
进入拉回到本地的api-blueprint文档目录编写文档, 如上例
cd ~/github/api-blueprint-test
api文档规范请移步 github: https://github.com/apiaryio/api-blueprint
GUI工具 Kitematic 概览
容器概览

容器配置

容器配置--域名及端口配置

容器配置--卷配置

剩下两个tab还没探索是干嘛的
