@EggGump
2018-07-24T08:03:01.000000Z
字数 5764
阅读 2532
将keycloak用于保护rest资源
keycloak
keycloak配置
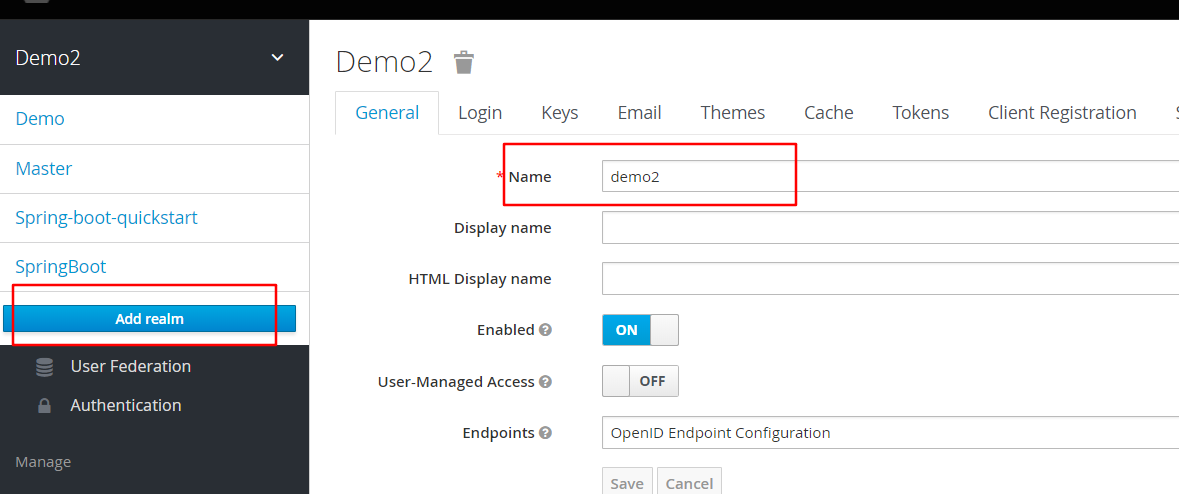
创建一个realm
创建两个role

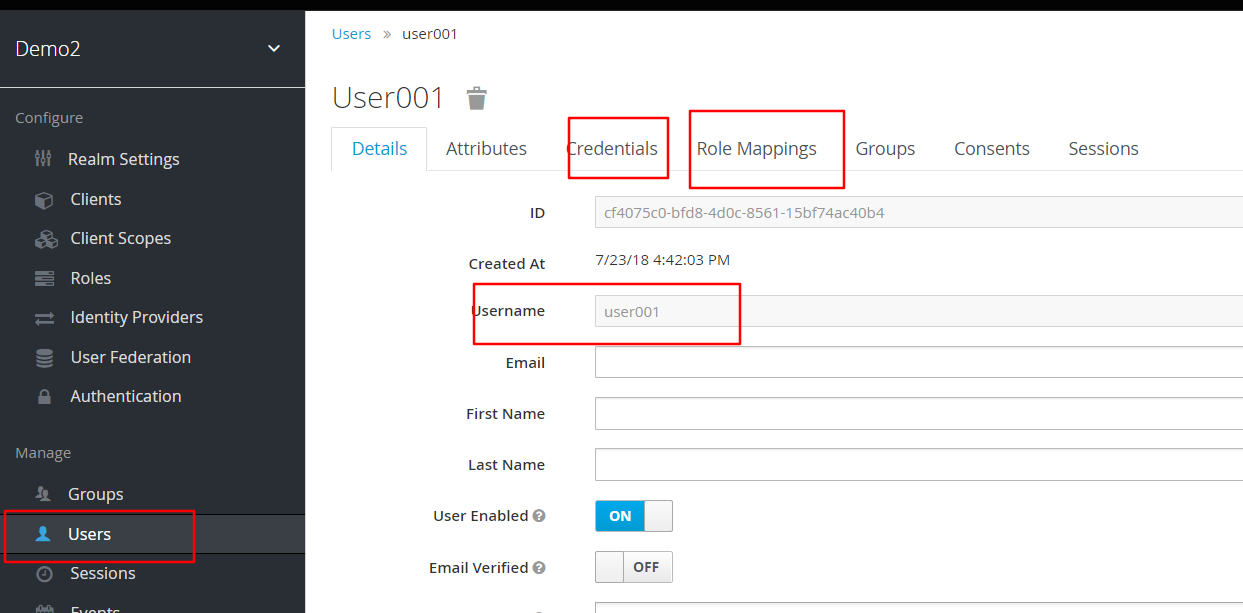
创建两个user,他别属于两个role
user001属于user,user002属于user_pre和user,并将他们的密码都设为1
创建一个client,
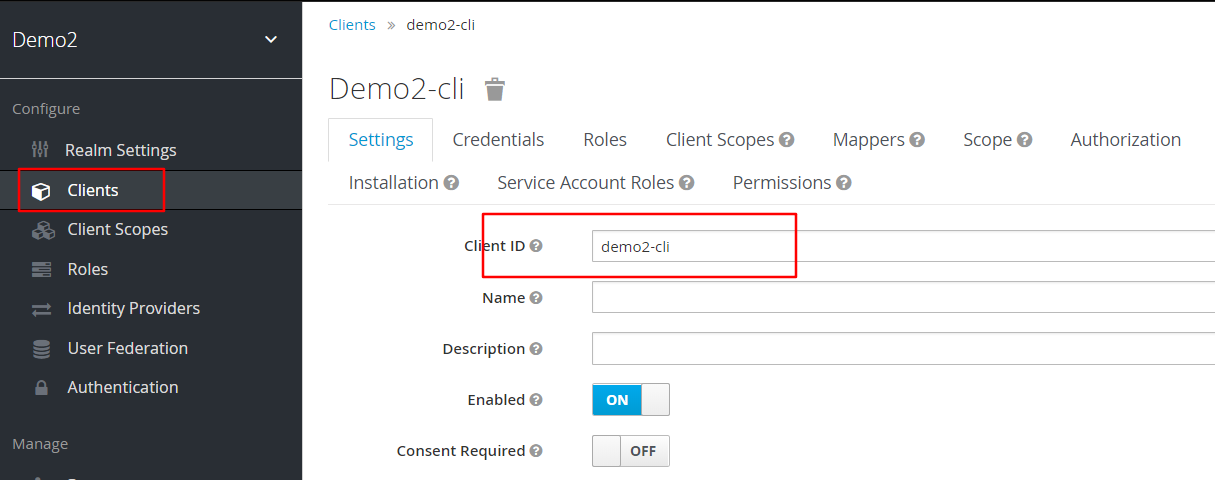
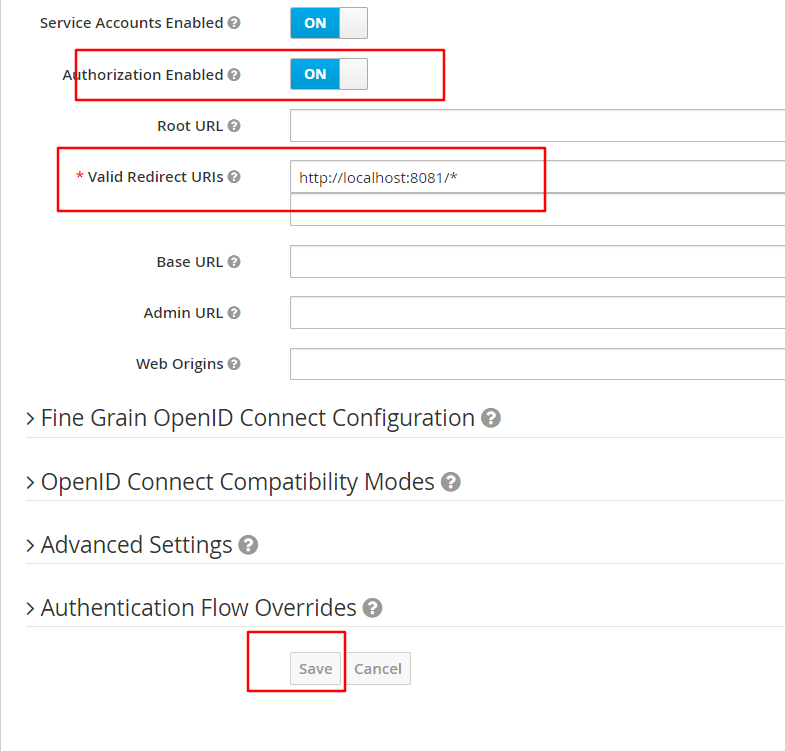
并指定重定向uri,开启授权,别忘了保存
然后选中authorization,接下来我们来设置三个东西:resource,policy,permission
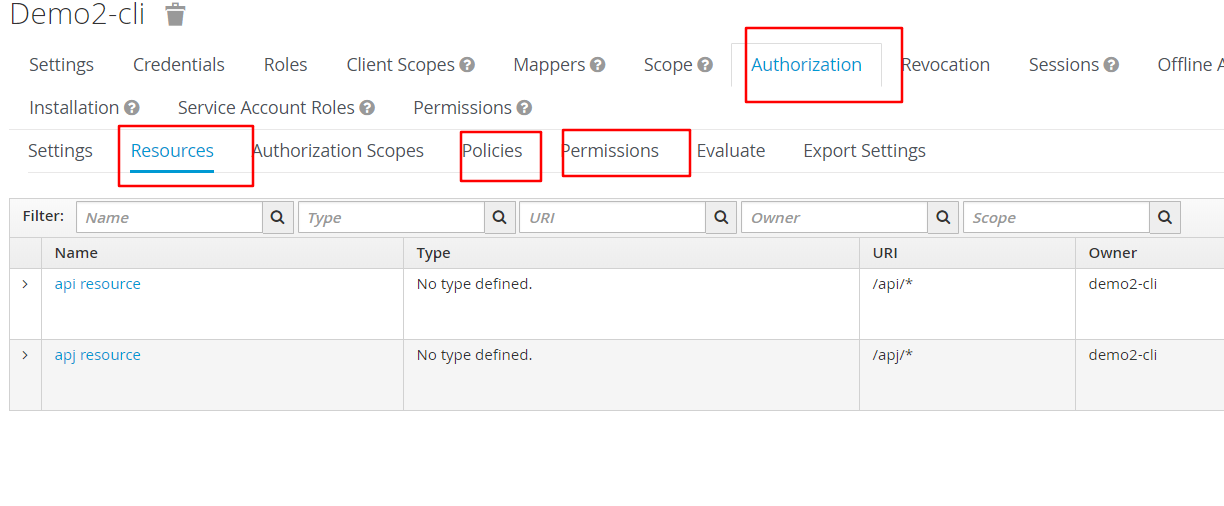
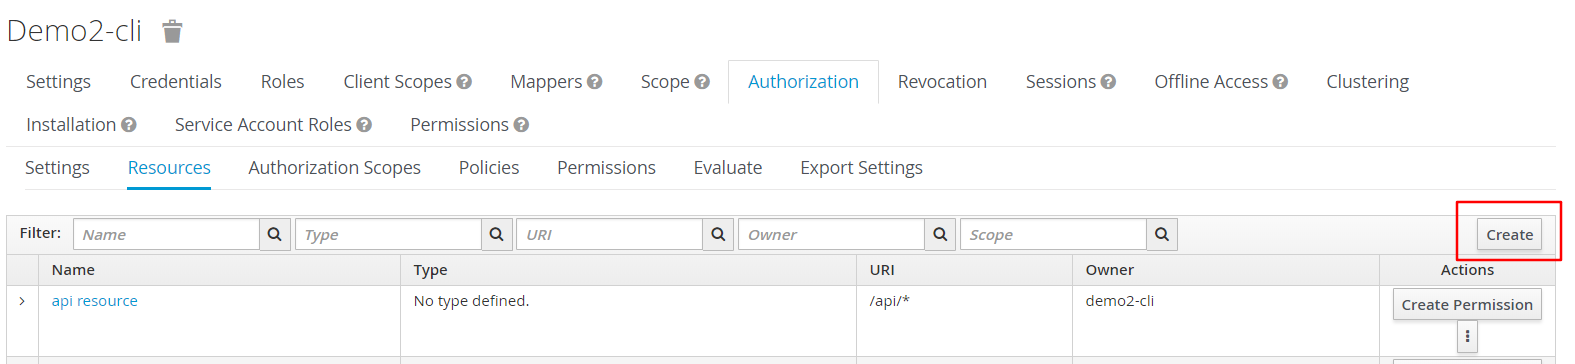
resource的设置
创建一个resource:api resource
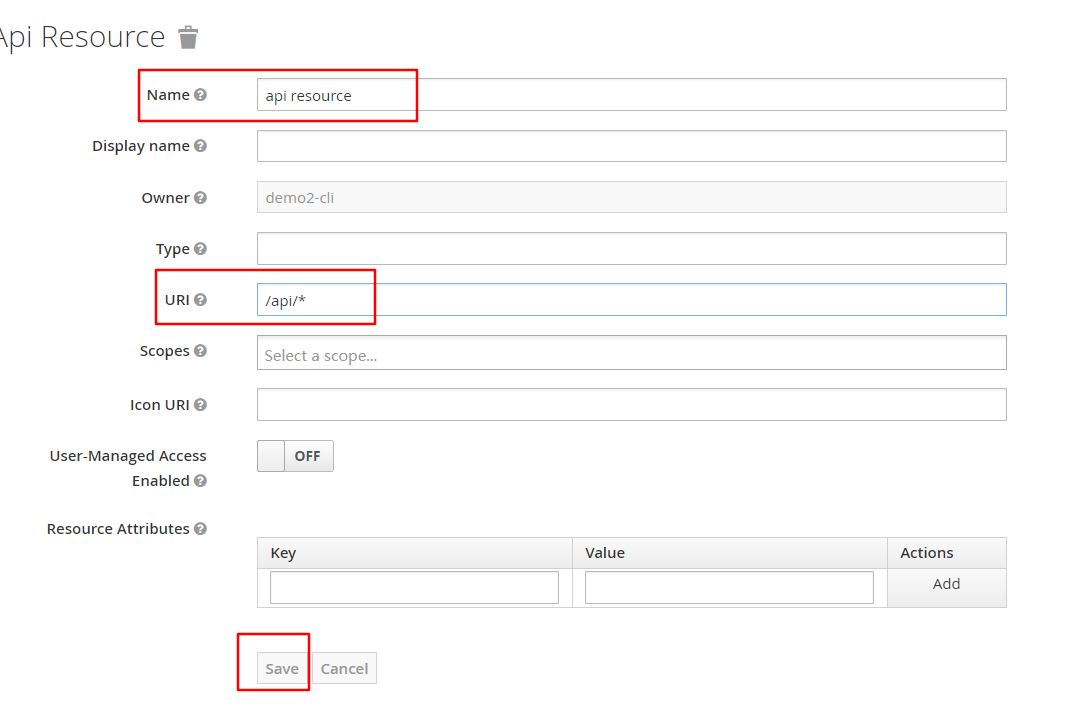
同理,再创一个资源apj resource,uripolicy设置
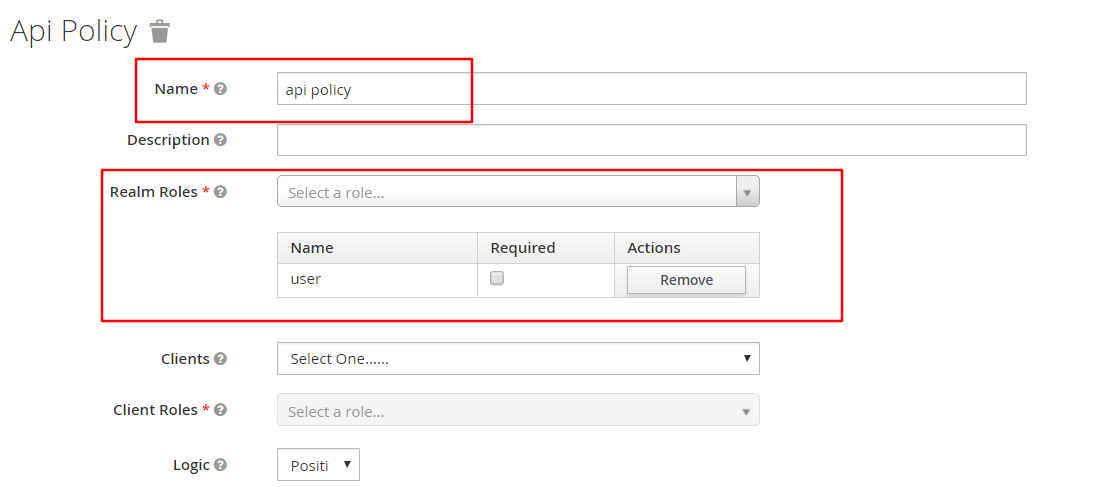
创建一个policy:api policy
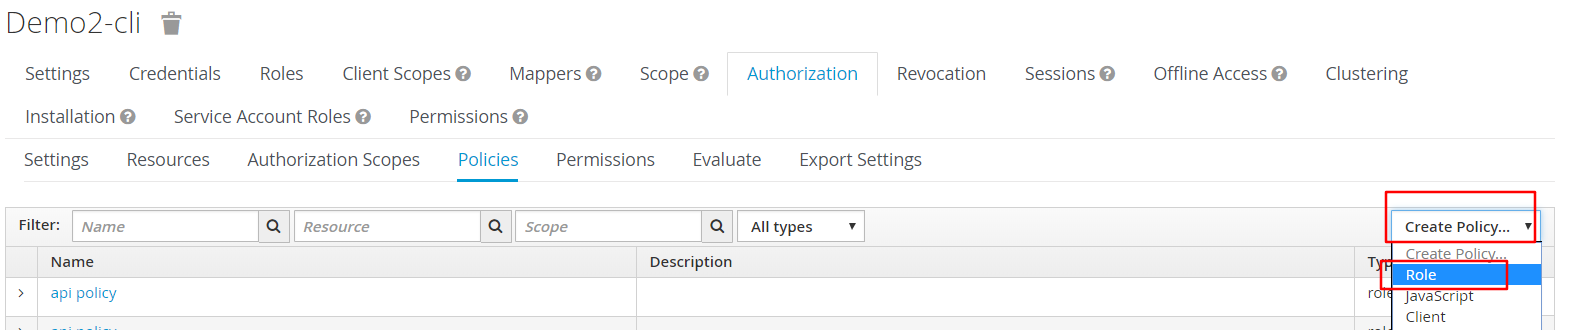
把user加入到api policy中
同理,再创一个policy:apj policy,把user_pre加其中
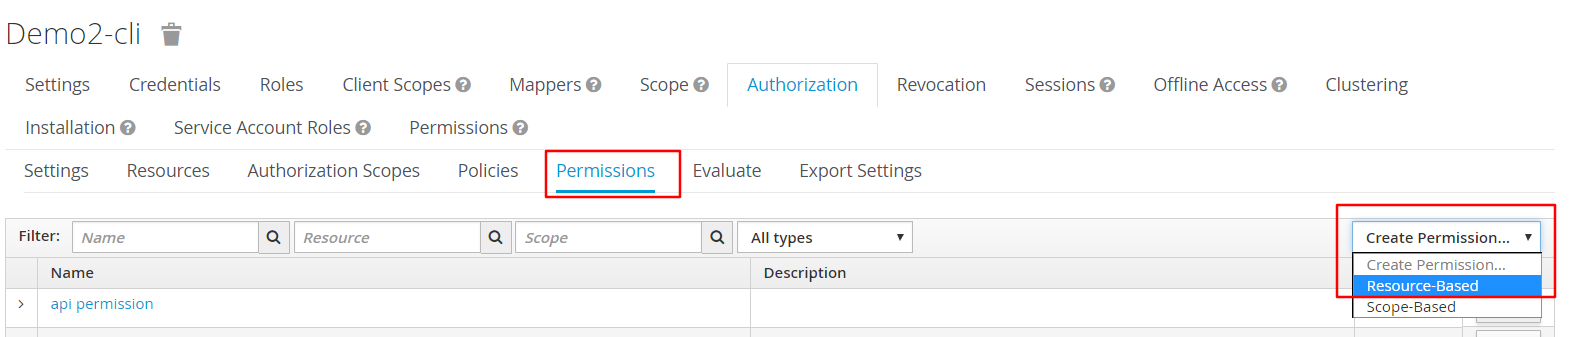
permission的设置
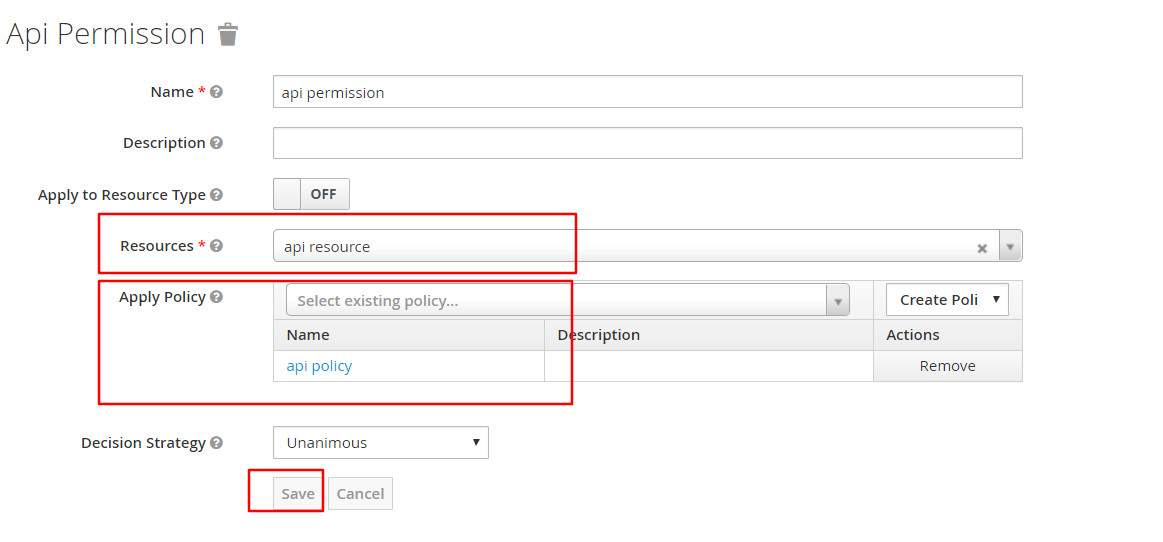
创建一个permission:api permission
将api resource加入resource,api policy加入policy
同理,理创一个apj permission,将apj resource 和apj policy 分别加入其中
至此,keycloak配置已经结束了,我们来总结一下:
demo2-cli里面定义重定向地址是我们的资源位置,有两个资源:api resource和apj resource,user001 和user002 分别有资格访问这两个资源(通达pemission次resource和policy联系)
java springboot端
这里要注意的是secret字段,后面说,真是一个大坑
properties
server.port=8081keycloak.realm=demo2keycloak.auth-server-url=http://localhost:8080/authkeycloak.ssl-required=externalkeycloak.resource=demo2-clikeycloak.bearer-only=truekeycloak.credentials.secret=e17b7d66-7218-47b9-94c0-df77810e6559keycloak.securityConstraints[0].authRoles[0]=userkeycloak.securityConstraints[0].securityCollections[0].name=protectedkeycloak.securityConstraints[0].securityCollections[0].patterns[0]=/*keycloak.policy-enforcer-config.on-deny-redirect-to=/accessDenied
pom
<?xml version="1.0" encoding="UTF-8"?><project xmlns="http://maven.apache.org/POM/4.0.0"xmlns:xsi="http://www.w3.org/2001/XMLSchema-instance"xsi:schemaLocation="http://maven.apache.org/POM/4.0.0 http://maven.apache.org/xsd/maven-4.0.0.xsd"><modelVersion>4.0.0</modelVersion><groupId>com.example</groupId><artifactId>demo-keycloak-2.0.2-rest</artifactId><version>0.0.1-SNAPSHOT</version><packaging>jar</packaging><name>demo-keycloak-2.0.2-rest</name><description>Demo project for Spring Boot</description><parent><groupId>org.springframework.boot</groupId><artifactId>spring-boot-starter-parent</artifactId><version>2.0.2.RELEASE</version><relativePath /> <!-- lookup parent from repository --></parent><properties><project.build.sourceEncoding>UTF-8</project.build.sourceEncoding><project.reporting.outputEncoding>UTF-8</project.reporting.outputEncoding><java.version>1.8</java.version></properties><dependencies><!-- keycloak --><dependency><groupId>org.keycloak</groupId><artifactId>keycloak-spring-boot-starter</artifactId><version>4.1.0.Final</version></dependency><dependency><groupId>org.springframework.boot</groupId><artifactId>spring-boot-starter-web</artifactId></dependency><dependency><groupId>org.springframework.boot</groupId><artifactId>spring-boot-starter-test</artifactId><scope>test</scope></dependency></dependencies><build><plugins><plugin><groupId>org.springframework.boot</groupId><artifactId>spring-boot-maven-plugin</artifactId></plugin></plugins></build></project>
controller
package com.example.demo.web;import org.springframework.web.bind.annotation.RequestMapping;import org.springframework.web.bind.annotation.RequestMethod;import org.springframework.web.bind.annotation.RestController;@RestControllerpublic class ApplicationController {@RequestMapping(value = "/api/resourcea", method = RequestMethod.GET)public String handleResourceA() {return "Access Granted in my own demo api a";}@RequestMapping(value = "/api/resourceb", method = RequestMethod.GET)public String handleResourceAB() {return "Access Granted in my own demo api b";}@RequestMapping(value = "/apj/resourceb", method = RequestMethod.GET)public String handleResourceB() {return "Access Granted in my own demo apj b";}}
java端的就这么多,接下来就是应用了。如果这时启动springboot,浏览器访问我们的资源时会提示无权限
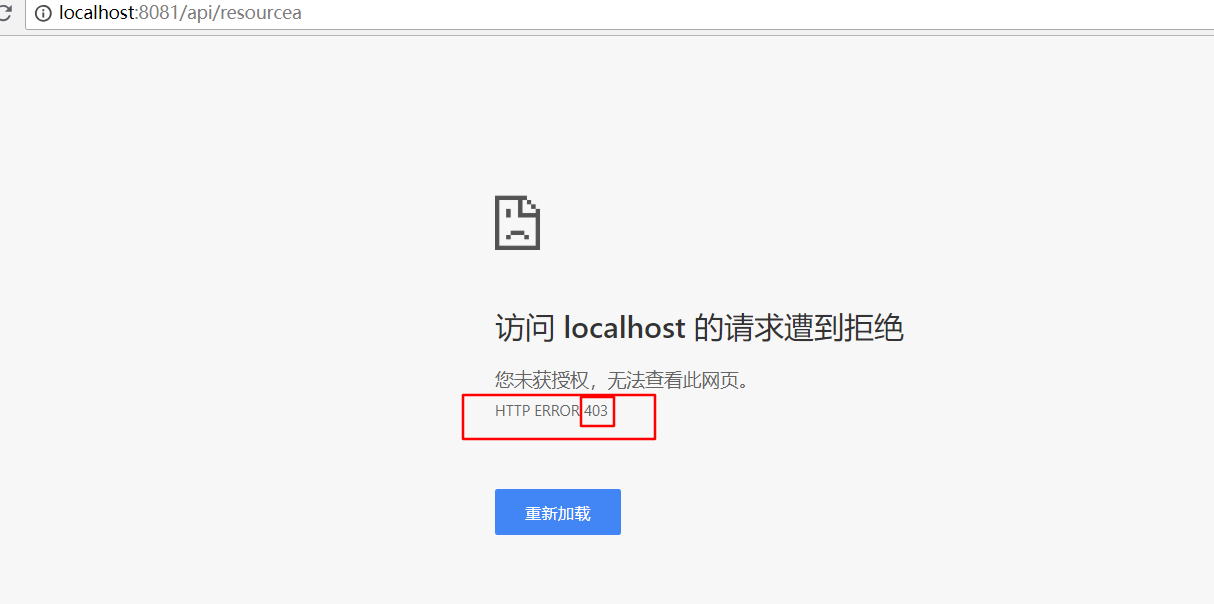
原因是无token.
下面的请求我们用postman处理
浏览器端(postman)模拟
这里我们先看一下client端的secret
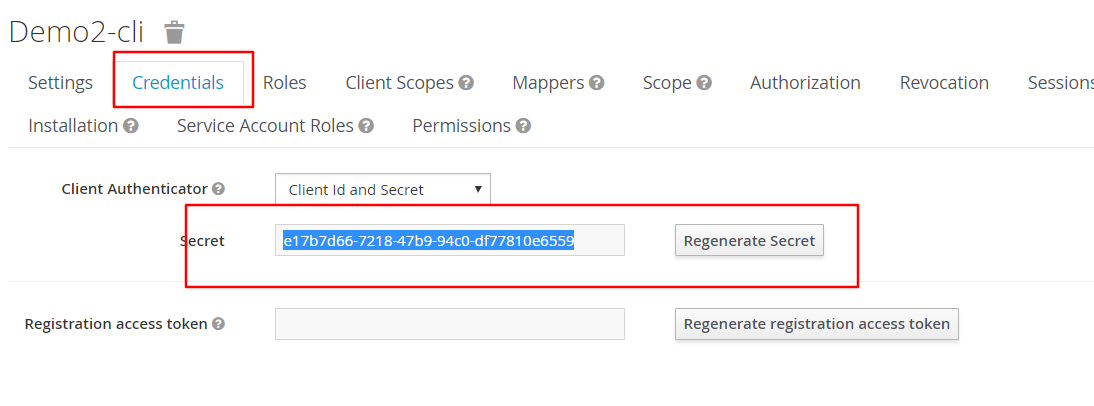
这个secret要与properties里的secret字段相同,否则会出错
1.向浏览器发送请求:http://localhost:8080/auth/realms/demo2/.well-known/uma2-configuration
这里的demo2就是我们前面在keycloak里创建的demo2
获得:
{"issuer": "http://localhost:8080/auth/realms/demo2","authorization_endpoint": "http://localhost:8080/auth/realms/demo2/protocol/openid-connect/auth","token_endpoint": "http://localhost:8080/auth/realms/demo2/protocol/openid-connect/token","token_introspection_endpoint": "http://localhost:8080/auth/realms/demo2/protocol/openid-connect/token/introspect","end_session_endpoint": "http://localhost:8080/auth/realms/demo2/protocol/openid-connect/logout","jwks_uri": "http://localhost:8080/auth/realms/demo2/protocol/openid-connect/certs","grant_types_supported": ["authorization_code","implicit","refresh_token","password","client_credentials"],"response_types_supported": ["code","none","id_token","token","id_token token","code id_token","code token","code id_token token"],"response_modes_supported": ["query","fragment","form_post"],"registration_endpoint": "http://localhost:8080/auth/realms/demo2/clients-registrations/openid-connect","token_endpoint_auth_methods_supported": ["private_key_jwt","client_secret_basic","client_secret_post","client_secret_jwt"],"token_endpoint_auth_signing_alg_values_supported": ["RS256"],"scopes_supported": ["openid","address","email","offline_access","phone","profile"],"resource_registration_endpoint": "http://localhost:8080/auth/realms/demo2/authz/protection/resource_set","permission_endpoint": "http://localhost:8080/auth/realms/demo2/authz/protection/permission","policy_endpoint": "http://localhost:8080/auth/realms/demo2/authz/protection/uma-policy"}
有图为证:
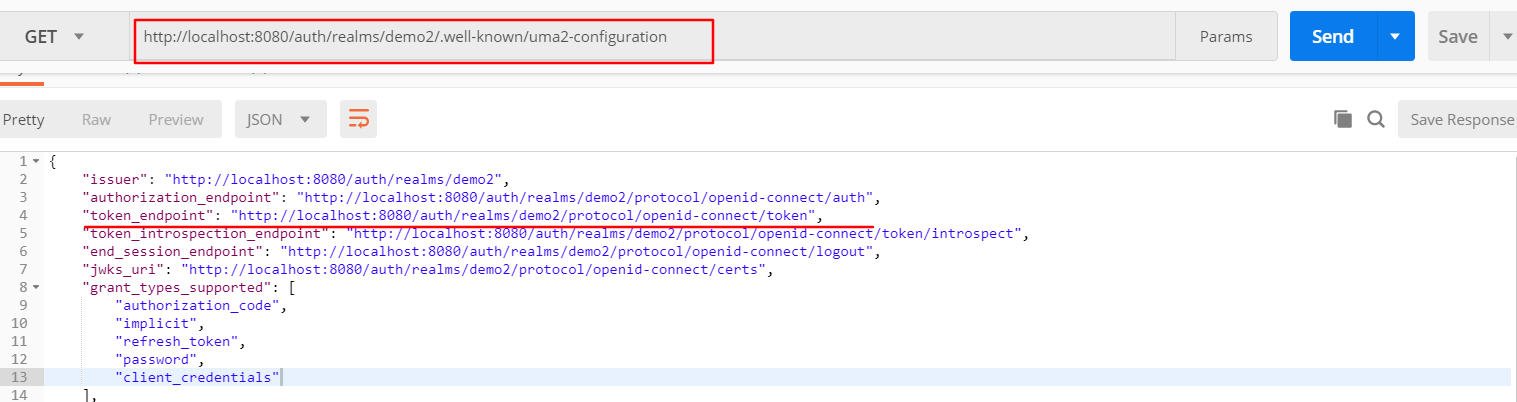
我们要的就是token_endpoint后面的这个链接
http://localhost:8080/auth/realms/demo2/protocol/openid-connect/token
2.获取token
打开OAuth2.0授权框
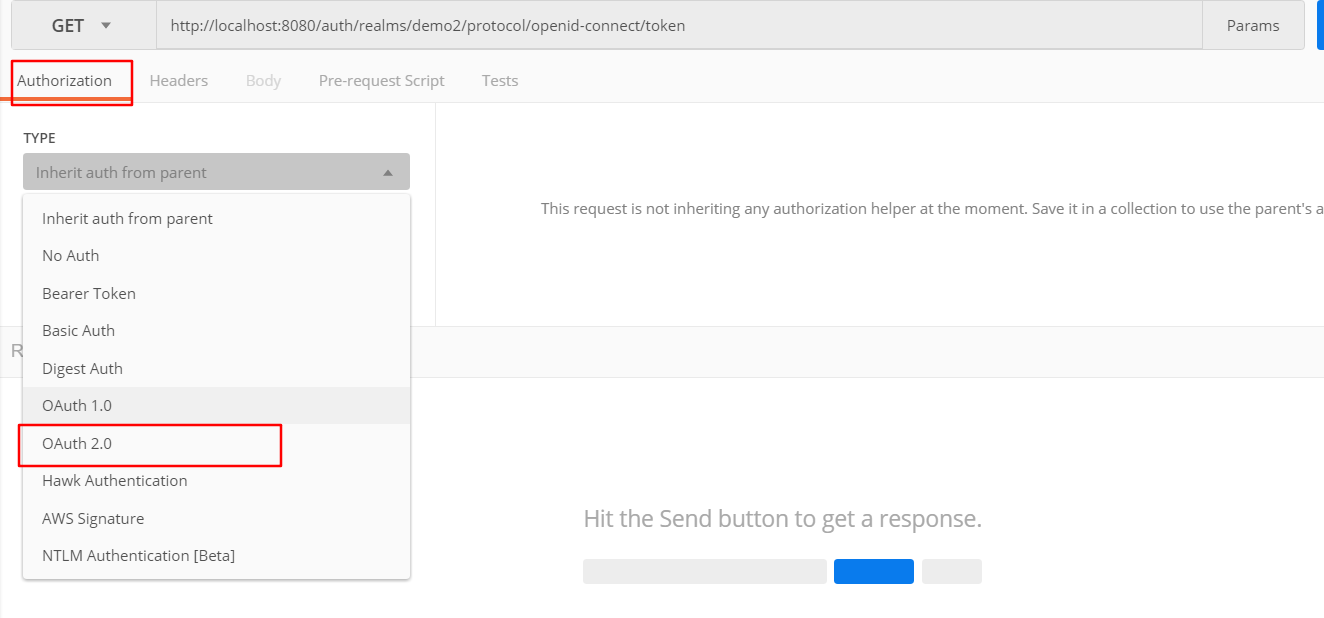
进入
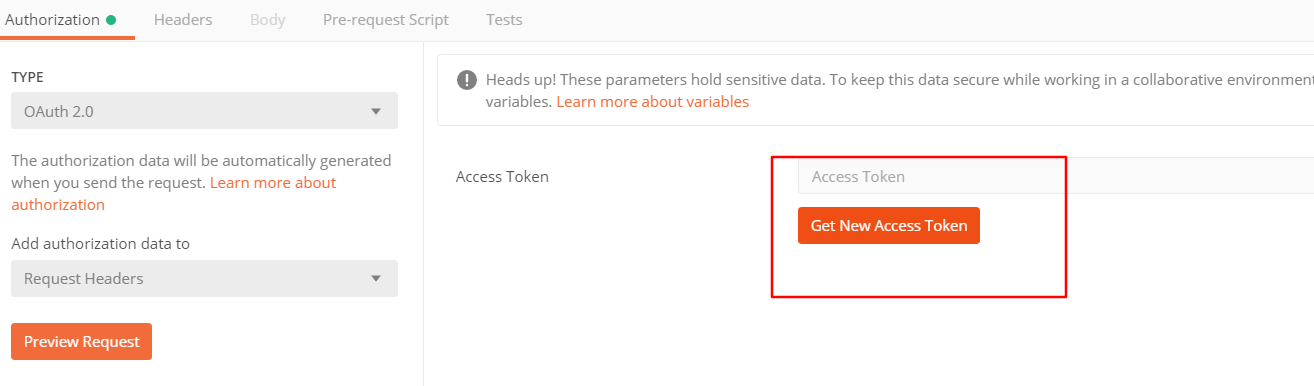
选密码授权
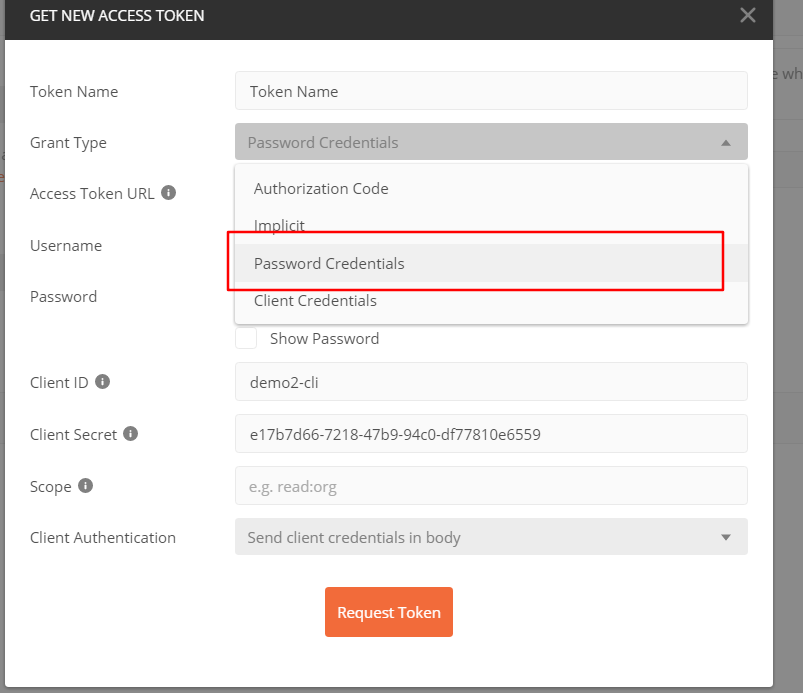
进入后有三个地方要改:tokenURL就是我们前面token endpoint那个url,填用户名密码,还有client Secret就是我们keycloak中demo2-cli的secret,最后再RequestToken就可以了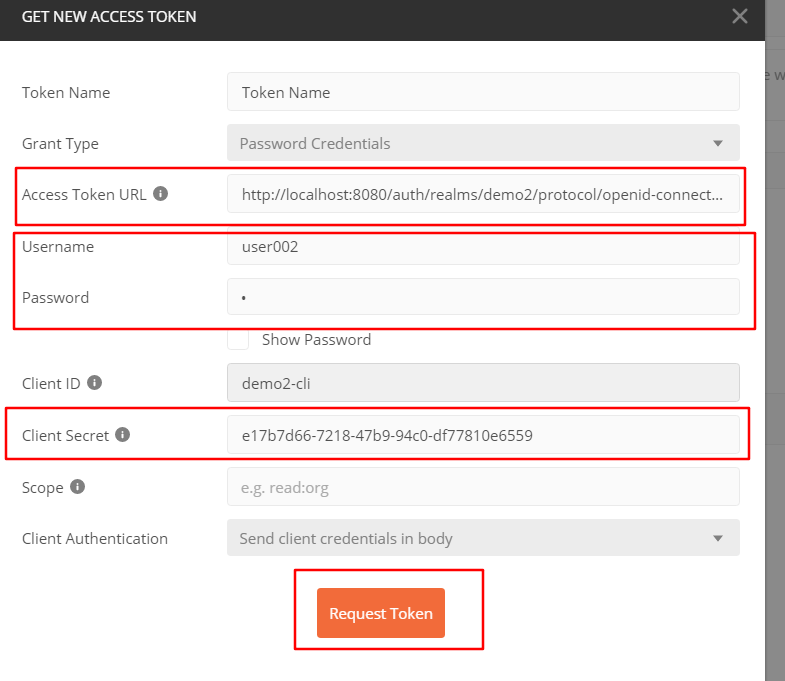
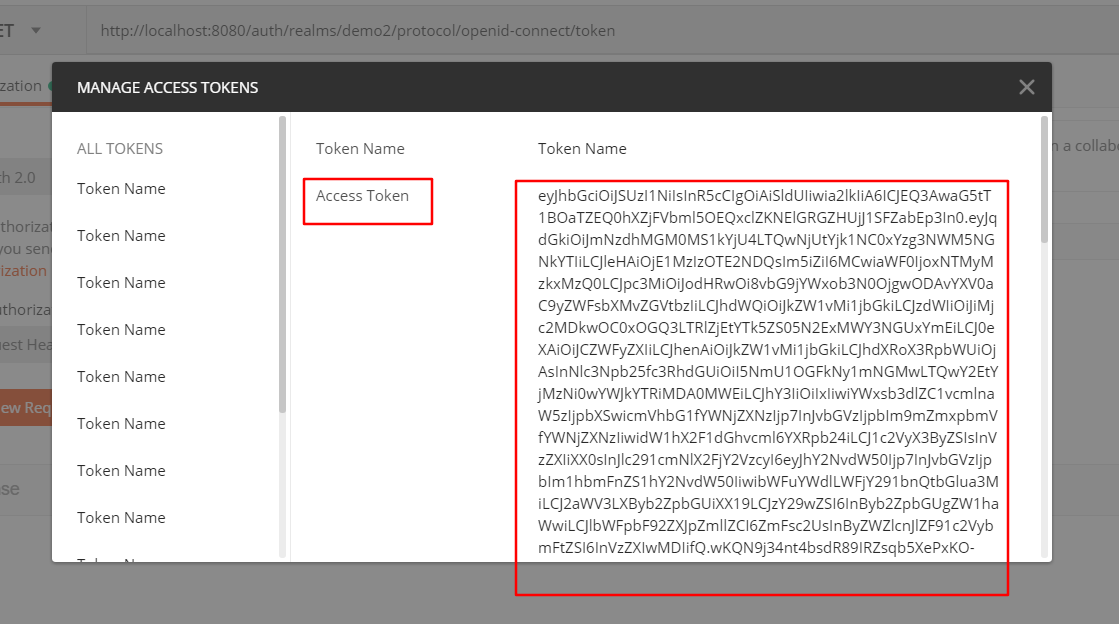
我们可以得到一个token,这个就是我们忙了半天最后要的东西,它可以让我们访问登录用户相应的资源。
接下来我们把得到的token通过请求头带过去就可以访问相应的资源了,看一图
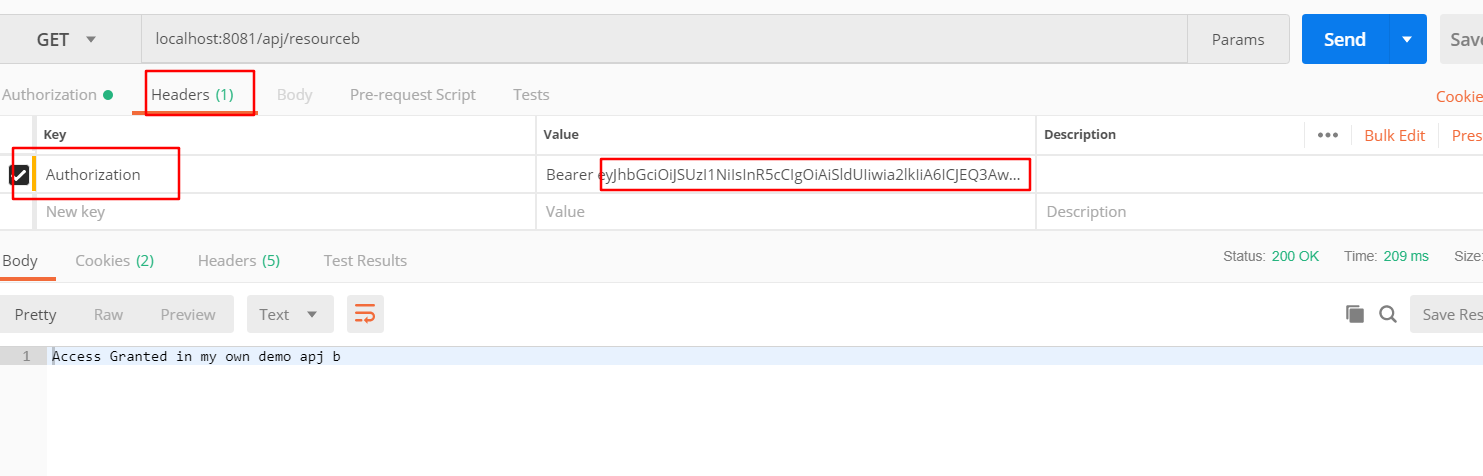
这里的Barer是一个固定值,它+空格+token构成键Authorize的值,我们看到确实是可以访问的,由于我们登录的是user002,所以访问的是apj/resourceb,我们试试api/resourcea行不行。
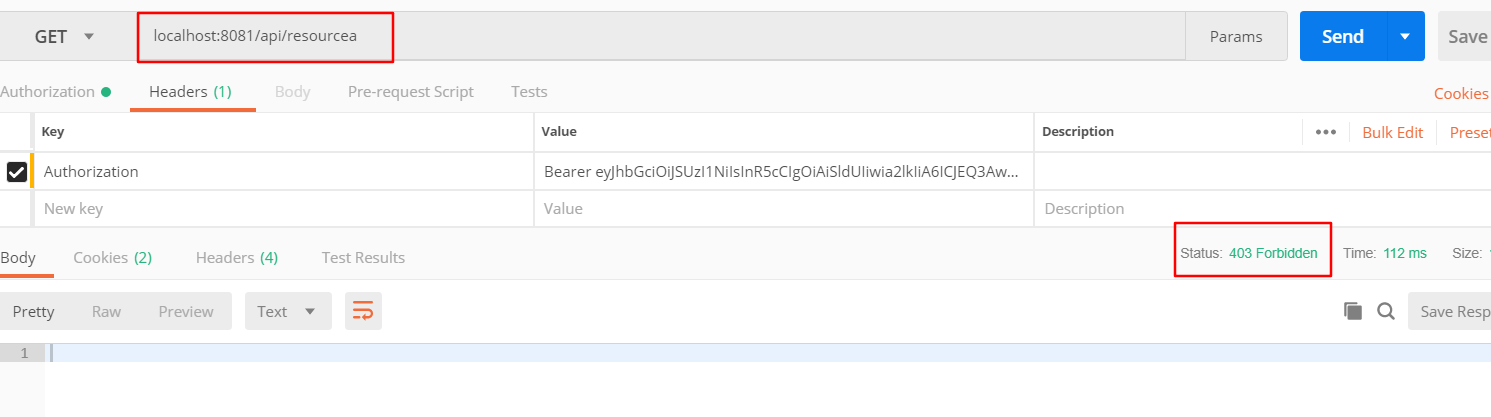
可以看到是403未授权错识,这次我们用user001来获取token再访问api/resourcea试试
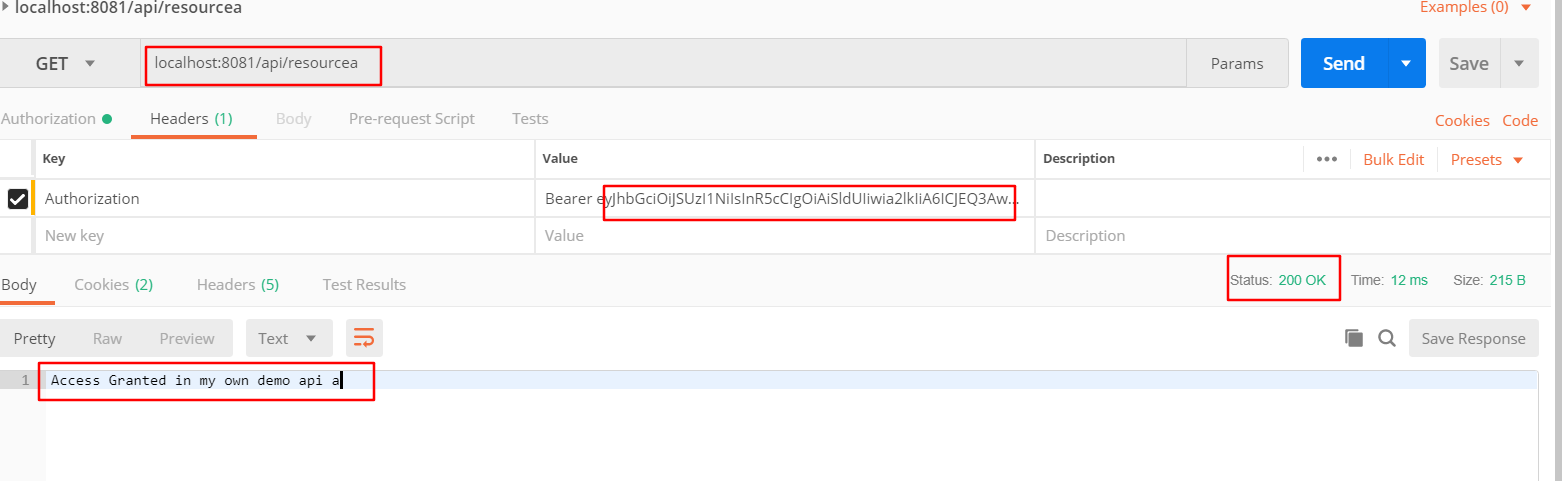
这里我用通过user001获取的token来替代了原来的token,可以看到api/resourcea可以访问了。
- 注意两点:
1、properties里面设置了访问角色控制,因此user002同时有user和user-pre角色
2、将得到的token复制过去后注意最后一行有时会有多余的空格,有的话要删去,否则会有SSL错误
springboot端源码:https://download.csdn.net/download/hb_688/10560360
