@nalan90
2018-06-25T10:43:50.000000Z
字数 1847
阅读 2258
Google Authenticator 配置SSH动态验证码登录
自动化运维
环境部署
##1、安装依赖库[root@jdy-vpc-gw-01 ~]#yum install -y git make gcc libtool pam-devel automake autoconf ntp wget##2、下载google-authenticator[root@jdy-vpc-gw-01 ~]#wget https://github.com/google/google-authenticator/archive/1.02.tar.gz##3、解压缩[root@jdy-vpc-gw-01 ~]#tar -zxvf 1.02.tar.gz && cd google-authenticator-1.02/libpam/##4、编译安装(注意是否有报错)[root@jdy-vpc-gw-01 ~]#./bootstrap.sh && ./configure --prefix=/usr/local/google-authenticator && make && make install##5、创建软链[root@jdy-vpc-gw-01 ~]#ln -s /usr/local/google-authenticator/lib/security/pam_google_authenticator.so /usr/lib64/security/pam_google_authenticator.so##6、编辑配置文件[root@jdy-vpc-gw-01 ~]#vim /etc/pam.d/sshd#%PAM-1.0auth required pam_google_authenticator.so nullok ##添加此行auth required pam_sepermit.so#auth substack password-auth ##注释该行auth include postlogin[root@jdy-vpc-gw-01 ~]#vim /etc/ssh/sshd_configChallengeResponseAuthentication yes ## 将no —> yesUsePAM yes##先验证公钥,再验证校验码AuthenticationMethods publickey,password publickey,keyboard-interactive ## 添加此行##7、重启sshd服务[root@jdy-vpc-gw-01 ~]#systemctl restart sshd
手机客户端下载
IOS请直接使用App Store下载

Android请在各大应用商店下载
生成二维码
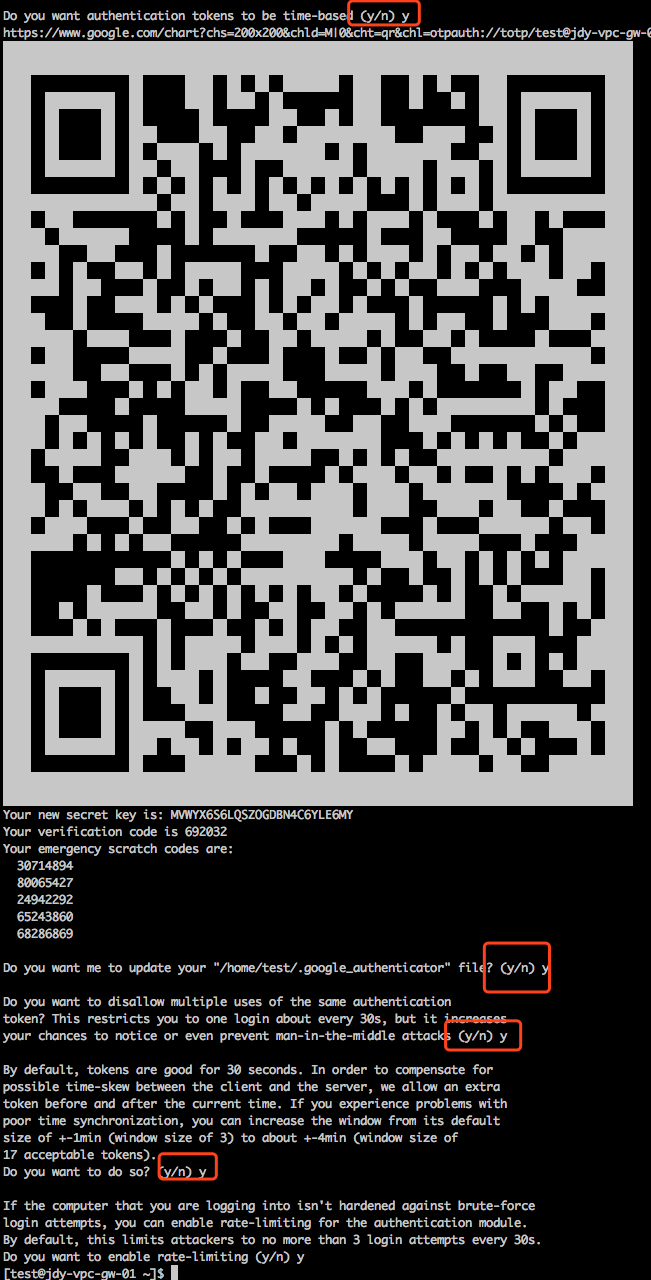
##登录跳板机并执行以下命令##to-jdy-vpc-gw-01是个人建立的别名:ssh -A test@47.xx.xx.201work:~ ys$ to-jdy-vpc-gw-01Last login: Thu Dec 7 08:16:05 2017 from 61.51.129.138Welcome to Alibaba Cloud Elastic Compute Service ![test@jdy-vpc-gw-01 ~]$ /usr/local/google-authenticator/bin/google-authenticator
执行完之后会出现以下图片所示的步骤,全部选择yes即可
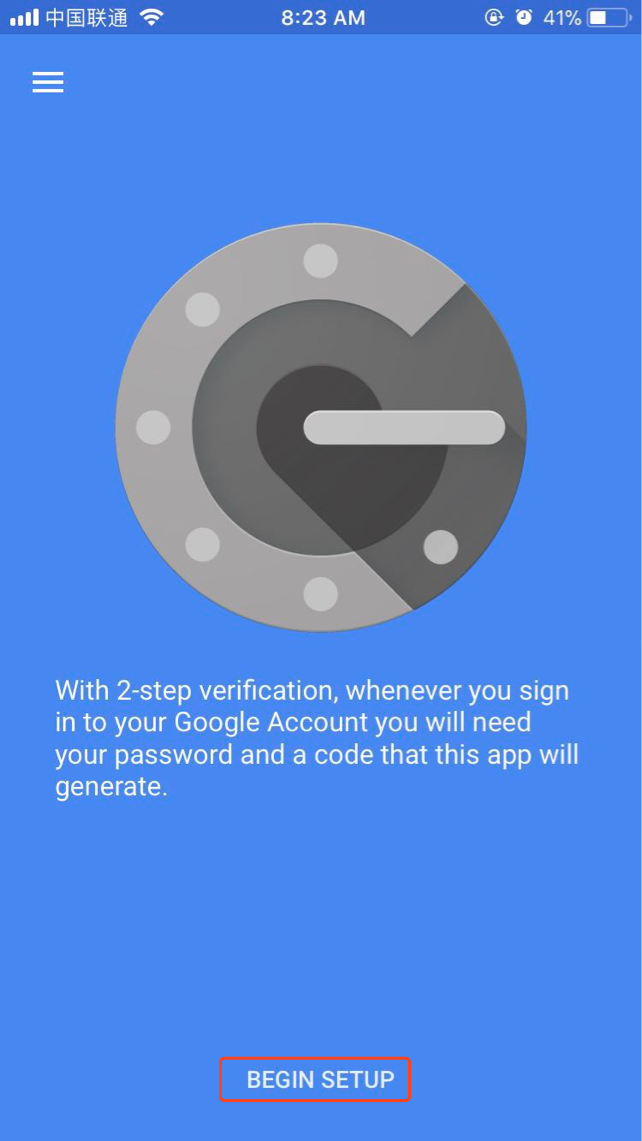
打开手机端的Google Authenticator,点击BEGIN SETUP
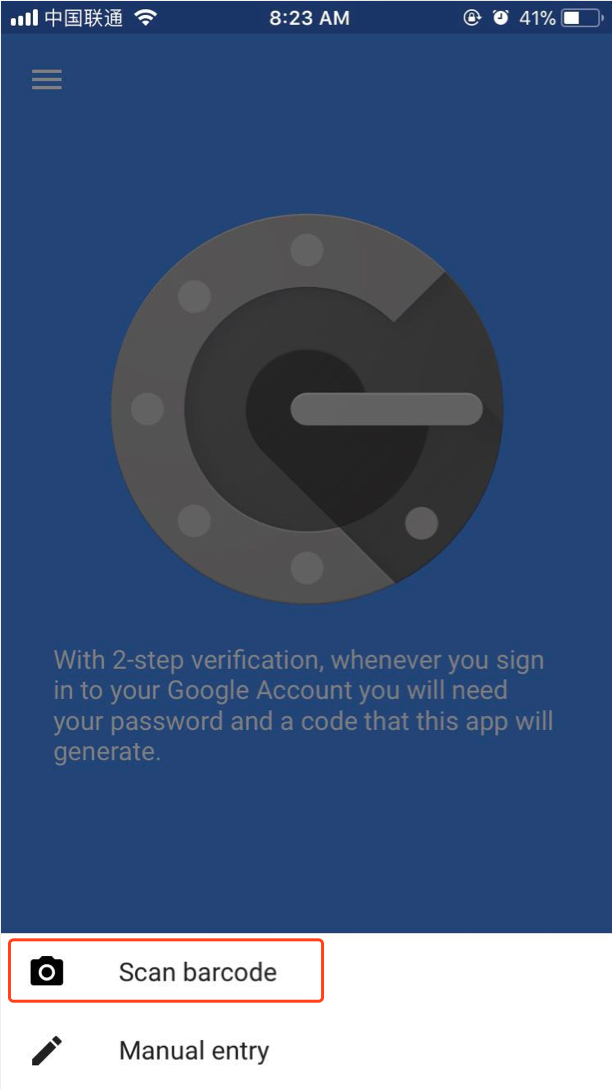
点击Scan Barcode,扫描执行命令之后生成的二维码(不要扫描文档中的二维码)
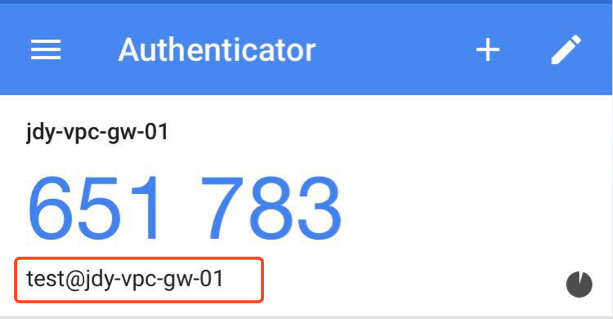
扫描完成之后会自动添加相应的记录(验证码默认的有效期为30秒),请核对用户名、服务器是否正确
验证是否生效
## 退出服务器[test@jdy-vpc-gw-01 ~]$ exitlogoutConnection to 47.xx.xx.201 closed.work:~ ys$ to-jdy-vpc-gw-01## 再次登录服务器时要求输入验证码,输入的数字不会回显Verification code:Last login: Thu Dec 7 08:18:33 2017 from 61.51.129.138## 登录成功Welcome to Alibaba Cloud Elastic Compute Service !
修改用户到期时间
usermod -e 2017-12-31 hugechage -l hugefor user in `ls /home | grep -v zhangshuang`;do usermod -e 2018-09-18 $user; done
