@yzzer
2020-05-04T13:50:14.000000Z
字数 3251
阅读 710
React Native 目录结构
我们来看看刚刚创建的项目。
一个新的 React Native 项目,根目录下的文件和目录结构如下
└── hello├── App.js├── __tests__├── android├── app.json├── babel.config.js├── index.js├── ios├── metro.config.js├── node_modules├── package.json├── package-lock.json└── yarn.lock4 directories, 8 files
总共有 4 个目录和 8 个文件。
├── babel.config.js├── node_modules├── package-lock.json├── package.json└── yarn.lock
package字眼的是相关的依赖库,如果你安装了新的的第三方库,这里会多内容
node_modules就是一些库的代码├── metro.config.js
这个是 FaceBook 的工程构件文件,这个不需要做任何修改,我们基本也没机会修改它。
├── android├── ios
这两个目录是 React Native 原生组件和其它需要原生代码的目录。包含了该项目 iOS 和 Android 平台下所有的原生代码。
一般情况下,我们不需要对这两个目录做任何修改,如果需要修改,我们也会特别指出。
├── __tests__
这个目录是测试文件目录。如果你要进行单元测试,可以将测试代码放在这个目录下。
├── App.js├── app.json├── index.js
整个项目中,最重要的就是这三个文件
| 文件 | 说明 |
|---|---|
| App.js | 项目的实际 React Native 源码,主要是存放入口组件 App 的源码 |
| app.json | 项目的配置文件 |
| index.js | 项目的入口文件,如果需要全局加载和全局配置,可以把代码写在这里 |
app.json
app.json 是项目的配置文件,存放了一些公共的配置项。
新创建的项目,app.json 内容如下
{"name": "hello","displayName": "hello"}
| 属性 | 说明 |
|---|---|
| name | 用于配置项目的名称 |
| displayName | 用于配制生成 iOS 和 Android 项目时的显示名称,也就是桌面上图标下面的名称。 |
index.js
index.js 是项目的入口文件,一些初始化的加载和初始化配置都放在这里。
新创建的项目,index.js 内容如下
/*** @format*/import {AppRegistry} from 'react-native';import App from './App';import {name as appName} from './app.json';AppRegistry.registerComponent(appName, () => App);
代码很简单,就是加载 App.js 中的 App 组件,然后使用 AppRegistry.registerComponent() 函数注册组件和初始化。
一般情况下,如果需要全局加载和全局配置,可以把代码写在这里
App.js
App.js 是项目的实际 React Native 源码,主要是存放入口组件 App 。
新创建的项目,App.js 内容如下
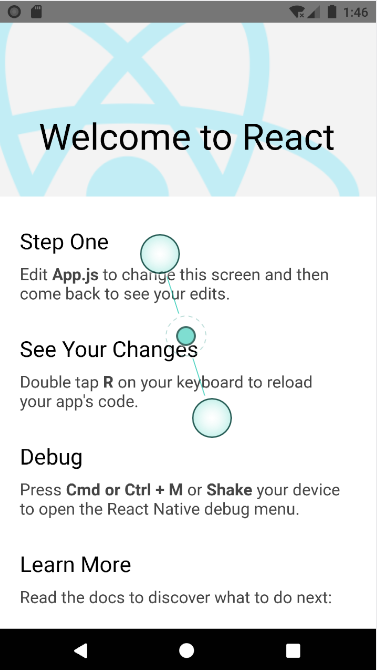
/*** Sample React Native App* https://github.com/facebook/react-native** @format* @flow*/import React from 'react';import {SafeAreaView,StyleSheet,ScrollView,View,Text,StatusBar,} from 'react-native';import {Header,LearnMoreLinks,Colors,DebugInstructions,ReloadInstructions,} from 'react-native/Libraries/NewAppScreen';const App: () => React$Node = () => {return (<><StatusBar barStyle="dark-content" /><SafeAreaView><ScrollViewcontentInsetAdjustmentBehavior="automatic"style={styles.scrollView}><Header />{global.HermesInternal == null ? null : (<View style={styles.engine}><Text style={styles.footer}>Engine: Hermes</Text></View>)}<View style={styles.body}><View style={styles.sectionContainer}><Text style={styles.sectionTitle}>Step One</Text><Text style={styles.sectionDescription}>Edit <Text style={styles.highlight}>App.js</Text> to change thisscreen and then come back to see your edits.</Text></View><View style={styles.sectionContainer}><Text style={styles.sectionTitle}>See Your Changes</Text><Text style={styles.sectionDescription}><ReloadInstructions /></Text></View><View style={styles.sectionContainer}><Text style={styles.sectionTitle}>Debug</Text><Text style={styles.sectionDescription}><DebugInstructions /></Text></View><View style={styles.sectionContainer}><Text style={styles.sectionTitle}>Learn More</Text><Text style={styles.sectionDescription}>Read the docs to discover what to do next:</Text></View><LearnMoreLinks /></View></ScrollView></SafeAreaView></>);};const styles = StyleSheet.create({scrollView: {backgroundColor: Colors.lighter,},engine: {position: 'absolute',right: 0,},body: {backgroundColor: Colors.white,},sectionContainer: {marginTop: 32,paddingHorizontal: 24,},sectionTitle: {fontSize: 24,fontWeight: '600',color: Colors.black,},sectionDescription: {marginTop: 8,fontSize: 18,fontWeight: '400',color: Colors.dark,},highlight: {fontWeight: '700',},footer: {color: Colors.dark,fontSize: 12,fontWeight: '600',padding: 4,paddingRight: 12,textAlign: 'right',},});export default App;

