@Lxyour
2017-05-31T14:47:29.000000Z
字数 6581
阅读 1727
WebPack新手入门教程
WEB-Build
什么是webpack
webpack的官网: http://webpack.github.io/ ,
文档地址: http://webpack.github.io/docs/
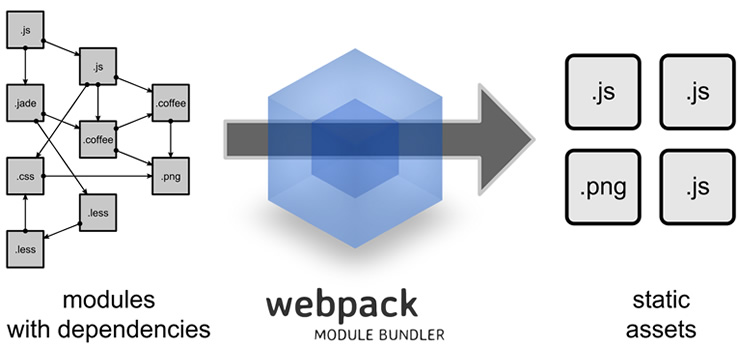
webpack是近期最火的一款模块加载器兼打包工具,它能把各种资源,例如JS(含JSX)、coffee、样式(含less/sass)、图片等都作为模块来使用和处理。

拓展阅读:
一小时包教会 —— webpack 入门指南
webpack入门
入门Webpack,看这篇就够了
Webpack从入门到上线
一、安装
我们常规直接使用 npm 的形式来安装。
全局安装:
//执行全局安装$ npm install -g webpack//安装成功后/usr/local/bin/webpack -> /usr/local/lib/node_modules/webpack/bin/webpack.js/usr/local/lib└─┬ webpack@1.13.2├─┬ enhanced-resolve@0.9.1│ └── graceful-fs@4.1.6├─┬ memory-fs@0.3.0│ └── readable-stream@2.1.5└─┬ node-libs-browser@0.6.0└─┬ buffer@4.9.1└── base64-js@1.1.2
当然如果常规项目还是把包依赖写入 package.json 里更人性化:
//初始化项目依赖$ npm init
安装到你的项目目录:
$ npm install --save-dev webpack
执行完之后项目根目录会多了名字为node_modules的文件夹,并包含了很多node包
安装加载器(Loaders)
比如安装url-loader
npm install url-loader --save-dev
二、配置
每个项目下都必须配置有一个 webpack.config.js ,它的作用如同常规的 gulpfile.js/Gruntfile.js ,就是一个配置项,告诉 webpack 它需要做什么。
示例:
var webpack = require('webpack');var commonsPlugin = new webpack.optimize.CommonsChunkPlugin('common.js');module.exports = {//插件项plugins: [commonsPlugin],//页面入口文件配置entry: {index : './src/js/page/index.js'},//入口文件输出配置output: {path: 'dist/js/page',filename: '[name].js'},module: {//加载器配置loaders: [{ test: /\.css$/, loader: 'style-loader!css-loader' },{ test: /\.js$/, loader: 'jsx-loader?harmony' },{ test: /\.scss$/, loader: 'style!css!sass?sourceMap'},{ test: /\.(png|jpg)$/, loader: 'url-loader?limit=8192'}]},//其它解决方案配置resolve: {root: 'E:/github/flux-example/src', //绝对路径extensions: ['', '.js', '.json', '.scss'],alias: {AppStore : 'js/stores/AppStores.js',ActionType : 'js/actions/ActionType.js',AppAction : 'js/actions/AppAction.js'}}};
配置说明:
context:上下文。
entry:入口文件,是所有依赖关系的入口,webpack从这个入口开始静态解析,分析模块之间的依赖关系。
output:打包输出的配置。
devtools:SourceMap选项,便于开发模式下调试。
watch:监听模式,增量更新,开发必备!
profile:优化。
cache:webpack构建的过程中会生成很多临时的文件,打开cache可以让这些临时的文件缓存起来,从而更快的构建。
module.loaders:如前文介绍,loaders用来对文件做预处理。这样webpack就可以打包任何静态文件。
resolve.alias:模块别名,这样可以更方便的引用模块。
plugins:如前文介绍,webpack的一些内置功能均是以插件的形式提供。
阅读更多:Webpack配置从零到一
三、运行
执行下列命令即可:
$ webpack --display-error-details
参数“--display-error-details”是推荐加上的,方便出错时能查阅更详尽的信息(比如 webpack 寻找模块的过程),从而更好定位到问题。
其他主要的参数有:
$ webpack --config XXX.js //使用另一份配置文件(比如webpack.config2.js)来打包$ webpack --watch //监听变动并自动打包$ webpack -p //压缩混淆脚本,这个非常非常重要!$ webpack -d //生成map映射文件,告知哪些模块被最终打包到哪里了
其中的 -p 是很重要的参数,曾经一个未压缩的 700kb 的文件,压缩后直接降到 180kb(主要是样式这块一句就独占一行脚本,导致未压缩脚本变得很大)。
使用webpack构建本地服务器
npm install --save-dev webpack-dev-server
安装加载器(Loaders)
npm install --save-dev json-loader
Babel的安装与配置
npm install --save-dev babel-core babel-loader babel-preset-es2015 babel-preset-react
现在你的webpack的配置已经运行你使用ES6以及JSX的语法了。继续用上面的例子进行测试,不过要使用React,不要忘了先安装 React 和 React-DOM
npm install --save react react-dom
使用ES6的语法,更新Greeter.js并返回一个React组件
//Greeter,jsimport React, {Component} from 'react'import config from './config.json';class Greeter extends Component{render() {return (<div>{config.greetText}</div>);}}export default Greeter
使用ES6的模块定义和渲染Greeter模块, main.js文件:
import React from 'react';import {render} from 'react-dom';import Greeter from './Greeter';render(<Greeter />, document.getElementById('root'));
与gulp配合
安装
$ npm install gulp --save-dev //安装gulp$ npm install gulp-util --save-dev //安装gulp-util$ npm install webpack-dev-server --save-dev //安装webpack开发服务
引入
在项目根目录新建gulpfile.js文件,引入相关内容
var gulp = require('gulp');var gutil = require('gulp-util');var webpack = require('webpack');var webpackDevServer = require('webpack-dev-server');var config = require('./webpack.config.js');
我们可以将也webpack.config.js文件引入,传入webpack({}),也可以只需把配置写到 webpack({ ... }) 中去即可,无须再写 webpack.config.js
创建gulp任务
gulp.task("webpack", function(callback) {// run webpackwebpack({// configuration 可以把webpack.config.js内容放入这里}, function(err, stats) {if(err) throw new gutil.PluginError("webpack", err);gutil.log("[webpack]", stats.toString({// output options}));callback();});});
完整的gulp配置
一个基于webpack-dev-server的gulpfile.js基本配置文件:
var gulp = require('gulp');var gutil = require('gulp-util');var webpack = require('webpack');var webpackDevServer = require('webpack-dev-server');var config = require('./webpack.config.js');var devStats = {colors: true,reasons: false,chunks: false, //屏蔽(react)模块的一些明细chunkModules: false,chunkOrigins: false,modules: false,cached: false,cachedAssets: false,children: false,warning: false};gulp.task('webpack', function (callback) {var compiler = webpack(config)var serverConfig = {hot: true,contentBase: 'dist',stats: devStats};new webpackDevServer(compiler, serverConfig).listen(8080, "localhost", function(err) {if(err) throw new gutil.PluginError("webpack-dev-server", err);// Server listeninggutil.log("[webpack-dev-server]", "http://localhost:8080");// keep the server alive or continue?// callback();});})
启动gulp
通过创建gulp任务启动webpack-dev-server,webpack-dev-server会将打包好的文件临时储存在内存中,需要通过http请求,如:
//启动gulp任务来执行webpack-dev-server$ gulp webpack//在地址栏输入http://loaclhost:8080/index.html
一个常见的Webpack配置文件
首先准备一下该配置文件需要安装的插件
$ npm install html-webpack-plugin --save-dev$ npm install extract-text-webpack-plugin --save-dev$ npm install autoprefixer --save-dev$ npm install style-loader --save-dev$ npm install babel-loader babel-core --save-dev
一个常见的Webpack配置文件:
var webpack = require('webpack');var HtmlWebpackPlugin = require('html-webpack-plugin');var ExtractTextPlugin = require('extract-text-webpack-plugin');module.exports = {watch: true, //监听变化自动编译//文件入口配置entry: __dirname + "/src/index.js",//文件输出配置output: {path: __dirname + "/dist",filename: "[name]-[hash].js"},//加载器配置module: {loaders: [{test: /\.json$/,loader: "json"},{test: /\.js$/,exclude: /node_modules/,loader: 'babel'},{test: /\.css$/,loader: ExtractTextPlugin.extract('style', 'css?modules!postcss')},{test: /\.scss$/,loader: 'style!css!sass?sourceMap'},{test: /\.(png|jpg)$/,loader: 'url-loader?limit=8192'}]},postcss: [require('autoprefixer')],//插件项plugins: [new HtmlWebpackPlugin({template: __dirname + "/app/index.tmpl.html"}),new webpack.optimize.OccurenceOrderPlugin(),new webpack.optimize.UglifyJsPlugin(),new ExtractTextPlugin("[name]-[hash].css")],//其它解决方案配置resolve: {root: 'E:/github/flux-example/src', //绝对路径extensions: ['', '.js', '.json', '.scss'],alias: {AppStore: 'js/stores/AppStores.js',ActionType: 'js/actions/ActionType.js',AppAction: 'js/actions/AppAction.js'}}}
一些报错
- 报错一:
Module not found: Error: Can't resolve 'css' in 'E:\xxx\xxx'
原因:没有装css-loader,解决方案:执行npm install css-loader --save
- 报错二:
Module not found: Error: Can't resolve 'sass' in 'E:\xxx\xxx'
原因:没有装sass-loader,解决方案:执行npm install sass-loader --save
- 报错三:
WebpackOptionsValidationError: Invalid configuration object. Webpack has been initialised using a configuration object that does not match the API schema.configuration.resolve has an unknown property 'modulesDirectories'.
原因:resolve的API变了,,解决方案: 将modulesDirectories改成modules, 参考
- 报错四:
Module build failed: No input specified: provide a file name or a source string to process
原因:WebPack的API变了,解决方案: 参考
