@abelsu7
2019-05-19T04:10:51.000000Z
字数 15784
阅读 5844
IBM LinuxONE 实验说明
IBM LinuxONE RHEL 云计算
- 目录
- 环境准备:创建并登录 LinuxONE 虚拟主机实例
- 实验一:Cloud Native Workloads
- 实验二:Deploy a financial microservice
- Architecture
- Step 1 - Discover and locally run the banking application
- 1. 获取项目代码
- 2. 申请 banking API
- 3. 启动 banking application
- 4. 推送至 Github 远程仓库
- Step 2 - Build and deploy a Docker image to IBM Cloud private
- 1. 构建 Docker 镜像
- 2. Deploy the Docker image to IBM Cloud private
- Step 3 - Instantiate the banking microservice from the IBM Cloud private catalog
- 1. Discover the Helm chart
- 2. 配置 Helm Chart
- 3. 查看应用
目录
环境准备:创建并登录 LinuxONE 虚拟主机实例
1. 创建 Virtual Server 实例
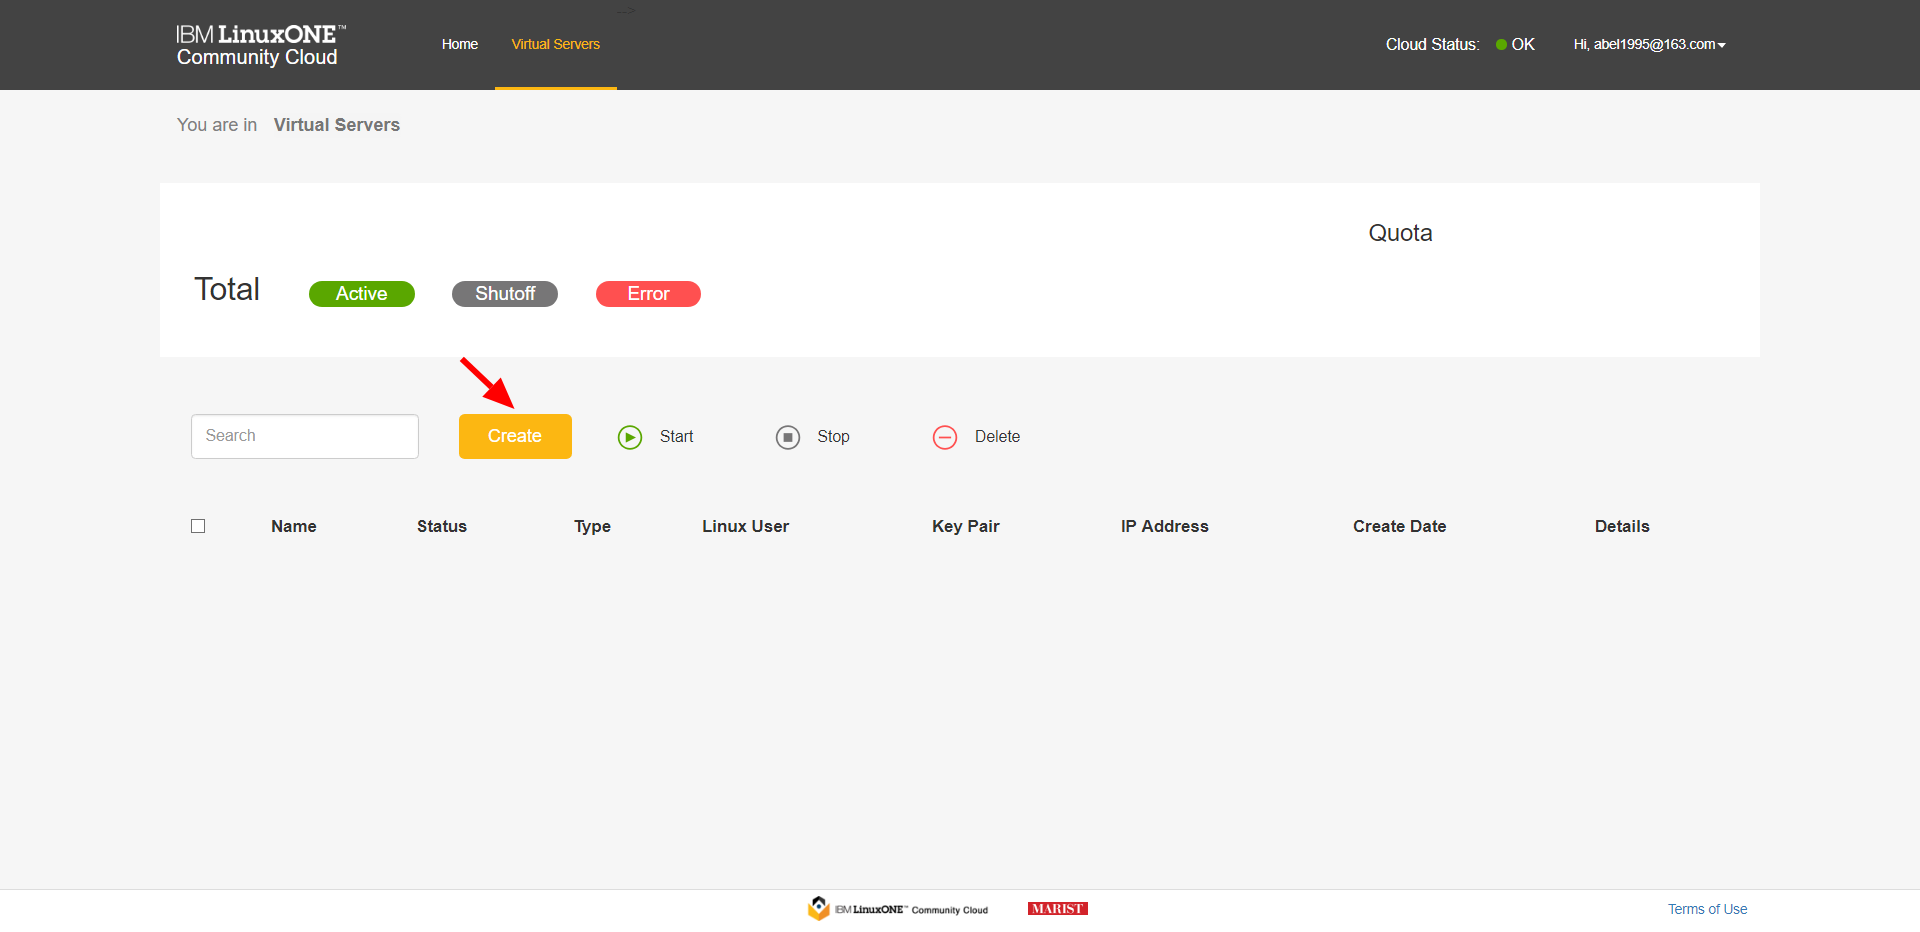
登录后,进入Manage Instances,点击Create:
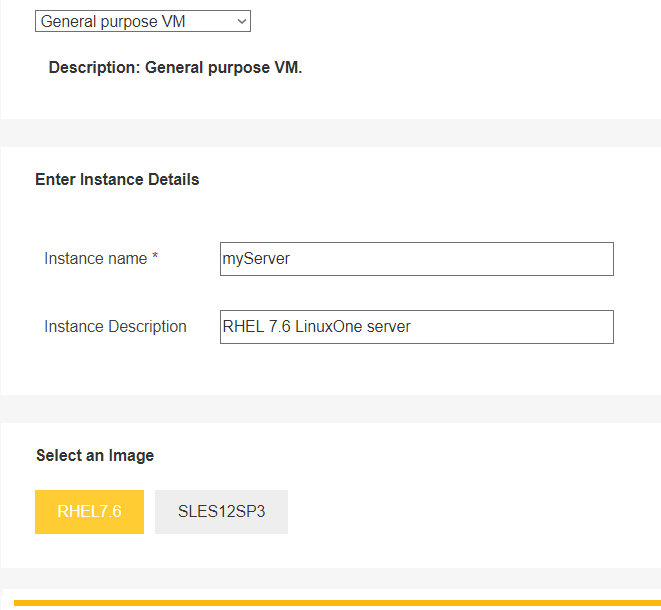
选择General purpose VM,输入实例名,并选择RHEL7.6镜像:
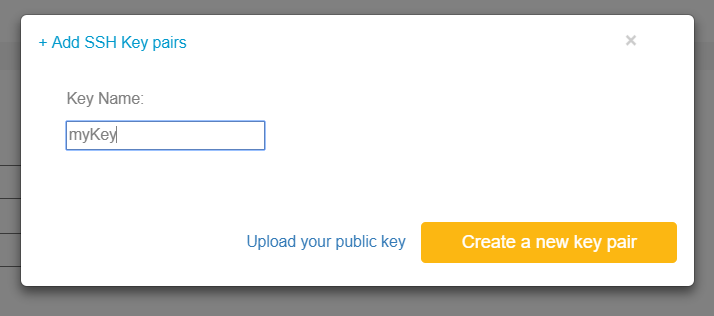
在Select a SSH Key Pair下,点击Create,并在弹出窗口中输入密钥名,创建密钥:

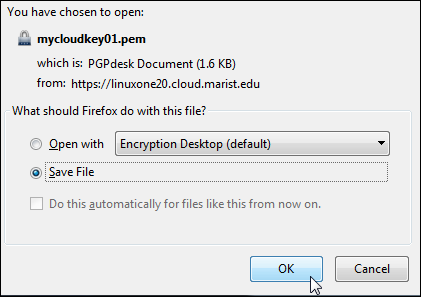
之后会保存一个名为myKey.pem的文件:
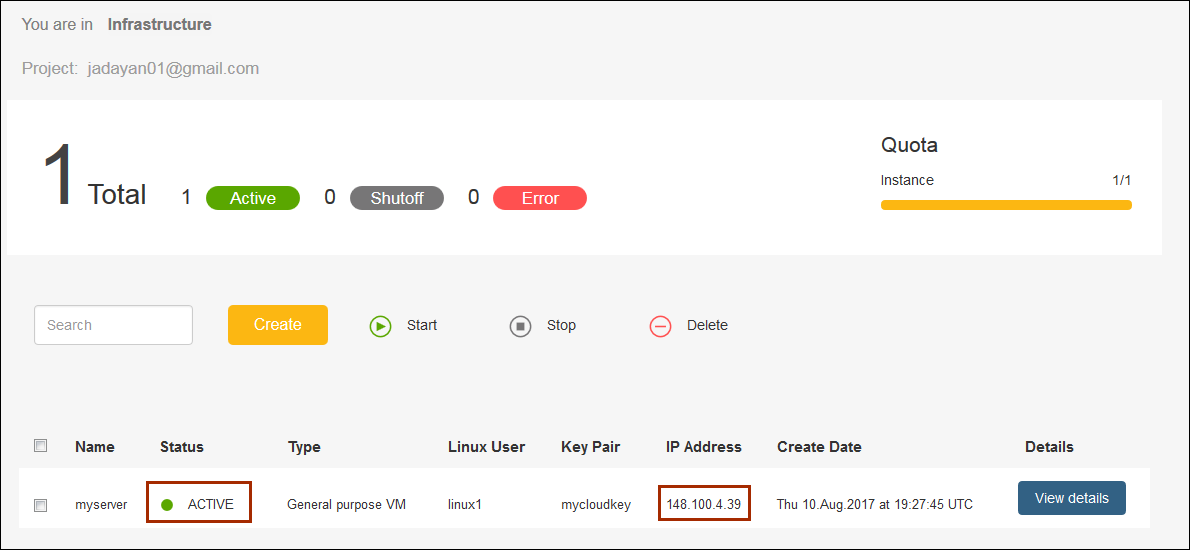
最后选中刚才创建的 SSH Key,点击Create创建实例。等待一段时间后,即可看到实例处于ACTIVE状态。记录下实例的 IP 地址,并确认用户名是否为linux1:
2. 使用 SSH 连接至实例
如果你用的是 Mac 或 Linux,可以直接使用该密钥文件登录:
ssh -i /path/to/key/keyname.pem linux1@serveripaddress
如果是 Windows,可以使用 PuTTY,步骤如下:
下载并安装 PuTTY
打开 PuTTYgen,点击
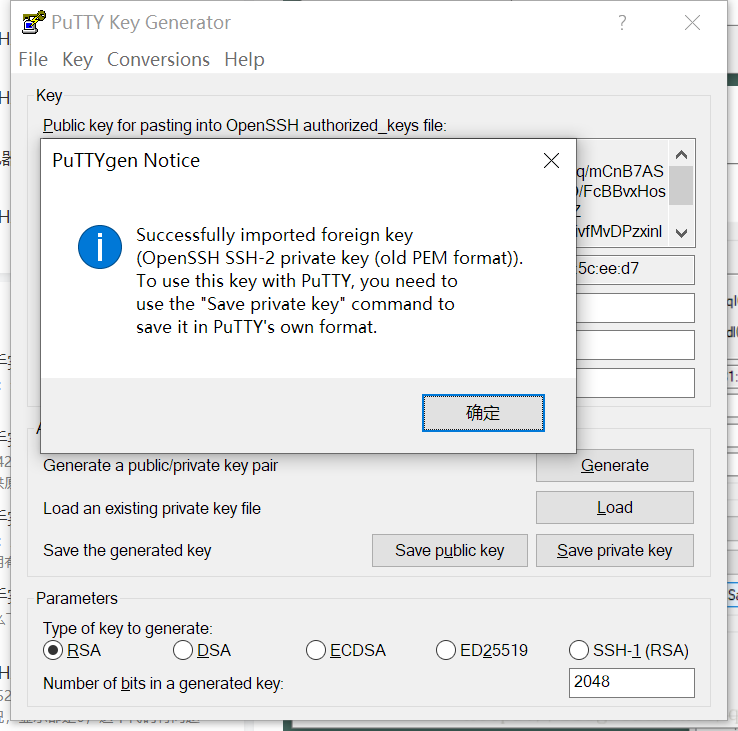
Load,选择刚才保存的.pem文件将其导入,之后 PuTTY 会提示导入成功:
- 之后点击
Save private key,保存*.ppk私钥文件,名字任取 - 最后打开 PuTTY,配置私钥:
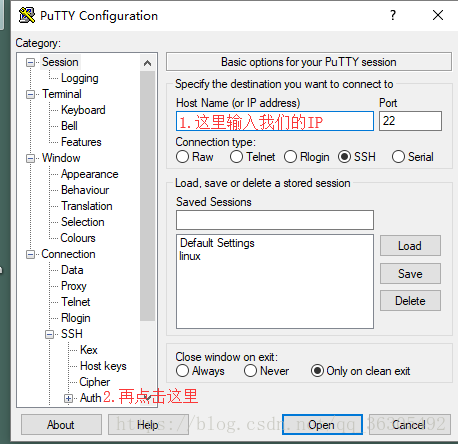
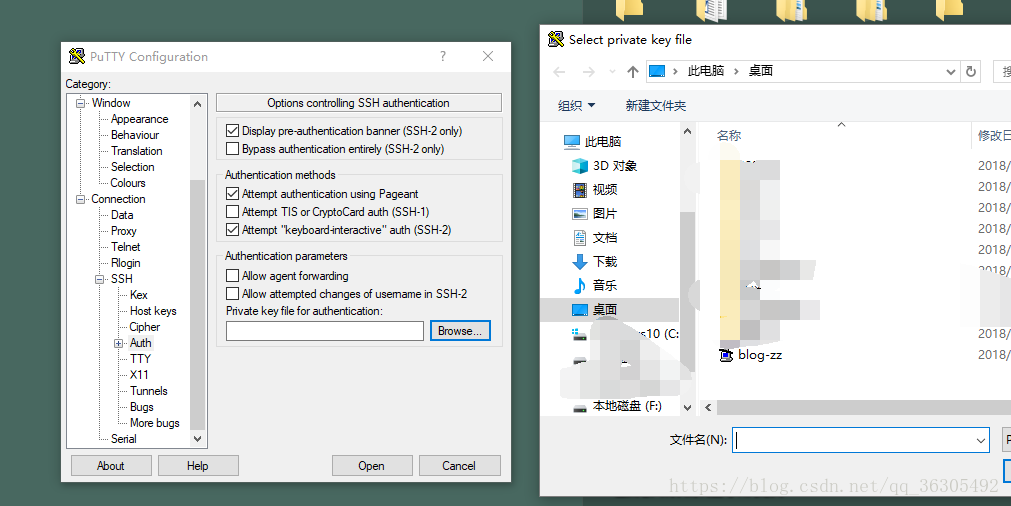
为了方便退出 PuTTY 后再次登录,在Saved Sessions中输入会话名,然后点Save保存:
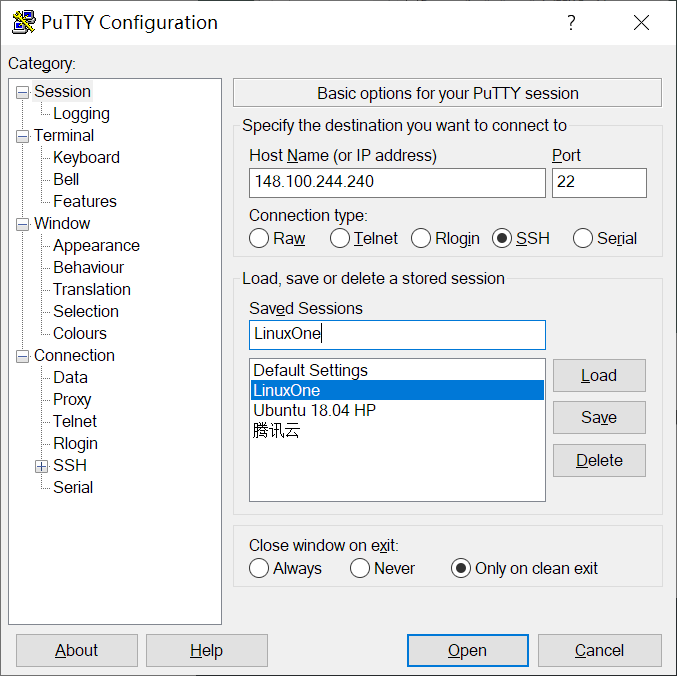
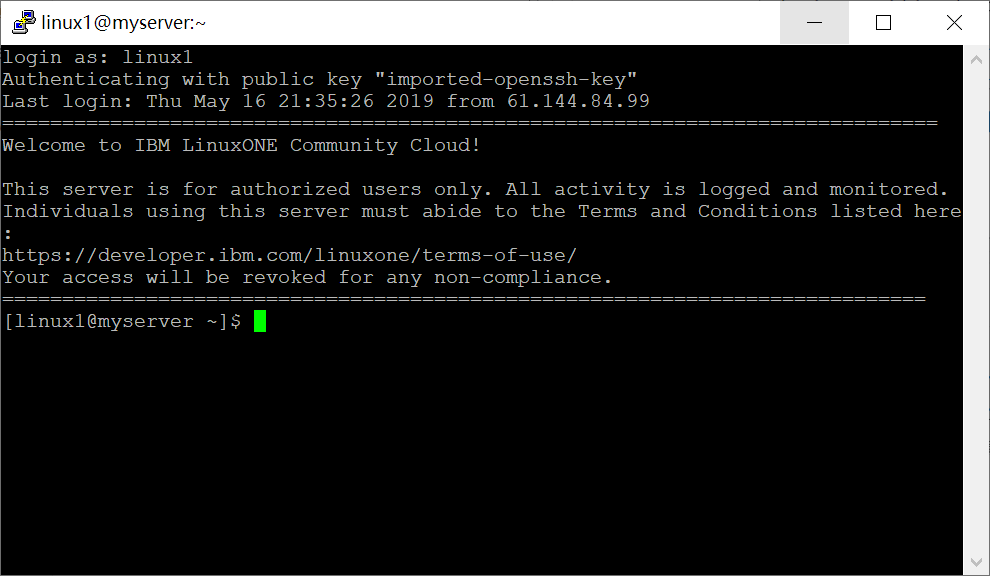
最后双击LinuxOne会话登录。当提示输入用户名时,输入linux1即可登录:
PuTTY 快捷键:复制
Ctrl+Insert,粘贴Shift+Insert
实验一:Cloud Native Workloads
Github Repo:Cloud-Native-Workloads-on-LinuxONE
Scenario One
1. 安装 Docker
[linux1@myserver ~]$ sudo su # 切换至 root[root@myserver linux1]$ cd ~[root@myserver ~]$ wget ftp://ftp.unicamp.br/pub/linuxpatch/s390x/redhat/rhel7.3/docker-17.05.0-ce-rhel7.3-20170523.tar.gz# 解压 Docker 归档包[root@myserver ~]$ tar -xzvf docker-17.05.0-ce-rhel7.3-20170523.tar.gz[root@myserver ~]$ cp docker-17.05.0-ce-rhel7.3-20170523/docker* /usr/bin/
注意:这里直接
cp到/usr/bin就好,因为/usr/local/bin不在PATH环境变量里
之后启动docker daemon:
[root@myserver ~]$ docker daemon -g /local/docker/lib &
输出类似如下内容:
[root@myserver ~]$ docker daemon -g /local/docker/lib &[1] 21376[root@myserver ~]$ Command "daemon" is deprecated, and will be removed in Docker 17.12. Please run `dockerd` directly.WARN[0000] the "-g / --graph" flag is deprecated. Please use "--data-root" insteadWARN[0000] could not change group /var/run/docker.sock to docker: group docker not foundINFO[0000] libcontainerd: new containerd process, pid: 21387WARN[0000] containerd: low RLIMIT_NOFILE changing to max current=1024 max=4096INFO[0001] Graph migration to content-addressability took 0.00 secondsINFO[0001] Loading containers: start.INFO[0001] Default bridge (docker0) is assigned with an IP address 172.17.0.0/16. Daemon option --bip can be used to set a preferred IP addressINFO[0001] Loading containers: done.INFO[0001] Daemon has completed initializationINFO[0001] Docker daemon commit=89658be graphdriver=overlay version=17.05.0-ceINFO[0001] API listen on /var/run/docker.sock
启动完成后,检查一下后台有无docker进程运行:
[root@myserver ~]$ ps aux | grep dockerroot 21505 0.1 1.1 508456 43508 ? Sl 10:55 0:51 dockerd -g /local/docker/lib root 21515 0.0 0.3 213372 12868 ? Ssl 10:55 0:26 docker-containerd -l unix:///var/run/docker/libcontainerd/docker-containerd.sock --metrics-interval=0 --start-timeout 2m --state-dir /var/run/docker/libcontainerd/containerd --shim docker-containerd-shim --runtime docker-runc[root@myserver ~]$ docker versionClient:Version: 17.05.0-ceAPI version: 1.29Go version: go1.8.1Git commit: 89658beBuilt: Tue May 23 20:15:42 2017OS/Arch: linux/s390xServer:Version: 17.05.0-ceAPI version: 1.29 (minimum version 1.12)Go version: go1.8.1Git commit: 89658beBuilt: Tue May 23 20:15:42 2017OS/Arch: linux/s390xExperimental: false
2. 安装 docker-compose
使用yum安装python-setuptools:
[root@myserver ~]$ yum info python-setuptoolsName : python-setuptoolsArch : noarchVersion : 0.9.8Release : 7.el7Size : 1.9 MRepo : installedFrom repo : rhel7-baseSummary : Easily build and distribute Python packagesURL : http://pypi.python.org/pypi/setuptoolsLicense : Python or ZPLv2.0Description : Setuptools is a collection of enhancements to the Python: distutils that allow you to more easily build and distribute: Python packages, especially ones that have dependencies on: other packages.:: This package contains the runtime components of setuptools,: necessary to execute the software that requires: pkg_resources.py.:: This package contains the distribute fork of setuptools.[root@myserver ~]$ yum install -y python-setuptools
之后使用easy_install安装pip:
网速过慢的话先禁用掉 IPv6:
echo 1 > /proc/sys/net/ipv6/conf/all/disable_ipv6
[root@myserver ~]$ easy_install pip
升级backports.ssl_match_hostname,由于系统自带安装了backports.ssl-match-hostname 3.5.0.1,pip 无法将其卸载,这里会提示出错:
[root@myserver ~]$ pip install backports.ssl_match_hostname --upgradeDEPRECATION: Python 2.7 will reach the end of its life on January 1st, 2020. Please upgrade your Python as Python 2.7 won't be maintained after that date. A future version of pip will drop support for Python 2.7.Collecting backports.ssl_match_hostnameDownloading https://files.pythonhosted.org/packages/ff/2b/8265224812912bc5b7a607c44bf7b027554e1b9775e9ee0de8032e3de4b2/backports.ssl_match_hostname-3.7.0.1.tar.gzInstalling collected packages: backports.ssl-match-hostnameFound existing installation: backports.ssl-match-hostname 3.5.0.1ERROR: Cannot uninstall 'backports.ssl-match-hostname'. It is a distutils installed project and thus we cannot accurately determine which files belong to it which would lead to only a partial uninstall.
添加--ignore-installed参数即可解决:
[root@myserver ~]$ pip install backports.ssl_match_hostname --upgrade --ignore-installed
最后,使用pip安装docker-compose:
[root@myserver ~]$ yum install python-devel libffi-devel # 先安装依赖,不然会报错[root@myserver ~]$ pip install docker-compose==1.13.0
注意:这里若不指定版本,会报
ImportError: No module named glob的错误,pip install glob2也无法解决。。暂时没找到解决办法
验证一下docker-compose是否已经安装:
[root@myserver ~]$ docker-compose versiondocker-compose version 1.13.0, build 1719cebdocker-py version: 2.7.0CPython version: 2.7.5OpenSSL version: OpenSSL 1.0.2k-fips 26 Jan 2017
3. 安装并运行 WebSphere Liberty
先手动拉取websphere-liberty镜像到本地:
[root@myserver ~]$ docker image pull s390x/websphere-liberty:webProfile7webProfile7: Pulling from s390x/websphere-libertya39cfce7a60d: Pull complete4e699efbddb6: Pull complete9a3ffeac4412: Pull complete52c5a080fd6d: Pull complete6f0d27faa63a: Pull completea3d346a6c218: Pull completee9129f75e0bc: Pull complete905ebfd4a924: Pull completebd9b8600bfe7: Pull complete5746a3a16c6e: Pull complete621479e04496: Pull complete26db9a45b5d9: Pull complete32c81cd7fa4a: Pull complete705855d9301f: Pull complete0bd5ae8e4470: Pull completeDigest: sha256:87e41c209fa1c8ab33fc0cd0e126eec1493a50c49fe557f398707b4f4755d07aStatus: Downloaded newer image for s390x/websphere-liberty:webProfile7[root@myserver ~]$ docker imagesREPOSITORY TAG IMAGE ID CREATED SIZEs390x/websphere-liberty webProfile7 def868b21def 27 hours ago 473MB
后台运行容器,并指定端口映射规则:
[root@myserver ~]$ docker run -d -p 80:9080 -p 443:9443 s390x/websphere-liberty:webProfile73c9d3b02de11bc5b912a8df1b3987e60bf797ea02cbbbc4457a6e09307f3c95e[root@myserver ~]$ docker psCONTAINER ID IMAGE COMMAND CREATED STATUS PORTS NAMES3c9d3b02de11 s390x/websphere-liberty:webProfile7 "/opt/ibm/helpers/..." 21 seconds ago Up 19 seconds 0.0.0.0:80->9080/tcp, 0.0.0.0:443->9443/tcp mystifying_golick
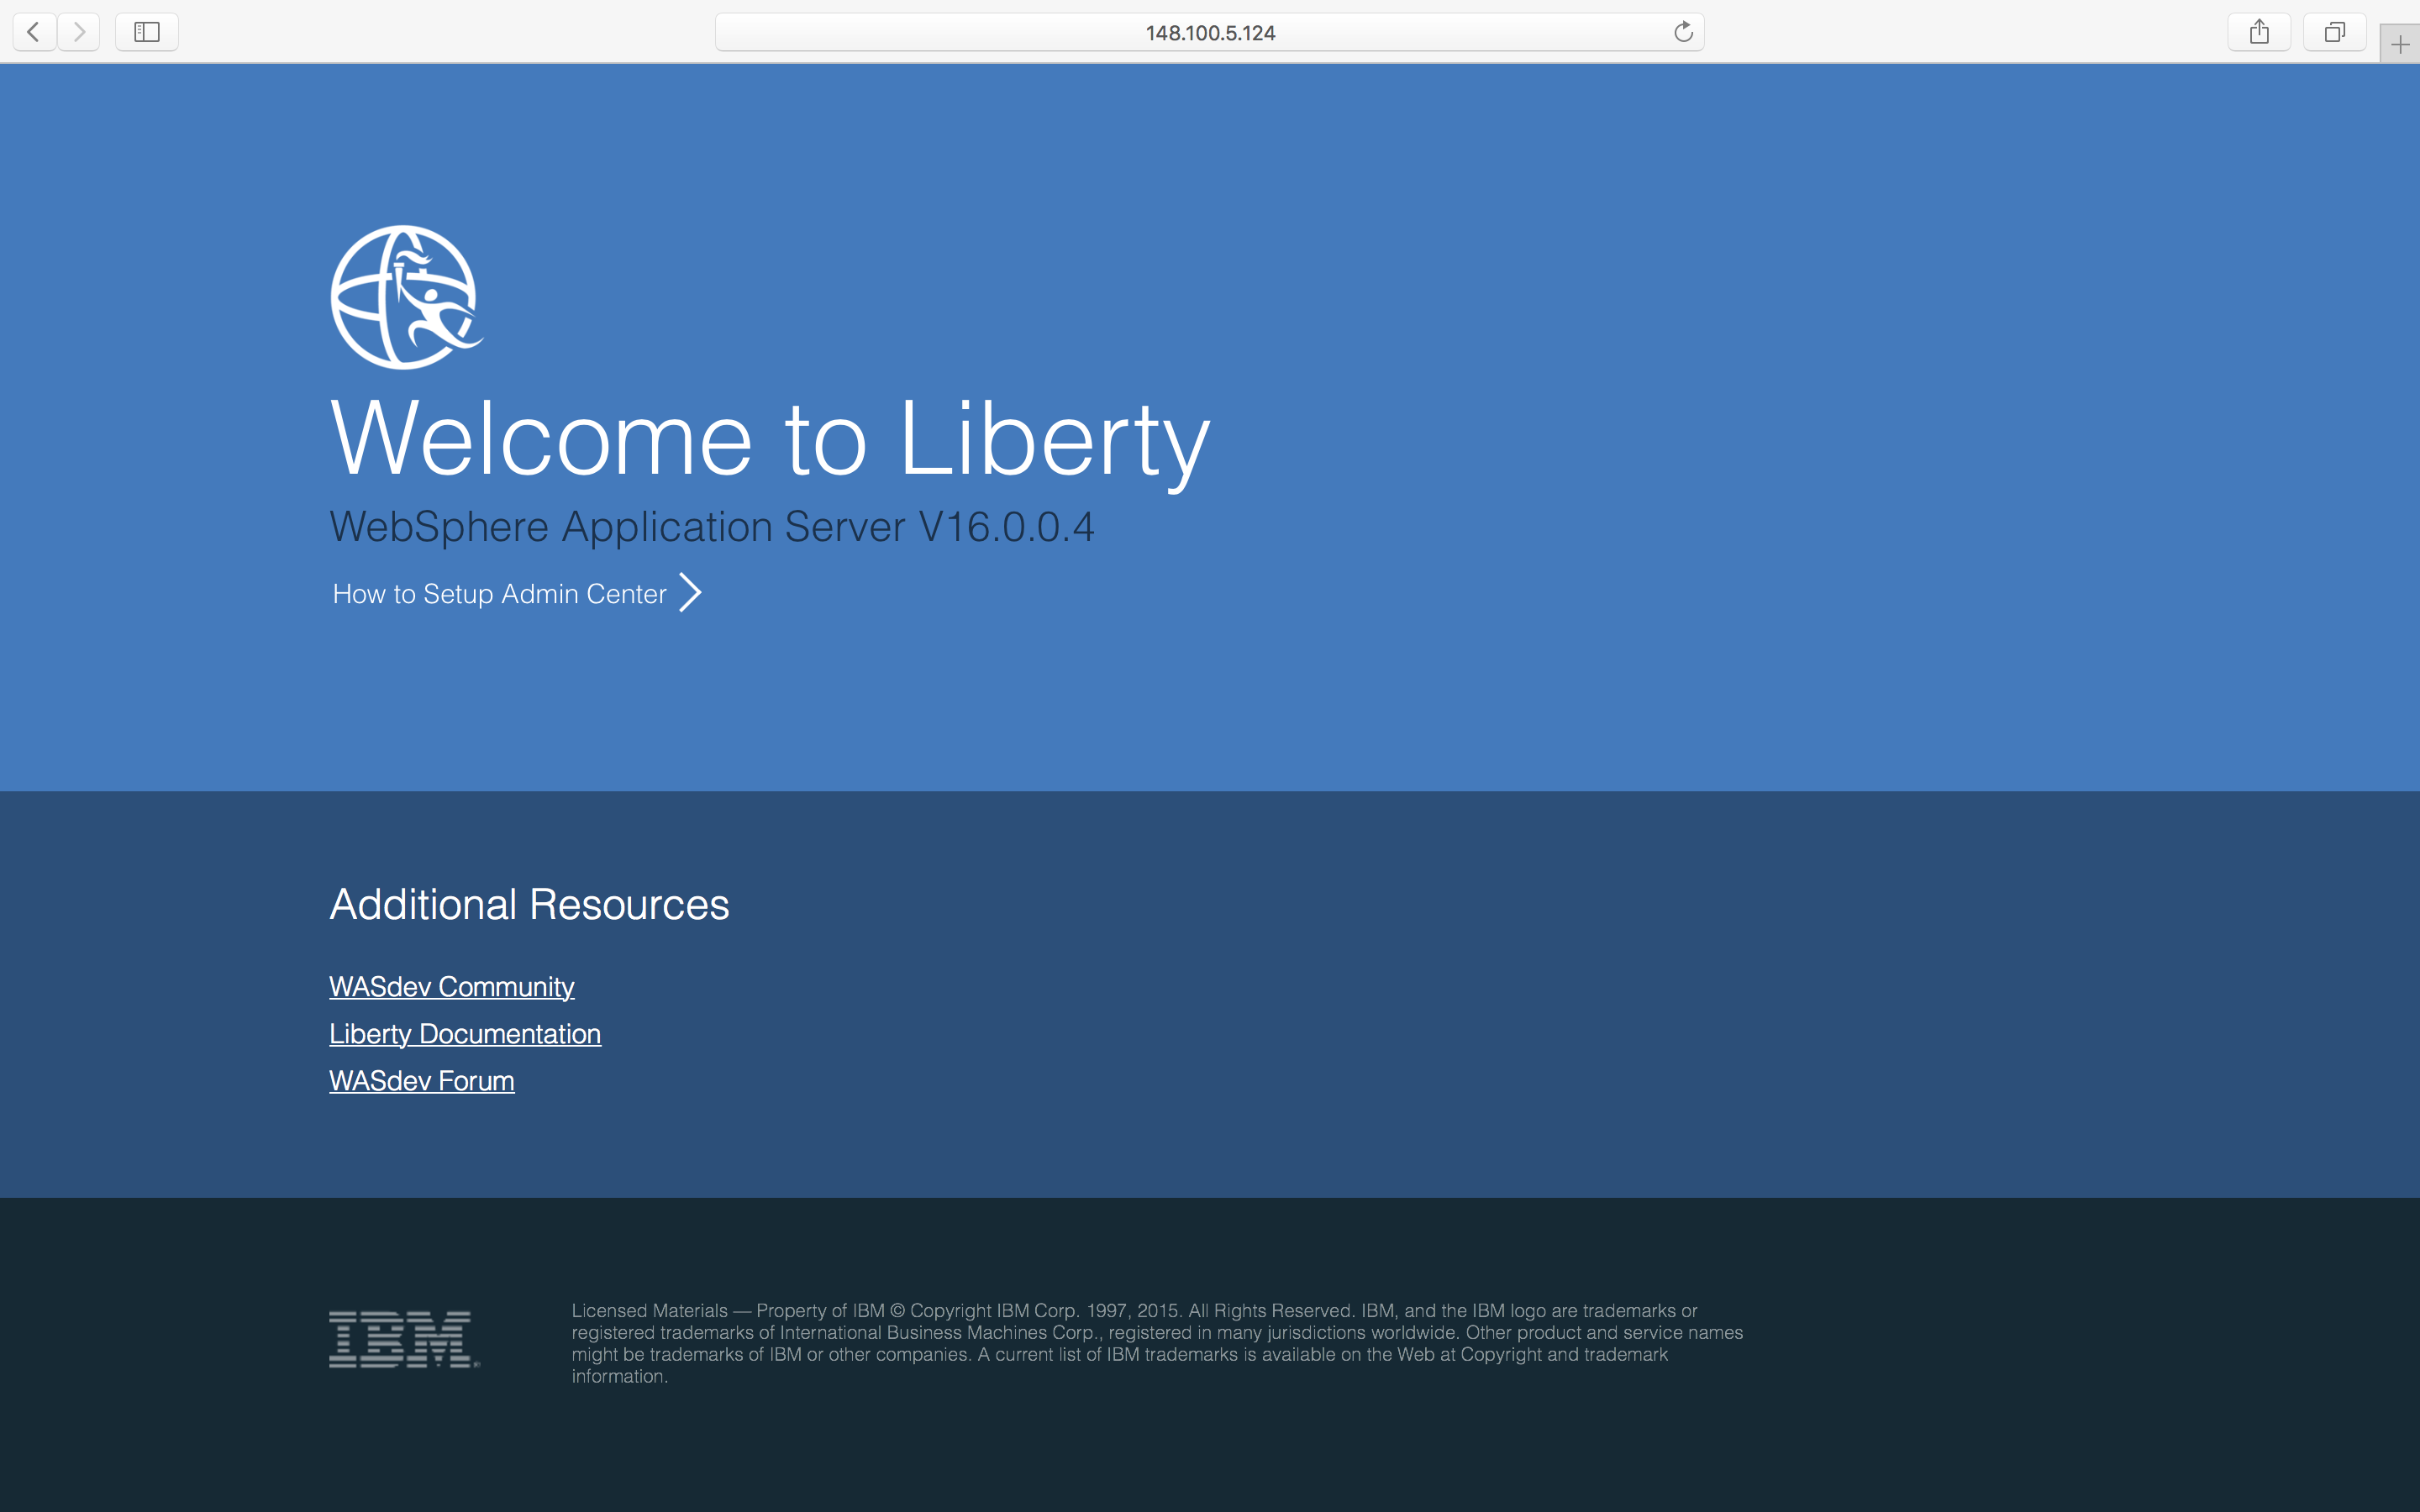
浏览器访问http://[LinuxOne Host IP],即可看到WebSphere Liberty的界面:
4. 安装并运行 WordPress
首先,RHEL 7.6已经自带安装了VIM 7.4,启动命令是vi,习惯用vim命令的同学可以先设置一下别名:
[root@myserver ~]$ alias vim='vi'
不过该别名仅在当前会话中生效。可以将上面这句加到~/.bashrc中,再使用source命令使其生效:
[root@myserver ~]$ source ~/.bashrc
创建并编辑docker-compose.yml:
[root@myserver ~]$ vim docker-compose.yml
按i进入编辑模式(所有 Vim 命令注意区分大小写),输入以下内容:
version: '2'services:wordpress:image: s390x/wordpressports:- 8080:80 # 将本地 8080 端口映射到容器的 80 端口environment:WORDPRESS_DB_PASSWORD: examplemysql:image: brunswickheads/mariadb-5.5-s390xenvironment:MYSQL_ROOT_PASSWORD: example
之后按Esc退出编辑模式,输入:wq保存并退出。
检查一下docker-compose.yml的内容:
[root@myserver ~]$ cat docker-compose.ymlversion: '2'services:wordpress:image: s390x/wordpressports:- 8080:80 # 将本地 8080 端口映射到容器的 80 端口environment:WORDPRESS_DB_PASSWORD: examplemysql:image: brunswickheads/mariadb-5.5-s390xenvironment:MYSQL_ROOT_PASSWORD: example
创建wordpress目录方便整理:
[root@myserver ~]$ mkdir wordpress[root@myserver ~]$ mv docker-compose.yml wordpress/[root@myserver ~]$ cd wordpress/[root@myserver wordpress]$ lsdocker-compose.yml
最后,根据docker-compose.yml中定义的服务启动容器:
[root@myserver wordpress]$ docker-compose up -d
创建完成后,查看相关容器的状态:
[root@myserver wordpress]$ docker-compose psName Command State Ports-------------------------------------------------------------------------------------wordpress_mysql_1 /docker-entrypoint.sh mysq ... Up 3306/tcpwordpress_wordpress_1 docker-entrypoint.sh apach ... Up 0.0.0.0:8080->80/tcp
浏览器访问http://[Your LinuxONE IP Address]:8080,即可看到 WordPress 的页面:

Scenario Two
1. MEAN Stack 环境准备
MEANStack :
实验是参考 Creating a Single Page Todo App with Node and Angular | Scotch.io 这篇文章作为示例,简单起见代码主要目录如下:
-app (Express routes and MongoDB connections)-config (MongoDB and other config parameters)-public (Frontend : Angular.js code, index page etc)
实验的 Github Repo 中已经准备了这部分代码,可以直接拉取到本地使用:
[root@myserver ~]$ git clone https://github.com/IBM/Cloud-Native-Workloads-on-LinuxONE[root@myserver ~]$ cp -r Cloud-Native-Workloads-on-LinuxONE/files/mean-docker ./[root@myserver ~]$ yum install -y tree[root@myserver ~]$ tree mean-dockermean-docker├── docker-compose.yml├── express-server│ ├── app│ │ ├── models│ │ │ └── todo.js│ │ └── routes.js│ ├── config│ │ └── database.js│ ├── Dockerfile│ ├── license│ ├── package.json│ ├── public│ │ ├── index.html│ │ └── js│ │ ├── controllers│ │ │ └── main.js│ │ ├── core.js│ │ └── services│ │ └── todos.js│ ├── README.md│ └── server.js└── README.md8 directories, 14 files
首先修改 Angular.js 的 CDN 为国内的源:
[root@myserver ~]$ lltotal 28K-rw-------. 1 root root 1.4K Aug 23 2016 anaconda-ks.cfgdrwxr-xr-x 6 root root 4.0K May 16 23:28 Cloud-Native-Workloads-on-LinuxONEdrwxr-xr-x 2 root root 4.0K May 23 2017 docker-17.05.0-ce-rhel7.3-20170523drwxr-xr-x 11 linadm users 4.0K May 16 23:22 htop-2.2.0drwxr-xr-x 5 root root 4.0K May 17 04:47 ICp-banking-microservicesdrwxr-xr-x 3 root root 4.0K May 18 23:22 mean-dockerdrwxr-xr-x 2 root root 4.0K May 16 23:10 wordpress[root@myserver ~]$ vi mean-docker/express-server/public/index.html
然后修改高亮的部分为以下内容:
//cdn.bootcss.com/angular.js/1.2.16/angular.min.js
注意:如果之前使用
docker-compose up启动过应用,则需要先重新构建镜像,再启动应用,以下是说明:
[root@myserver ~]$ cd mean-docker[root@myserver mean-docker]$ docker-compose down # 停止正在运行的容器[root@myserver mean-docker]$ docker-compose build # 先重新构建镜像[root@myserver mean-docker]$ docker-compose up # 再基于新镜像重新启动容器
看到两个绿色的done,就可以访问:8081端口查看应用了。
重新构建镜像说明结束
查看docker-compose.yml的内容:
[root@myserver ~]$ cd mean-docker/[root@myserver mean-docker]$ lsdocker-compose.yml express-server README.md[root@myserver mean-docker]$ vim docker-compose.yml
docker-compose.yml内容如下:
version: '2' # specify docker-compose version# Define the services/containers to be runservices:express: # name of the second servicebuild: express-server # specify the directory of the Dockerfileports:- "8080:8080" # specify ports forwardinglinks:- databasedatabase: # name of the third serviceimage: mongo # specify image to build container fromports:- "27017:27017" # specify port forewarding
查看express-server/Dockerfile:
[root@myserver mean-docker]$ vim express-server/Dockerfile
Dockerfile内容如下:
FROM s390x/ibmnode:latest# Create a directory where our app will be placedRUN mkdir -p /usr/src# Change directory so that our commands run inside this new dirWORKDIR /usr/src# Copy dependency definitionsCOPY package.json /usr/src# Install dependeciesRUN npm install# Get all the code needed to run the appCOPY . /usr/src# Expose the port the app runs inEXPOSE 8080# Serve the appCMD ["npm", "start"]
注意:需要一些 Docker 基础知识,可以参考 Docker 实践简明指南
因为之前本地的8080端口被 WordPress 占用了,所以这里我们使用8081端口。
docker-compose.yml修改如下:
......ports:- "8081:8081" # 本地 8081 端口映射到 express 容器的 8081 端口......
express-server/Dockerfile修改如下:
# Expose the port the app runs inEXPOSE 8081......# Express listening portENV PORT 8081
2. 启动 MEAN Stack
在mean-docker目录下运行docker-compose up:
[root@myserver mean-docker]$ docker-compose upStarting meandocker_database_1 ...Starting meandocker_database_1 ... doneStarting meandocker_express_1 ...Starting meandocker_express_1 ... doneAttaching to meandocker_database_1, meandocker_express_1database_1 | note: noprealloc may hurt performance in many applicationsexpress_1 |express_1 | > node-todo@0.0.1 start /usr/srcexpress_1 | > node server.jsexpress_1 |express_1 | App listening on port 8081
使用
docker-compose -d即可在后台运行express-server
浏览器访问http://[ip of machine]:8081,即可看到你的 TODO-List App:

使用docker-compose ps命令查看启动的容器:
[root@myserver mean-docker]$ docker-compose psName Command State Ports----------------------------------------------------------------------------------------------------meandocker_database_1 /bin/sh -c mongod --dbpath ... Up 0.0.0.0:27017->27017/tcp, 28017/tcpmeandocker_express_1 npm start Up 0.0.0.0:8081->8081/tcp
实验二:Deploy a financial microservice
Github Repo:ICp-banking-microservices
Architecture

Step 1 - Discover and locally run the banking application
1. 获取项目代码
首先登录 Github,Fork 该实验的 Github Repo - ICp-banking-microservices 到自己账号下:

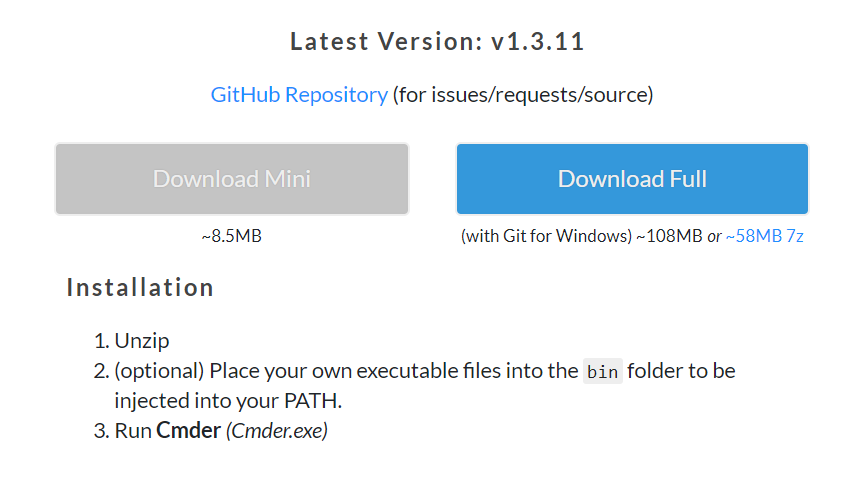
因为之后要使用 Git 的命令行工具,推荐下载 Cmder,选择Download Full,其中包含了Git for Windows:
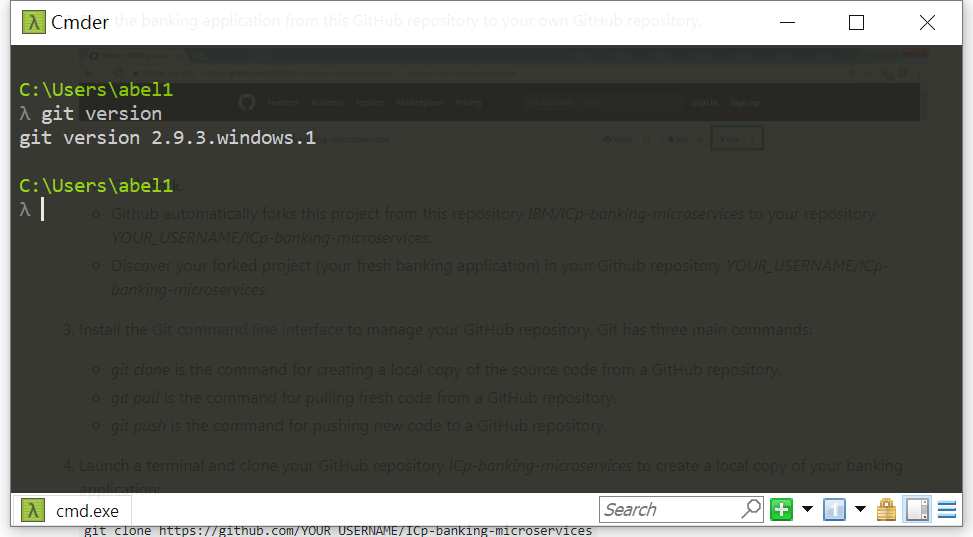
之后运行Cmder.exe,验证 Git 是否可用:
将你 Fork 的项目git clone至本地:
git clone https://github.com/YOUR_USERNAME/ICp-banking-microservices
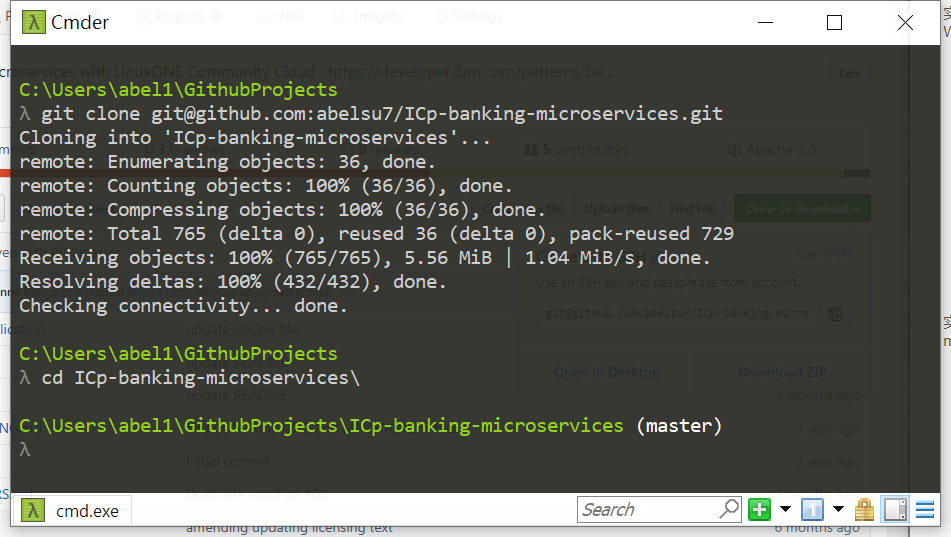
注意:因为我已经在 Github 上配好了
SSH Key,所以选择的是Clone with SSH。未配置SSH Key使用Clone with HTTPS的链接就可以,只是在每次git push的时候要输入用户名和密码
最后在 IDE 中打开源码目录banking-application(推荐 VS Code):
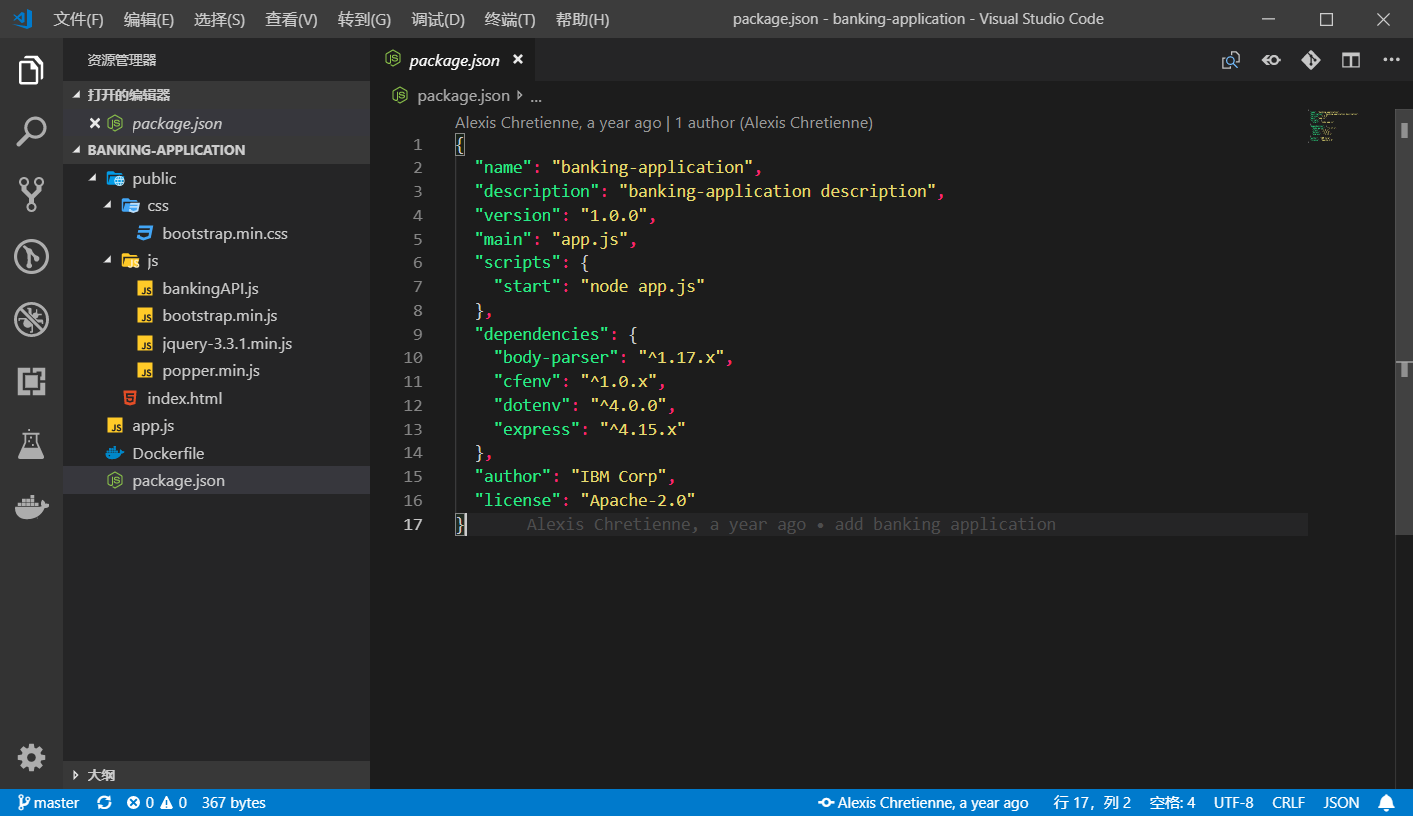
app.js:server codepublic/index.html:client code (banking dashboard)public/css:Bootstrap 4.1.0public/js:JS 库,包括Bootstrap、JQuery、popper.js和bankingAPIpackage.json:Node .js相关依赖包Dockerfile:用于构建 Docker 镜像
2. 申请 banking API
首先注册一个 IBM ID。
之后前往 API Developer Portal,点击Create an account创建新用户。注意:要使用之前注册 IBM ID 的邮箱进行注册:

注册完毕后登录,在Apps选项卡下点击Create new App创建新应用:

Title输入My Banking Application即可,之后点击Submit提交:

注意:需要记录下
Client ID和Client Secret,之后会用到。
之后需要申请banking API。在API Products选项卡下找到Banking Product:

点击Subscribe申请Default Plan:

选择刚才创建的应用My Banking Application:

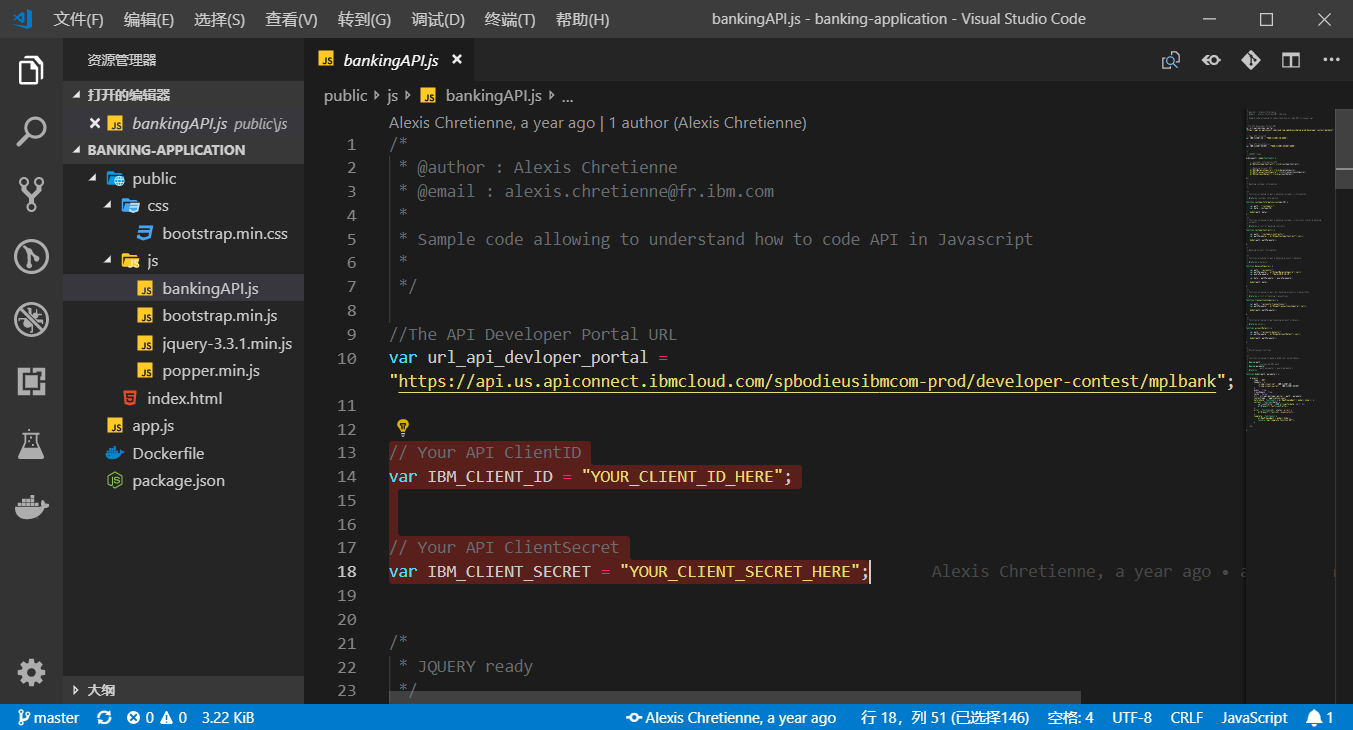
最后在banking-application/public/js/bankingAPI.js中填入你的Client ID和Client Secret:
3. 启动 banking application
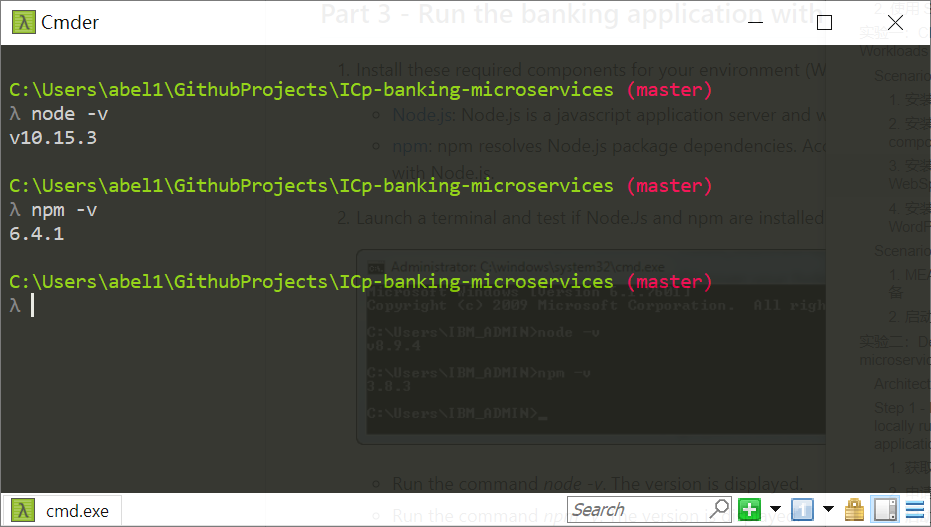
需要安装 Node.js,选择10.15.3 LTS下载安装包并安装,之后验证 Node.js 以及 npm 版本:
进入ICp-banking-microservices/banking-application目录,执行npm install:
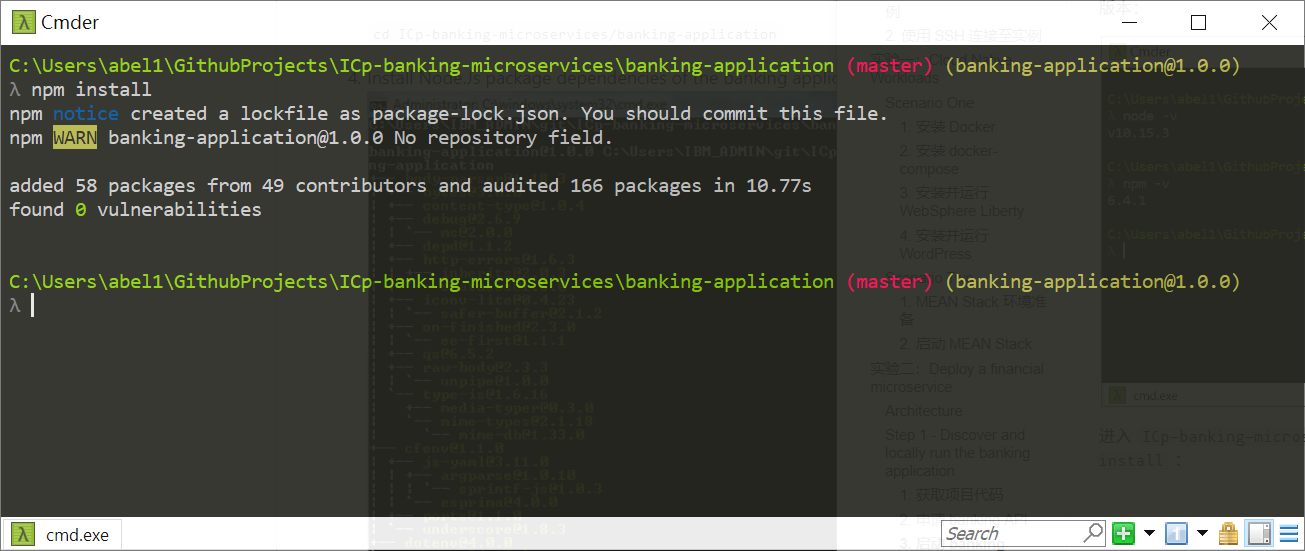
也可以直接在 VS Code 的内建终端中操作
node app.js启动应用:
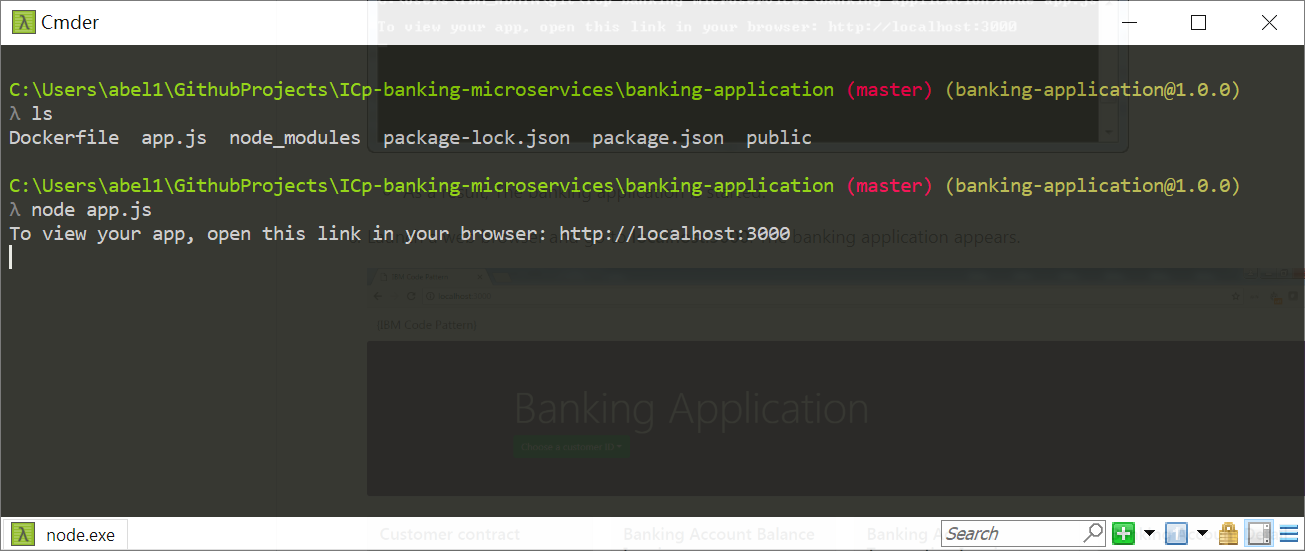
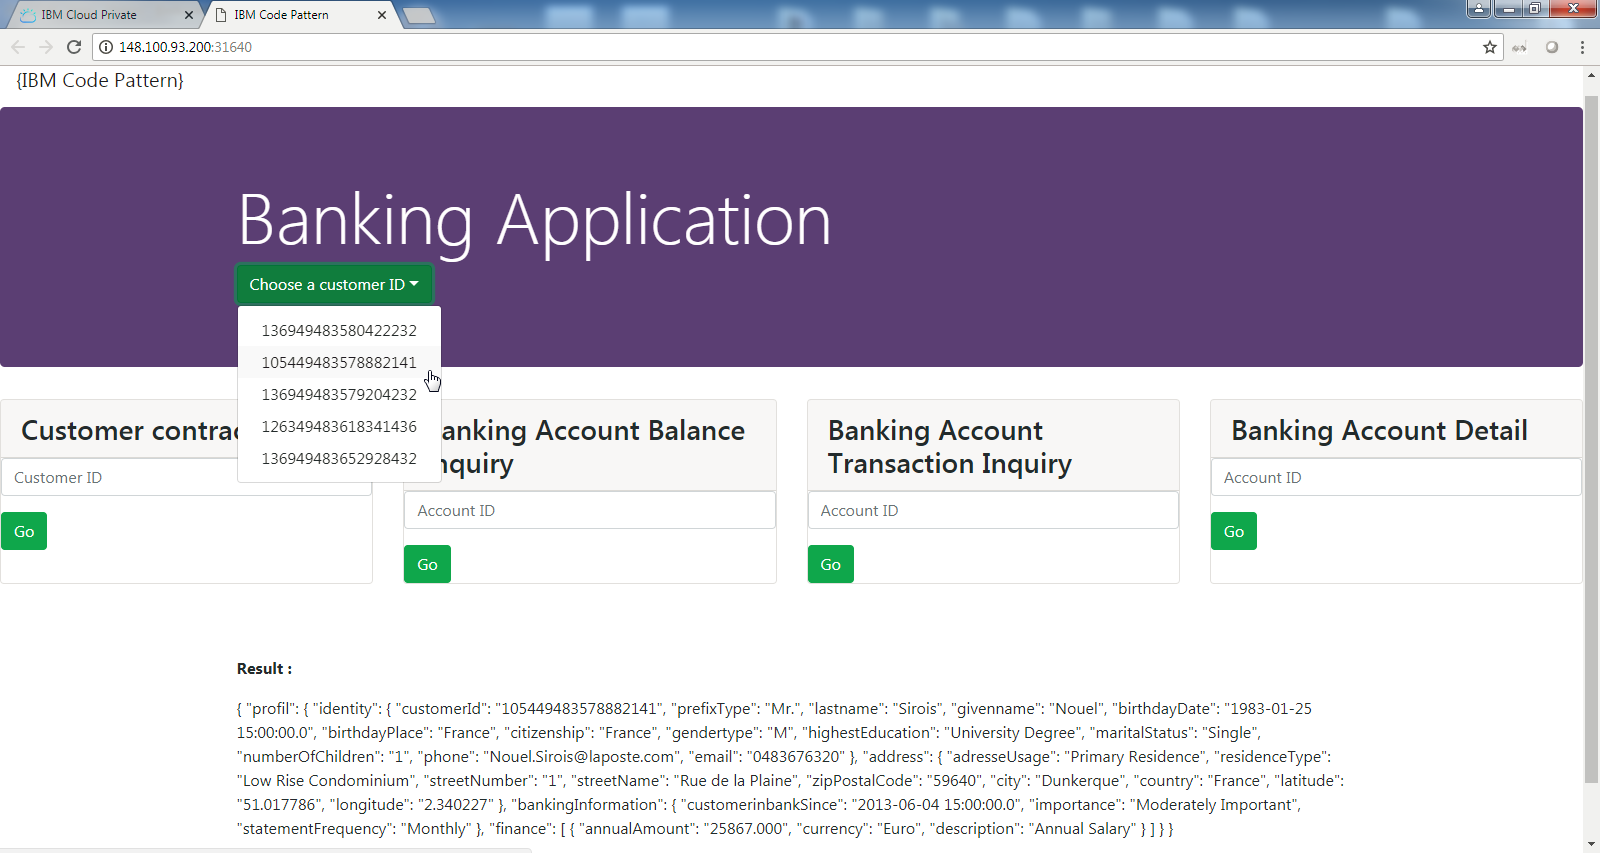
浏览器访问http://localhost:3000,即可访问应用:

随便选择一个customer ID测试,若有JSON格式的数据返回,则说明 API 可用:

4. 推送至 Github 远程仓库
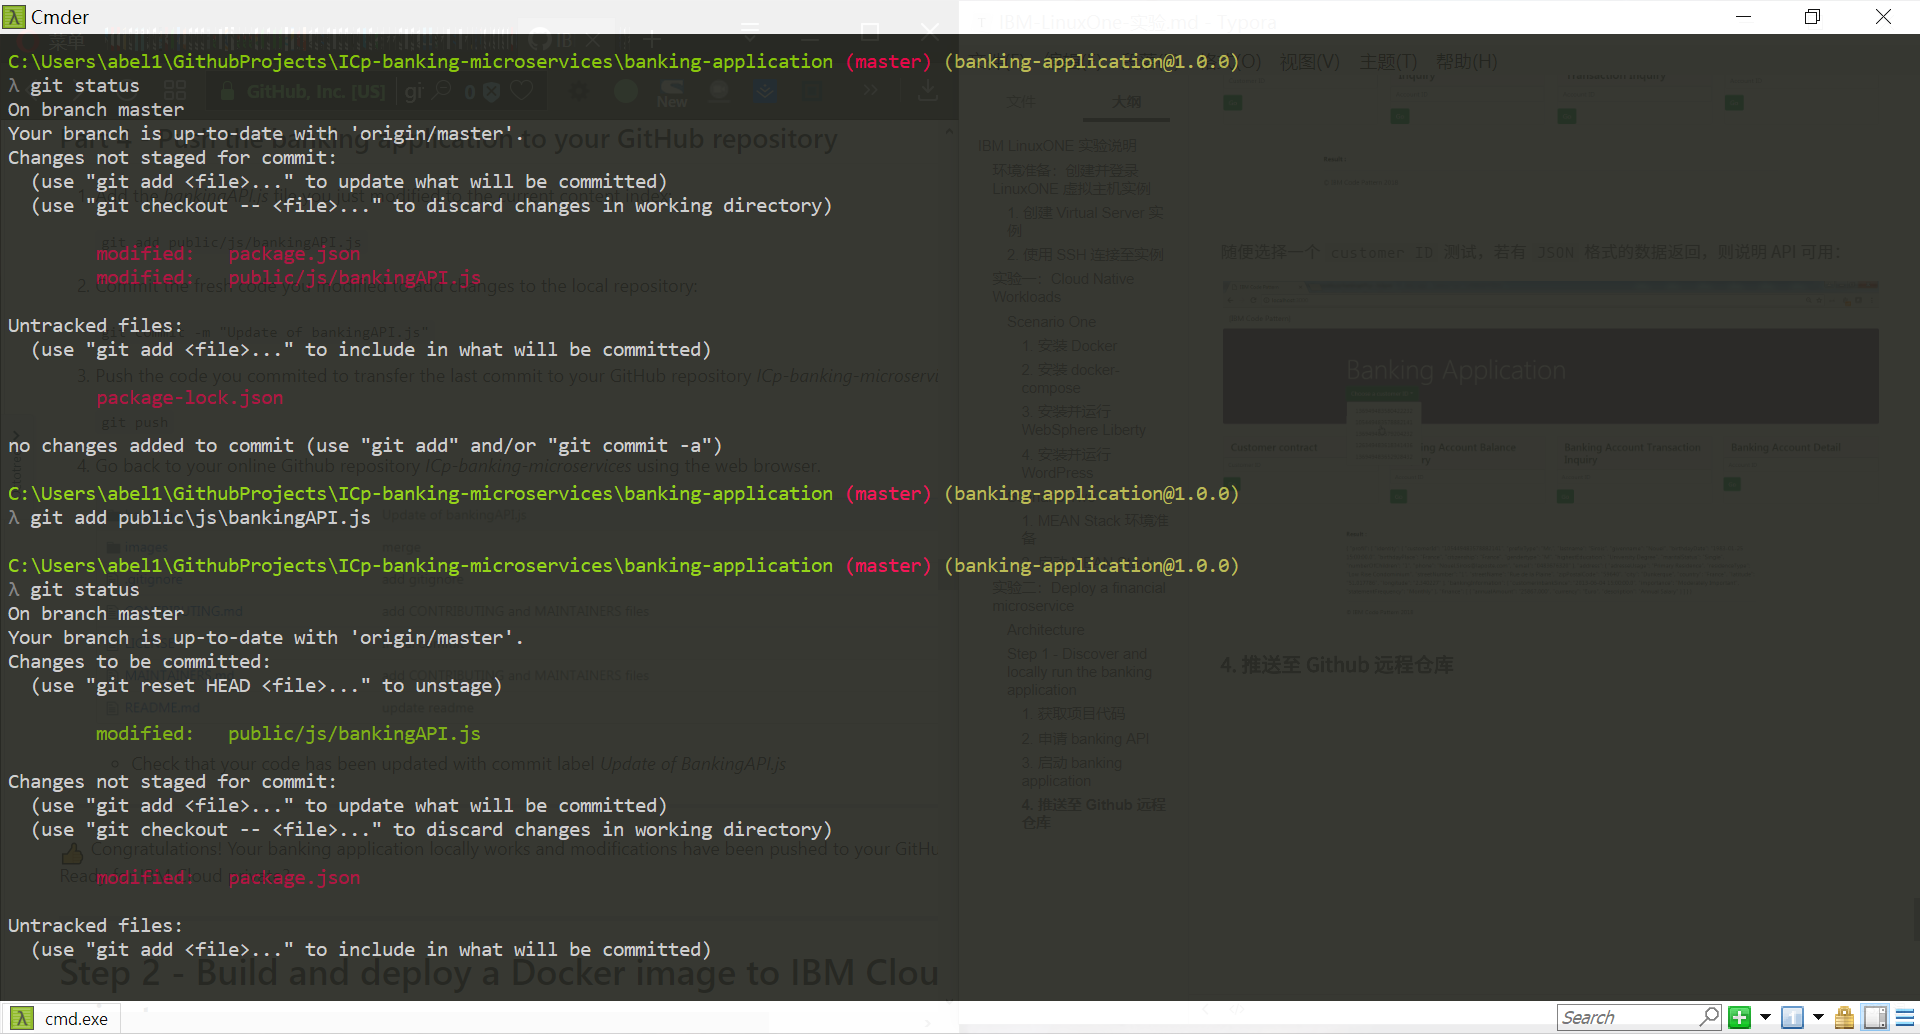
git add public/js/bankingAPI.jsgit commit -m "Update of bankingAPI.js"git push origin master
注意:实际上不应该把
Client ID和Client Secret这种密钥类型的数据推到 Github 上,这里为了方便实验暂时这么做,以后切勿模仿。。
Step 2 - Build and deploy a Docker image to IBM Cloud private
1. 构建 Docker 镜像
先登录你的 LinuxONE 主机实例,之后将你 Fork 后又更新的代码拉取到本地:
[root@myserver ~]$ git clone https://github.com/abelsu7/ICp-banking-microservices.git # 改成你自己的账号Cloning into 'ICp-banking-microservices'...remote: Enumerating objects: 42, done.remote: Counting objects: 100% (42/42), done.remote: Compressing objects: 100% (42/42), done.remote: Total 771 (delta 1), reused 36 (delta 0), pack-reused 729Receiving objects: 100% (771/771), 5.56 MiB | 0 bytes/s, done.Resolving deltas: 100% (433/433), done.
之后需要用到banking-application目录下的Dockerfile:
FROM ibmcom/ibmnodeWORKDIR "/app"# Install app dependenciesCOPY package.json /app/RUN cd /app; npm install; npm prune --production# Bundle app sourceCOPY . /appENV NODE_ENV productionENV PORT 3000EXPOSE 3000CMD ["npm", "start"]
具体含义略。之后使用docker build命令构建镜像:
[root@myserver ICp-banking-microservices]$ cd banking-application/[root@myserver banking-application]$ lsapp.js Dockerfile package.json public[root@myserver banking-application]$ docker build -t "abelsu7-banking-image:latest" ./ # 改成你的用户名......Successfully built b5b7495e8495Successfully tagged abelsu7-banking-image:latest[root@myserver banking-application]$ docker imagesREPOSITORY TAG IMAGE ID CREATED SIZEabelsu7-banking-image latest b5b7495e8495 About a minute ago 462MBmeandocker_express latest f3cf2438cdb9 5 hours ago 470MBs390x/websphere-liberty webProfile7 def868b21def 33 hours ago 473MBibmcom/ibmnode latest 9a87e4f94692 12 months ago 457MBs390x/ibmnode latest 9a87e4f94692 12 months ago 457MBs390x/wordpress latest d3ab4dbbe59f 17 months ago 388MBsinenomine/mongodb-s390x latest c23b42b446b7 20 months ago 658MBbrunswickheads/mariadb-5.5-s390x latest 1cc1be288a3e 3 years ago 311MB
运行容器:
[root@myserver banking-application]$ docker run -p 3000:3000 abelsu7-banking-image> banking-application@1.0.0 start /app> node app.jsTo view your app, open this link in your browser: http://localhost:3000
浏览器访问http://[LinuxOne Host IP]:3000,即可访问应用。
2. Deploy the Docker image to IBM Cloud private

利用 Jenkins 实现 CI/CD 与 DevOps,略
Step 3 - Instantiate the banking microservice from the IBM Cloud private catalog
1. Discover the Helm chart
点击 这里 注册申请 ICP,之后从 这里 登录 IBM Cloud Private:
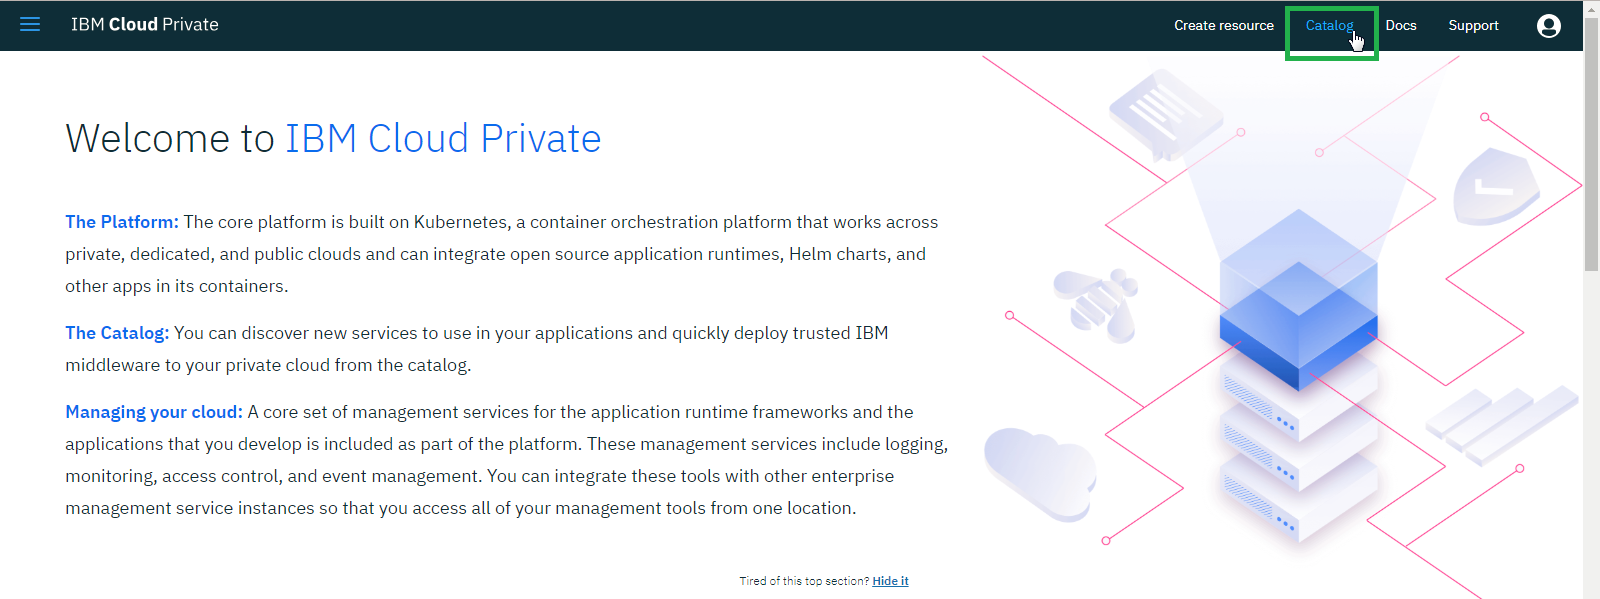
点击右上角的 Catalog,稍等片刻(页面加载可能比较慢),找到openmplbank并点击进入:

2. 配置 Helm Chart
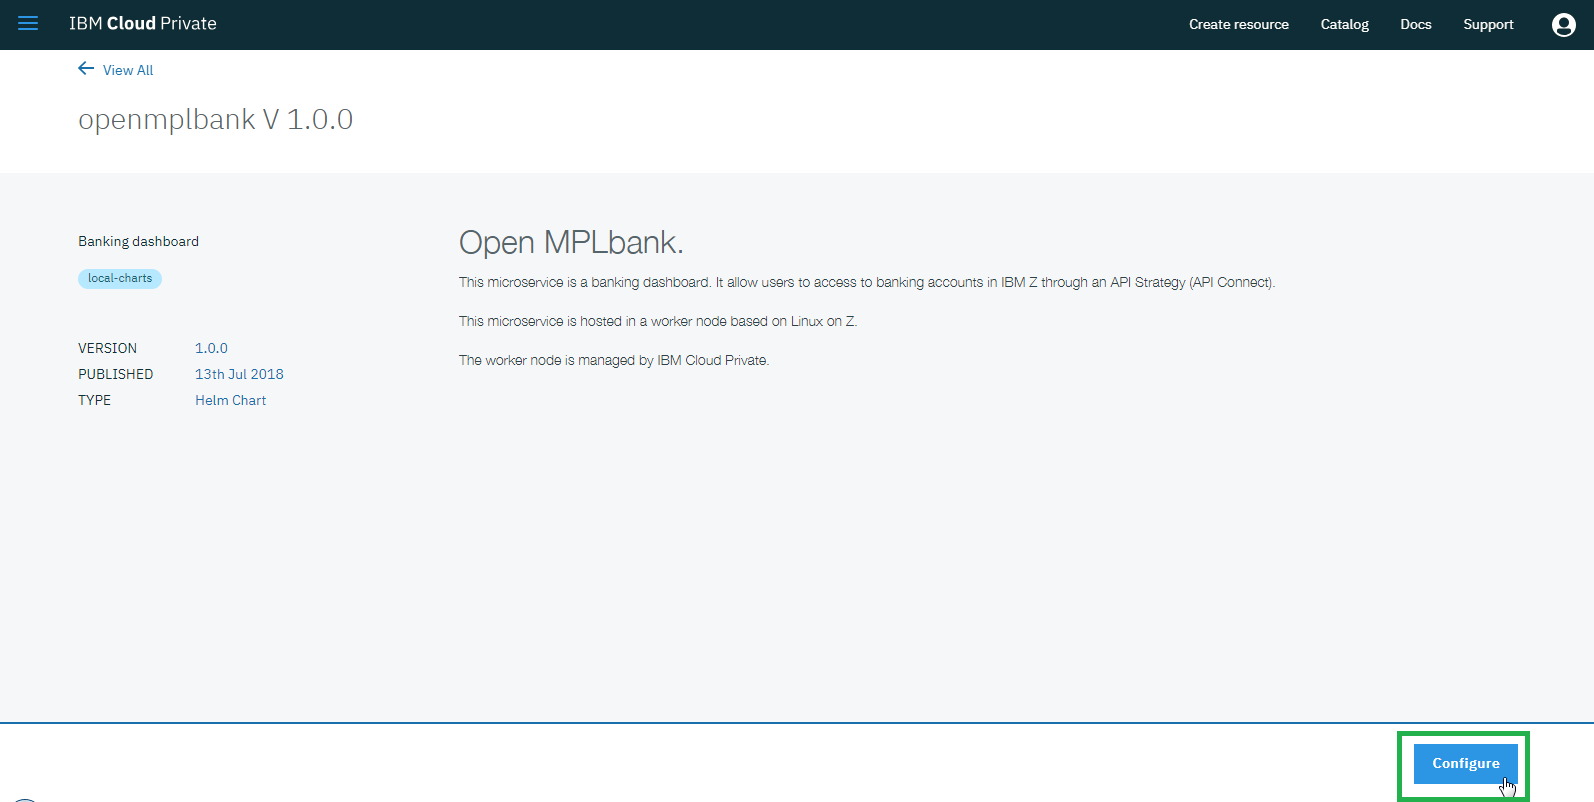
点击Configure:
输入Release name和Target Namespace:
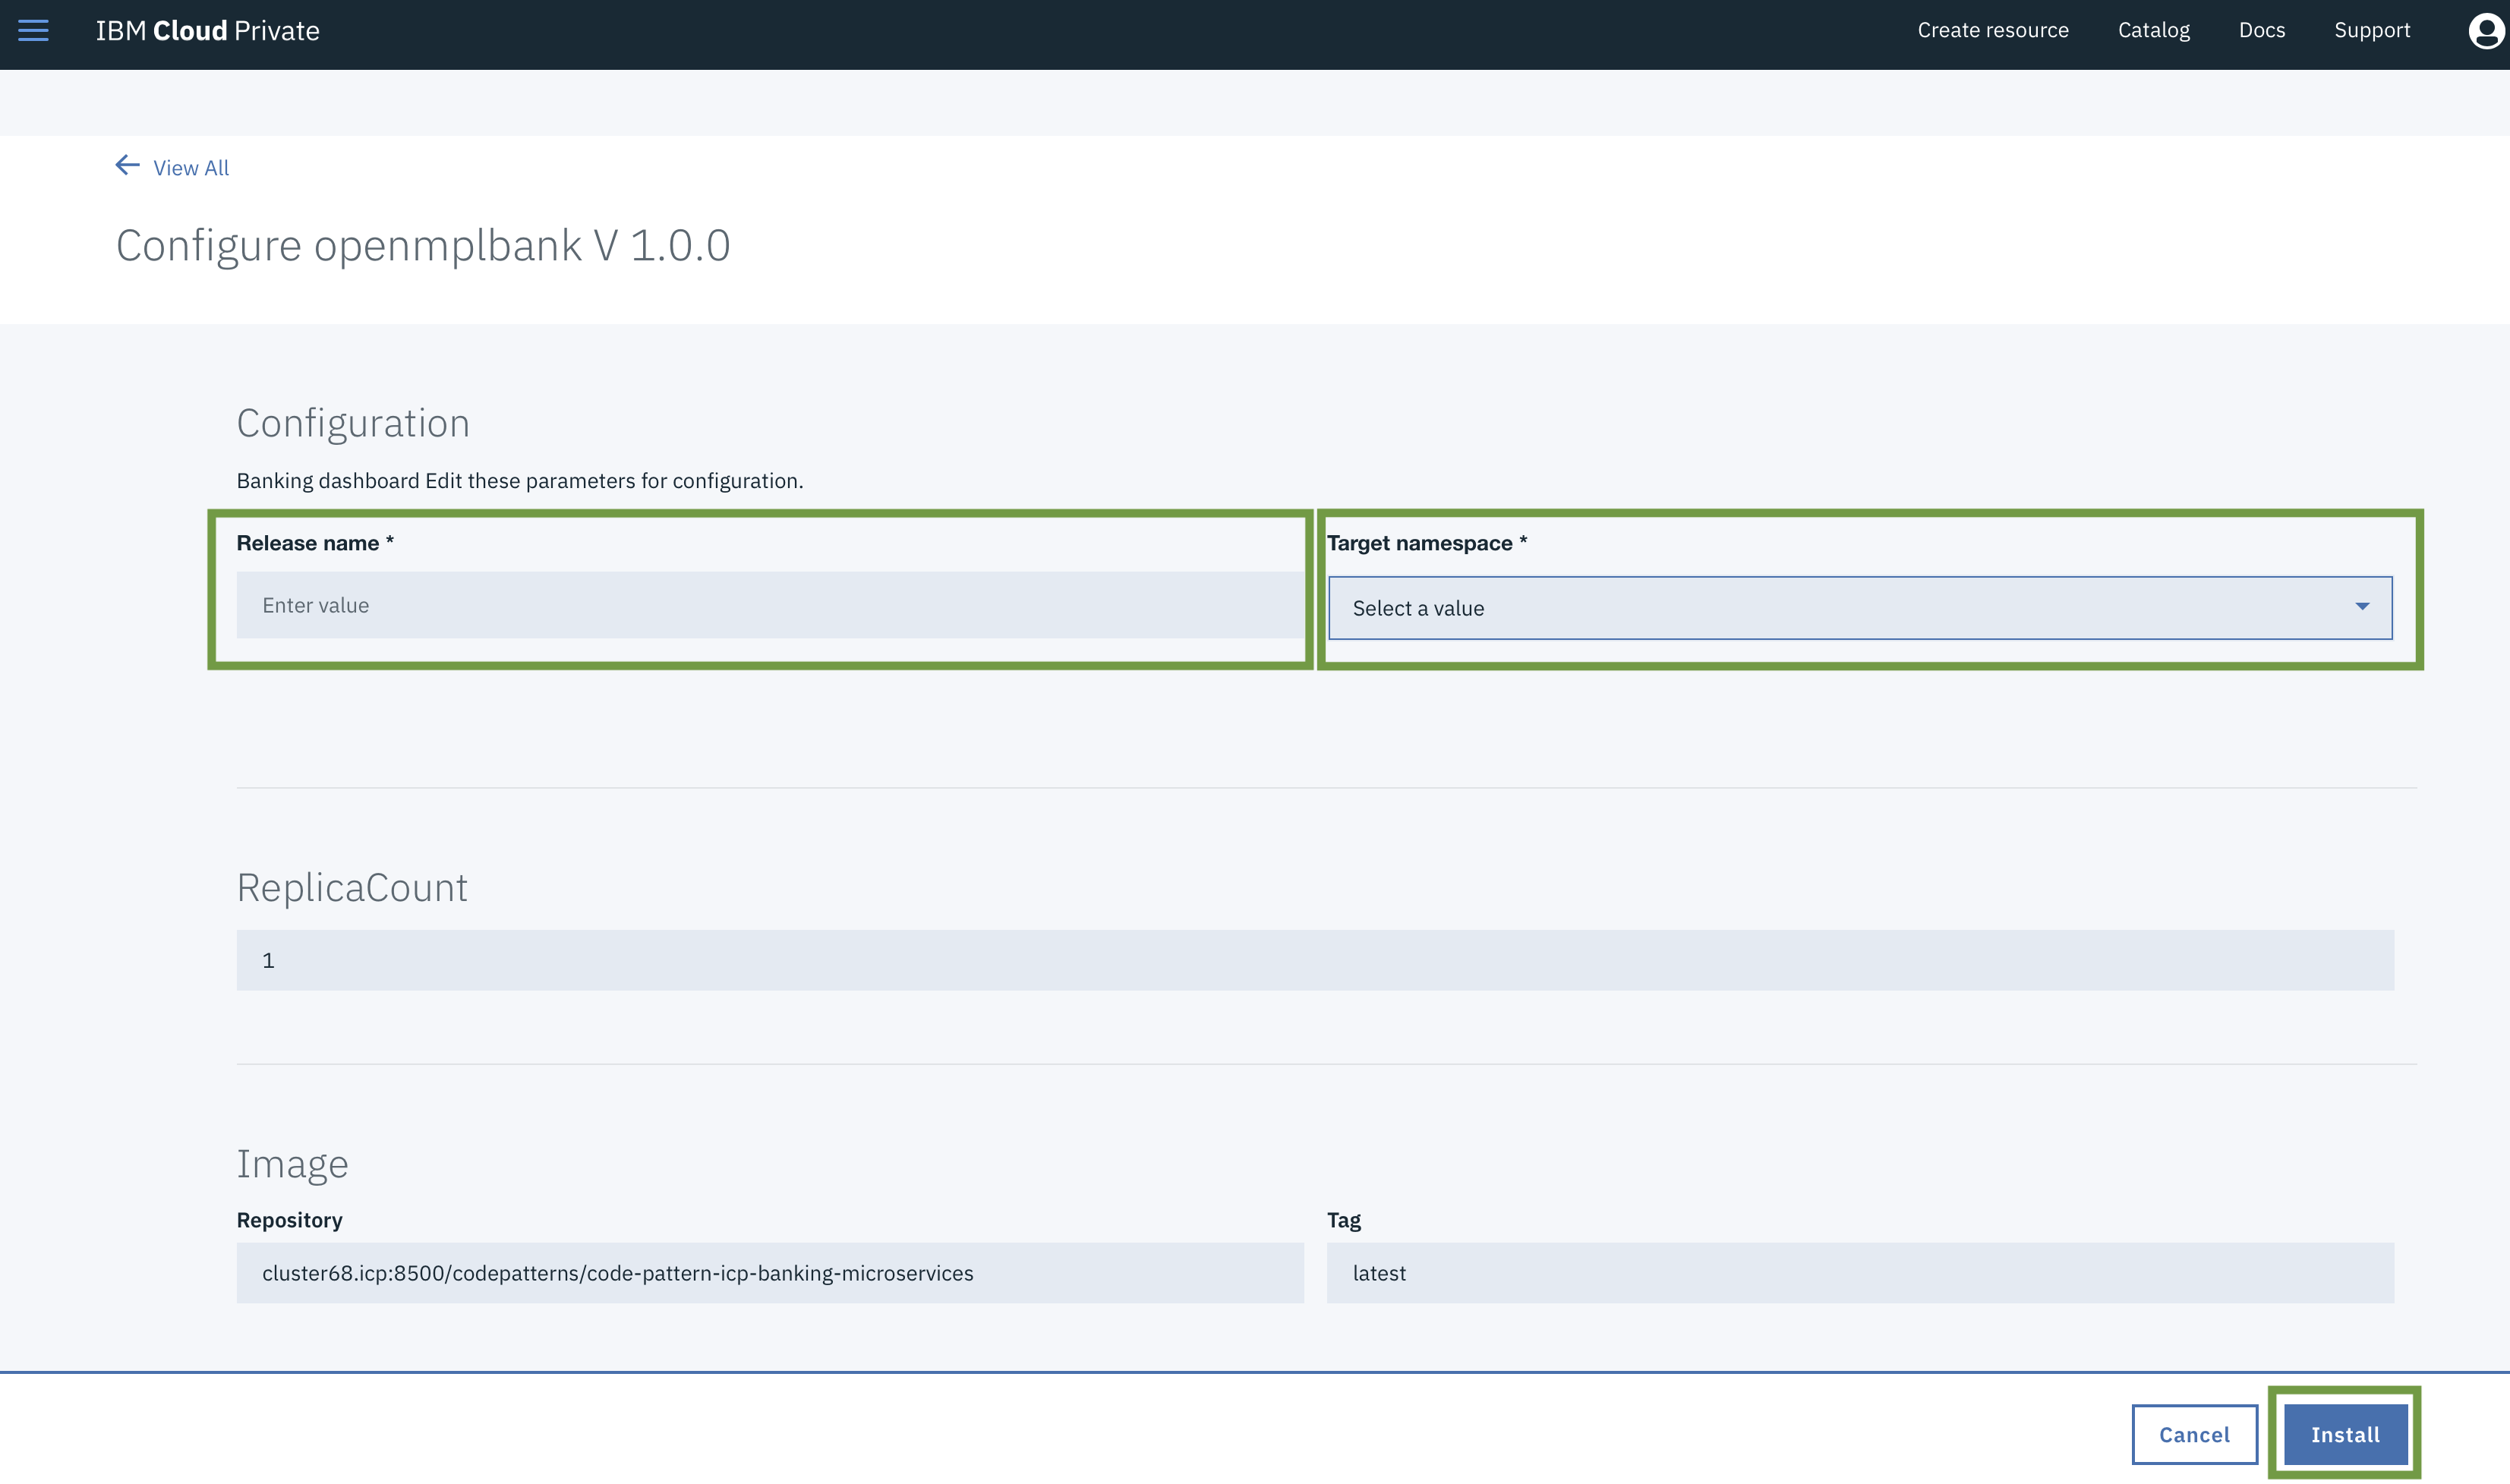
Release Name:用于部署的服务名,例如我的就是abelsu7-openmplbankTarget Namespace:下拉可选,应该只有一个,ns开头
镜像已经指定好了,最后点击Install,完成配置,ICP 会自动部署:
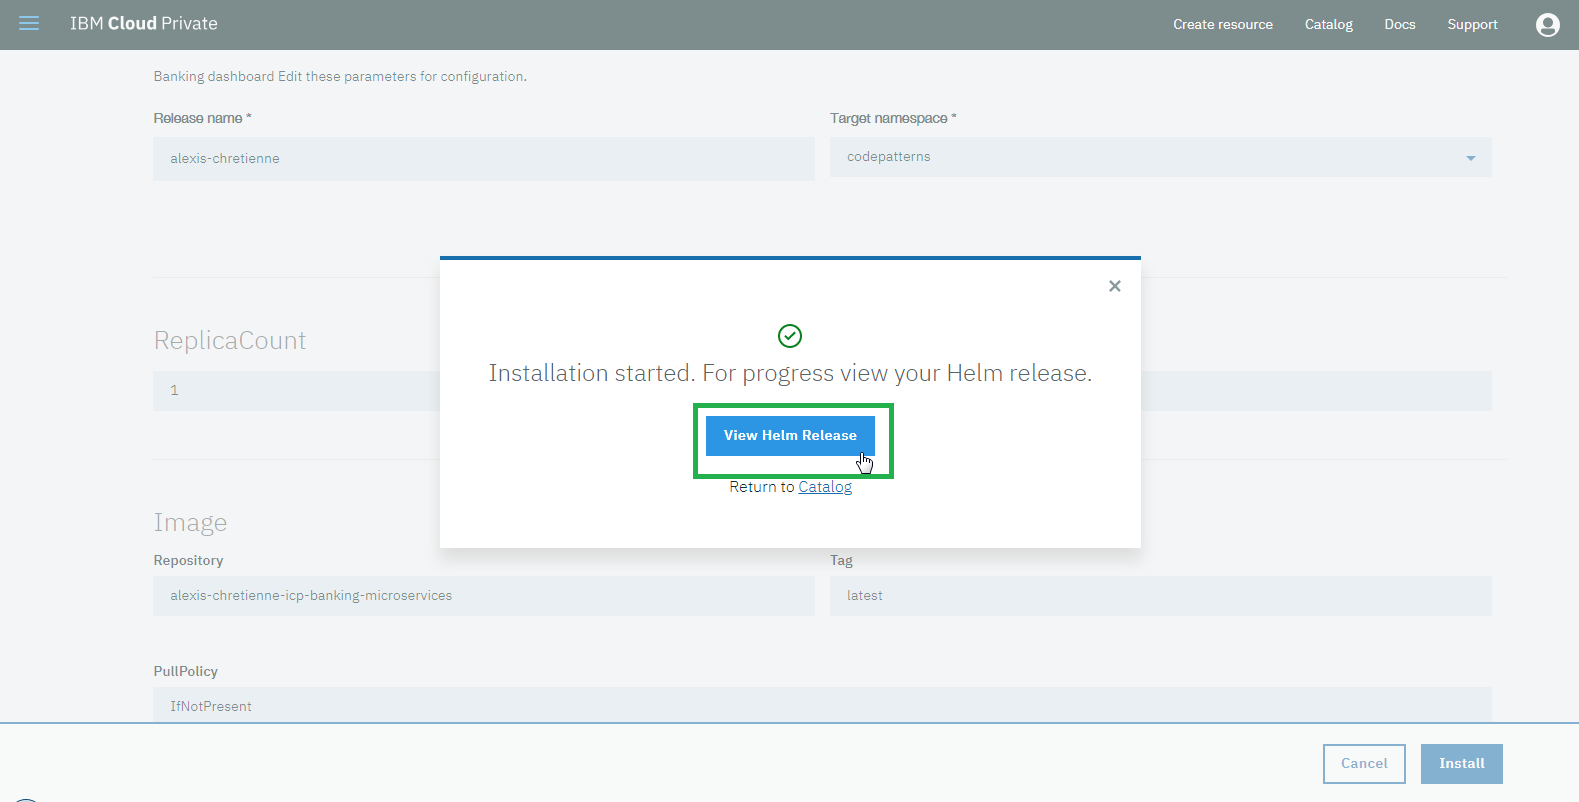
点击View Helm Release,查看已部署的服务。
3. 查看应用
首先确定Deployment标签下的AVAILABLE数量为1,表示有可用的Pod,之后点击Launch,浏览器会自动跳转到分配的端口:
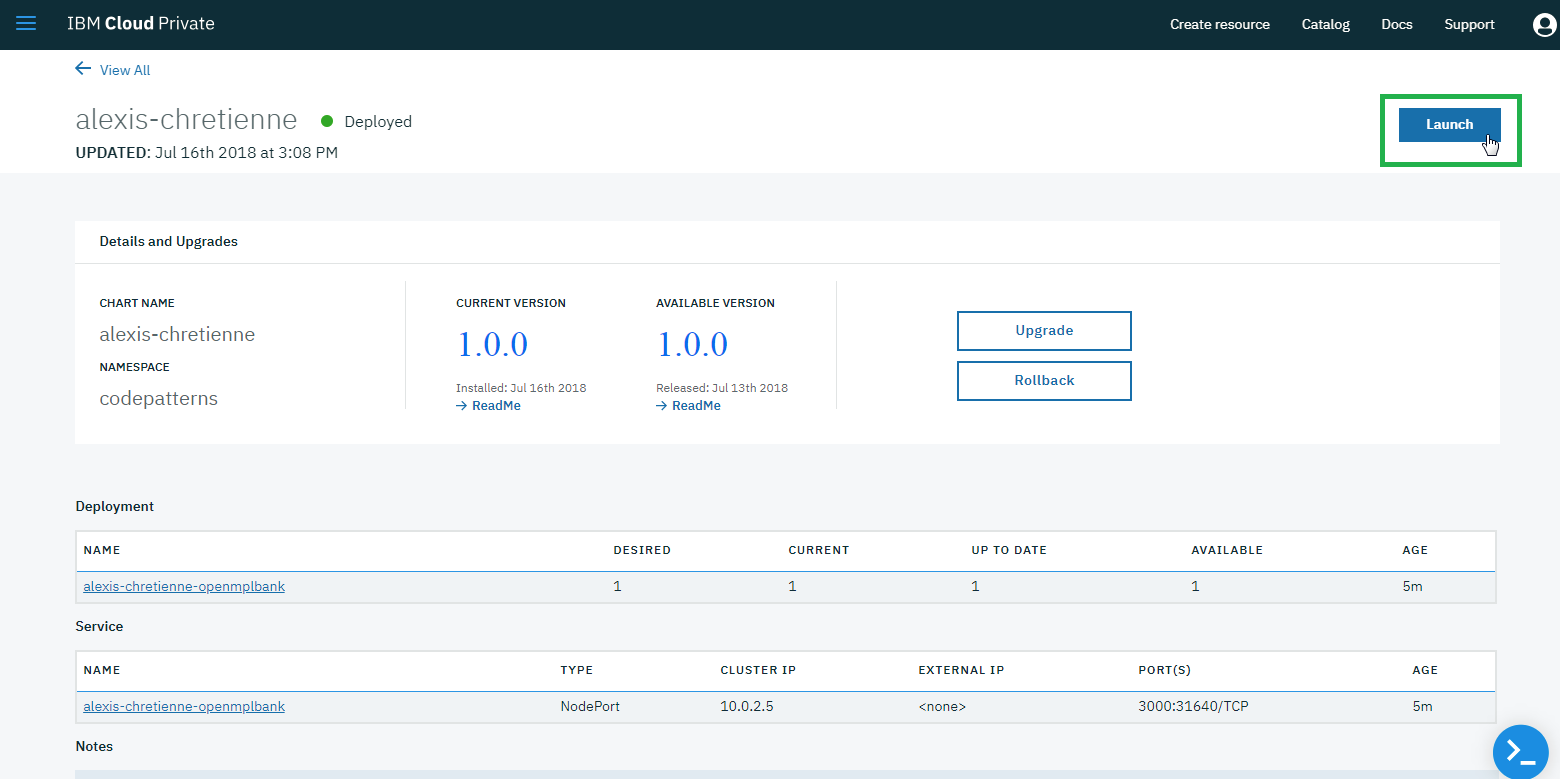
之后就和此前的实验一样了,只不过你的应用是部署在 ICP 上,由 Kubernetes 自动维护可用的 Pod 数量:
